
2008+ eBay spoiler


Thread Starter
Member
SL Member
Joined: May 2009
Posts: 81
From: far far away
My girls parents ordered her a spoiler for her 2009 Scion xB.
The spoiler it self looks good, and the paint matches and looks great as well.
No complaints on that.
I have seen/read the How To's on installing this and I was ready for what was to come ( )
)
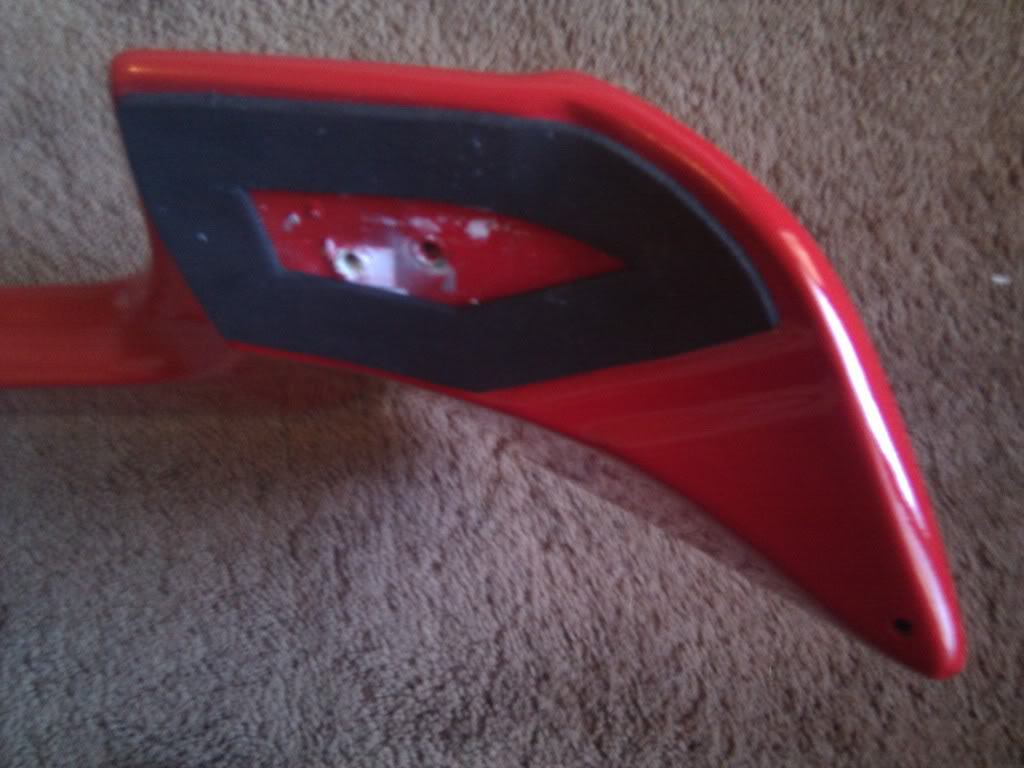
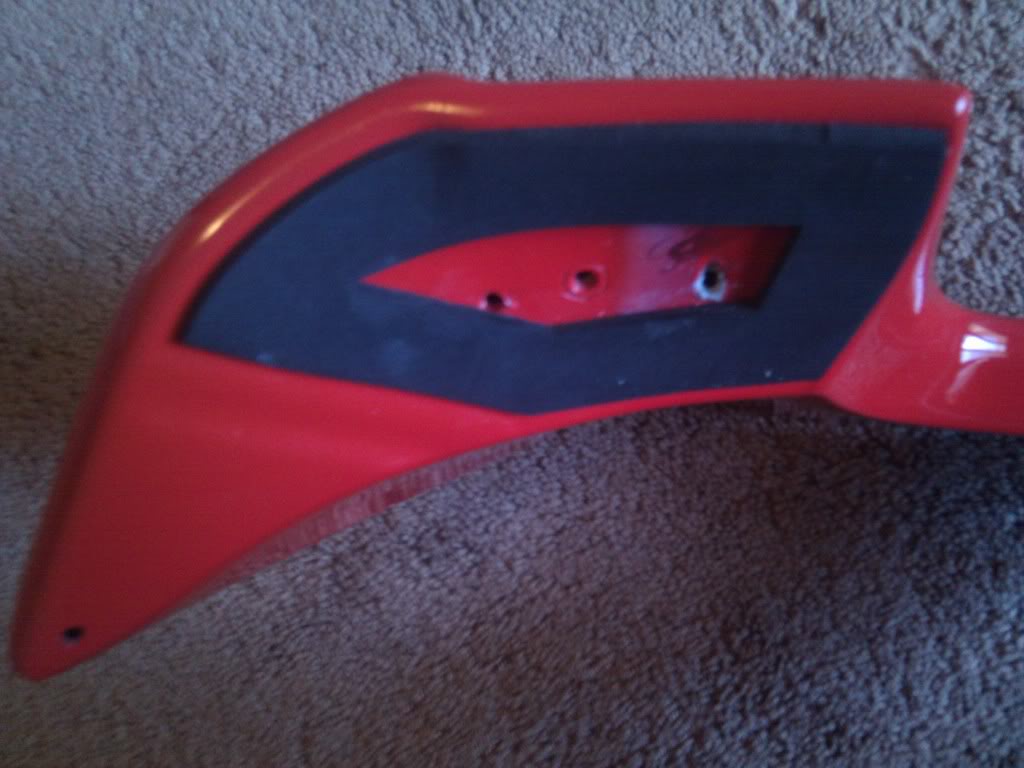
but then.... I turned it over and saw it only has 1 hole on each side to bolt it on to the car, as opposed to the 4 the "OEM" one comes with.
The "hardware" kit that it came with was 2 screws, 2 washers and 2 other plastic inserts.
Not sure as to how to approach this or get it installed, I was hoping to use the template but thats out since the holes on the template wont match up.
I forgot to snap pics, I will when I get home though.
Have you guys purchased these spoilers and how did you get them instaled?
Thanks in advance...
The spoiler it self looks good, and the paint matches and looks great as well.
No complaints on that.
I have seen/read the How To's on installing this and I was ready for what was to come (
but then.... I turned it over and saw it only has 1 hole on each side to bolt it on to the car, as opposed to the 4 the "OEM" one comes with.
The "hardware" kit that it came with was 2 screws, 2 washers and 2 other plastic inserts.
Not sure as to how to approach this or get it installed, I was hoping to use the template but thats out since the holes on the template wont match up.
I forgot to snap pics, I will when I get home though.
Have you guys purchased these spoilers and how did you get them instaled?
Thanks in advance...


thread the bolts into the inserts on the wing. use a bright colored paint marker and dab the bolt heads with the paint liberally. line the wing up on the hats and press down enough for the paint on the bolts to make a mark on the hatch. Boom, you have your markings of where to drill.

There was a thread here somewhere about the install, i'll have to look..
BANG
https://www.scionlife.com/forums/sho...hlight=spoiler
https://www.scionlife.com/forums/sho...hlight=spoiler
hope they help
EDIT #2
template
http://www.scikotics.com/forums/showthread.php?t=295237
BANG
https://www.scionlife.com/forums/sho...hlight=spoiler
https://www.scionlife.com/forums/sho...hlight=spoiler
hope they help
EDIT #2
template
http://www.scikotics.com/forums/showthread.php?t=295237
Thread Starter
Member
SL Member
Joined: May 2009
Posts: 81
From: far far away
No it didnt, I have some there that im gonna use though to help me stick it on there as well.
Yeah one hole on the left and one on the right.
Ill snap some pics and post them up...
Good Idea, This may be the easiest and best route for this POS.
Thank You, I have both those "bookmarked" and the template printed out (had to sign up to DL the zip.)
Ill get the pics on here once im home and well see what we can come up with but I think "Big_Jim" has the right Idea.
Im gonna use the templates/instructions from the OEM one and mark the one screw thats on there over the template and drill just that one hole and BAU from there...
Sounds easy in my head, hope it executes just like that lol.
Yeah one hole on the left and one on the right.
Ill snap some pics and post them up...
thread the bolts into the inserts on the wing. use a bright colored paint marker and dab the bolt heads with the paint liberally. line the wing up on the hats and press down enough for the paint on the bolts to make a mark on the hatch. Boom, you have your markings of where to drill.
There was a thread here somewhere about the install, i'll have to look..
BANG
https://www.scionlife.com/forums/sho...hlight=spoiler
https://www.scionlife.com/forums/sho...hlight=spoiler
hope they help
EDIT #2
template
http://www.scikotics.com/forums/showthread.php?t=295237
BANG
https://www.scionlife.com/forums/sho...hlight=spoiler
https://www.scionlife.com/forums/sho...hlight=spoiler
hope they help
EDIT #2
template
http://www.scikotics.com/forums/showthread.php?t=295237
Ill get the pics on here once im home and well see what we can come up with but I think "Big_Jim" has the right Idea.
Im gonna use the templates/instructions from the OEM one and mark the one screw thats on there over the template and drill just that one hole and BAU from there...
Sounds easy in my head, hope it executes just like that lol.


Thread Starter
Member
SL Member
Joined: May 2009
Posts: 81
From: far far away
there is 6 holes but only 2 of them (1 on each side in the middle) have threads in them to bolt it on.
I was considering that as well and using double sided tape to help it stick on there.
could you do me a favor and snap a close up of your side (either or) on the spoiler please.
I wanna see how close it needs to be to the roof and the edge of the rear hatch...
Not sure if that makes sense.
I was considering that as well and using double sided tape to help it stick on there.
could you do me a favor and snap a close up of your side (either or) on the spoiler please.
I wanna see how close it needs to be to the roof and the edge of the rear hatch...
Not sure if that makes sense.
Thread Starter
Member
SL Member
Joined: May 2009
Posts: 81
From: far far away
Thank You.
because of how the spoiler attaches to the hatch, 3m body tape wont work. theres not enough surface contact for it to work properly. i'd leave the foam on there if you plan on bolting it in. I took it off mine, and wish i left it on, to make a nice seal

Senior Member
SL Member
Joined: Jul 2009
Posts: 114
From: Rapid City, SD
I got the same spoiler and removed the foam and replaced it with 3m red tape and used the bolts as well. Got a perfect seal and a year latter absolutely no problems. Make sure you put some red loctite on the bolts don't want them coming loose and falling inside your hatch.
Thread Starter
Member
SL Member
Joined: May 2009
Posts: 81
From: far far away
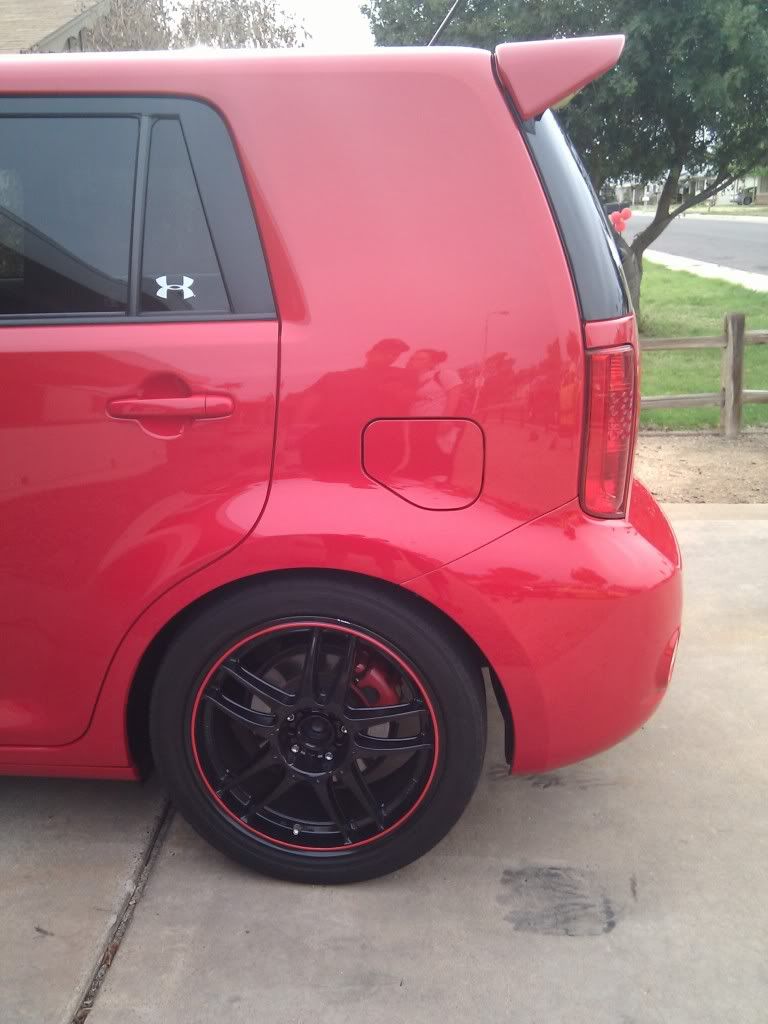
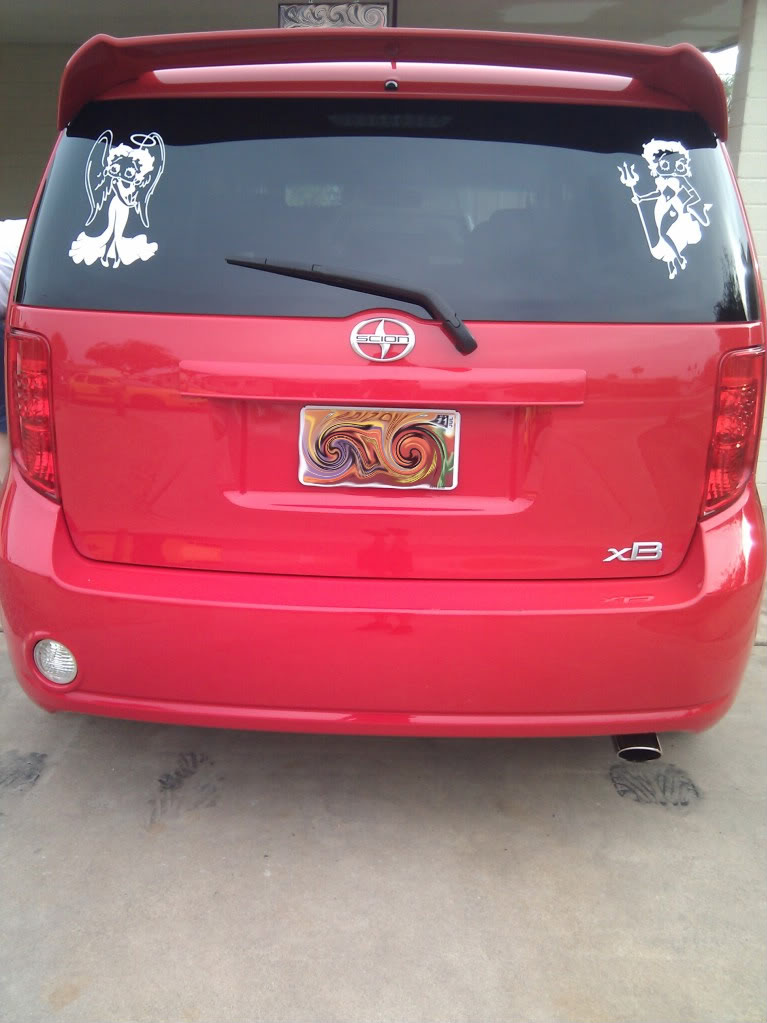
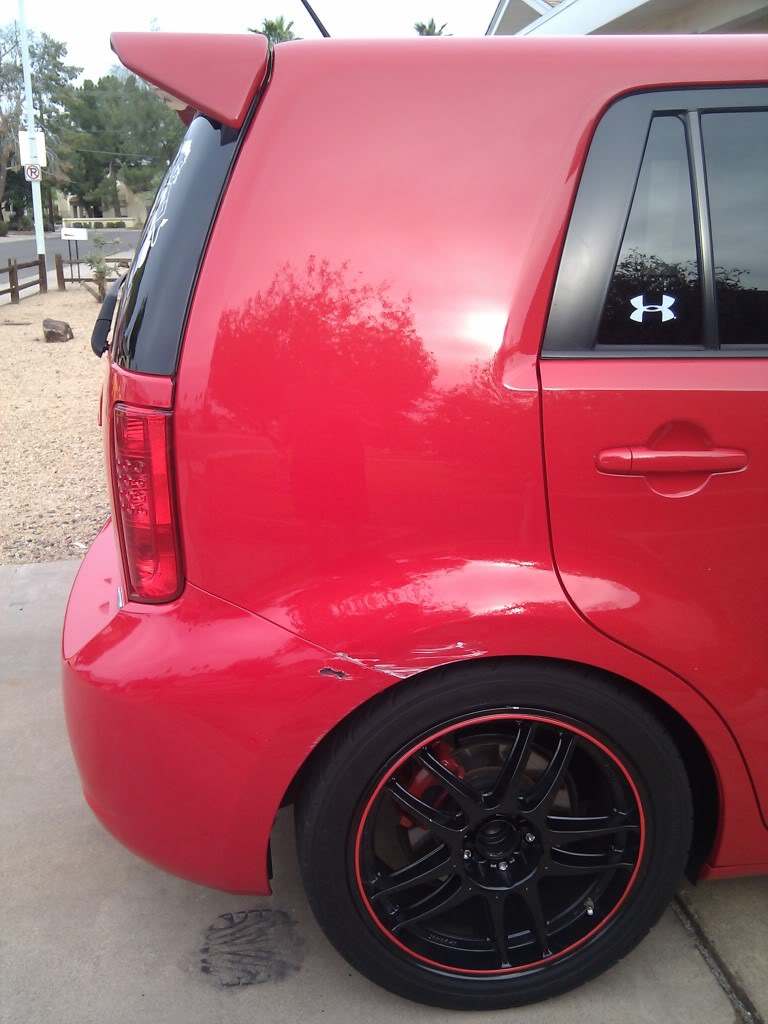
Got it installed, drilled one to many holes because ____ didnt go as planned.
Its aligned well and looks great, just wish it was a "one shot, one kill" type install.
Maybe cuz im a rookie and never done this before.
Heres some pics:
Its aligned well and looks great, just wish it was a "one shot, one kill" type install.
Maybe cuz im a rookie and never done this before.
Heres some pics:

Member
SL Member
Joined: May 2010
Posts: 79
From: San Antonio, TX
I just installed your exact same "2-bolt" spoiler on my car last Sunday. I left the foam on. It went on fairly easily and seems to be solid with even the 2 bolts. Before I bought it from Ebay I asked the seller if it was a "2 bolt" spoiler and he said no it was "4" which is what I wanted. Well I received the 2 bolt which looks exactly like your red one. Since I had it custom painted, I elected to install it anyway. It looks good. My only complaint about this aftermarket one compared to factory is that the front edge of the spoiler (at the ends) leaves too much of a gap between the spoiler and the body. On lighter colored cars I think it looks like crap. On my elusive blue metallic, I can live with it. There is about a 1/4" between the edge of the glass and the front edge of the spoiler. On the factory one, it completely covers the glass and goes all the way to the body. But for $130 painted, I just cant complain.