


A few interior changes


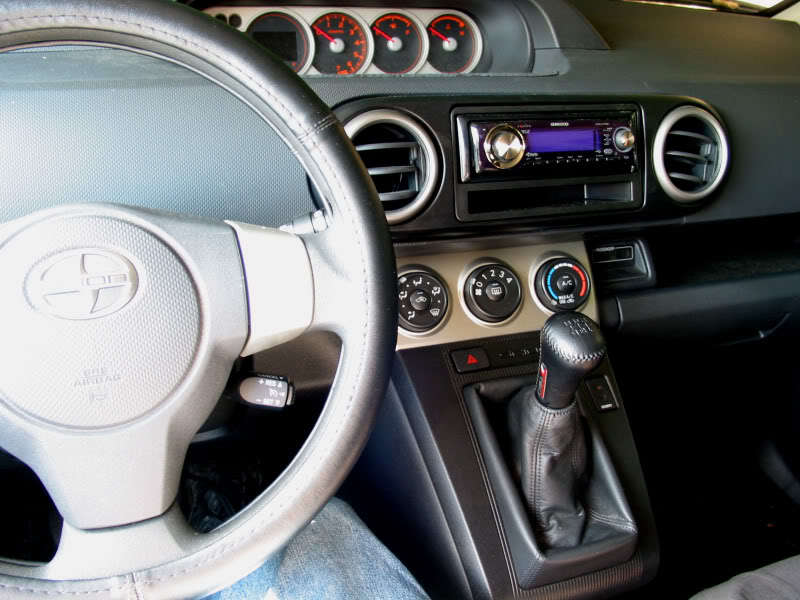
I've installed the black shifter trim and my initial reaction is it's pretty much demanding the HVAC panel be color matched. That might then become a forcing function for the left side switch panel. Going have to think about this.
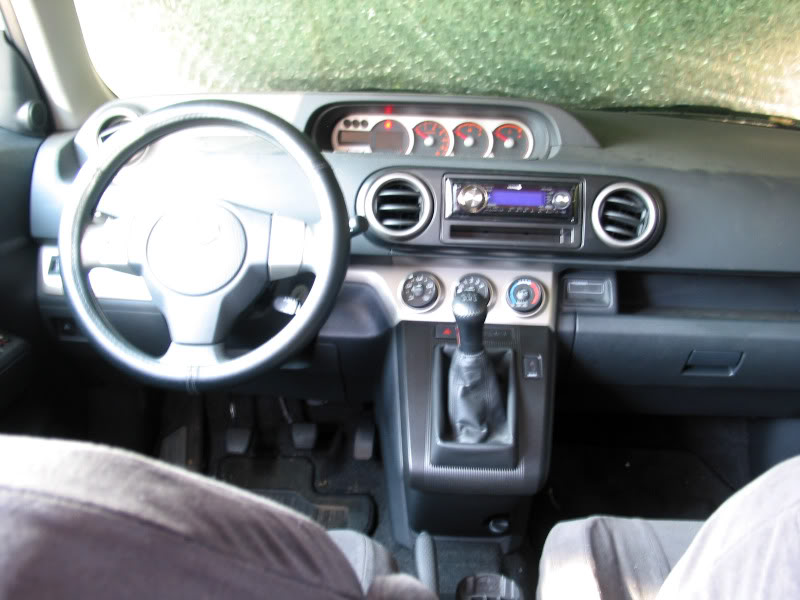

 !
!It's funny, part of me wants to treat the HVAC panel, and part of me wants to keep it silver. I like the accents and if I treat the HVAC panel, it's liable to push the left side switch panel as well. Decisions, decisions
 !
!
Last edited by TrevorS; Nov 22, 2009 at 04:29 PM.

Thread Starter
Member

SL Member
Joined: Nov 2009
Posts: 62
From: San Diego
ZXC
Thats funny, because that same thing happened to me. I ran out of paint when I did the shifter part, I used some old regular spray paint (came out ok, this platis dip is MUCH better though) but I also knew that the HVAC and left panel had to be matched. It was realllly easy to do. I thought it would be hard but i just got brave and pulled apart my dash and found it to be simple. Just be brave and figure out how to take them apart and youll find its easy and definately imo a good idea to match the colors. I just hated the silver, but thats just me.
Also when I painted the gauges I found that to be really easy as well. I just pulled back on the piece in front of them and then unscrewed the gauge cluster component and took that apart by unscrewing in a few places. I think it looks good painted black also. once i get a new head unit I think the orange will look alot better then it does now because I think with the radio its too much. Im gonna put in an ACIC-F900T, that pioneer with dvd and navi.
Im also changing my HVAC led's. I ordered some a red yellow and green one just to see what it looks like as a tester. They come in this week so hopefully they look good, not tacky :/
Also when I painted the gauges I found that to be really easy as well. I just pulled back on the piece in front of them and then unscrewed the gauge cluster component and took that apart by unscrewing in a few places. I think it looks good painted black also. once i get a new head unit I think the orange will look alot better then it does now because I think with the radio its too much. Im gonna put in an ACIC-F900T, that pioneer with dvd and navi.
Im also changing my HVAC led's. I ordered some a red yellow and green one just to see what it looks like as a tester. They come in this week so hopefully they look good, not tacky :/
Last edited by Danimal506; Nov 22, 2009 at 07:46 PM.
Yes, I noticed you painted your gauge panel. I was trying to visualize how mine would look with just the HVAC panel treated, but something was different and I finally realized it was your gauges. I like the silver accents, but I'm seeing two problems with the appearance with the HVAC trim remaining silver. One is I've silver/black/silver/black color bands traveling down the dash to the right of the steering wheel -- makes it look kind of busy. The other is just that the styling of the HVAC and Shifter panels are so obviously mated that the color difference just creates visual tension. So, I've decided to treat the HVAC panel, but I'm hoping the left side switch panel and gauges will balance each other. Guess I'll find out !
The HVAC panel now has two hours drying time on it.

!The HVAC panel now has two hours drying time on it.

If you take a look at the company website, they provide a list of stores that carry their products. Among them are Lowes and HomeDepot -- I got mine from Lowes.
http://www.plastidip.com/diy_where_to_buy.php
http://www.plastidip.com/diy_where_to_buy.php
OK, the HVAC panel is installed and I'm thinking the overall color scheme works. At least for me, the silver of the gauge panel balances the silver of the left side switch panel, the air vent outlets providing additional balancing accents. As for the HVAC panel, to me, the combination of styling flow, color and texture merge it visually into the shift console, transforming the whole into a "pedestal" for the radio. Since the switch panel is visually a standalone piece (unlike the center "pedestal"), it just needs to color match the gauge panel (IMO).
Still, all this stuff ultimately comes down to personal taste! Once again, thanks awfully for the idea. I really never cared for that shift console top panel being silver -- just too much silver. This seems like the perfect answer .

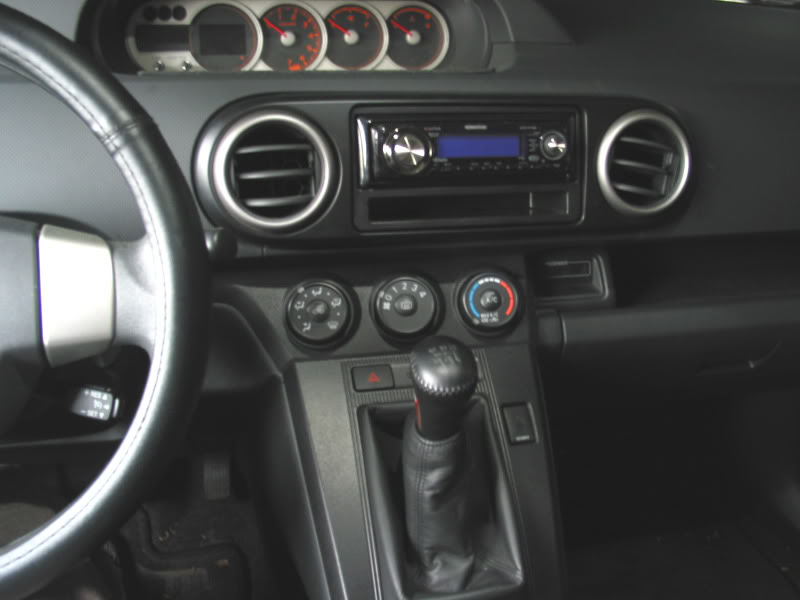

Still, all this stuff ultimately comes down to personal taste
! Once again, thanks awfully for the idea. I really never cared for that shift console top panel being silver -- just too much silver. This seems like the perfect answer .
Last edited by TrevorS; Nov 23, 2009 at 07:37 PM.


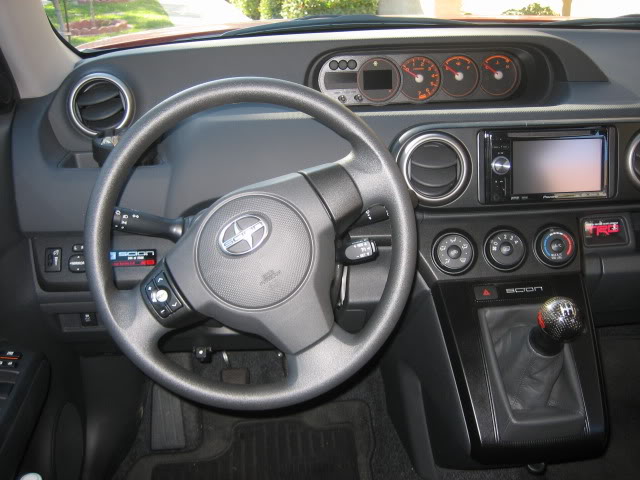
Looks real good with the blacked out steering wheel trim against the blacked out dash panels -- it seems to help bring out the various gray/black shades of the dash area. The silver around the vents still works nicely IMO. Also a neat touch with the handles and map light trim.
Last edited by TrevorS; Nov 25, 2009 at 11:19 PM.


Senior Member

SL Member
Joined: Oct 2009
Posts: 390
Those people on the home decorating shows were right; a little paint does make a big difference.
As to cleaning, I think a damp microfiber cloth will work well. A little 409 or similar stuff for any oily residue. After all, Plastidip was make for tool handles, which get really dirty.
As to cleaning, I think a damp microfiber cloth will work well. A little 409 or similar stuff for any oily residue. After all, Plastidip was make for tool handles, which get really dirty.

