


Interior Panel Refinishing project COMPLETED!


Thread Starter
Senior Member


SL Member
Joined: Feb 2011
Posts: 455
From: Oregon City, OR
 Interior Panel Refinishing project COMPLETED!
so im in my second term of body shop currently and ive under taken quite an extensive project on my part. im doing a full interior refinishing project, i am sanding down alot of panels perfectly smooth and re painting them with a show quality finish two two-tone gloss black and kandy metallic green. the panels i have been working on include:
entire upper and lower C pillars
hatch latch panel
lower C pillars side cubbies
all 4 door control panels
both shifter plates
A/C control panel
mirror control panel
all 4 A/C trim rings
tweeter housings
both steering wheel plates
passenger air bag indicator bezel
both dome light bezels
all four grab handles
aaaaand....
i think thats it.
anyways this is me about 3 days into the project so im going to TRY post pictures on a daily basis.
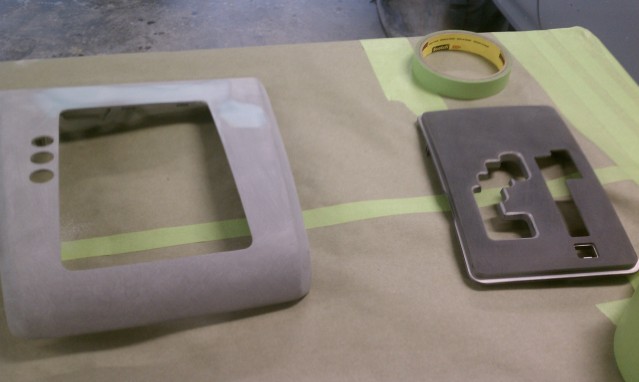
so i will start with my shifter plate. ive completely filled in both switch holes and the scion logo area (hazard lights and optional fog lights) with a special plastic repair filler topped off with flexible polyester glazing putty and sanded smooth. ive also sanded out all the grooves so its completely smooth. the three holes you see are where the hazard, fog, and laser switches will go. (ive also done the center shifting plate as well)
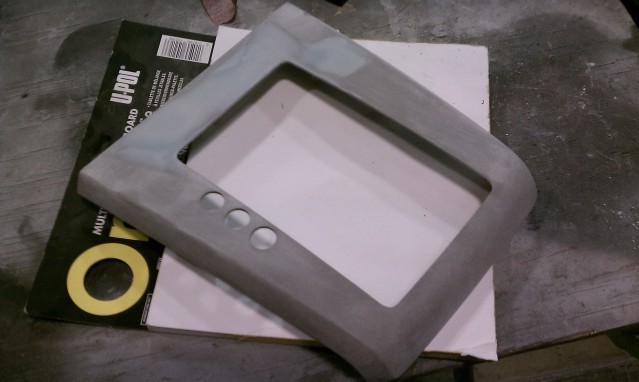
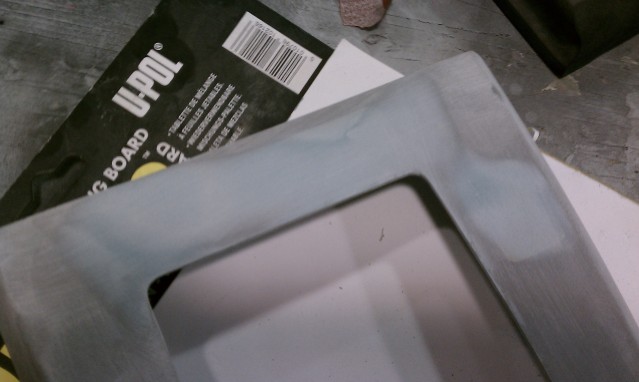
the top face will be gloss black and along the edge will be the green
ive also finished the rear hatch latch pannels. this will be a nice gloss black and the area where the hatch latch is will be green. ive also sanded the little ridges out.
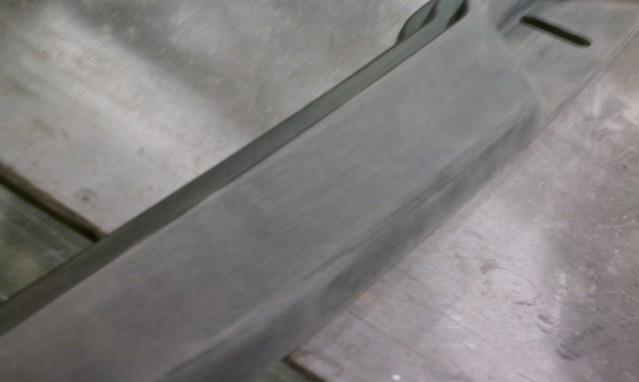
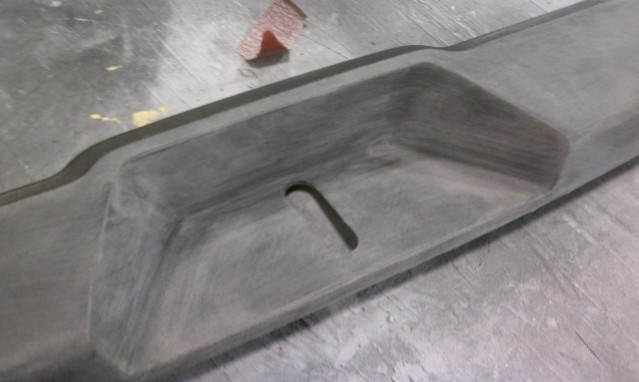
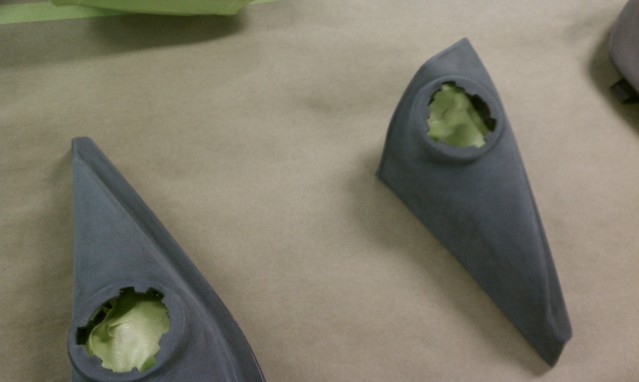
now i am currently working on sanding out the texture in the upper C pillar panels, ive already drilled my 5mm holes for my RGB led infinity mirrors. ive also filled in the air bag badge.
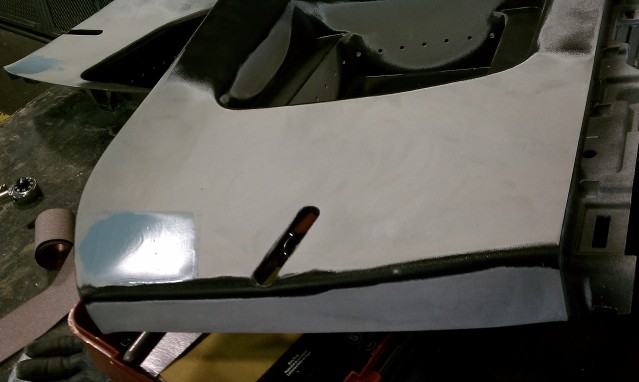
well... im going back to do more sanding. ill post more pics up later. hope you like im quite excited for this project.
:D:D:D:D
entire upper and lower C pillars
hatch latch panel
lower C pillars side cubbies
all 4 door control panels
both shifter plates
A/C control panel
mirror control panel
all 4 A/C trim rings
tweeter housings
both steering wheel plates
passenger air bag indicator bezel
both dome light bezels
all four grab handles
aaaaand....
i think thats it.
anyways this is me about 3 days into the project so im going to TRY post pictures on a daily basis.
so i will start with my shifter plate. ive completely filled in both switch holes and the scion logo area (hazard lights and optional fog lights) with a special plastic repair filler topped off with flexible polyester glazing putty and sanded smooth. ive also sanded out all the grooves so its completely smooth. the three holes you see are where the hazard, fog, and laser switches will go. (ive also done the center shifting plate as well)
the top face will be gloss black and along the edge will be the green
ive also finished the rear hatch latch pannels. this will be a nice gloss black and the area where the hatch latch is will be green. ive also sanded the little ridges out.
now i am currently working on sanding out the texture in the upper C pillar panels, ive already drilled my 5mm holes for my RGB led infinity mirrors. ive also filled in the air bag badge.
well... im going back to do more sanding. ill post more pics up later. hope you like im quite excited for this project.
:D:D:D:D
Last edited by DJ_Moonbass; Jun 24, 2012 at 02:32 AM. Reason: update

Senior Member
Utah Scions
SL Member
Joined: Aug 2007
Posts: 4,139
From: City of Salt, Utah
I'm assuming you used a Fusor product to fill in the shifter surround? I've been wanting to fill mine in as well.
Project looks good, but a ton of work! Good luck and I look forward to the results!
Project looks good, but a ton of work! Good luck and I look forward to the results!


Senior Member
SL Member
Joined: Jan 2012
Posts: 171
that looks great so far. I was in the process of doing the same, but not going for super smooth, I wanted everything painted the same as inside with some texture. I sanded most of it down then continued. But yours will look awesome I am sure. How hard is it to get the rear c panels out, the upper parts? I have done all 4 doors and the hatch already and a couple dash pieces. Looking forward to seeing more pics
Thread Starter
Senior Member
SL Member
Joined: Feb 2011
Posts: 455
From: Oregon City, OR
for the rear C pillars the entire back seat has to come out then you remove the lower then the upper.
yeah its ALOT of sanding. luckily my new DA sander takes out the texture fairly quickly but the big pocket in the upper C pillar has to be taken down by hand..
anyways more pics:
ive finished the first upper C pillar. i didnt sand out the bottom because it would be a waste of time. im putting a solid mirror there plus it would be a royal PITA. it took long enough going in there with a finger and sandpaper and fingerf***ing the texture down.
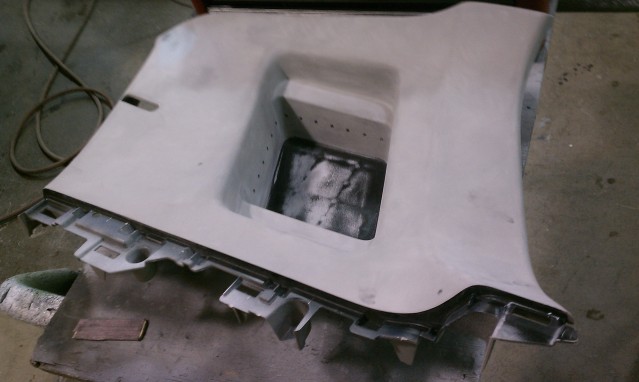
ive also begun soldering up all the 5mm RGB leds to get ready to make my LED string. this is also very time consuming because i also need to resistor each color of the LED. so far i have 12. only 88 more to go
yeah its ALOT of sanding. luckily my new DA sander takes out the texture fairly quickly but the big pocket in the upper C pillar has to be taken down by hand..
anyways more pics:
ive finished the first upper C pillar. i didnt sand out the bottom because it would be a waste of time. im putting a solid mirror there plus it would be a royal PITA. it took long enough going in there with a finger and sandpaper and fingerf***ing the texture down.
ive also begun soldering up all the 5mm RGB leds to get ready to make my LED string. this is also very time consuming because i also need to resistor each color of the LED. so far i have 12. only 88 more to go


Thread Starter
Senior Member
SL Member
Joined: Feb 2011
Posts: 455
From: Oregon City, OR
hope youre coming to the may20th car show cuz thats when yall get to see it for the first time. well PNW peeps anyway.
sorry for the delay in constant pics havent been doing a good job recording my progress allthough i do have a few. i bassically have everything sanded and or scuffed and ready for primer and or sealer. i was supposed to do some today but all the spray booths were being used so hopefully tomorrow ill be able to at least snag the old primer booth.
but as for parts that are all ready to go heres a new list:
Re surfaced and smoothed out:
upper C pillars
Lower C pillars
Door control panels
rear hatch late panel
rear lower side cubbies
center shift bezel (sanded out grooves and filled in all switch holes and logos)
center shift plate (the very central plate, also sanded out all grooves)
upper gauge and AC bezel
tweeter housing
front map light bezel (filed in small grooves)
central dome light
AC vents. (yes the actual vents themselves, i completey dissasebled the AC vent assembly and sanded down each fin and even filled in the little finger indent area... ill post up pics later because its hard to explan)
scuffed and ready for sealer and paint (no primer):
all four AC vent trim rings
gauge face plate
AC control plate
mirror panel control plate (with some custom machine work i did to it to accomodate 6 lighted anitvandal switches)
AC vents. (yes the actual vents themselves, i completey dissasebled the AC vent assembly and sanded down each fin and even filled in the little finger indent area... and some other stuff ill post up pics later because its hard to explan)
both steering wheel plates
---
i WAS going to do my oh ____ handles as well. but apparently my oh ____ handles had something to say to SEM bumper striper i used on it to get the old enamel off. and it said melt. .... whoops.
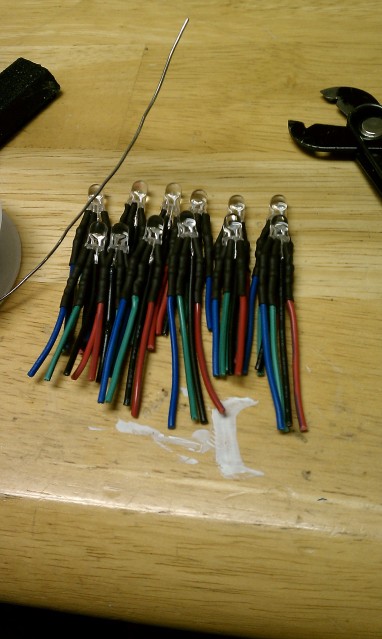
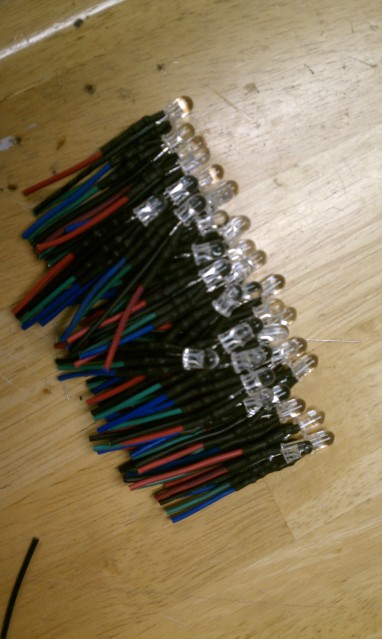
anyways ill post up pics as soon as i can sorry for the wait. oh also so far i have 39 RGB leds soldered and ready to go. each RGB 5mm LED is hand soldered with each negative lead (R, G, and B) having its own resistor and then an inch of wire lead following it as you can see in above pics. so so far thats 312 precise hand soldered joints. its taking quite a while. only 61 left.
oh one last thing. in case you are wondering the color. im doing gloss black on the C pillars, lower rear cubbies, central shift plate, gauge face plate and AC vents,
Synergy green metallic (the green camaro) on the Door handle plates, map and dome lights, tweeter housing, AC vent trim rings and steering wheel plates
and two tone gloss black AND synergy green metallic separated by a 1/8 inch chrome pinstripe on the shifter plate bezel, AC control plate, mirror control plate, guage cluster bezel (the one with the single AC vent) and the rear hatch latch panel.
lots of work but soooo worth it. just thinking i have ALL the prep work done. sanding the primer will be a breeze and some of the parts are ready to just seal and paint (you dont sand sealer it flashes in half hour then your ready to lay some base color coats.
sorry for the delay in constant pics havent been doing a good job recording my progress allthough i do have a few. i bassically have everything sanded and or scuffed and ready for primer and or sealer. i was supposed to do some today but all the spray booths were being used so hopefully tomorrow ill be able to at least snag the old primer booth.
but as for parts that are all ready to go heres a new list:
Re surfaced and smoothed out:
upper C pillars
Lower C pillars
Door control panels
rear hatch late panel
rear lower side cubbies
center shift bezel (sanded out grooves and filled in all switch holes and logos)
center shift plate (the very central plate, also sanded out all grooves)
upper gauge and AC bezel
tweeter housing
front map light bezel (filed in small grooves)
central dome light
AC vents. (yes the actual vents themselves, i completey dissasebled the AC vent assembly and sanded down each fin and even filled in the little finger indent area... ill post up pics later because its hard to explan)
scuffed and ready for sealer and paint (no primer):
all four AC vent trim rings
gauge face plate
AC control plate
mirror panel control plate (with some custom machine work i did to it to accomodate 6 lighted anitvandal switches)
AC vents. (yes the actual vents themselves, i completey dissasebled the AC vent assembly and sanded down each fin and even filled in the little finger indent area... and some other stuff ill post up pics later because its hard to explan)
both steering wheel plates
---
i WAS going to do my oh ____ handles as well. but apparently my oh ____ handles had something to say to SEM bumper striper i used on it to get the old enamel off. and it said melt.
.... whoops. anyways ill post up pics as soon as i can sorry for the wait. oh also so far i have 39 RGB leds soldered and ready to go. each RGB 5mm LED is hand soldered with each negative lead (R, G, and B) having its own resistor and then an inch of wire lead following it as you can see in above pics. so so far thats 312 precise hand soldered joints. its taking quite a while. only 61 left.
oh one last thing. in case you are wondering the color. im doing gloss black on the C pillars, lower rear cubbies, central shift plate, gauge face plate and AC vents,
Synergy green metallic (the green camaro) on the Door handle plates, map and dome lights, tweeter housing, AC vent trim rings and steering wheel plates
and two tone gloss black AND synergy green metallic separated by a 1/8 inch chrome pinstripe on the shifter plate bezel, AC control plate, mirror control plate, guage cluster bezel (the one with the single AC vent) and the rear hatch latch panel.
lots of work but soooo worth it. just thinking i have ALL the prep work done. sanding the primer will be a breeze and some of the parts are ready to just seal and paint (you dont sand sealer it flashes in half hour then your ready to lay some base color coats.
Thread Starter
Senior Member
SL Member
Joined: Feb 2011
Posts: 455
From: Oregon City, OR
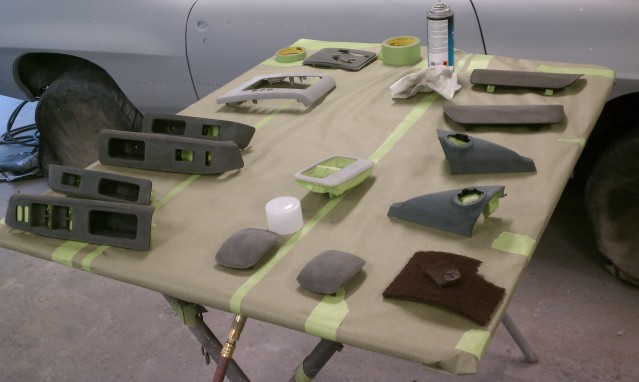
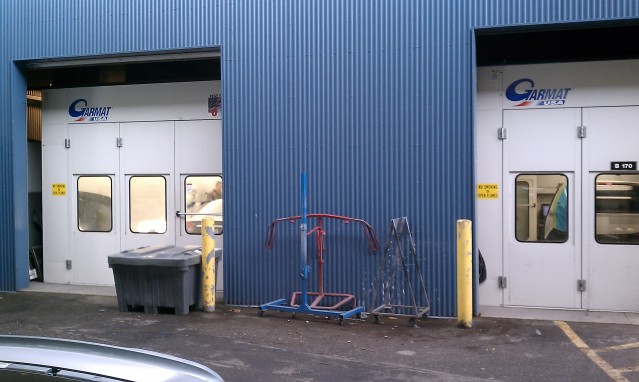
allright got some more photos here. im ready to spray some primer in the prep area:
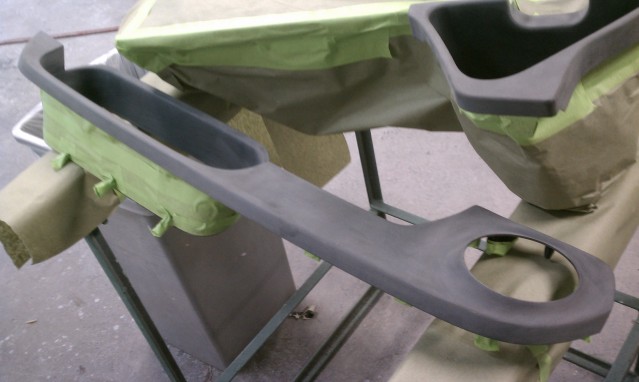

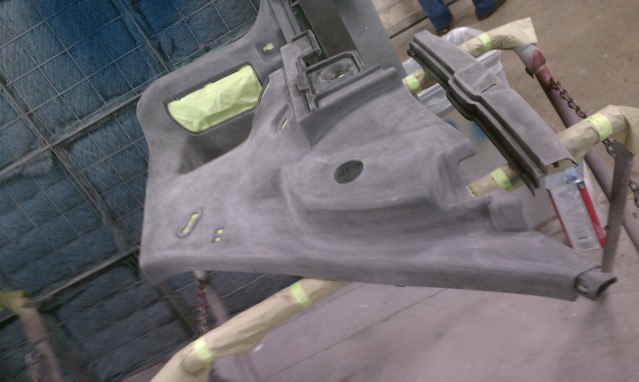
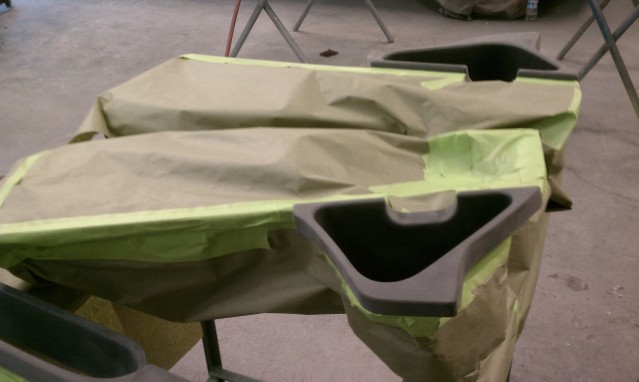
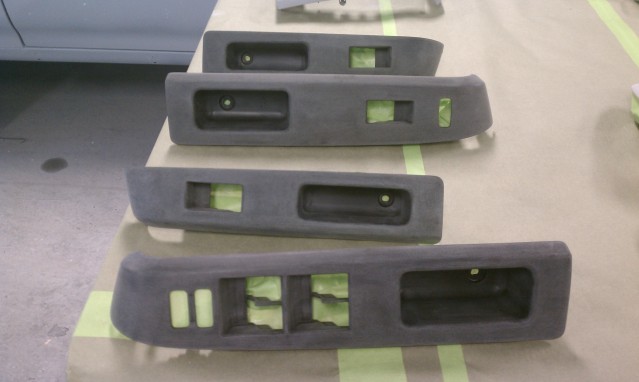
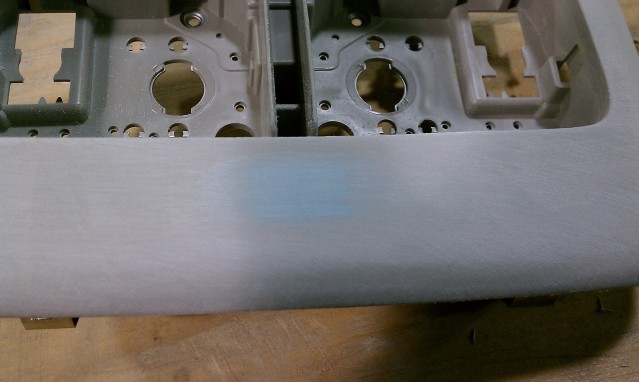
heres my little mod on my center dome light:


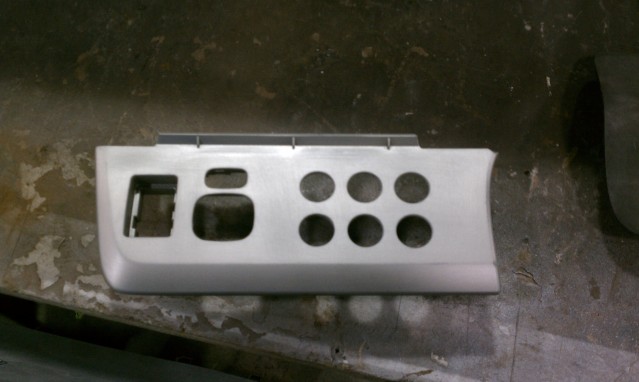
the machine work on the mirror control pannel. 6 evenly spaced and milled 5/8" holes (ill have to cut the dash out a little bit to accommodate the switches)
and then after im all done blocking out the primer this is where the REAL magic happens. cant freakin wait.
and then here is the pile of pre wired and resistored RGB LEDs i was talking about. 39 down and 61 to go.
thats it for now. ill take some pics as i prime it and then when its done and post them up.
heres my little mod on my center dome light:
the machine work on the mirror control pannel. 6 evenly spaced and milled 5/8" holes (ill have to cut the dash out a little bit to accommodate the switches)
and then after im all done blocking out the primer this is where the REAL magic happens. cant freakin wait.
and then here is the pile of pre wired and resistored RGB LEDs i was talking about. 39 down and 61 to go.
thats it for now. ill take some pics as i prime it and then when its done and post them up.
Thread Starter
Senior Member
SL Member
Joined: Feb 2011
Posts: 455
From: Oregon City, OR
weeks actually. i layed some primer today but unfortunately i had some lifts in a few areas so i need to sand it down clean it a little better lay down more adhesion promoter and try it again. not happy about it as its MORE work i have to do and i have 17 days left. i REALLY want this done by may 20th 
Thread Starter
Senior Member
SL Member
Joined: Feb 2011
Posts: 455
From: Oregon City, OR
well this is awesome. i thought i would have to do a second coat of primer on all my stuff and block it down again but actually all i need to do is go over everything with a 500 grit pad and its ready for sealer and paint. this awesome it puts me at least 3 days ahead of schedual. so i should be able to paint this stuff no later than tuesday.
Thread Starter
Senior Member
SL Member
Joined: Feb 2011
Posts: 455
From: Oregon City, OR
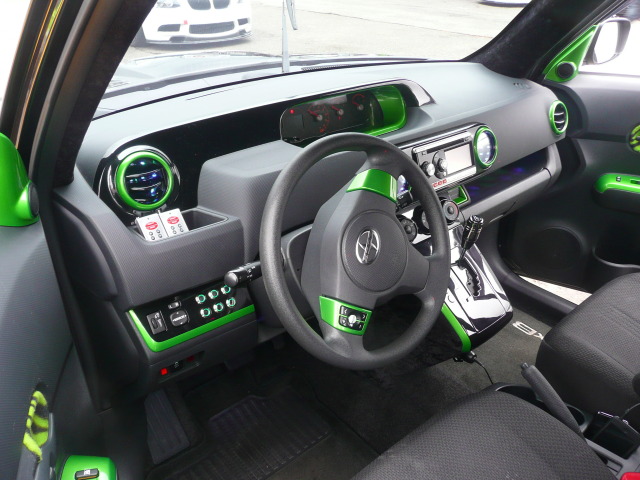
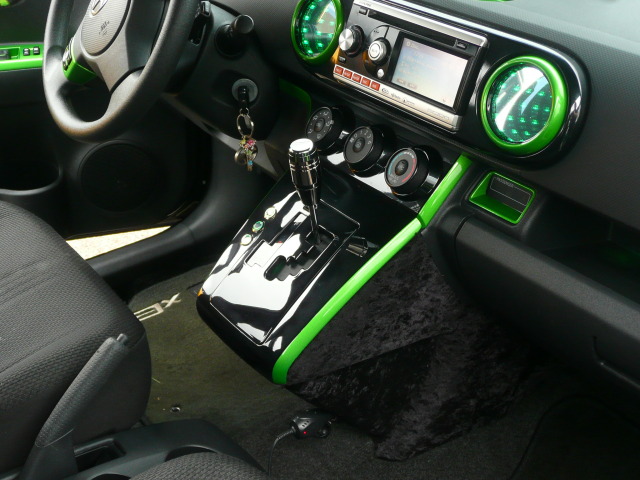
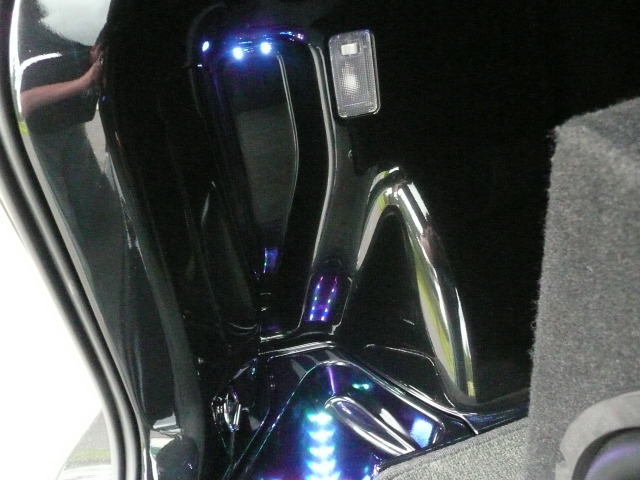
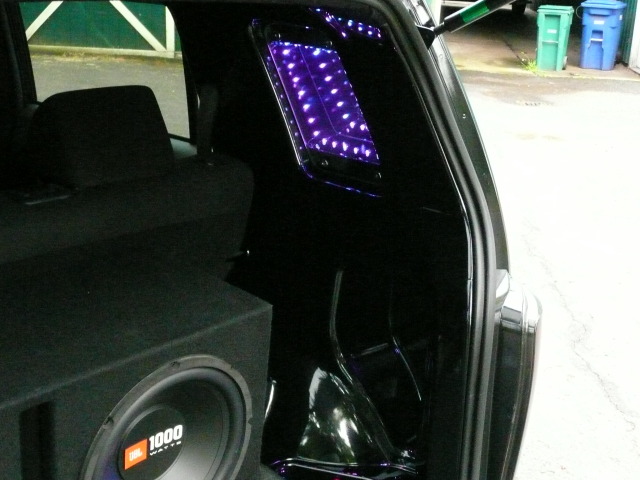
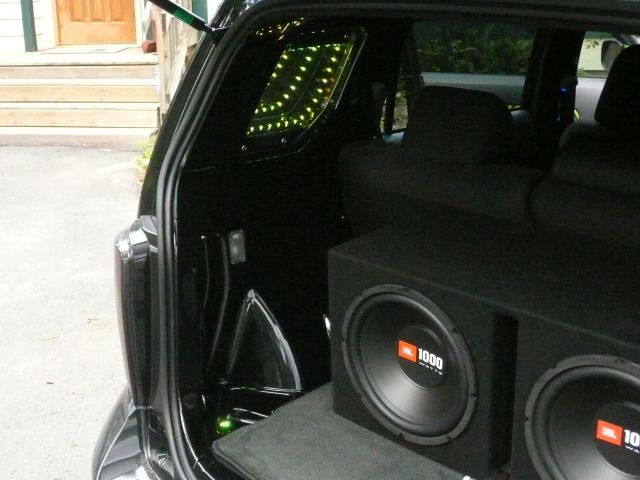
OKAY!!!! i got it all done and its all in... for now. in 6 weeks im going to pull it, do some touch up wet sanding and spot buffing to get some bumps and stuff out and then give it a good KILLERWAXX job. you want to wait at least 2 months before putting wax on it because the wax will seal off the air from the paint and it wont cure and could lift (for those who didnt know)
anyways here are the glory pics followed by all the pics as thumbnails
thumbnails:


anyways here are the glory pics followed by all the pics as thumbnails
thumbnails:


Senior Member
SL Member
Joined: Jan 2012
Posts: 104
From: Vantucky, WA
DJ, that looks awwwwwwsome! You're in OC I'm in Vantucky I'll drop my B off Monday so you can get to work on it then I will pick it up after my golf tournament.
But really your interior is sweet!
then I will pick it up after my golf tournament. But really your interior is sweet!
Thread Starter
Senior Member
SL Member
Joined: Feb 2011
Posts: 455
From: Oregon City, OR
thanks man. its a huge work in progress im not done yet. i think im going to wrap the glove box and panel beneath the steering wheel. getting rid of the zebra print and wrappin those with the same crushed panne velvet. i also have some clazzios on the way, ginormous thanks to 2zero6factory getting black diamond stitch with green stitching.
eventually ill get matching door panel inserts, center console cover, dash matt, and rear hatch panel cover made to go with the seats...
eventually ill get matching door panel inserts, center console cover, dash matt, and rear hatch panel cover made to go with the seats...