


Wood cargo floor


Thread Starter
Joined: Oct 2009
Posts: 1,516
From: Santa Clarita, CA
 Wood cargo floor
So I decided that I wanted something a little different fro the rear hatch floor. I took a cue from the old wood bed trucks, but after looking at the kits and seeing how thick they were and how much extra I would have left over after cutting them down I decided to build my own.
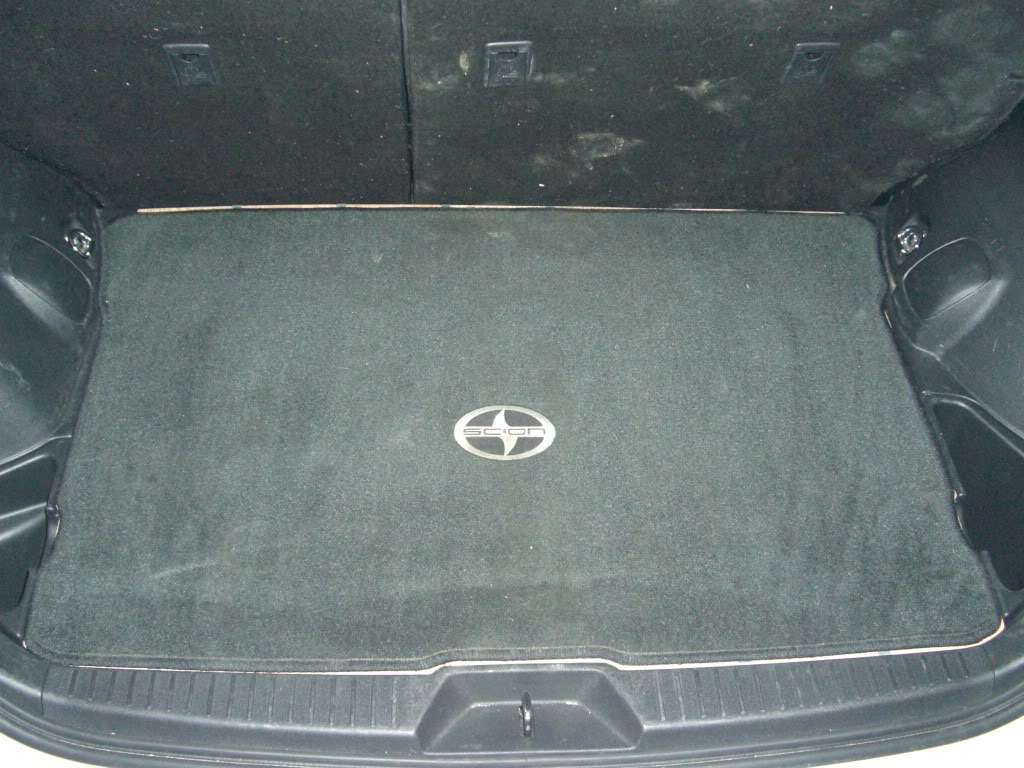
Just for reference here is a pic of what the floor looks like stock.
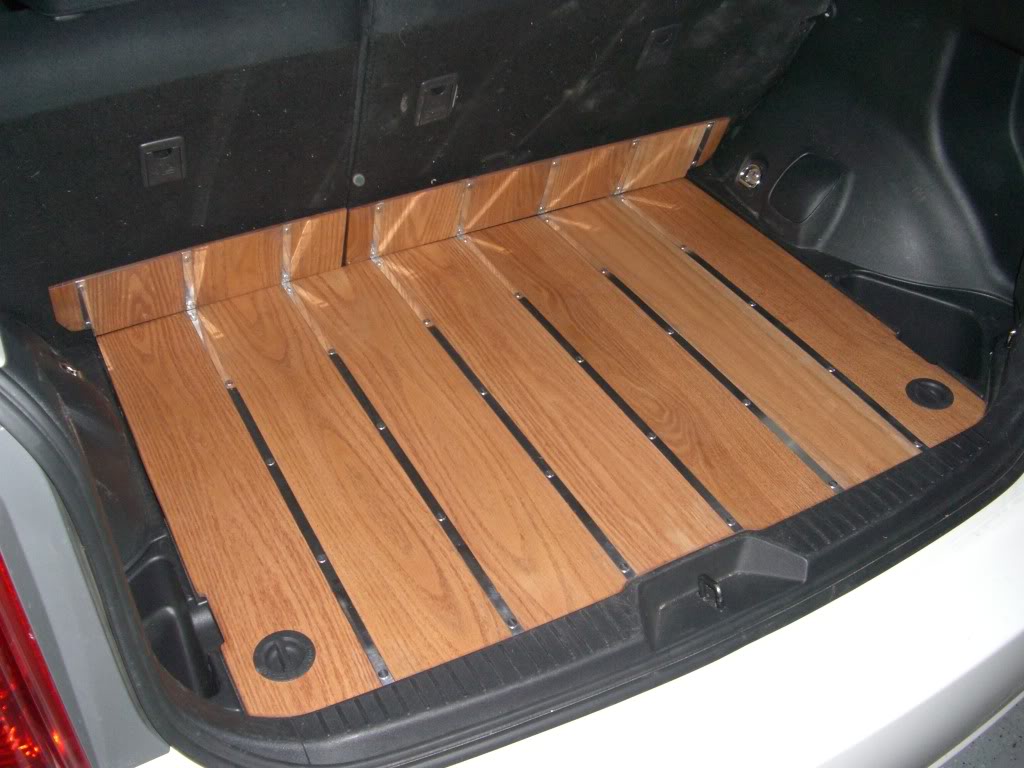
What I did was get some 1/4" x 6" x 4' solid oak planks, a couple 1/2" x 2" x 2' oak boards, some 1/2" x 1/16" x 6' aluminium strips, and a collection of 1/4" aluminium Chicago binding posts.
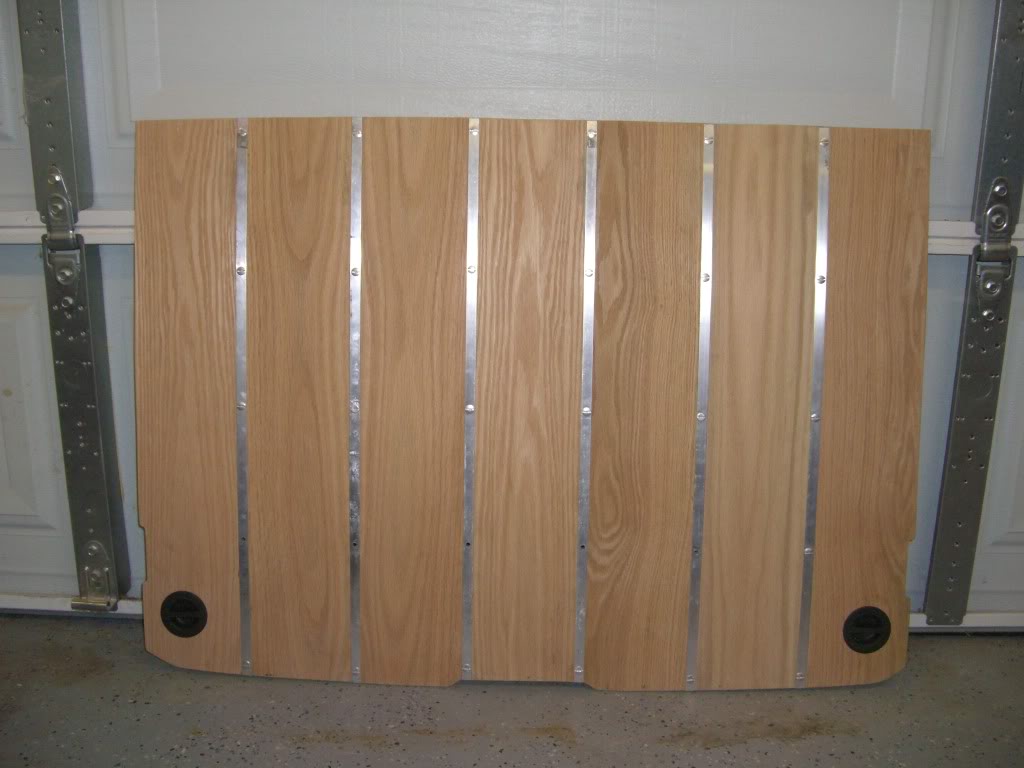
Don't really have any build pics but here is a couple shots of the boards glued together with the aluminium strips routered in between them and test fitted.
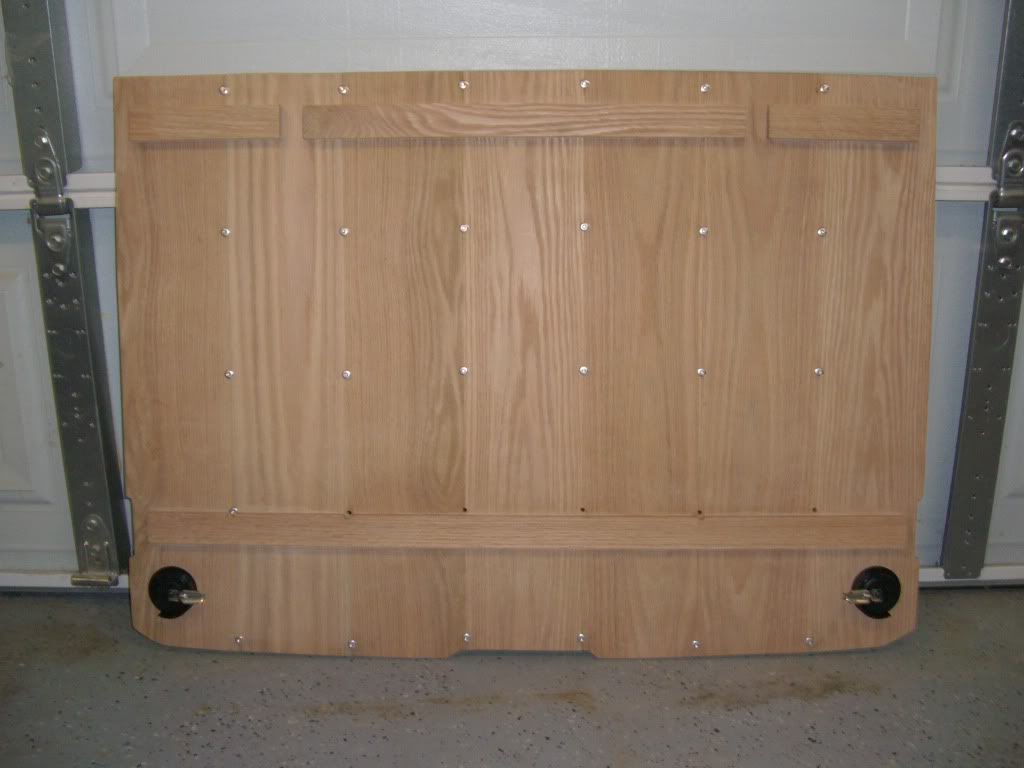
As you can see in this shot I also integrated to stock latches to keep the floor in place.
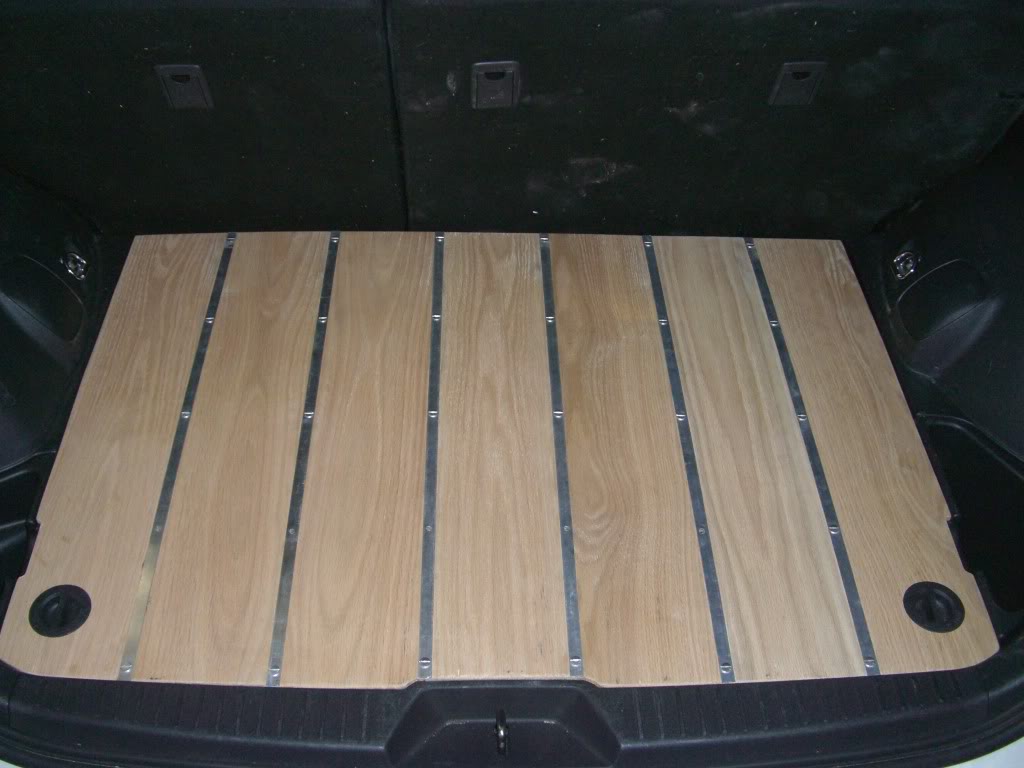
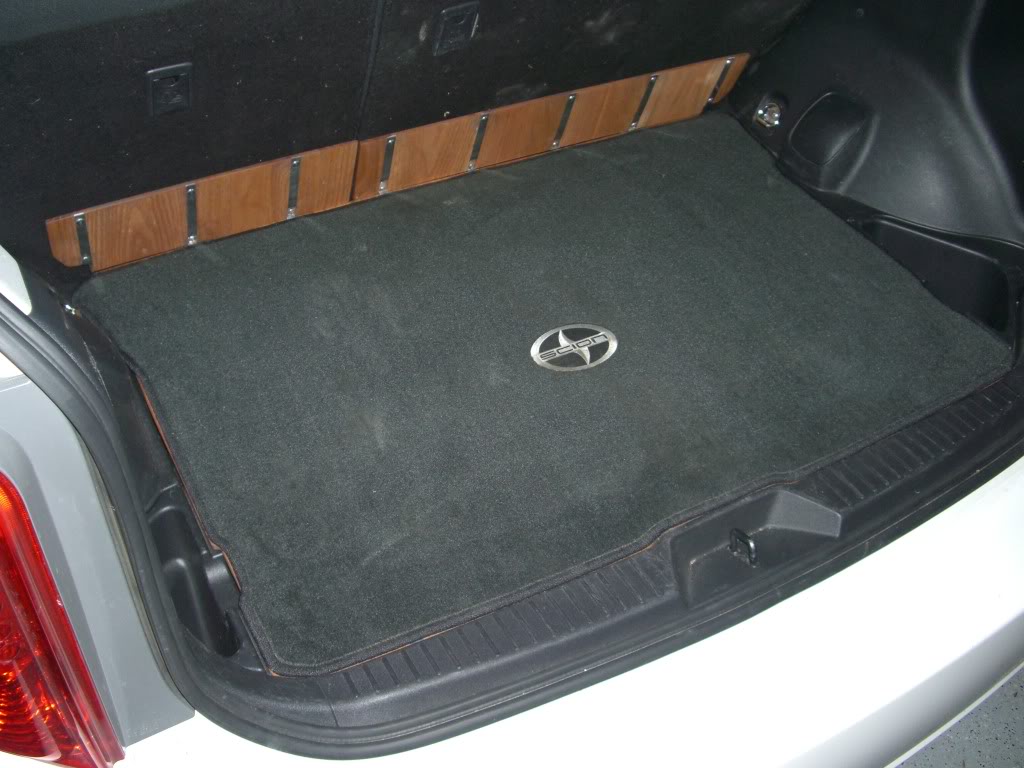
And here are the completed shots after polishing all the strips and binding posts and staining the wood with a cherry stain.
With cargo mat
And without
Eventually I'll be doing the back of the rear seats as well to have everything match when the seats are down. And possibly some floor mats.
Just for reference here is a pic of what the floor looks like stock.
What I did was get some 1/4" x 6" x 4' solid oak planks, a couple 1/2" x 2" x 2' oak boards, some 1/2" x 1/16" x 6' aluminium strips, and a collection of 1/4" aluminium Chicago binding posts.
Don't really have any build pics but here is a couple shots of the boards glued together with the aluminium strips routered in between them and test fitted.
As you can see in this shot I also integrated to stock latches to keep the floor in place.
And here are the completed shots after polishing all the strips and binding posts and staining the wood with a cherry stain.
With cargo mat
And without
Eventually I'll be doing the back of the rear seats as well to have everything match when the seats are down. And possibly some floor mats.

 Very originial and looks like it's a factory option.


Senior Member


SL Member
Joined: Oct 2009
Posts: 390
Wood cargo panel
Being a woodworker, I love it! I am so making me one!  For not thinking of it myself. What wood did you use and how thick was it? I'm wondering if being made of wood if the interior sound volume has gone up (being a solid reflective surface) or gone down (blocking any sound from the spare tire well).
For not thinking of it myself. What wood did you use and how thick was it? I'm wondering if being made of wood if the interior sound volume has gone up (being a solid reflective surface) or gone down (blocking any sound from the spare tire well).
Thread Starter
Joined: Oct 2009
Posts: 1,516
From: Santa Clarita, CA
Thanks for all the comments guys. I'm hoping that the other parts come out as well when I do them.
I took the stock panel and copied it on to cardboard and then traced it to the plank and cut to shape with a jig saw.
All parts are available at Lowe's, this is where I picked everything up. Though for cost savings I ordered most of the binding posts on Ebay after making sure they would work, as they are 80 cents each at Lowe's.
Laminate would definitely be tougher on the top but not through the cross section, but it would give you more finish options. Being that it is only 1/4" most plys don't have the needed strength. I actually looked at using oak or birch ply but when I saw how much it flexed I changed my mind. I also really wanted the same look as a wood bed floor made out of seperate pieces.
All parts are available at Lowe's, this is where I picked everything up. Though for cost savings I ordered most of the binding posts on Ebay after making sure they would work, as they are 80 cents each at Lowe's.
Laminate would definitely be tougher on the top but not through the cross section, but it would give you more finish options. Being that it is only 1/4" most plys don't have the needed strength. I actually looked at using oak or birch ply but when I saw how much it flexed I changed my mind. I also really wanted the same look as a wood bed floor made out of seperate pieces.


Senior Member
SL Member
Joined: Jun 2009
Posts: 102
From: Rochester, NY
Looks good Greg. If you continued all the way down the back of the seats that would look pretty darn nice. It would look alot like the interior of cars I use on a daily basis.....hearses lol. Around work my car is known as the "mini hearse" so doing this would just complete that look. Very nice job my friend.
Thread Starter
Joined: Oct 2009
Posts: 1,516
From: Santa Clarita, CA

I did one for myself. Made one just to see how hard it was and i thought it wasnt so bad i am going to make another for my wifes car and make a full deck from the back to the back of my driver seat for when i get my system and tv's and stuff for the shows and choose a real nice wood. Thanks for the idea man wish i would of thought of that a long time ago LOL!!!! But I am not done with this one yet havnt erased the pencil marks or put another support LOL!!!


 !
!
Last edited by TrevorS; Nov 27, 2009 at 12:44 AM.
Thread Starter
Joined: Oct 2009
Posts: 1,516
From: Santa Clarita, CA
I did one for myself. Made one just to see how hard it was and i thought it wasnt so bad i am going to make another for my wifes car and make a full deck from the back to the back of my driver seat for when i get my system and tv's and stuff for the shows and choose a real nice wood. Thanks for the idea man wish i would of thought of that a long time ago LOL!!!! But I am not done with this one yet havnt erased the pencil marks or put another support LOL!!!

LOL I am goign to do the full lenght one here this coming up week cause i am taking some time off. No I am not going to do the metel strips like the one above trying to be diff. Tell you the truth this one was just a mock up to see how easy it was to me to do LOL!!! It was easy. Alot of sanding take out put in and stuff like that but fun to do. Took me 2 and a half hours to do and i didnt finish ran out of day light. But I will post up when i get the rest done and the full floor. I want to do a diff color wood.
Thread Starter
Joined: Oct 2009
Posts: 1,516
From: Santa Clarita, CA
It is not the wood flooring it is the laminate how ever you spell it LOL!! Won't work I wish I could LOL!! Thats why I am going to get a diff color board that i would like a lot LOL!!!