XB2 OEM SCION Bumper Applique Install
 06-03-2013, 02:47 AM
#1
Member
Thread Starter

Join Date: Mar 2012
Location: Orange County
Posts: 45
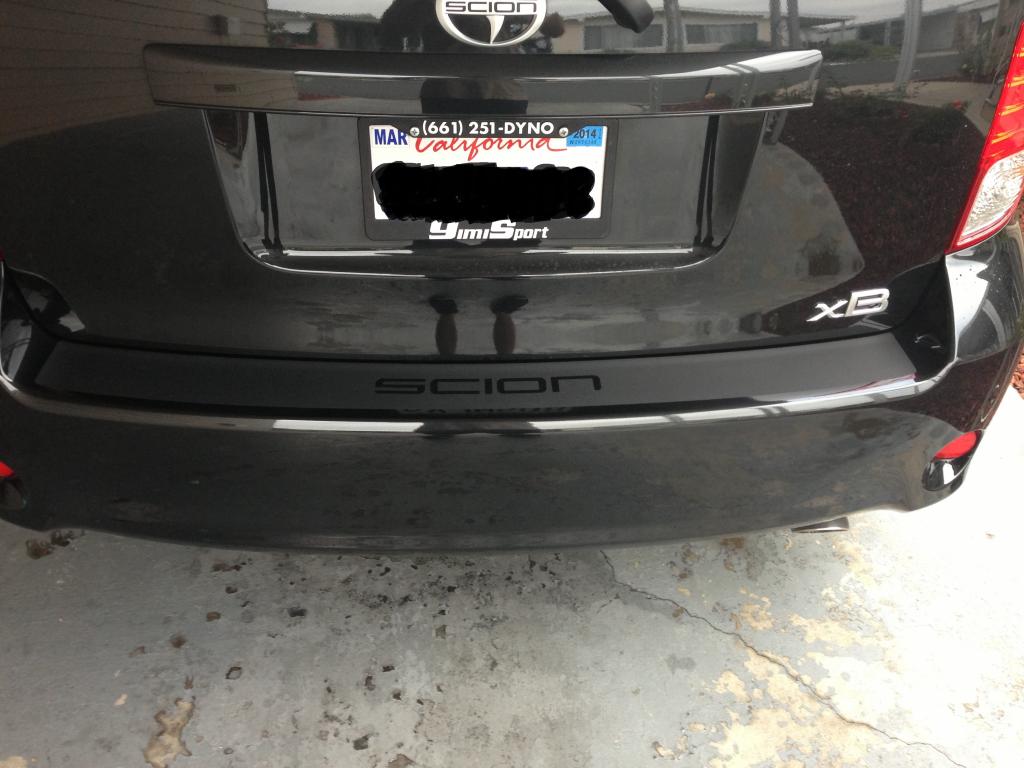
Okay so I just installed the OEM bumper applique on my 2012 Scion XB. I followed the How to for the XB1. The install is basically the same I figured I would just add how my install went for the XB2. Some of the parts I did differently then what the instructions say to do but this worked fine for me.
First wash your bumper then rewash with a cloth and rubbing alchol to get it as clean as possible.
Next, spray your bumper with a spray bottle filled with water and add a drop of dish soap. (The wetter the better). This will make it easy to slide around so you can line it up correctly.
Next I removed both plastic cover strips from the sticker. I carefully layed the strip down on the bumper and lined it up as good as possible by eye. Some instructions say to use a ruler but I didn't find that necessary. When I did this I noticed the rectangle in the middle of the "O" In scion was still stuck on the plastic strip so I just pulled it off and lined it up in the middle of the "o"
After you get it lined up as good as you can close the hatch and make sure it lines up with the back of the hatch door as well....This is something I forgot to do at first and sure enough it didn't line up when I closed the hatch so I fixed it quickly.
Once you have it lined up perfectly give it a second to dry so it sorta sticks.
You need it to stick a little bit so it doesn't move when using the credit card to get the water and bubbles out. Luckily I didn't find air bubbles to be much of an issue at all. I was easily able to get it to lay perfectly flat. I hope this helps someone who decides to give this a try. It was nice not to pay the dealership to do this and I really like the way it looks.

 06-04-2013, 06:44 PM
#3
Member
Thread Starter
Join Date: Mar 2012
Location: Orange County
Posts: 45
Thanks! Yea I really like the look of it, although I realized I don't have mine completely centered like the stock photo shows but oo well I think it still looks fine and serves its purpose the same. I got it from Scionpartspeople.com
Here is the link. This was the cheapest price I could find.
http://scionpartspeople.scionofpuyal...mper+Protector
Here is the link. This was the cheapest price I could find.
http://scionpartspeople.scionofpuyal...mper+Protector

Thread
Thread Starter
Forum
Replies
Last Post
umnitza
Exclusive Sponsored Sales
3
12-01-2014 06:26 PM
1NZ-FE
Scion xB 1st-Gen Aero & Exterior
22
09-28-2003 09:50 PM