
Painting (Brake Calipers)


Thread Starter
Senior Member

Scikotics
SL Member
Joined: Jun 2005
Posts: 2,757
From: West Des Moines, IA
I noticed that the only caliper painting walkthrough was for the xA/B. Granted, they do have front calipers and you can just follow those steps, I did a lot more prep work painting my calipers. So here it is, my walkthrough in painting the calipers on a tC.
After seeing a pic of Syxxpac's calipers, I decided I was going to paint my calipers. So I went out and bought the duplicolor caliper painting kit complete with paint, caliper cleaner, masking tape, paint brush, and a stirring stick. I took the jack out of the back of my car and pick pocketed my fianc� to get her keys. I then snuck out to her car and stole the jack out of the back of her Taurus. I took the jack out to my garage and gently placed the keys back in her pocket without her knowing. (I actually asked her for her keys and if I could borrow her jack, but the other story sounded better.)
I decided to start with the front seeing those were bigger calipers. I usually try to do the hardest/most time consuming parts first. With the wheels still on the ground, I used the lug wrench to bust the lugs loose. A half a turn will do, just so that you can get them off easily when the wheels are in the air. Then, I used the handy-dandy arrows on the side skirts to figure out where to place the jacks and lifted up the front of the car. Once the front wheels were airborne, I finished removing the lugs and pulled off the wheels.
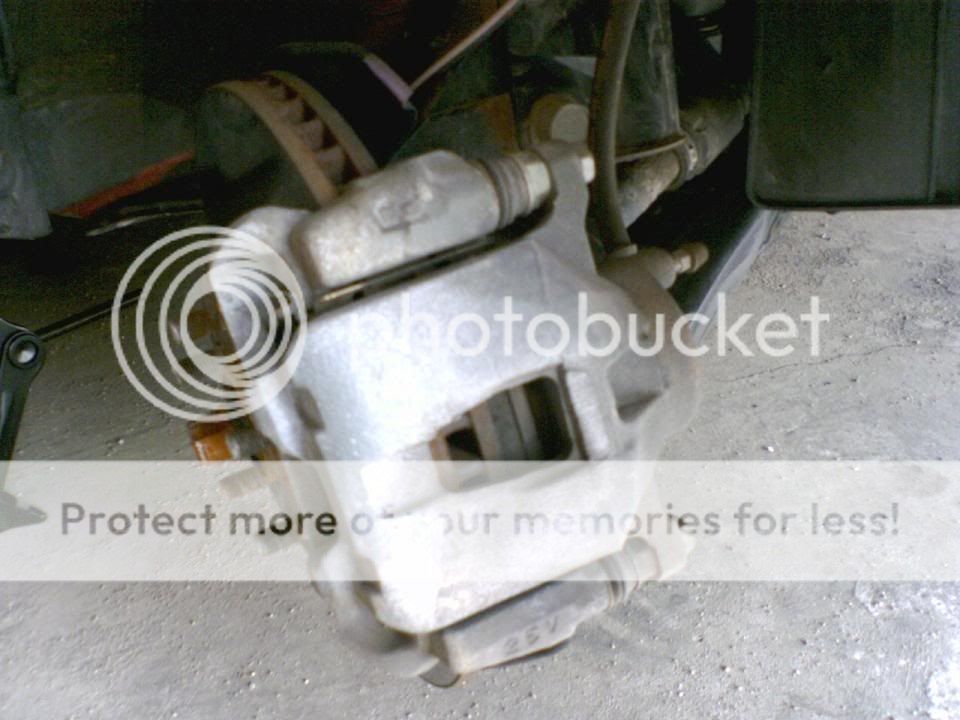
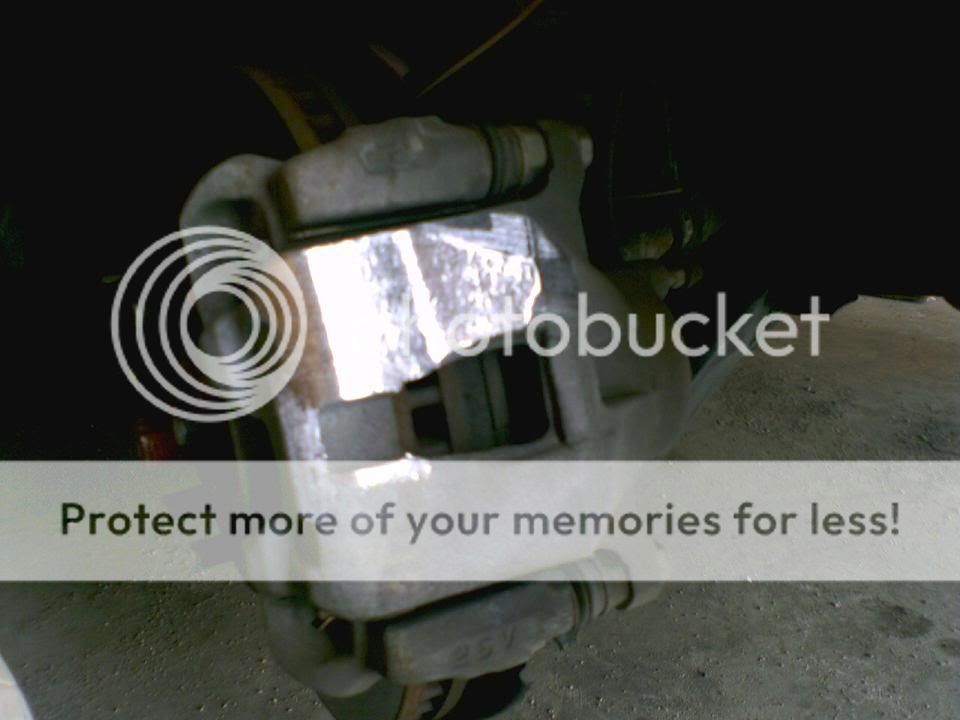
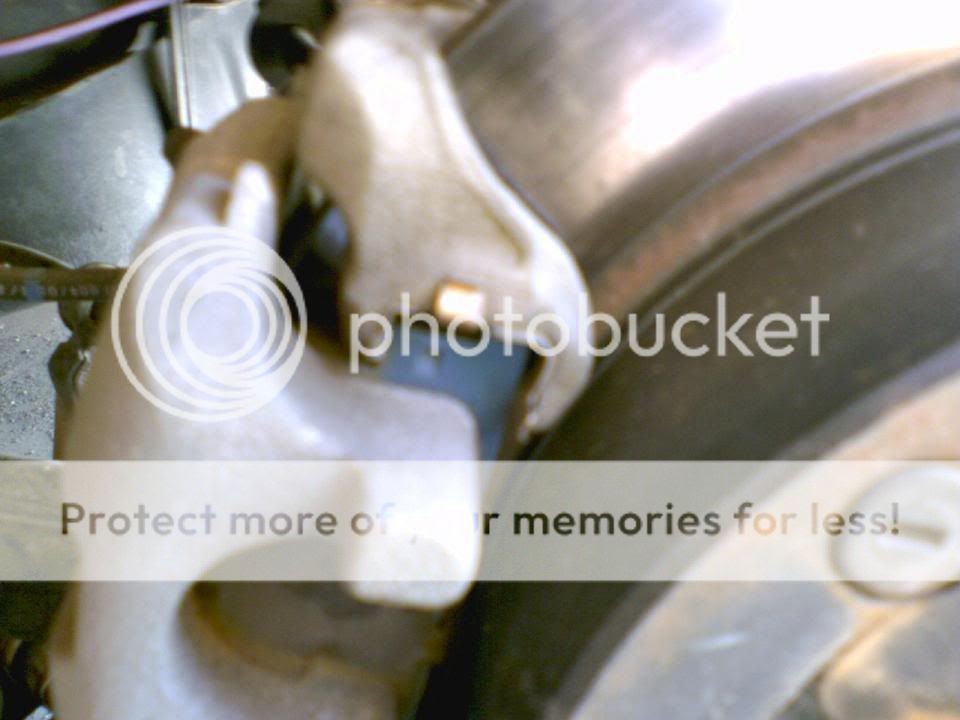
This is what the caliper looked like once I got the front wheels off:
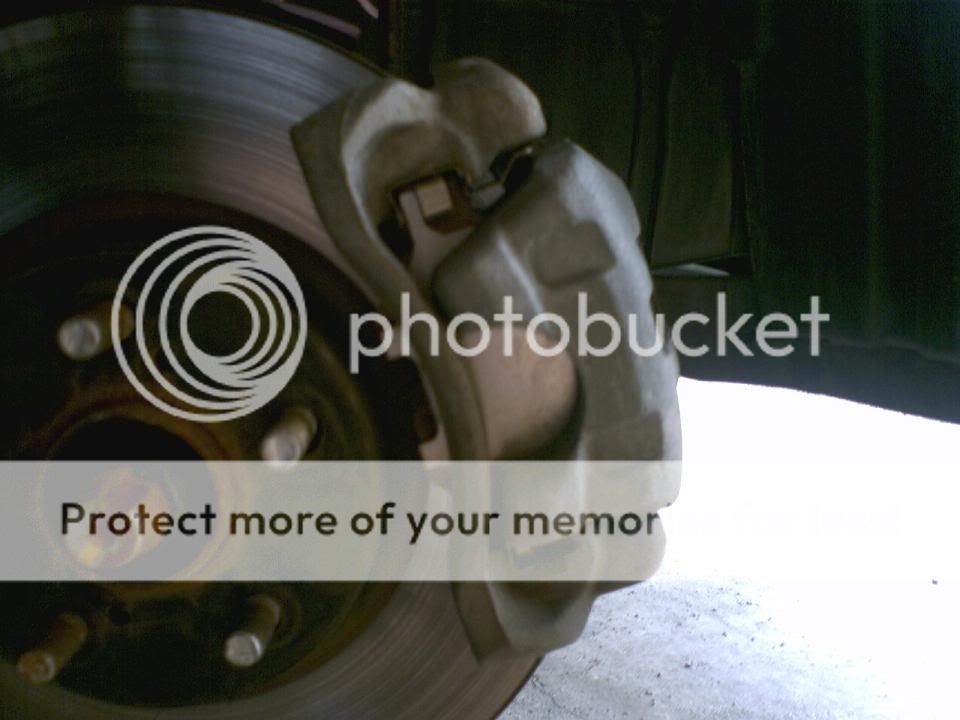
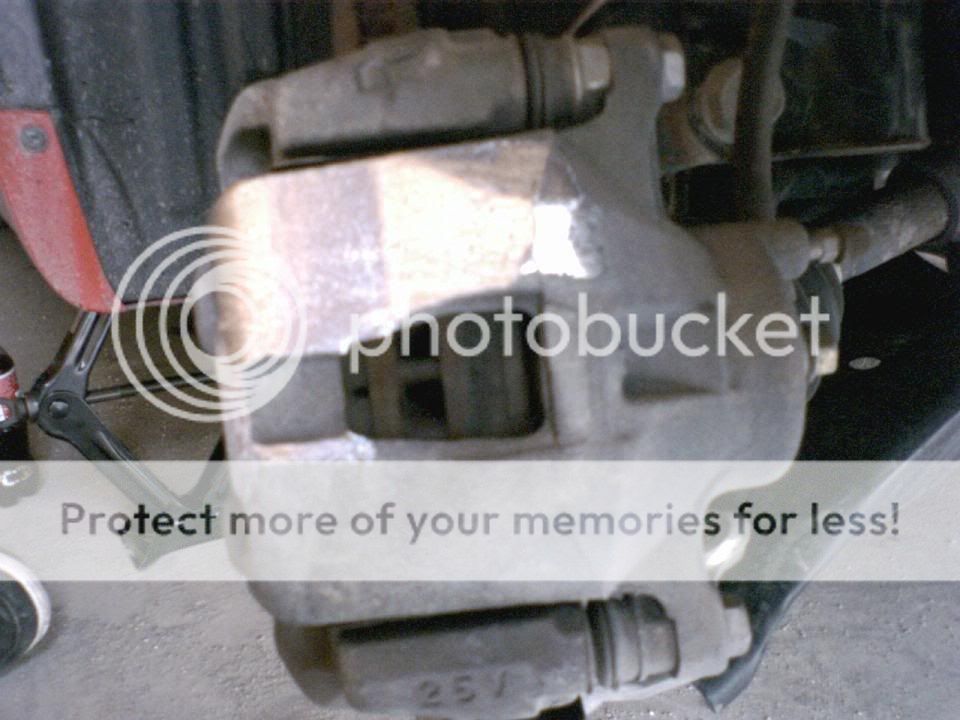
And the rear calipers before they were painted:
After doing some research here on ScionLife, I learned that the results are only as good as the prep work you do. When I saw how bumpy the calipers were from casting them, I thought to myself, "this just will not do". So I bust out my two favorite tools for working on cars: my pair of Mechanics Gloves (I love those things) and my Rotary Tool Kit (no, not a Dremel, this is a cheap knockoff). I go through all of the attachments and decide on the larger of the two sanding drums, stick on a roll of 60 grit sandpaper, and away I went. This pic was about 5 minutes into sanding the first caliper:
I continued sanding, trying to get every nook and cranny. After I got everything I could, I switched to a roll of 120 grit and went over everything again. After that, I took of that sanding drum and put on the smaller diameter drum and loaded that up with 120 grit as well to get the rest of the places the larger drum wouldn't go. This is what it looked like all sanded and fairly shiny:

Just to make sure I didn't miss anything, I took the bolts out so that I could pull the caliper off the rotor. I left the brake lines hooked up, but wanted to be able to move the caliper around a bit more. And just to make sure I didn't grind off anything important and screw stuff up, I pulled off the brake pads and the clips that hold them in. Those things are a pain to get off and I figured it would be the same putting them back together. So I laid them on the ground exactly like they came off the car. Seemed to work alright. I took this picture of the rear caliper clips in case I couldn't remember how they went on:
I went over everything again with the small diameter 120 grit attachment. This got everything nice and smooth. (I spent about 45 minutes to an hour sanding each caliper.)
Tip: It would be a good idea to get some safety glasses when doing this. I never wear safety glasses, but with the dust the "rotary tool" kicks up, I got a fair amount in my eyes.
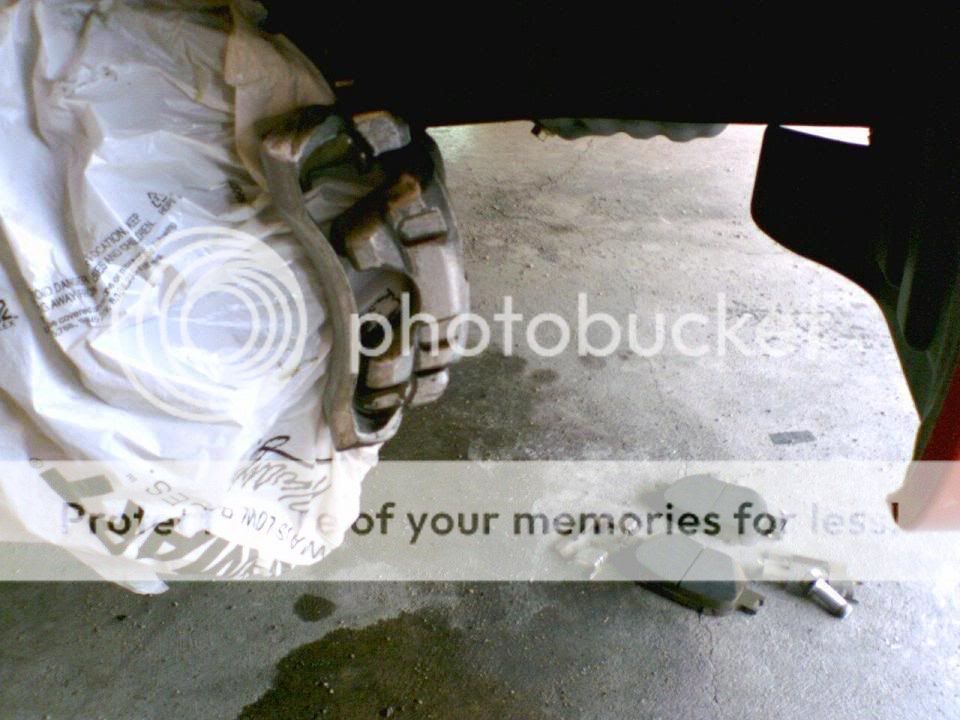
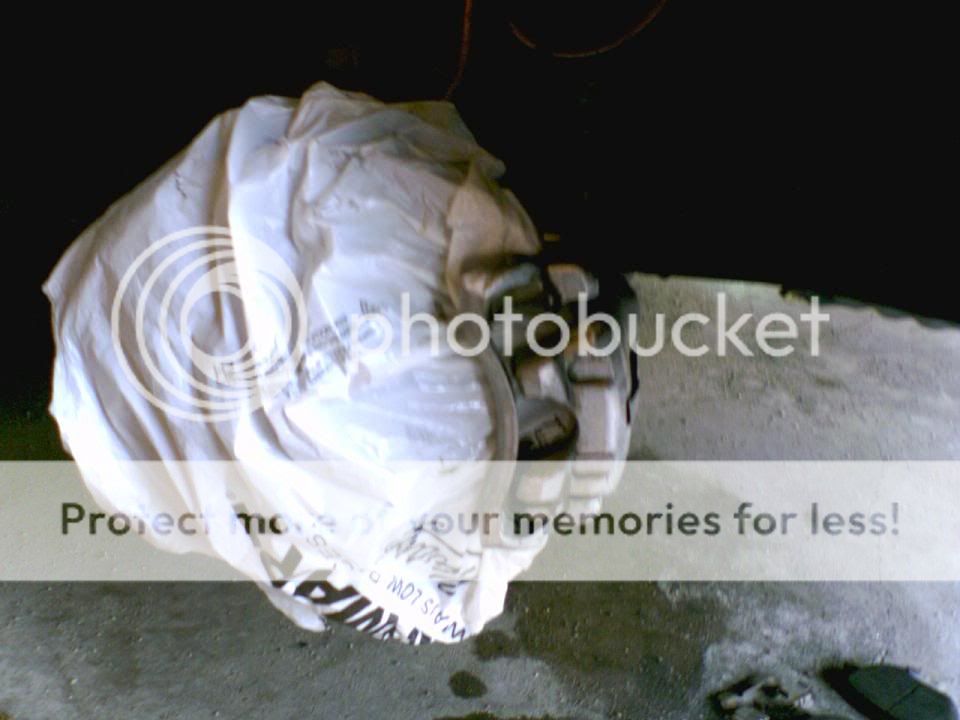
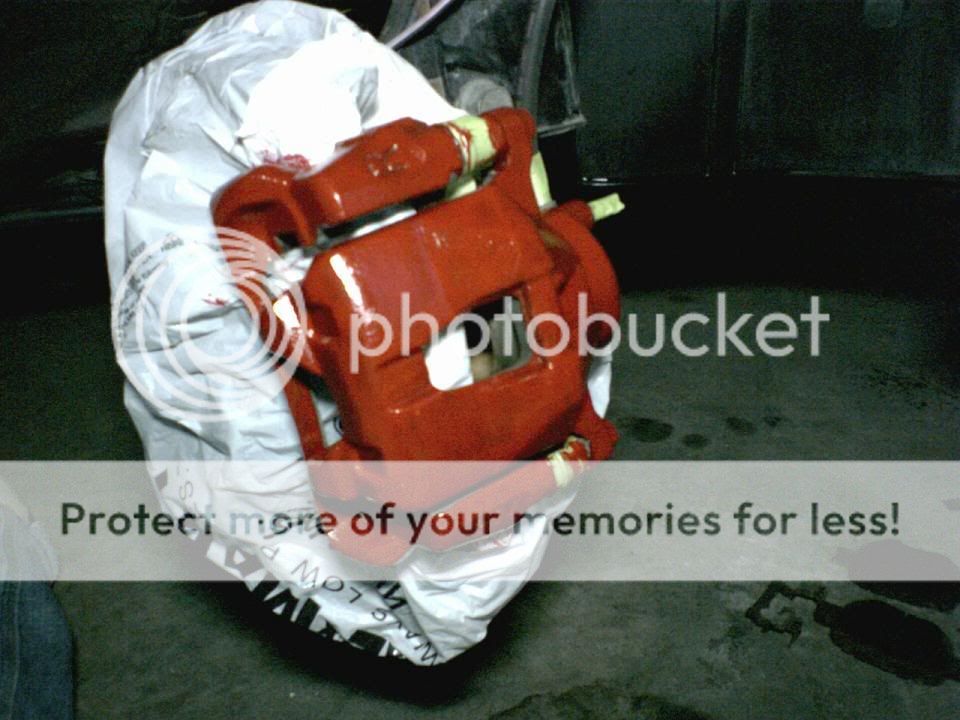
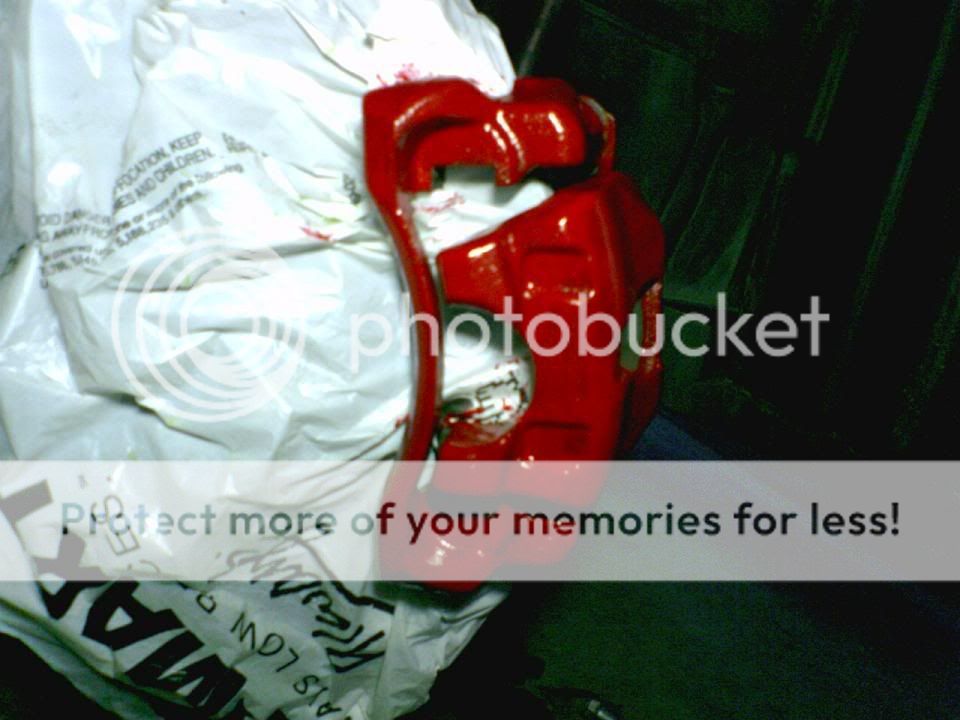
I didn't want to slop paint on everything under the fender, so scrounged around and found a couple of spare Wal-Mart plastic bags laying around (yea, right...who doesn't have a thousand of these stupid things laying around). I covered the rotors with the bag and loosely put the top bolt back in to hold the caliper on the car. I just slid the bottom bolt through the bracket while holding up the caliper. I let the caliper rest on that bolt instead of bolting it back on. It gave me a little more room to work. I had some painters masking tape laying around, so I used that instead of the tape supplied in the kit. I taped around the rubber fittings, the bleeder valve, and where the brake like connects to the caliper. Here are some pics of my calipers ready to be painted (in the first pic, you can see how I laid out my brake components so I could remember how they went together):
Before I started putting paint on, I found a bottle of Simple Green and hit the calipers with that to knock loose all of the dust from sanding the calipers. I sprayed the caliper, let it set for a few minutes, then used my fianc�'s toothbrush and scrubbed them clean (actually, it was one of my old toothbrushes that I use for detailing, but again...it sounded better). Now that most of the dust was gone, I used the caliper cleaner that came with the kit. That stuff is fun. You spray it on and it dries in a couple of seconds, ready for you to paint.
So, I decided to stretch my legs while I was shaking up the can of paint. Spent about two minutes shaking it, then opened it up and spent another minute stirring it with the supplied giant popsicle stick. After seeing how thick the paint went on, I decided to do the first coat thin, but thick enough to cover everything. Since this was only the first coat, it is ok if you miss a couple of spots. I just wanted to get the thing mostly covered. Here is a pic of one of my rear calipers halfway done with the first coat:
The nice thing about doing both of the fronts or both of the backs at the same time is while you are doing the second one, the first one is drying. After I got the first coat on the first caliper, I went to the second caliper and got that one covered. This is what the first caliper looked like after its first coat of paint and having dried for about 20 minutes while I was doing the other one:
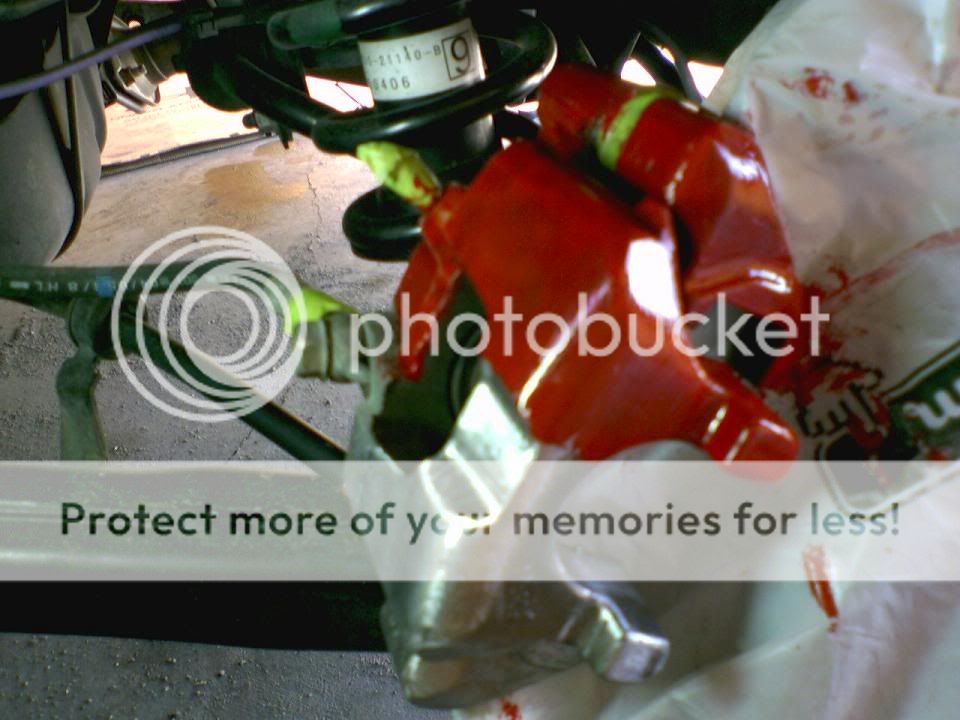
For me, I took about 20 minutes per caliper to paint them. Doing it this way, I got three coats on each before the paint started lifting and had to stop. The first coat is just to get a base on. The second coat allows you coat everything and get those spots you missed. With the third coat, I got everything coated evenly and it looked pretty good.
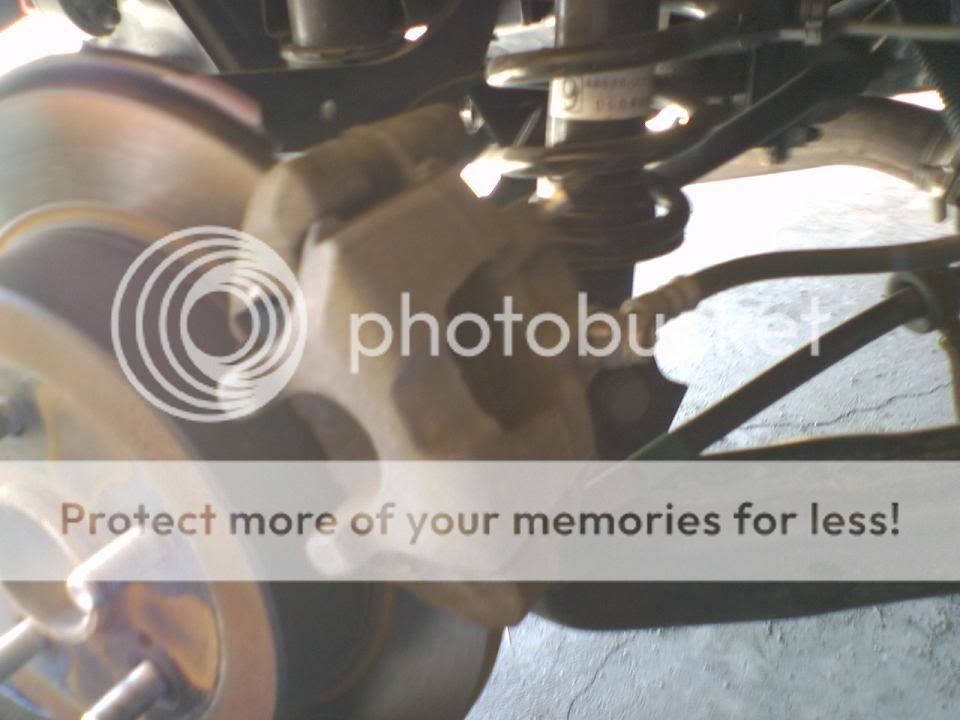
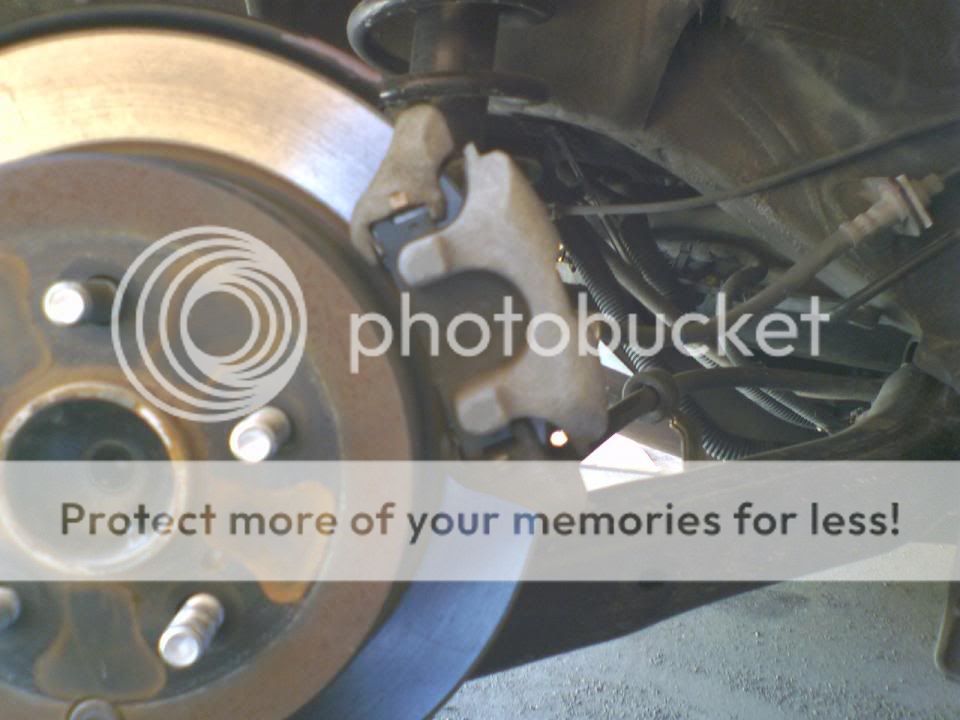
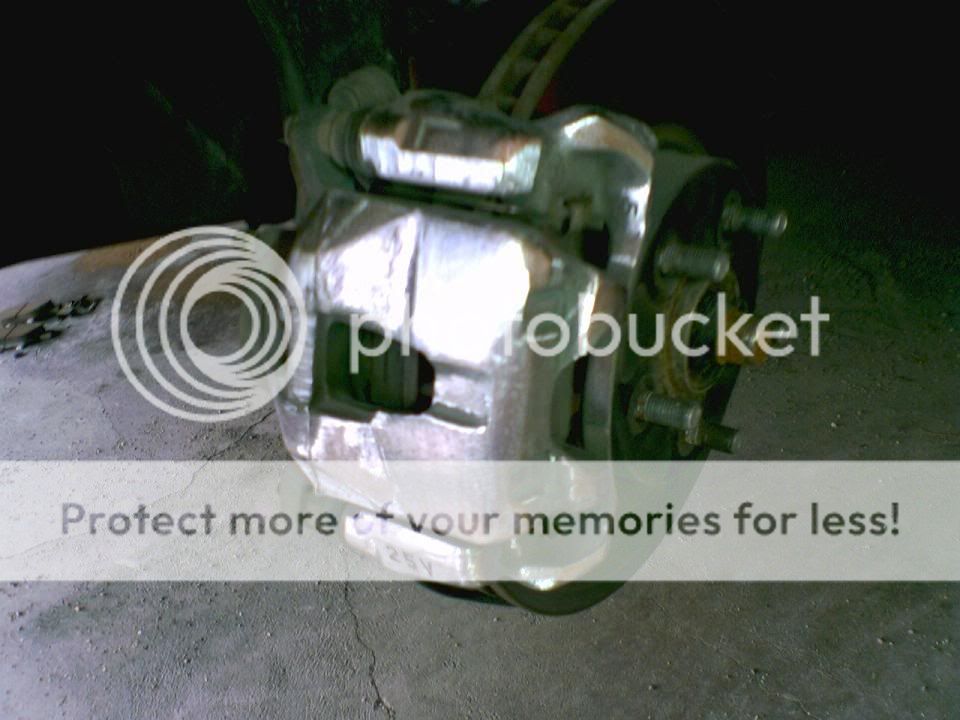
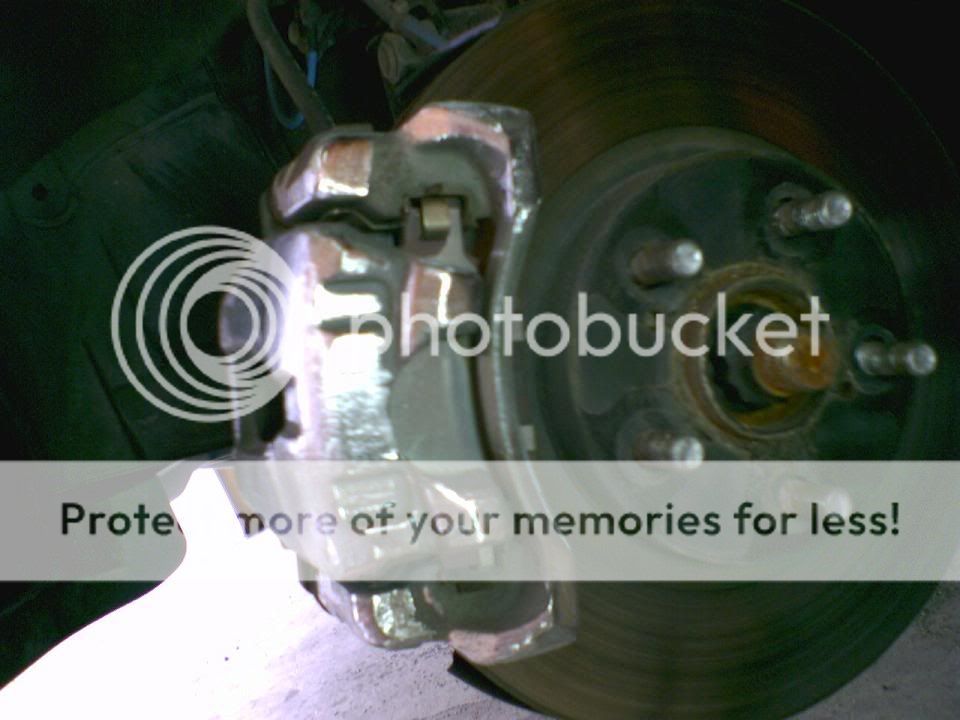
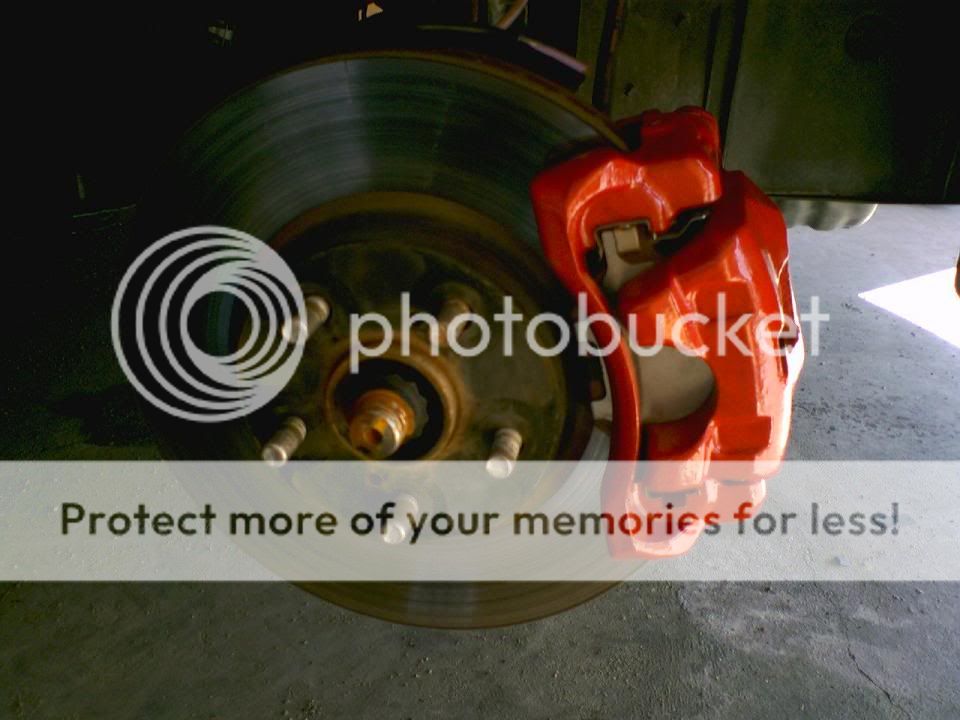
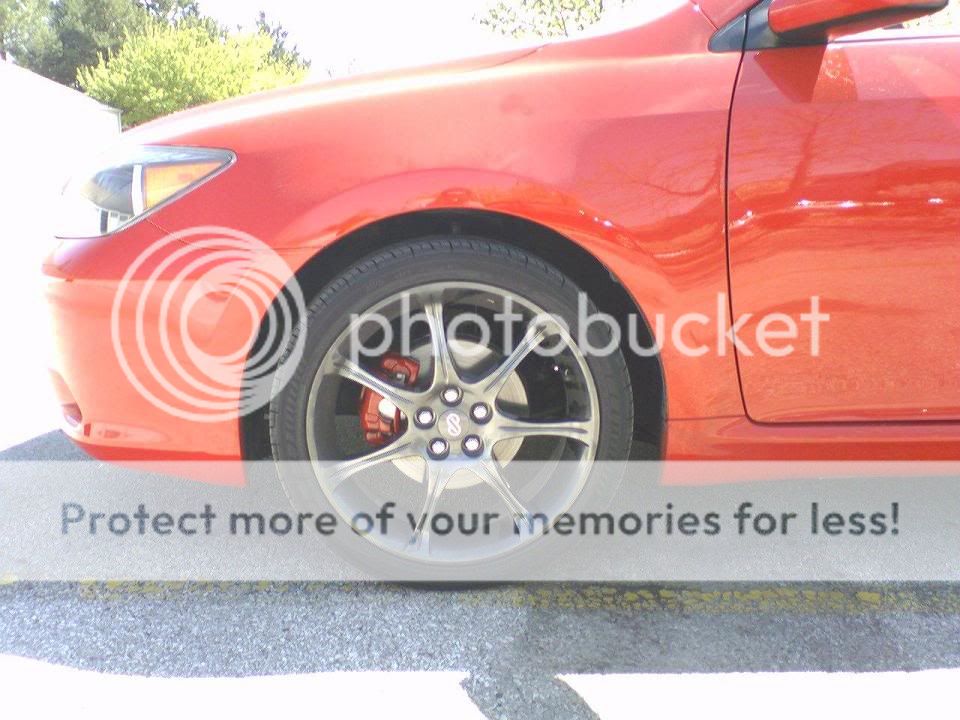
This is what the calipers looked like after the paint had dried and were bolted back on the car:
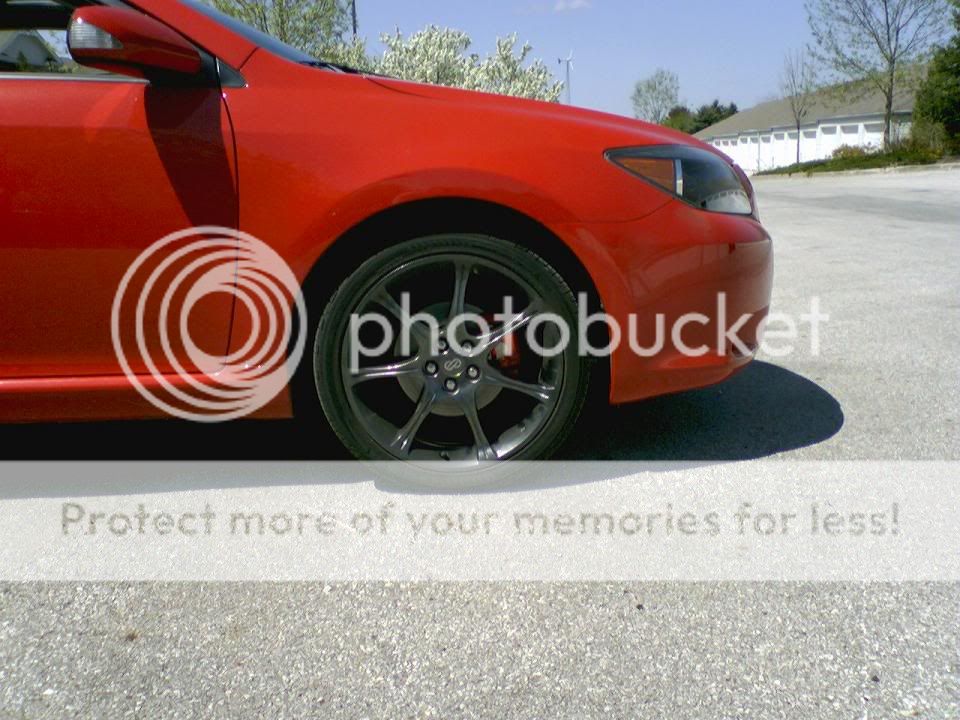
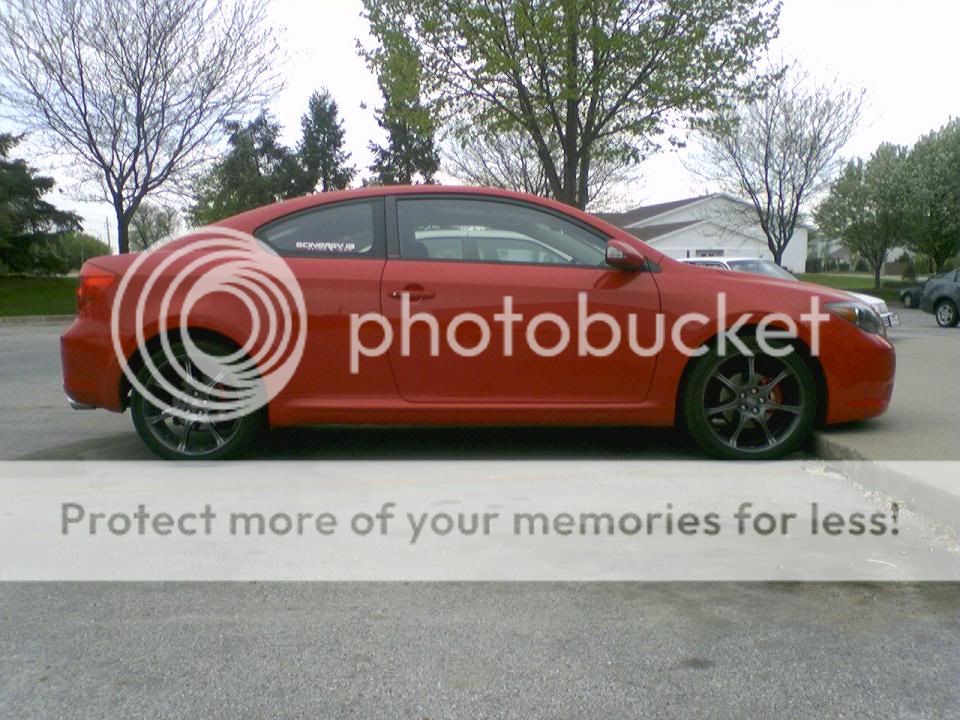
After everything is dry, you can put the rims back on. I put them on the car and installed the lugs. I tightened them in a star pattern to make sure the wheel was straight. Then I let the car down nice and gently and finished tightening all the lugs so they are nice and snug. What is left to do but take it outside for a quick photo shoot:

For anyone thinking about doing this, I would recommend a full weekend when you know you won't be going anywhere or if you have another car you can use to get around. I started Friday afternoon after I got off work and did the fronts. Saturday, I worked all afternoon reassembling the front calipers and sanding and painting the rears. Saturday night, I reassembled the rear calipers and bolted them back on the car. I let it dry all day Sunday. The important thing to do is put the jack back in your car and even more importantly, put the jack back in the fianc�'s car. I was sure to ask her nicely for her keys and place the jack back where I found it (haha, I actually stole the keys and just threw the jack in her car...........who am I kidding, I am whipped).
It was a fun project and really makes your calipers and wheels more noticeable. I will probably put another coat or two on the calipers just to even everything out and make it look nicer. I noticed several people staring at my calipers as they pass me/I pass them on the interstate. Very inexpensive, but noticeable mod for your car. And for any Release Series 1.0 owners who are thinking about doing this...the Red Duplicolor kit matches the Absolutely Red paint almost perfectly.
After seeing a pic of Syxxpac's calipers, I decided I was going to paint my calipers. So I went out and bought the duplicolor caliper painting kit complete with paint, caliper cleaner, masking tape, paint brush, and a stirring stick. I took the jack out of the back of my car and pick pocketed my fianc� to get her keys. I then snuck out to her car and stole the jack out of the back of her Taurus. I took the jack out to my garage and gently placed the keys back in her pocket without her knowing. (I actually asked her for her keys and if I could borrow her jack, but the other story sounded better.)
I decided to start with the front seeing those were bigger calipers. I usually try to do the hardest/most time consuming parts first. With the wheels still on the ground, I used the lug wrench to bust the lugs loose. A half a turn will do, just so that you can get them off easily when the wheels are in the air. Then, I used the handy-dandy arrows on the side skirts to figure out where to place the jacks and lifted up the front of the car. Once the front wheels were airborne, I finished removing the lugs and pulled off the wheels.
This is what the caliper looked like once I got the front wheels off:
And the rear calipers before they were painted:
After doing some research here on ScionLife, I learned that the results are only as good as the prep work you do. When I saw how bumpy the calipers were from casting them, I thought to myself, "this just will not do". So I bust out my two favorite tools for working on cars: my pair of Mechanics Gloves (I love those things) and my Rotary Tool Kit (no, not a Dremel, this is a cheap knockoff). I go through all of the attachments and decide on the larger of the two sanding drums, stick on a roll of 60 grit sandpaper, and away I went. This pic was about 5 minutes into sanding the first caliper:
I continued sanding, trying to get every nook and cranny. After I got everything I could, I switched to a roll of 120 grit and went over everything again. After that, I took of that sanding drum and put on the smaller diameter drum and loaded that up with 120 grit as well to get the rest of the places the larger drum wouldn't go. This is what it looked like all sanded and fairly shiny:
Just to make sure I didn't miss anything, I took the bolts out so that I could pull the caliper off the rotor. I left the brake lines hooked up, but wanted to be able to move the caliper around a bit more. And just to make sure I didn't grind off anything important and screw stuff up, I pulled off the brake pads and the clips that hold them in. Those things are a pain to get off and I figured it would be the same putting them back together. So I laid them on the ground exactly like they came off the car. Seemed to work alright. I took this picture of the rear caliper clips in case I couldn't remember how they went on:
I went over everything again with the small diameter 120 grit attachment. This got everything nice and smooth. (I spent about 45 minutes to an hour sanding each caliper.)
Tip: It would be a good idea to get some safety glasses when doing this. I never wear safety glasses, but with the dust the "rotary tool" kicks up, I got a fair amount in my eyes.
I didn't want to slop paint on everything under the fender, so scrounged around and found a couple of spare Wal-Mart plastic bags laying around (yea, right...who doesn't have a thousand of these stupid things laying around). I covered the rotors with the bag and loosely put the top bolt back in to hold the caliper on the car. I just slid the bottom bolt through the bracket while holding up the caliper. I let the caliper rest on that bolt instead of bolting it back on. It gave me a little more room to work. I had some painters masking tape laying around, so I used that instead of the tape supplied in the kit. I taped around the rubber fittings, the bleeder valve, and where the brake like connects to the caliper. Here are some pics of my calipers ready to be painted (in the first pic, you can see how I laid out my brake components so I could remember how they went together):
Before I started putting paint on, I found a bottle of Simple Green and hit the calipers with that to knock loose all of the dust from sanding the calipers. I sprayed the caliper, let it set for a few minutes, then used my fianc�'s toothbrush and scrubbed them clean (actually, it was one of my old toothbrushes that I use for detailing, but again...it sounded better). Now that most of the dust was gone, I used the caliper cleaner that came with the kit. That stuff is fun. You spray it on and it dries in a couple of seconds, ready for you to paint.
So, I decided to stretch my legs while I was shaking up the can of paint. Spent about two minutes shaking it, then opened it up and spent another minute stirring it with the supplied giant popsicle stick. After seeing how thick the paint went on, I decided to do the first coat thin, but thick enough to cover everything. Since this was only the first coat, it is ok if you miss a couple of spots. I just wanted to get the thing mostly covered. Here is a pic of one of my rear calipers halfway done with the first coat:
The nice thing about doing both of the fronts or both of the backs at the same time is while you are doing the second one, the first one is drying. After I got the first coat on the first caliper, I went to the second caliper and got that one covered. This is what the first caliper looked like after its first coat of paint and having dried for about 20 minutes while I was doing the other one:
For me, I took about 20 minutes per caliper to paint them. Doing it this way, I got three coats on each before the paint started lifting and had to stop. The first coat is just to get a base on. The second coat allows you coat everything and get those spots you missed. With the third coat, I got everything coated evenly and it looked pretty good.
This is what the calipers looked like after the paint had dried and were bolted back on the car:
After everything is dry, you can put the rims back on. I put them on the car and installed the lugs. I tightened them in a star pattern to make sure the wheel was straight. Then I let the car down nice and gently and finished tightening all the lugs so they are nice and snug. What is left to do but take it outside for a quick photo shoot:
For anyone thinking about doing this, I would recommend a full weekend when you know you won't be going anywhere or if you have another car you can use to get around. I started Friday afternoon after I got off work and did the fronts. Saturday, I worked all afternoon reassembling the front calipers and sanding and painting the rears. Saturday night, I reassembled the rear calipers and bolted them back on the car. I let it dry all day Sunday. The important thing to do is put the jack back in your car and even more importantly, put the jack back in the fianc�'s car. I was sure to ask her nicely for her keys and place the jack back where I found it (haha, I actually stole the keys and just threw the jack in her car...........who am I kidding, I am whipped).
It was a fun project and really makes your calipers and wheels more noticeable. I will probably put another coat or two on the calipers just to even everything out and make it look nicer. I noticed several people staring at my calipers as they pass me/I pass them on the interstate. Very inexpensive, but noticeable mod for your car. And for any Release Series 1.0 owners who are thinking about doing this...the Red Duplicolor kit matches the Absolutely Red paint almost perfectly.
Senior Member
SL Member
Joined: Oct 2004
Posts: 944
From: Naples/Ft.Myers
i did the same but i just took the damn things OFF and then painted them. then when dry put em back on...no tape needed or mess getting it on anything else but what you wanna paint
good write up!
good write up!

Senior Member
Scikotics
SL Member
Joined: Oct 2005
Posts: 7,514
From: Orlando, FL (UCF)
wow! I think i'll add this to my my project list for this summer. I'm decomissioning the car for like 2-3 weeks and doing a whole bunch of crap. We'll just have to find time to do this.
looks great!
looks great!


Thread Starter
Senior Member
Scikotics
SL Member
Joined: Jun 2005
Posts: 2,757
From: West Des Moines, IA
Originally Posted by davedavetC
very detailed. you went all out on those bad boys.... how did it look polished? (like after you sanded? good enough to leave like that  )
)

Thread Starter
Senior Member
Scikotics
SL Member
Joined: Jun 2005
Posts: 2,757
From: West Des Moines, IA
Originally Posted by DTRUONG_112
very detailed writeup< I like it but I wouldve skipped the sanding part, thats just me.
Originally Posted by davedavetC
did you take those pics with a camera phone?


Senior Member
SL Member
Joined: May 2005
Posts: 2,840
From: Central PA
Originally Posted by THansenite

I like the calipers a lot, it's good to see that someone took their time to do it right.

Senior Member
SL Member
Scinergy
Joined: May 2005
Posts: 181
From: Atlanta, GA
Looks good, but I am not sure why you's guys are using the cheap Duplicolor paint. I used the G2 Caliper paint ( it's the same stuff that they use on Indy cars ). It's basically a ceramic coat that is ridiculously durable. It probably took a little longer to put on, but it was well worth it and it looks great. Also, if you put it on exactly as the instructions tell you ( which I did ), it is guaranteed for life or they will send you another cannister of the paint to do it again.
No sanding or grinding, everything is included with the G2 paint kit. Caliper cleaner, paint, and brush.
I'd recommend it to anyone.
No sanding or grinding, everything is included with the G2 paint kit. Caliper cleaner, paint, and brush.
I'd recommend it to anyone.

Thread Starter
Senior Member
Scikotics
SL Member
Joined: Jun 2005
Posts: 2,757
From: West Des Moines, IA
Originally Posted by dCvingtC
Looks good, but I am not sure why you's guys are using the cheap Duplicolor paint. I used the G2 Caliper paint ( it's the same stuff that they use on Indy cars ). It's basically a ceramic coat that is ridiculously durable. It probably took a little longer to put on, but it was well worth it and it looks great. Also, if you put it on exactly as the instructions tell you ( which I did ), it is guaranteed for life or they will send you another cannister of the paint to do it again.
No sanding or grinding, everything is included with the G2 paint kit. Caliper cleaner, paint, and brush.
I'd recommend it to anyone.
No sanding or grinding, everything is included with the G2 paint kit. Caliper cleaner, paint, and brush.
I'd recommend it to anyone.