
Side Marker Install (Custom)


Thread Starter
Member

CinSity Scions
Joined: Sep 2005
Posts: 42
I decided to do this project because when i used to have my lambo doors on, the shock would make a bump on both my fenders, so i decided to cover them up with side markers!! how exciting!
"I am not responsible for anything that can go wrong to you guys when doing this. Do at you own risk." Now thats out of the way, read on!
Equipment needed:
-92'95' civic side markers
-18 gauge wire
-electrical tape
-wire connectors
Tools needed:
-soldering gun
-solder
-ruler
-dremel
-pencil
-wire stripper
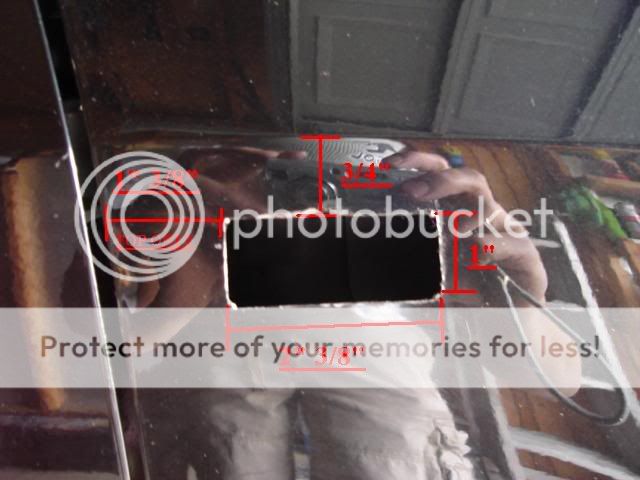
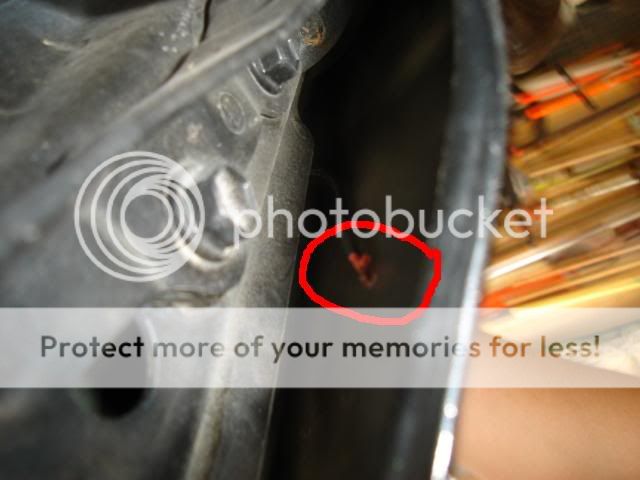
Step one: get out your ruler and pencil. Now here are the measurements for THIS TYPE of side marker ONLY. (any other type will need to measure the inside of the marker instead of the outside.) Now draw in lightly, make sure after finishing drawing the rectangle; that it is not slanted, you want it to be straight.
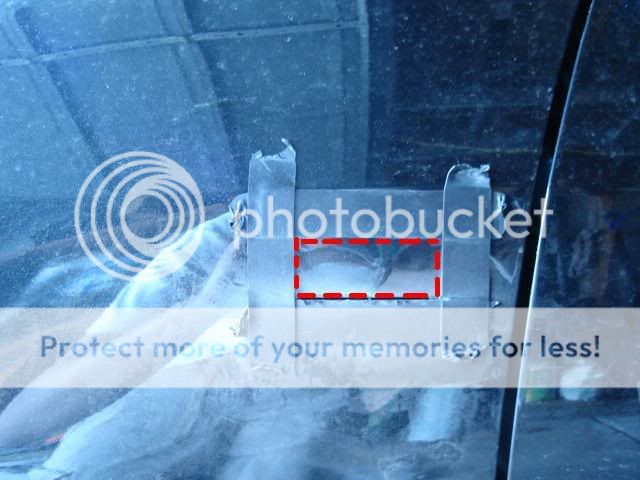
Step two: Next get the electrical tape, and tape around the lines of the rectangle as pictured below
Step three: cut out the rectangle with your dremel tool, (You might need a couple of discs to cut the fender; they tend to run out) the electrical tape is there for a reason, cut inside the lines and dont cut all the way to the corner. Leave just a tiny bit left and do the rest.
NOTE:If you are not experience at cutting, get thicker tape, because sometimes when u hit the edge, the dremel might slip and scratch ur fender. Now you dont want that to happen.
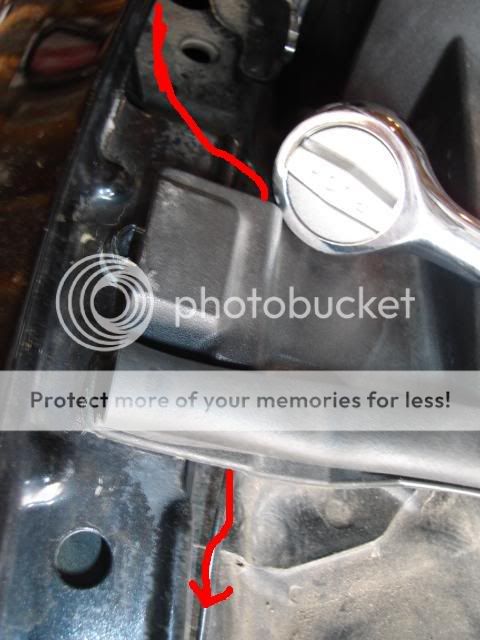
Image after finish cut :

Step 4: With the tape still on, get a flat head and ply out the cutted piece and just jerk it until it comes off.
Step 5: Now that your cut is finished, its time for the lighting.
SIDE MARKERS:
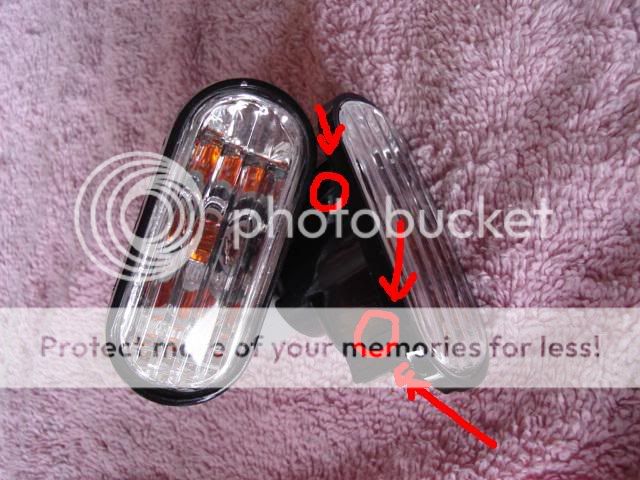
Prep Work: Take out the sander piece for the dremel and flaten out the edges on the side marker loctaed below, there should be a max of 4 edges, 2 on top, 2 on bottom. also, there is a little round piece near the edge, trim that piece off too.
Step 6: Take your 18 guage wire and cut four 5' pieces of wire, and strip off about 1/2" of the tips. Now with your connectors, Put only 1 connector per wire.
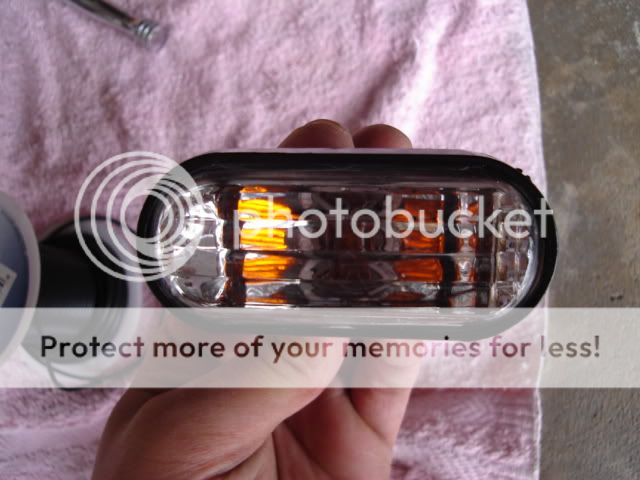
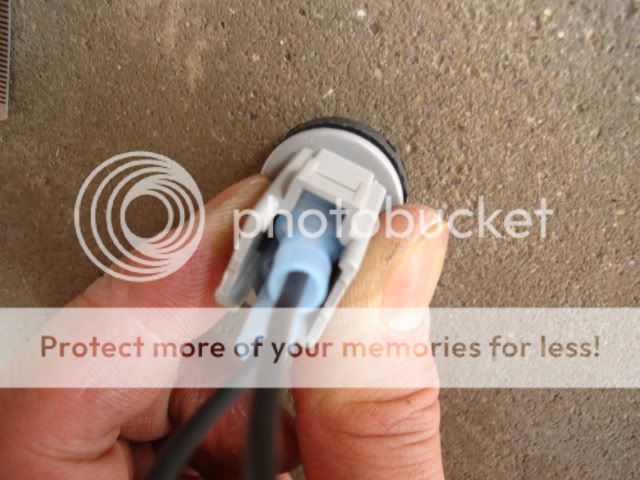
Step 7: Take one of the side markers, take out the bulb assembly, and the bulb. Should look like this :

Step 8: Take 2 wires and plug them into the assembly, make your u put in flat on the ground when puttin in the wires cuz the bulb thing will push out the other side when putting on the connector just like this:
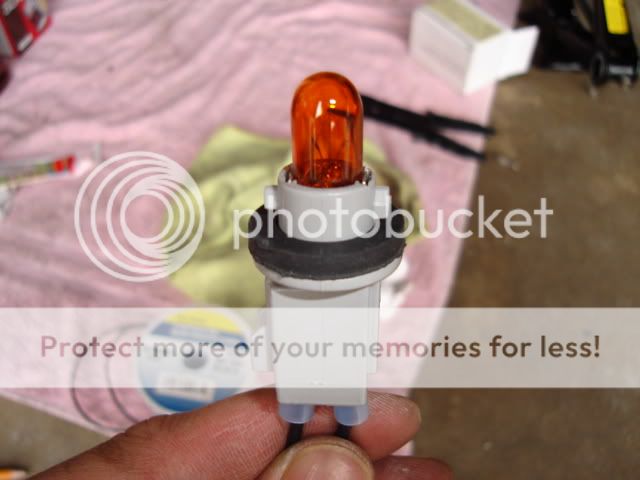
Step 9: Place your bulb back in
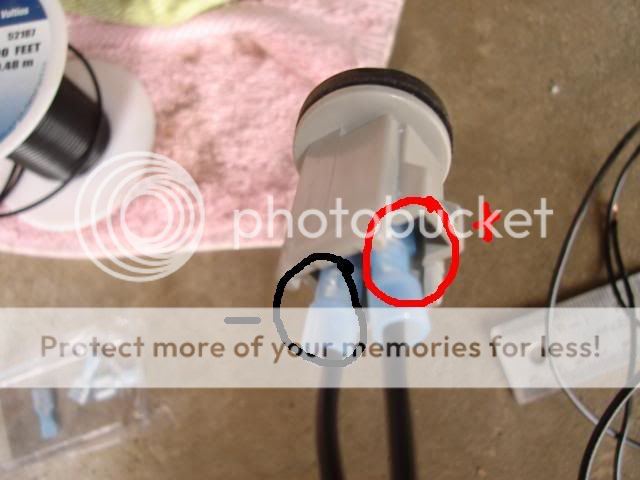
Step 10: The part closest to the clip of the bulb assembly is the positive terminal. I marked the end of the wire with a piece of electric tape to know that it is the postive wire.
Note: if u want to test the light, just touch the wires to the battery to see if it lights up
Step 11: Place the bulb back into the side marker, now its time to run the wire through the fender. u need to open your hood and run the wires through the cutted marker hole up to the top of the fender. Keep your head under the hood and the wire should pop up like this:
use the dremel sander to sand the edges of the cut in your fender, then touch it up with either touch up paint, rust protection or clear coat. Let dry.
Place the sidemarker to the hole. start with one side first, then pop in the clip at the other side. It should lock in perfectly.


Now pull all the wires through. This is now i ran the wire. (you are gonna tap the wires into the parking lights)
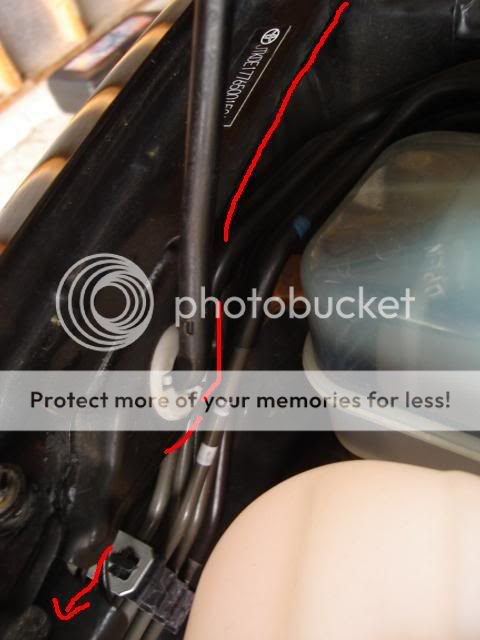
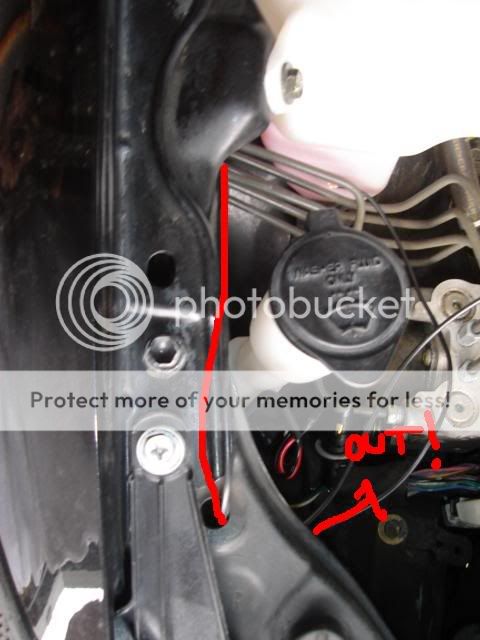
Done. the wires are now in postion.
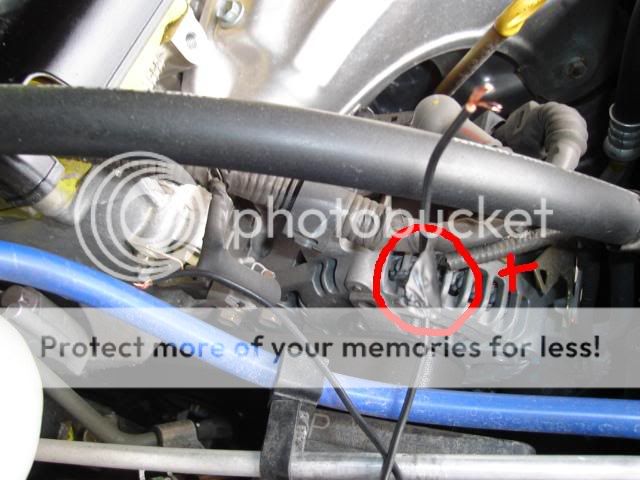
Step 12: ok, disconnect your battery. Unplug your parking light and pull the harness closest to you, so you have enough room to work with.
Step 13: Now its time to splice it open. DO NOT CUT THE WIRE! here is where u need to strip it
NOTE: Green is positive, Black/White is negative
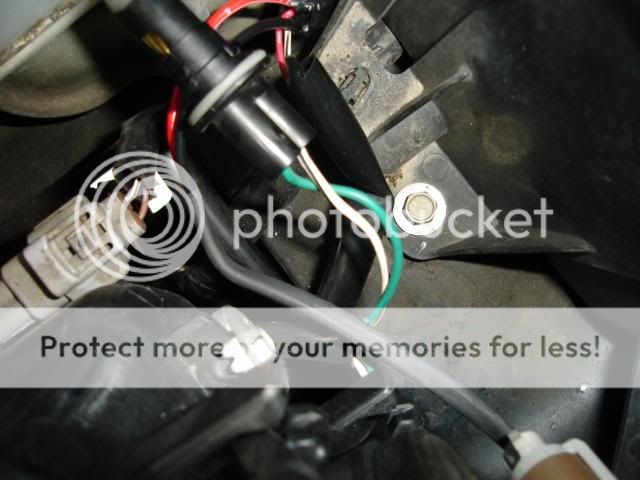
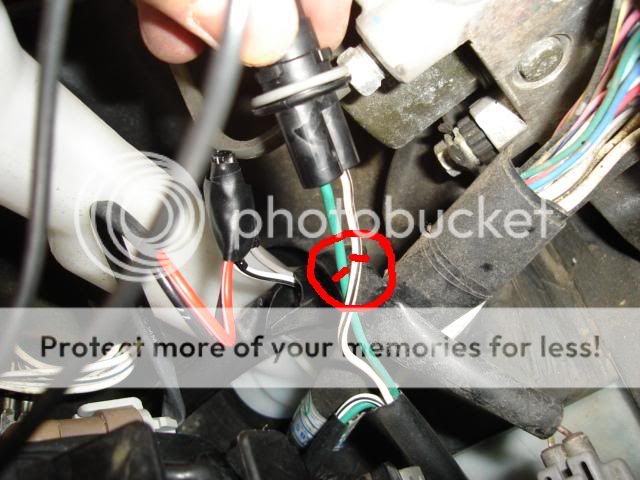
Step 14: After you strip it, connect postive wire of sidemaker to the green wire as pictured below.
Step 15: Get out the soldering iron, solder it on. After you finish tape it up with electrical tape. Do the same with the negative wire.
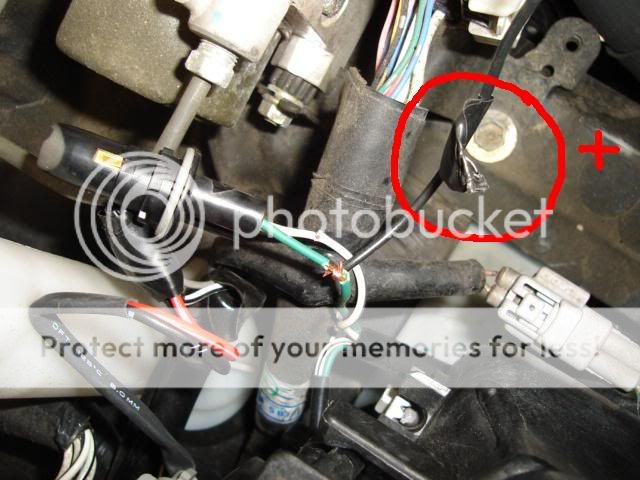
Step 16: so the same procedures on the driver side, and make sure you taped it good.
Step 17: Now after everything is finished and cleaned up, plug in ur battery and turn it on!!!!!! bam and this is the finished product. ENJOY!!


NOTE: This will only turn on when parking or headlights are turned on. This will not blink when you turn on ur signals (because i thought the mirrors were enough, i dont like too much blinking)
Blinking option: If you want it to blink, you will need to tap the green wire only on the parking light and tap the other wire to the positive wire on the turning signal light, therefore, it will be on and will blink when u turn on ur signals. (extension of one wire will be needed in order to reach the signal wire.
"I am not responsible for anything that can go wrong to you guys when doing this. Do at you own risk." Now thats out of the way, read on!
Equipment needed:
-92'95' civic side markers
-18 gauge wire
-electrical tape
-wire connectors
Tools needed:
-soldering gun
-solder
-ruler
-dremel
-pencil
-wire stripper
Step one: get out your ruler and pencil. Now here are the measurements for THIS TYPE of side marker ONLY. (any other type will need to measure the inside of the marker instead of the outside.) Now draw in lightly, make sure after finishing drawing the rectangle; that it is not slanted, you want it to be straight.
Step two: Next get the electrical tape, and tape around the lines of the rectangle as pictured below
Step three: cut out the rectangle with your dremel tool, (You might need a couple of discs to cut the fender; they tend to run out) the electrical tape is there for a reason, cut inside the lines and dont cut all the way to the corner. Leave just a tiny bit left and do the rest.
NOTE:If you are not experience at cutting, get thicker tape, because sometimes when u hit the edge, the dremel might slip and scratch ur fender. Now you dont want that to happen.
Image after finish cut :
Step 4: With the tape still on, get a flat head and ply out the cutted piece and just jerk it until it comes off.
Step 5: Now that your cut is finished, its time for the lighting.
SIDE MARKERS:
Prep Work: Take out the sander piece for the dremel and flaten out the edges on the side marker loctaed below, there should be a max of 4 edges, 2 on top, 2 on bottom. also, there is a little round piece near the edge, trim that piece off too.
Step 6: Take your 18 guage wire and cut four 5' pieces of wire, and strip off about 1/2" of the tips. Now with your connectors, Put only 1 connector per wire.
Step 7: Take one of the side markers, take out the bulb assembly, and the bulb. Should look like this :
Step 8: Take 2 wires and plug them into the assembly, make your u put in flat on the ground when puttin in the wires cuz the bulb thing will push out the other side when putting on the connector just like this:
Step 9: Place your bulb back in
Step 10: The part closest to the clip of the bulb assembly is the positive terminal. I marked the end of the wire with a piece of electric tape to know that it is the postive wire.
Note: if u want to test the light, just touch the wires to the battery to see if it lights up
Step 11: Place the bulb back into the side marker, now its time to run the wire through the fender. u need to open your hood and run the wires through the cutted marker hole up to the top of the fender. Keep your head under the hood and the wire should pop up like this:
use the dremel sander to sand the edges of the cut in your fender, then touch it up with either touch up paint, rust protection or clear coat. Let dry.
Place the sidemarker to the hole. start with one side first, then pop in the clip at the other side. It should lock in perfectly.
Now pull all the wires through. This is now i ran the wire. (you are gonna tap the wires into the parking lights)
Done. the wires are now in postion.
Step 12: ok, disconnect your battery. Unplug your parking light and pull the harness closest to you, so you have enough room to work with.
Step 13: Now its time to splice it open. DO NOT CUT THE WIRE! here is where u need to strip it
NOTE: Green is positive, Black/White is negative
Step 14: After you strip it, connect postive wire of sidemaker to the green wire as pictured below.
Step 15: Get out the soldering iron, solder it on. After you finish tape it up with electrical tape. Do the same with the negative wire.
Step 16: so the same procedures on the driver side, and make sure you taped it good.
Step 17: Now after everything is finished and cleaned up, plug in ur battery and turn it on!!!!!! bam and this is the finished product. ENJOY!!
NOTE: This will only turn on when parking or headlights are turned on. This will not blink when you turn on ur signals (because i thought the mirrors were enough, i dont like too much blinking)
Blinking option: If you want it to blink, you will need to tap the green wire only on the parking light and tap the other wire to the positive wire on the turning signal light, therefore, it will be on and will blink when u turn on ur signals. (extension of one wire will be needed in order to reach the signal wire.


Senior Member
SL Member
Joined: Dec 2004
Posts: 1,227
From: Bay Area, CA
did you left the bare metal expose after you made the cut? i guess its covered by the sidemarker but aren't you worried about rust? maybe rub some touch-up paint or clearcoat on it for protection.


Thread Starter
Member
CinSity Scions
Joined: Sep 2005
Posts: 42
Originally Posted by maximus96
did you left the bare metal expose after you made the cut? i guess its covered by the sidemarker but aren't you worried about rust? maybe rub some touch-up paint or clearcoat on it for protection.
Thread Starter
Member
CinSity Scions
Joined: Sep 2005
Posts: 42
Originally Posted by hieoctane
sryy..quick ques..other than amber bulbs, what bulbs are allowed in side markers? (colors, and intensities)
Thread Starter
Member
CinSity Scions
Joined: Sep 2005
Posts: 42
Originally Posted by SO-CAL_TC
so the lambo doors damaged your car? Which ones did you have?
Great write up btw
Great write up btw


Originally Posted by lao847
Originally Posted by SO-CAL_TC
so the lambo doors damaged your car? Which ones did you have?
Great write up btw
Great write up btw


Senior Member
SL Member
Joined: May 2005
Posts: 1,726
The side markers are night time indicator lights. They serve the same purpose as the lights inside the corner of the headlights.
They aren't turn signals. Read his first post over. He doesn't like the extra blinky so he wired it so that it turns on when the parking lights or headlights are on.
They aren't turn signals. Read his first post over. He doesn't like the extra blinky so he wired it so that it turns on when the parking lights or headlights are on.
