
Glove Box LED Light DIY


Thread Starter
Senior Member

SL Member
Joined: Mar 2011
Posts: 2,102
From: Nashua, NH
sticky? 
Glove Box LED Light DIY
You will need:
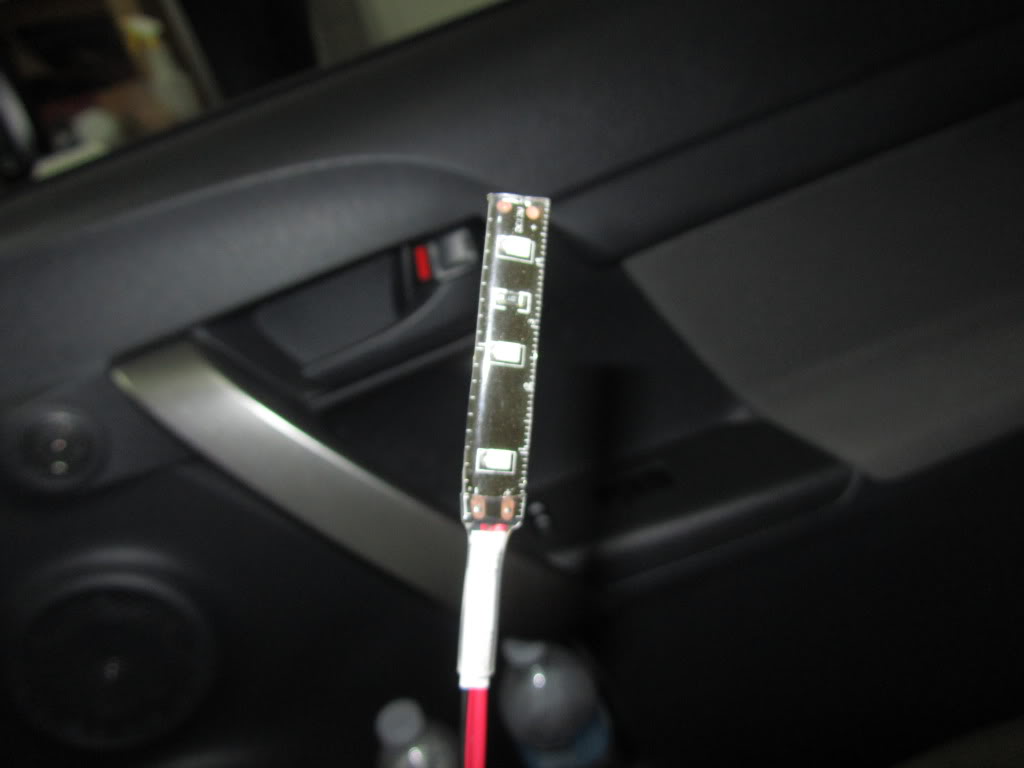
1. LED:
http://www.superbrightleds.com/cgi-b...FLS.htm#photos
WFLS-B30, using just 3 of them
2. Level Switch:
http://www.radioshack.com/product/in...ductId=2049719
the outside pins are NORMALLY CLOSED CIRCUIT so in this position both wires would pass electricity

3. In-line Fuse Holder:
http://www.radioshack.com/product/in...ductId=2102786
4. 0.5-1A Fuse
Step 1:
Pull off the stereo panel and disconnect the power plug from the clock
Remove the glove box by pushing IN from both sides.
Remove the black covering

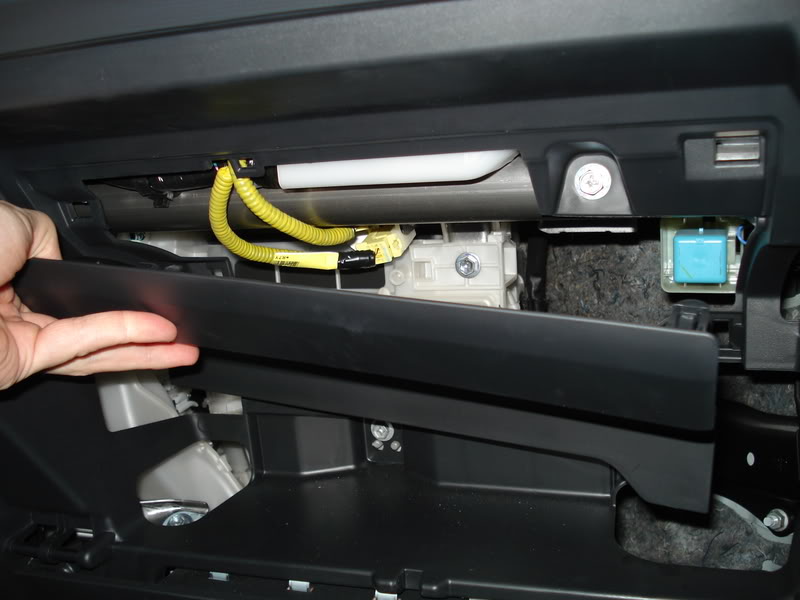
(thanx 1stone! )
)
Step 2:
Remove the electric tape and open up the sleeve the power plug is in

Step 3:
I found that the blue wire is connected to Accessory. You can try looking for constant 12V if you want. I did this out of safety - in case the switch breaks off or whatever else and the light would be ON inside without you ever knowing. Also I dont know what this is conected to so you must use a fuse, maybe this is connected to airbags who knows...

Step 4:
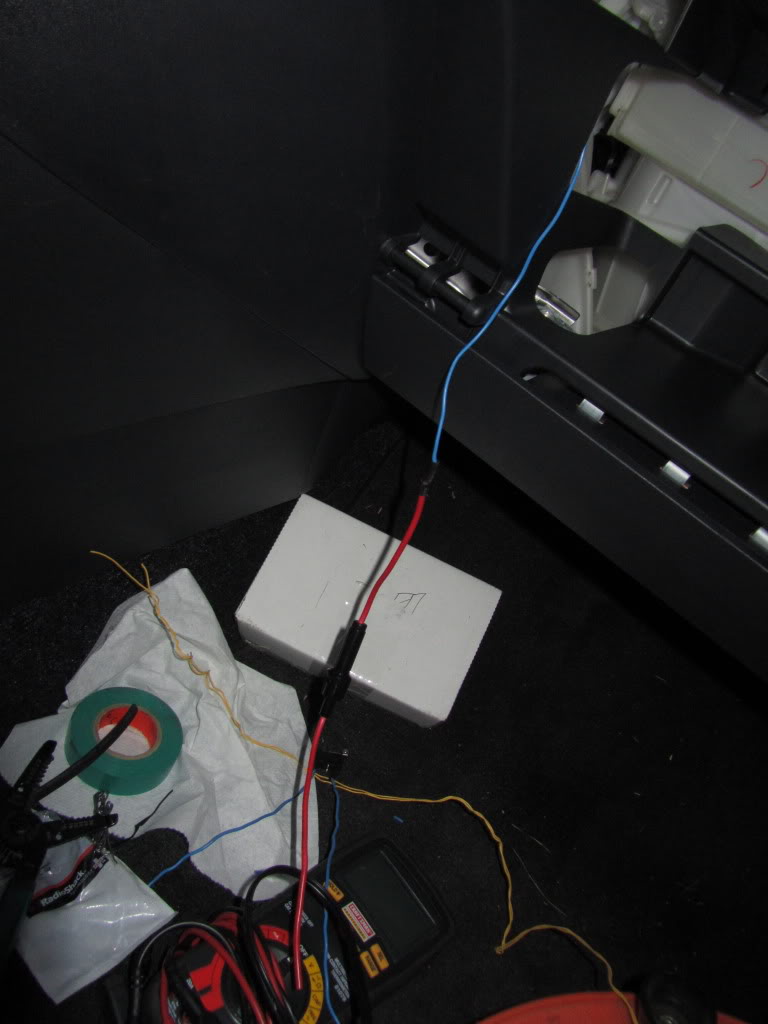
Scrape off some insulation or cut the wire. Solder on a wire.


Step 5:
Feed the wire through the back of the stereo into the glove compartment and solder on the in-line fuse

Step 6:
Solder on the wires on the outside pins of the switch and solder one side to the inline fuse holder

Step 7:
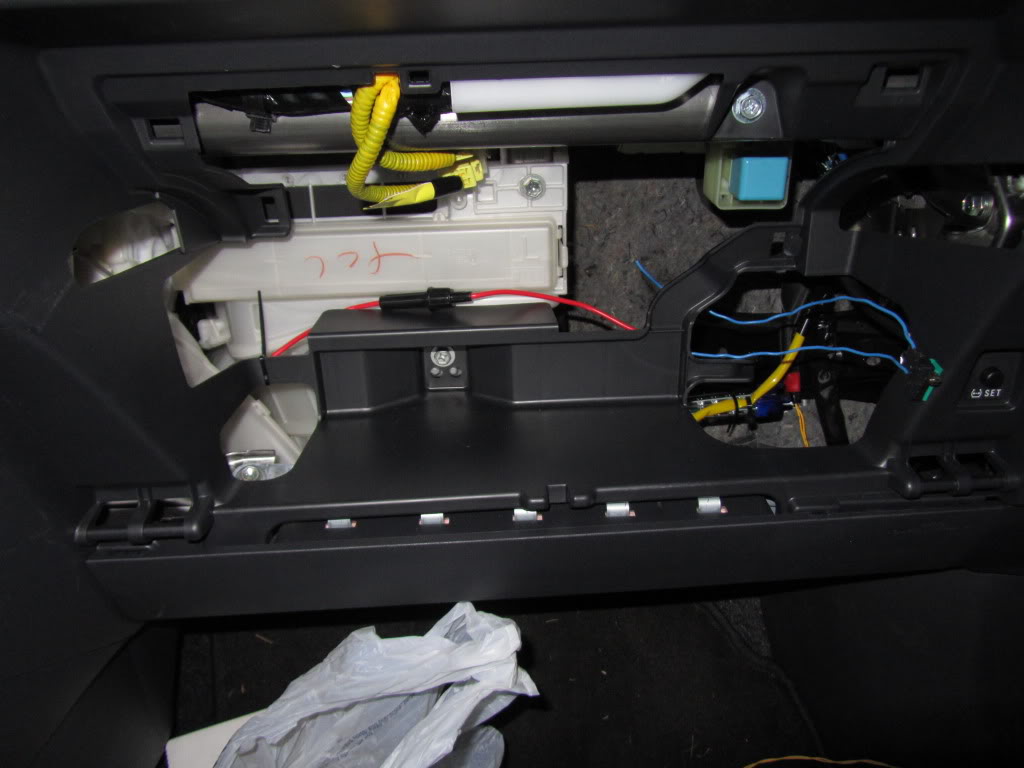
Align everything inside of the glove box compartment
Step 8:
Solder Positive side of the LED to the switch

Step 9:
Ground and mount the LED

Step 10:
Zip tie some wires and re-install the black cover. Turn on the Accessory

Step 11:
Aligning the switch is a bit tricky and will take a couple tries. I just used electrical tape to place it at the edge in the corner then re installed the glove box and tried closing it and listened for a CLICK indicating the the switch broke circuit. Once I found the perfect position I used 3M double sided heavy duty tape. I will secure it better in the future but for now it holds up EXTREMELY PROMISING


You're Done!
Glove Box LED Light DIY
You will need:
1. LED:
http://www.superbrightleds.com/cgi-b...FLS.htm#photos
WFLS-B30, using just 3 of them
2. Level Switch:
http://www.radioshack.com/product/in...ductId=2049719
the outside pins are NORMALLY CLOSED CIRCUIT so in this position both wires would pass electricity
3. In-line Fuse Holder:
http://www.radioshack.com/product/in...ductId=2102786
4. 0.5-1A Fuse
Step 1:
Pull off the stereo panel and disconnect the power plug from the clock
Remove the glove box by pushing IN from both sides.
Remove the black covering
(thanx 1stone!
Step 2:
Remove the electric tape and open up the sleeve the power plug is in
Step 3:
I found that the blue wire is connected to Accessory. You can try looking for constant 12V if you want. I did this out of safety - in case the switch breaks off or whatever else and the light would be ON inside without you ever knowing. Also I dont know what this is conected to so you must use a fuse, maybe this is connected to airbags
Step 4:
Scrape off some insulation or cut the wire. Solder on a wire.
Step 5:
Feed the wire through the back of the stereo into the glove compartment and solder on the in-line fuse
Step 6:
Solder on the wires on the outside pins of the switch and solder one side to the inline fuse holder
Step 7:
Align everything inside of the glove box compartment
Step 8:
Solder Positive side of the LED to the switch
Step 9:
Ground and mount the LED
Step 10:
Zip tie some wires and re-install the black cover. Turn on the Accessory
Step 11:
Aligning the switch is a bit tricky and will take a couple tries. I just used electrical tape to place it at the edge in the corner then re installed the glove box and tried closing it and listened for a CLICK indicating the the switch broke circuit. Once I found the perfect position I used 3M double sided heavy duty tape. I will secure it better in the future but for now it holds up EXTREMELY PROMISING
You're Done!


Thread
Thread Starter
Forum
Replies
Last Post
SkillFreeJake
Scion tC 2G Aero & Exterior
17
Jul 27, 2015 12:34 AM
ScottsXBScion
Scion xA/xB 1st-Gen ICE & Interior
5
Nov 25, 2003 10:30 PM
sithscripter
Scion xA/xB 1st-Gen ICE & Interior
9
Sep 26, 2003 05:27 AM