
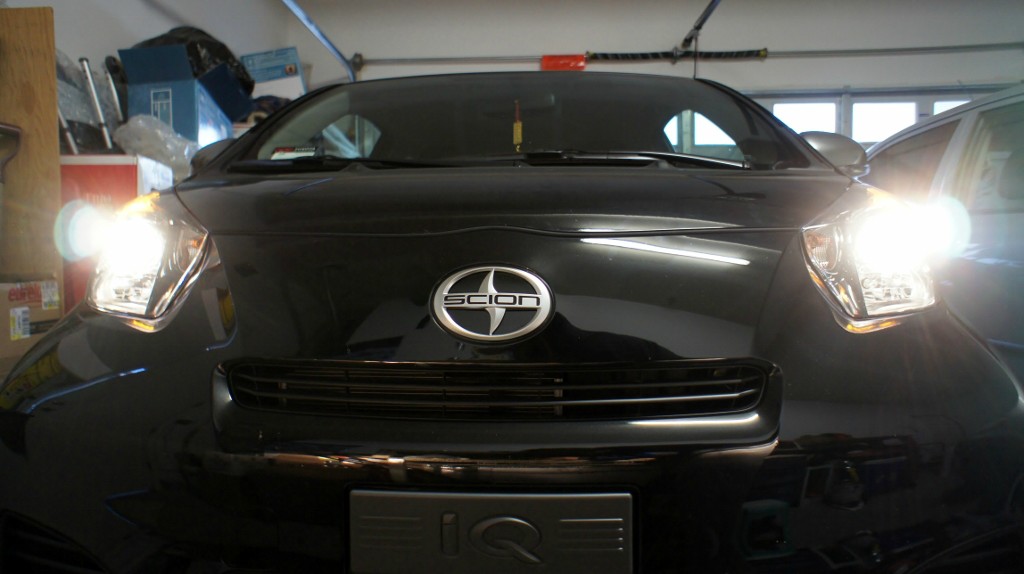
8000K HID installed :)


Thread Starter
Member
Joined: Feb 2005
Posts: 37
From: Vacaville, CA
Hi all, I just installed a HID kit on the iQ. I bought a set of 8000K H11 Slim HID conversion kit online. I ordered the one with slim ballast since there is not much space under the hood to place them.
I am not sure if this will be helpful or not, I took some pictures during my installation and would like to share with you all. Hopefully this can help out as a reference
Before installation.
Please be aware that DO NOT touch any bulb with your hands directly. The oil / grease on the hands make cause the bulbs to shatter when turned on.
Stock light:
I replaced the left side bulb first.
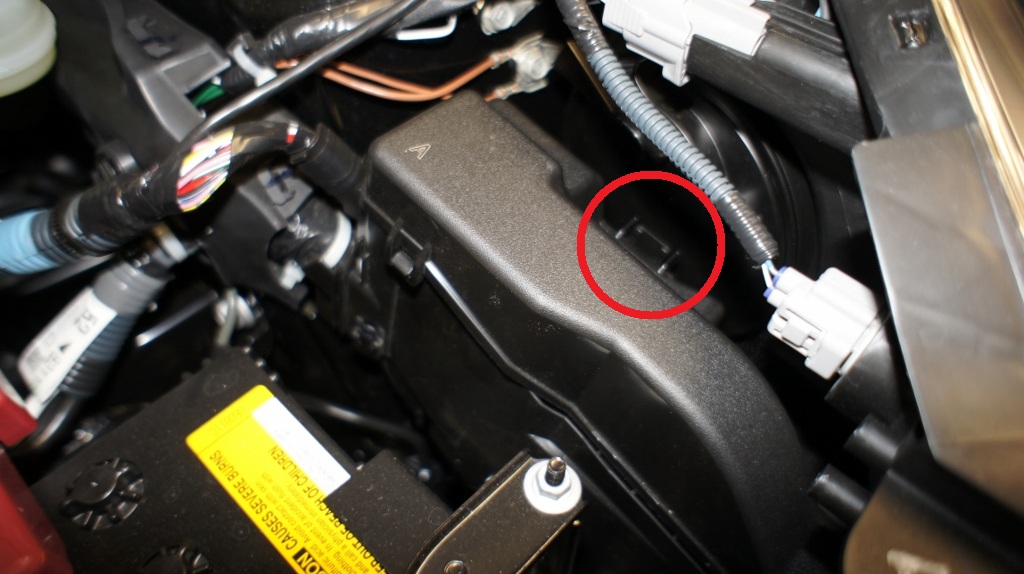
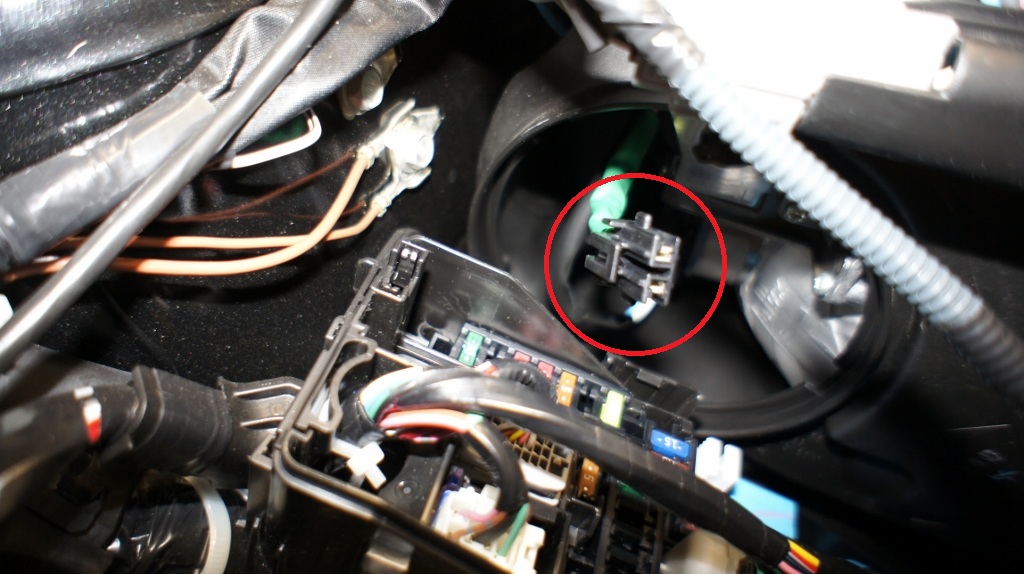
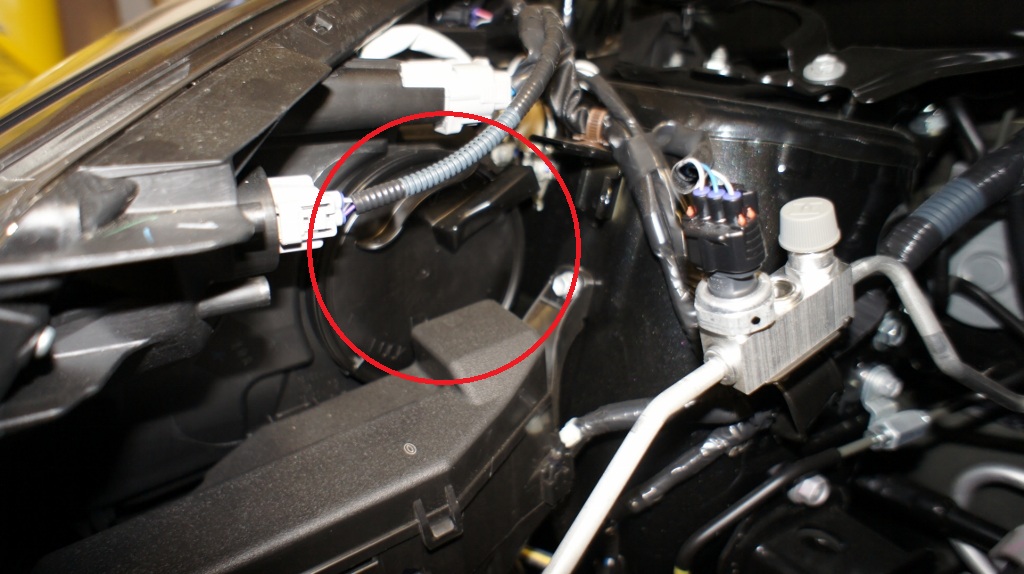
First, remove the fuse cover, the latch is circled in the picture below:
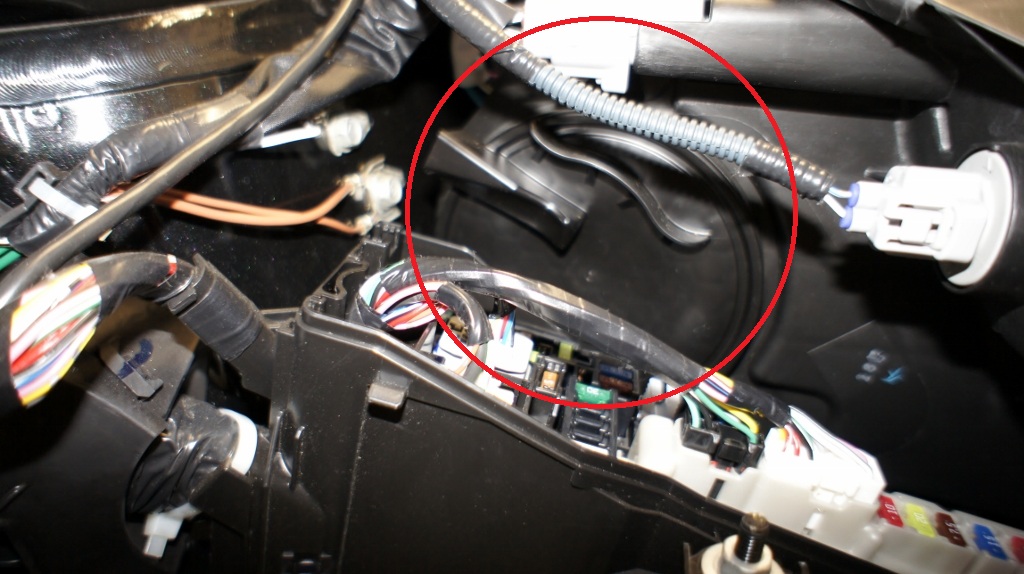
It gives more room to replace the bulb. Then rotate clockwise to remove the light console cover.
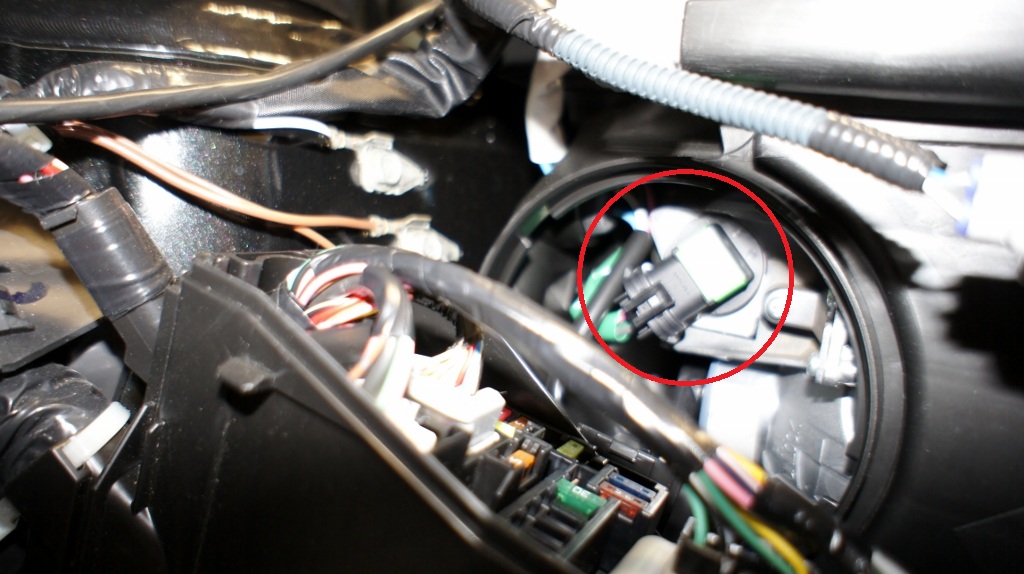
Once the cover is removed, remove the bulb by rotating it counter-clockwise.
Remove bulb from the socket. Be careful that the wire for the socket is short, don�t try to pull it too hard.
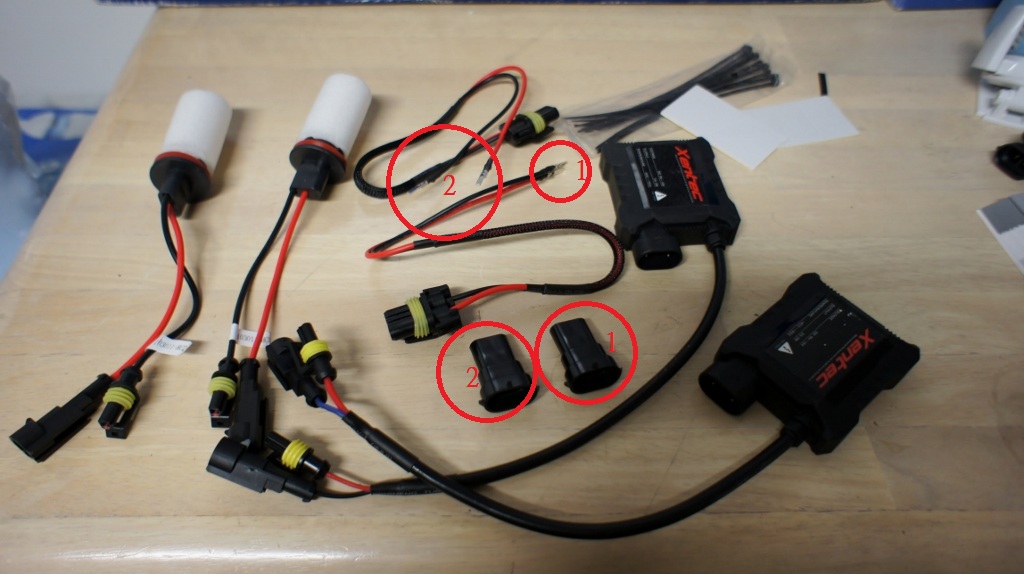
Here is the conversion kit that I got. Connect the extension wire to the connector. There are 2 sets of them.
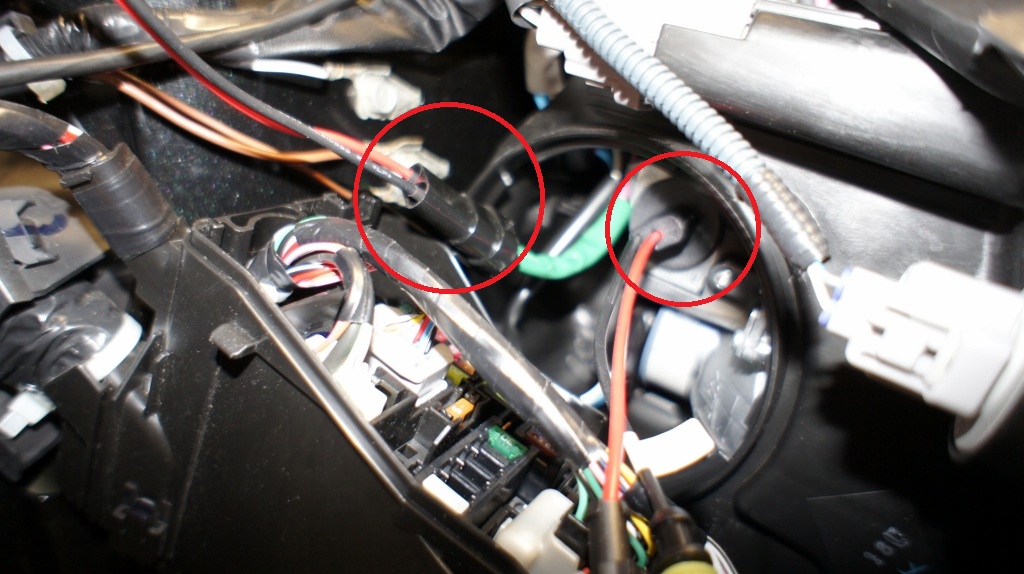
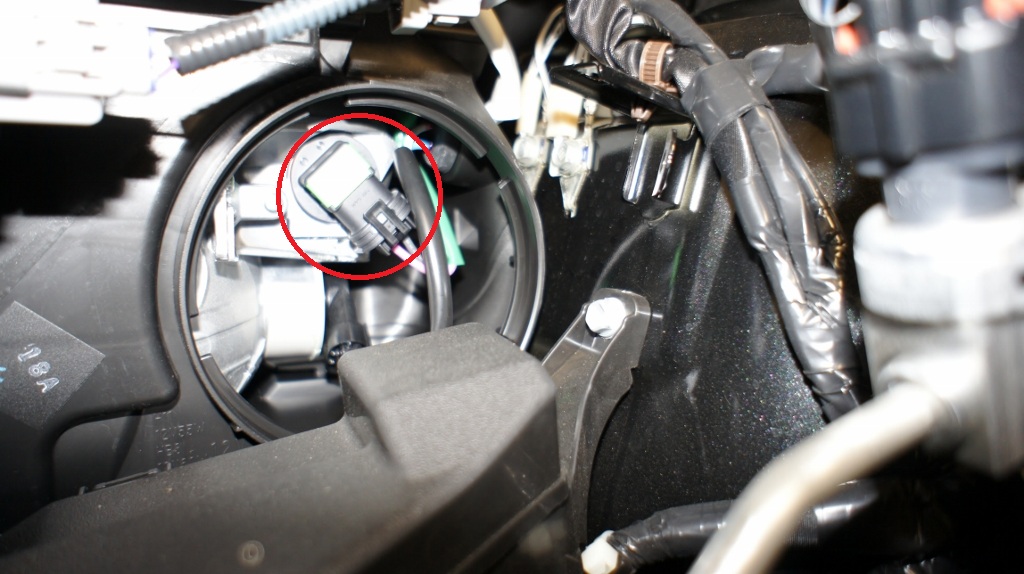
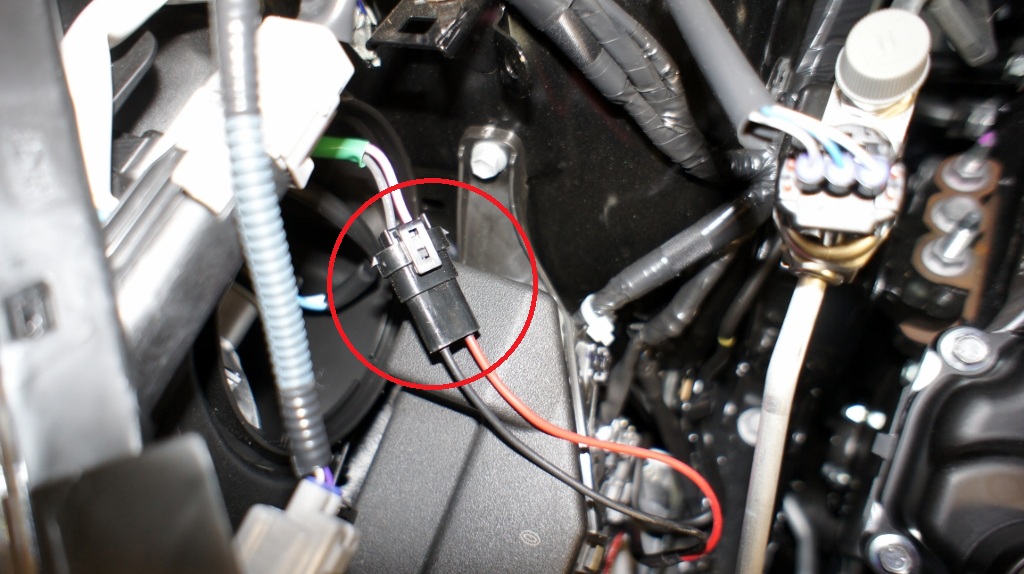
Now connect the socket with the extension wire (as circled on the left) *make sure the positive (red) and negative (black) are connected correctly to the socket*, and put in the HID bulb, rotate clockwise to lock it in place.
Now connect the connectors with the HID bulb to the ballast *make sure the positive and negative are connected correctly*
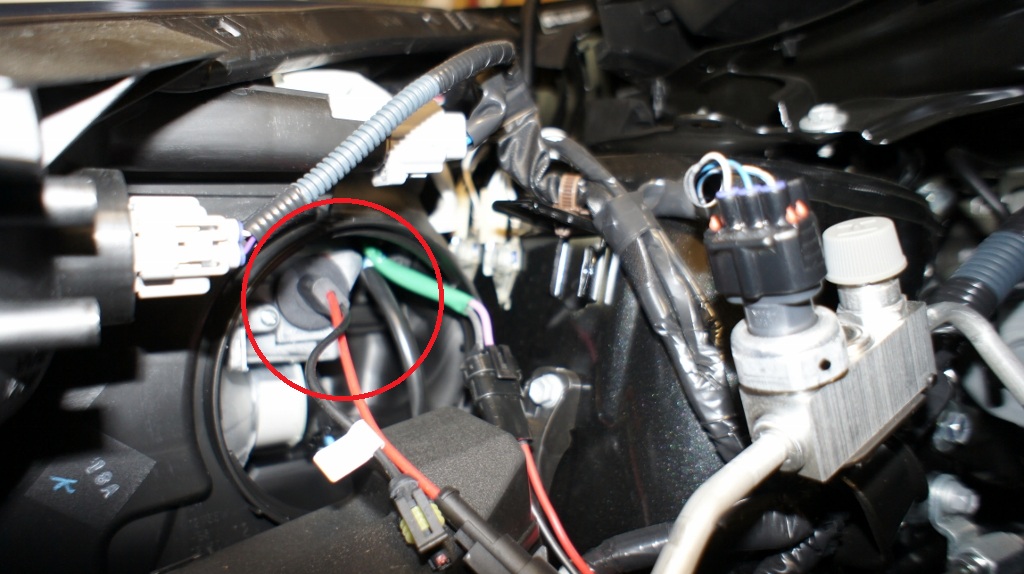
Connect the extension wire to the ballast.
Test to make sure the HID works.
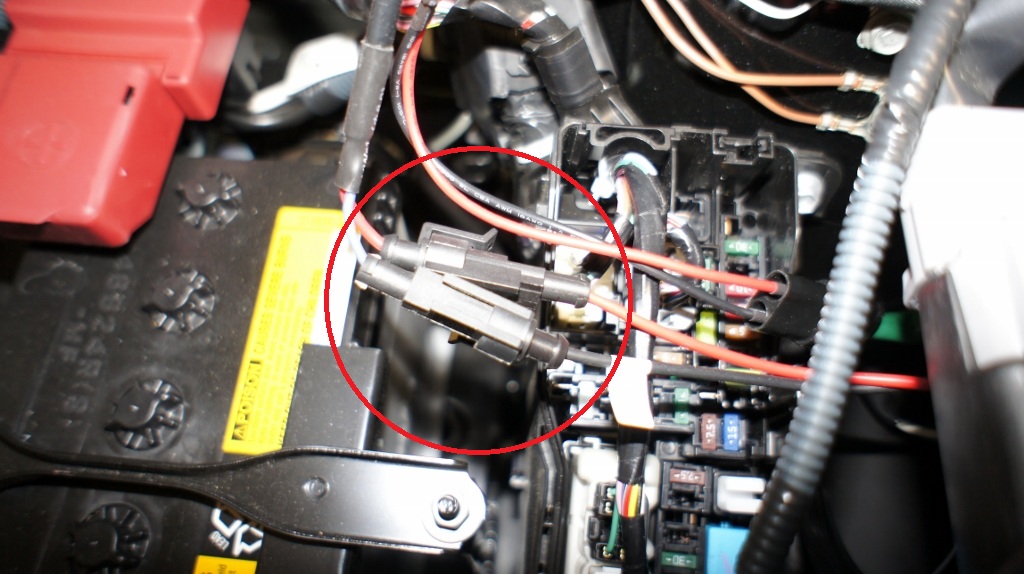
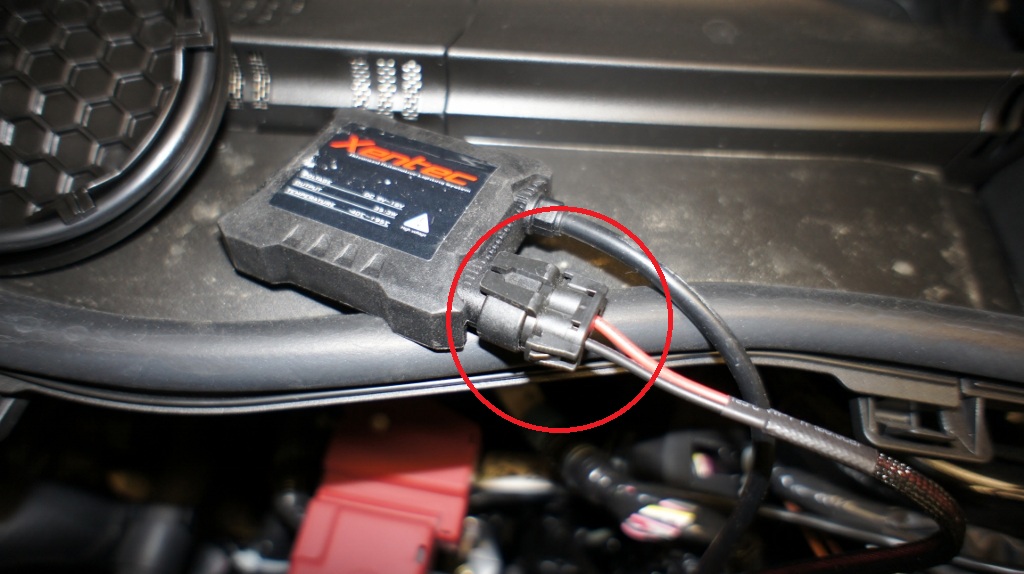
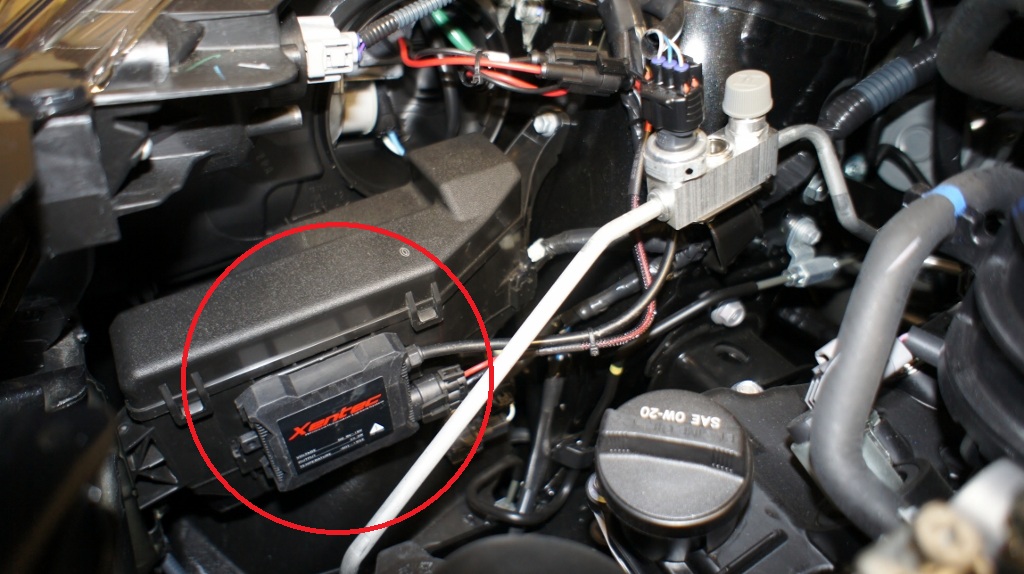
Organize the wire, and use double side tape (included in the kit) to put the ballast in place. I stick it on the side of the fuse box *make sure not to block the fuse box cover thou*

So left side is done, let�s move on to the right side.
Remove the light console cover by rotating it counter-clockwise
Rotate clockwise to remove the stock light bulb, then remove the socket just like the left side.
Connect the extension wire to the socket. *make sure the negative and the positive wire are matched*
Put in the HID bulb and secure it.
Connect the wire to the ballast, and then organize and secure the ballast in place.
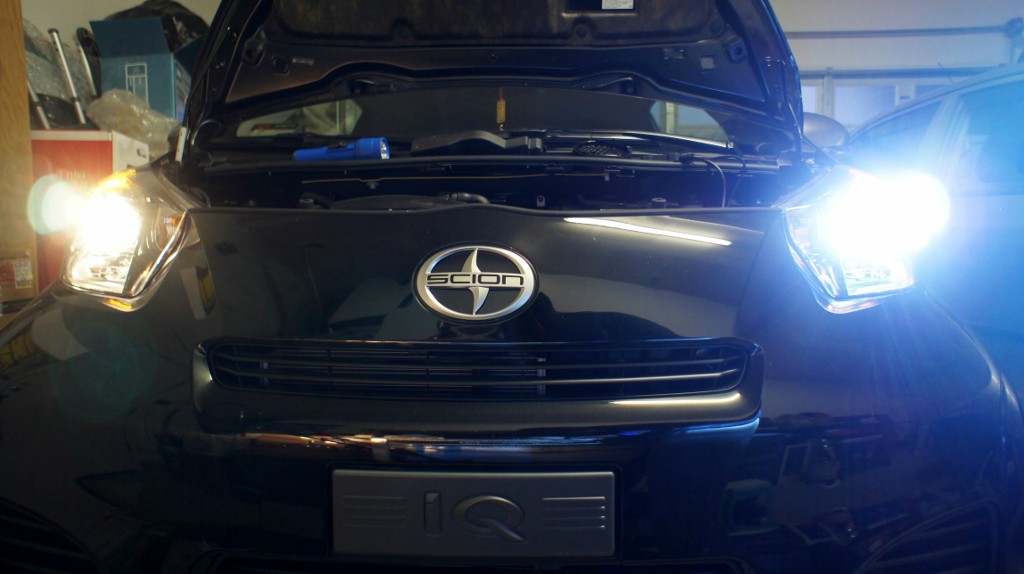
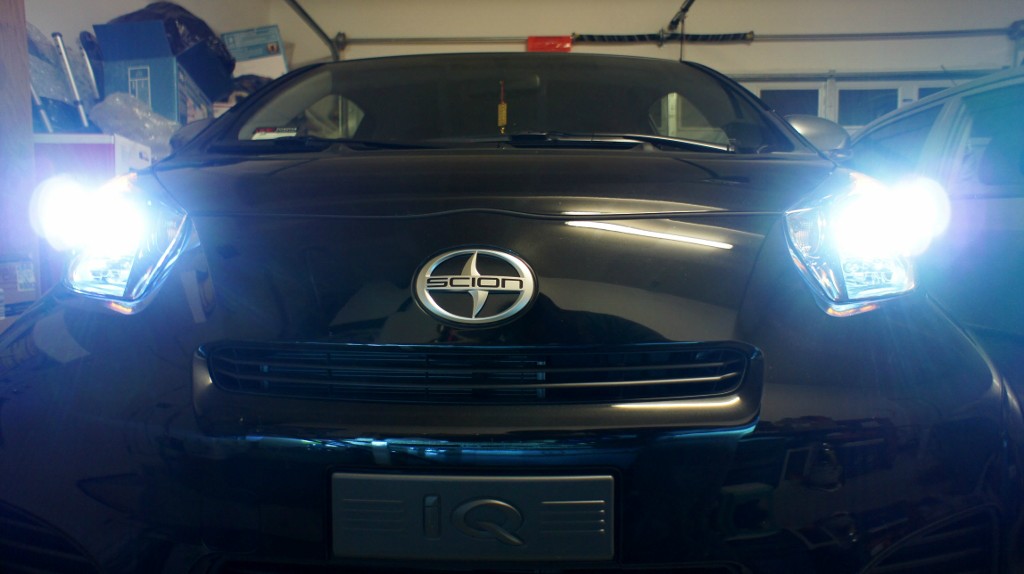
Here is the iQ with 8000K HID light
You may notice that I didn�t put the light console covers back after the installation. It is because I can�t run the wires with the cover on. If you want to put the covers back on, I suggest you to drill a hole in the middle of the covers, and run the wire through it. I am being too lazy to use the drill The conversion kit is water proof anyways, so I don�t think it really need the covers.
I am not sure if this will be helpful or not, I took some pictures during my installation and would like to share with you all. Hopefully this can help out as a reference
Before installation.
Please be aware that DO NOT touch any bulb with your hands directly. The oil / grease on the hands make cause the bulbs to shatter when turned on.
Stock light:

I replaced the left side bulb first.
First, remove the fuse cover, the latch is circled in the picture below:

It gives more room to replace the bulb. Then rotate clockwise to remove the light console cover.

Once the cover is removed, remove the bulb by rotating it counter-clockwise.

Remove bulb from the socket. Be careful that the wire for the socket is short, don�t try to pull it too hard.

Here is the conversion kit that I got. Connect the extension wire to the connector. There are 2 sets of them.

Now connect the socket with the extension wire (as circled on the left) *make sure the positive (red) and negative (black) are connected correctly to the socket*, and put in the HID bulb, rotate clockwise to lock it in place.

Now connect the connectors with the HID bulb to the ballast *make sure the positive and negative are connected correctly*

Connect the extension wire to the ballast.

Test to make sure the HID works.

Organize the wire, and use double side tape (included in the kit) to put the ballast in place. I stick it on the side of the fuse box *make sure not to block the fuse box cover thou*

So left side is done, let�s move on to the right side.
Remove the light console cover by rotating it counter-clockwise

Rotate clockwise to remove the stock light bulb, then remove the socket just like the left side.

Connect the extension wire to the socket. *make sure the negative and the positive wire are matched*

Put in the HID bulb and secure it.

Connect the wire to the ballast, and then organize and secure the ballast in place.

Here is the iQ with 8000K HID light

You may notice that I didn�t put the light console covers back after the installation. It is because I can�t run the wires with the cover on. If you want to put the covers back on, I suggest you to drill a hole in the middle of the covers, and run the wire through it. I am being too lazy to use the drill


Thread Starter
Member
Joined: Feb 2005
Posts: 37
From: Vacaville, CA


Thread
Thread Starter
Forum
Replies
Last Post
jaspercanda
Scion tC 2G Owners Lounge
4
Dec 28, 2014 10:09 AM
TheRedBox
Scion xA/xB 1st-Gen Drivetrain & Power
31
Dec 2, 2003 04:53 PM