
installing INJEN CAI


Edited : Stole few pics from Injen's site.
Hi, I installed the CAI last week. And took few pictures.
It came with :
1- two piece cold air intake 2- INJEN stickers
1- 3" injen filter
1- 2.75" straight hose
1- 3" straight hose
1- 14" vinyl trim
2- 6mm vibra mounts.
2- small clamps
2- med clamps
2- 6mm FLANGE NUTS 2- fender washers (nuts and washer were on the mounts)
1- license plate frame
3 pages of instruction.

All the step below are from the instruction by INJEN. I think they are pretty good.
Step1- Remove the battary
Step2 - disconnect these 2 things.

step3- Remove the 2 little screws to pull out the MAFS

step4- remove more screws.

inside the air box.

Step5-remove this clamp with a piler, then pull the air box out.


Step6- use a small knife to remove these things ( i don't know what they are called)
use the knife to pop the top layer up, then pop the whole thing up. There are 5 of them on top.

Step7- Remove screws from under the bumpers. I think there are 8 of them. 6 blacks and 2 silvers. use 10mm socket to remove them.

step8- remove a screw behind the wheel fenders. one of each side of the car.

Step9- pull the bumper down and out to remove it.
Step10- Jack up the car and remove the drive side wheel.
Step11- Locate the grounding wire on the bracket connected to the frame. This ground will be relocated in order to place the second vibra mount in place.


step12- place the 2.75" straight hose over the throttle body. use two clamps but only tighten the clamp on the bottom clamp(but mine pic only have the bottom clamp in. )use a 8mm socket.

Step13- Take one of the vibra mount and screw it into existing bracket.(remember to take the nut and washer out, we use them later to tighten up the CAI).

step14- Take the remaining vibra mount and screw it into the bracket were the grounding wire was once located. Screw the vibra mount until it bottoms out.

I didn't take anymore pic after this because i was running late for work. So i will use the pics from INJEN.
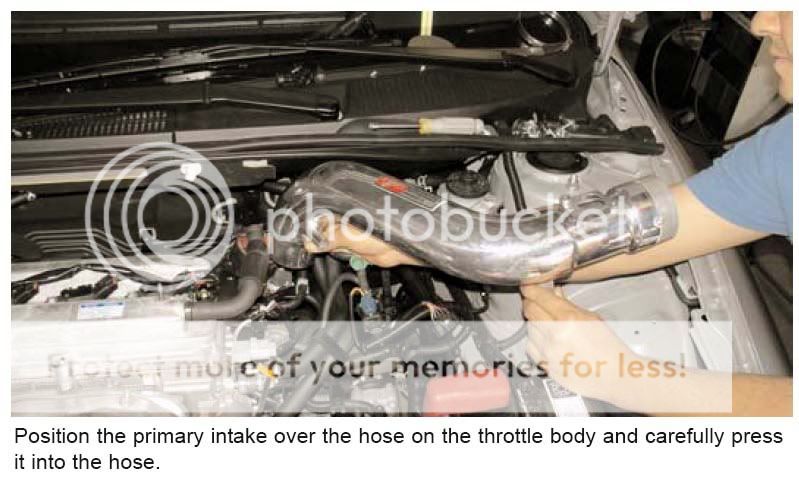
step15- Position the primary intake over the throttle body and carefully press it into the hose.
step16- Once the intake side of the primary intake has been pressed into the throttle body hose continue to align the intake bracket to teh primary vibra mount. When the bracket has been aligned. use the nut and washer to secure the intake.

step17- After the intake has been positioned, fit the stock breather hose and connect it to the 1/2" port on the intake.

step18- injen has design a holding bracket for the vacuum switching valve . Simply take the VSV and press the stud into the pre drilled hole on the bracket.
step19- Take the stock MAFS and press it into the adapter. us the stock screws to fasten the MAFS.

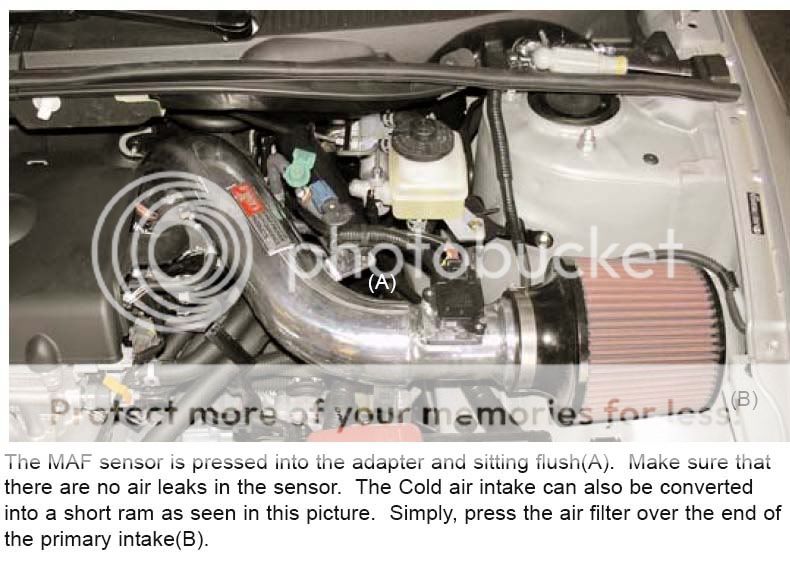
step20- The MAFS is pressed into the adapter and sitting flush. make sure that there are no air leaks in the sensor. Press the air filter over the end of the primary intake to make it short rams.
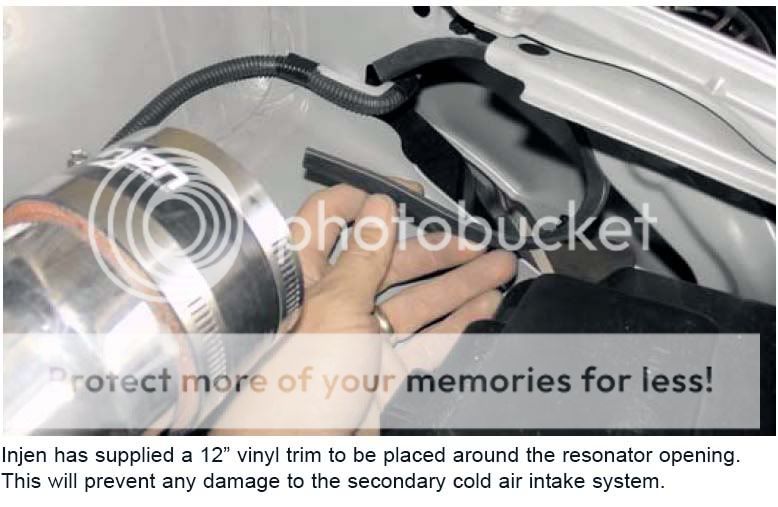
step 21- use the 12" vinyl trim to place around the resonator opening. This will prevent damage to the secondary CAI system.
step 22- insert the secondary CAI through the bumper area. You have wiggle it up to the engine area. and align the bracket to the vibra mount stud. and us the washer and nut to secure it.
step 23- join the primary and secondary intakes by the hose. and fasten with the clamp.

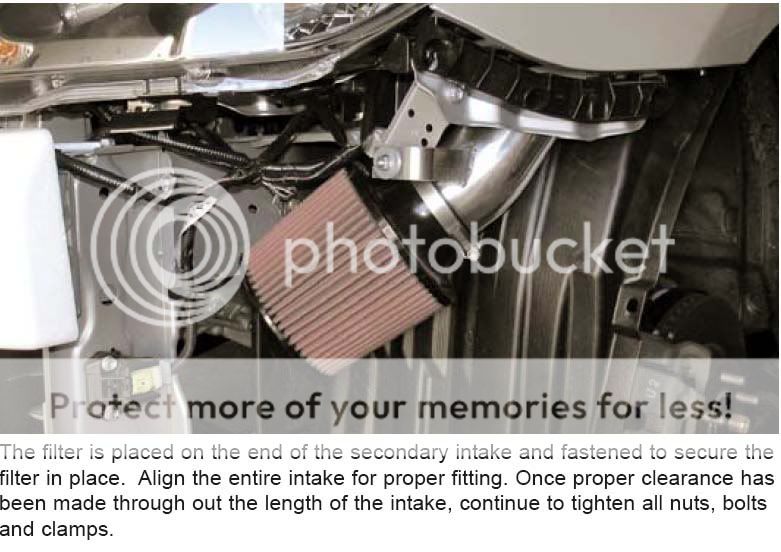
step 24- push in the air filter and tighten it with clamp.
now put back the bumper and wheel
While putting back the bumper, make sure the black plastic under the car goes inside the bumper not outside.
Photos Moved to SL Server 4-16-06 By: Kaeon
Hi, I installed the CAI last week. And took few pictures.
It came with :
1- two piece cold air intake 2- INJEN stickers
1- 3" injen filter
1- 2.75" straight hose
1- 3" straight hose
1- 14" vinyl trim
2- 6mm vibra mounts.
2- small clamps
2- med clamps
2- 6mm FLANGE NUTS 2- fender washers (nuts and washer were on the mounts)
1- license plate frame
3 pages of instruction.
All the step below are from the instruction by INJEN. I think they are pretty good.
Step1- Remove the battary
Step2 - disconnect these 2 things.
step3- Remove the 2 little screws to pull out the MAFS
step4- remove more screws.
inside the air box.
Step5-remove this clamp with a piler, then pull the air box out.
Step6- use a small knife to remove these things ( i don't know what they are called)
use the knife to pop the top layer up, then pop the whole thing up. There are 5 of them on top.
Step7- Remove screws from under the bumpers. I think there are 8 of them. 6 blacks and 2 silvers. use 10mm socket to remove them.
step8- remove a screw behind the wheel fenders. one of each side of the car.
Step9- pull the bumper down and out to remove it.
Step10- Jack up the car and remove the drive side wheel.
Step11- Locate the grounding wire on the bracket connected to the frame. This ground will be relocated in order to place the second vibra mount in place.
step12- place the 2.75" straight hose over the throttle body. use two clamps but only tighten the clamp on the bottom clamp(but mine pic only have the bottom clamp in. )use a 8mm socket.
Step13- Take one of the vibra mount and screw it into existing bracket.(remember to take the nut and washer out, we use them later to tighten up the CAI).
step14- Take the remaining vibra mount and screw it into the bracket were the grounding wire was once located. Screw the vibra mount until it bottoms out.
I didn't take anymore pic after this because i was running late for work. So i will use the pics from INJEN.
step15- Position the primary intake over the throttle body and carefully press it into the hose.
step16- Once the intake side of the primary intake has been pressed into the throttle body hose continue to align the intake bracket to teh primary vibra mount. When the bracket has been aligned. use the nut and washer to secure the intake.
step17- After the intake has been positioned, fit the stock breather hose and connect it to the 1/2" port on the intake.
step18- injen has design a holding bracket for the vacuum switching valve . Simply take the VSV and press the stud into the pre drilled hole on the bracket.
step19- Take the stock MAFS and press it into the adapter. us the stock screws to fasten the MAFS.
step20- The MAFS is pressed into the adapter and sitting flush. make sure that there are no air leaks in the sensor. Press the air filter over the end of the primary intake to make it short rams.
step 21- use the 12" vinyl trim to place around the resonator opening. This will prevent damage to the secondary CAI system.
step 22- insert the secondary CAI through the bumper area. You have wiggle it up to the engine area. and align the bracket to the vibra mount stud. and us the washer and nut to secure it.
step 23- join the primary and secondary intakes by the hose. and fasten with the clamp.
step 24- push in the air filter and tighten it with clamp.
now put back the bumper and wheel
While putting back the bumper, make sure the black plastic under the car goes inside the bumper not outside.
Photos Moved to SL Server 4-16-06 By: Kaeon


 Good job man!


Senior Member
SL Member
Joined: Mar 2005
Posts: 1,554
From: Jacksonville, FL
^^^^yea you are right, that hose is a pain in the *** cant installed my intake cuz of this  thats why i bought different INJEN hose cuz that 2.75 hose im not feeling it there some gap so i bought lil smaller like the 2.5 INJEN hose it fit really well...
  problem solve....


thanks for the kind replies. this was my first write up. I will try to take and edit more pics next time i taking off the bumper. .
The first 200 miles with the CAI was not smooth. The car shakes when i try to shift at 3k RPM. I had to rev it up to 3500 rpm for the first two gears.
I had about 300 miles since putting the cai in. Now it is very smooth when shifting at 3k rpm. My friend complain it is too loud when i rev it up. LOL.
my next upgrade will be Alphawerk header. But it won't be anytime soon, becaues i am broke.

Member
SL Member
Joined: Jun 2005
Posts: 94
hey gamma.. i installed mine on friday... exact same steps.. and right wen i started the car... it had this really rough noise in the motor... not sure what it was.. but all the steps were done properly.. and now i guess the car is in "safe mode" because wenever i rev it to 3k rpm... it jus dies... and not let the car push that far.. =(


Member
SL Member
Joined: Oct 2005
Posts: 95
From: Ohio
So can it be done without removing the fender? I am thinking of going with the weapon R just so I do not need to take off the fender. Not sure how some people are claiming 20-30min install with removing the fender...