
08 tC Corbeau A4 instal. ALL AIRBAGS WORKING!!!!


Senior Member
Scion Evolution
Joined: Oct 2006
Posts: 1,400
From: Alhambra, CA
Originally Posted by java09
is 5ohm resistor 1/2W correct?

Thread Starter
Senior Member
SL Member

Joined: Sep 2007
Posts: 6,187
From: You All Ready Know_..
lady was wrong. all they had were 5.1 1/2w 5 to a pack.. no biggie.
this DIY pics are no good... can you show me which way they are supposed to go in and what not.. sorry for being a pest..
if you have force induction questions ask me so ill feel better! hahaha
this DIY pics are no good... can you show me which way they are supposed to go in and what not.. sorry for being a pest..
if you have force induction questions ask me so ill feel better! hahaha
Senior Member
Scion Evolution
Joined: Oct 2006
Posts: 1,400
From: Alhambra, CA
lol. not to worry, I'll be sure to have a lot f/i questions pretty soon... 
5.1ohm resistors are ok. Yeah the pics weren't working since last year.... pretty simple: just bend the ends in such a way that the whole resistor is shaped like a "U" so you can plug each end into one inlet in the plug (you'll see that the plug has two inlets inside. There's no specific direction (left/right) so just plug them in. Just make sure they're plugged in real good.
5.1ohm resistors are ok. Yeah the pics weren't working since last year.... pretty simple: just bend the ends in such a way that the whole resistor is shaped like a "U" so you can plug each end into one inlet in the plug (you'll see that the plug has two inlets inside. There's no specific direction (left/right) so just plug them in. Just make sure they're plugged in real good.
Thread Starter
Senior Member
SL Member
Joined: Sep 2007
Posts: 6,187
From: You All Ready Know_..
ok but i thought resistors were directional? that is why i was wondering which direction.. but i guess if the light goes off it worked if it didnt go off it didnt work! haha
and if you go turbo hit me up. i know todd the owner of turbotoytas very well!
thanks for the help and ill let you know how it goes with pics!
and if you go turbo hit me up. i know todd the owner of turbotoytas very well!
thanks for the help and ill let you know how it goes with pics!

Senior Member

SL Member
Scion Evolution
Joined: Oct 2005
Posts: 5,277
From: Andersen AFB, Guam
Hey man. Got your PM. Unfortunatly I had an 06 and no SRS Airbags so my plugs were different. But the zipties will work to make it think there is a passenger. DOnt forget the magnet, and the resistors will work, just have to put it in the right spot, and that guys pics dont work anymore. Wish I could help you out more man.
Enjoy the seats, I loved mine!!
Enjoy the seats, I loved mine!!
Thread Starter
Senior Member
SL Member
Joined: Sep 2007
Posts: 6,187
From: You All Ready Know_..
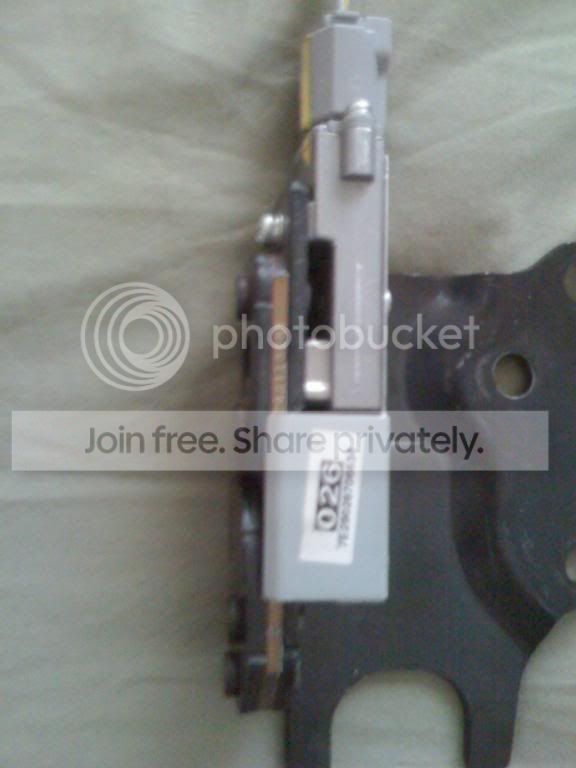
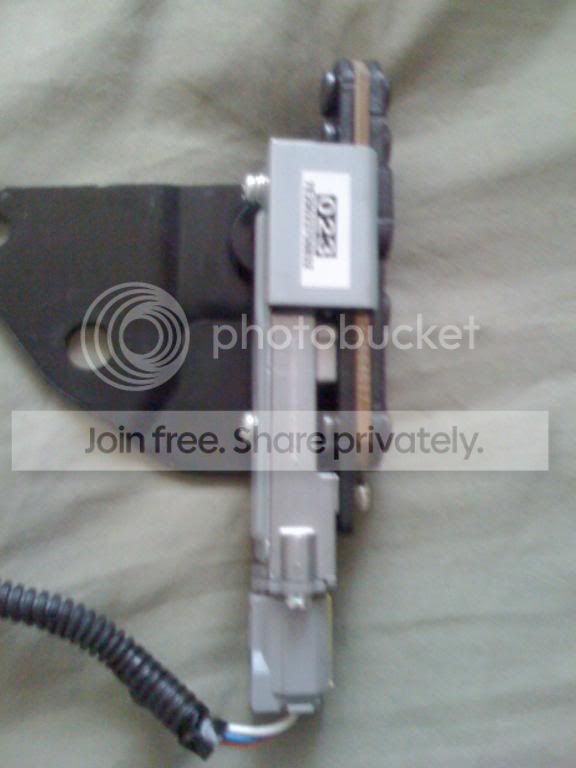
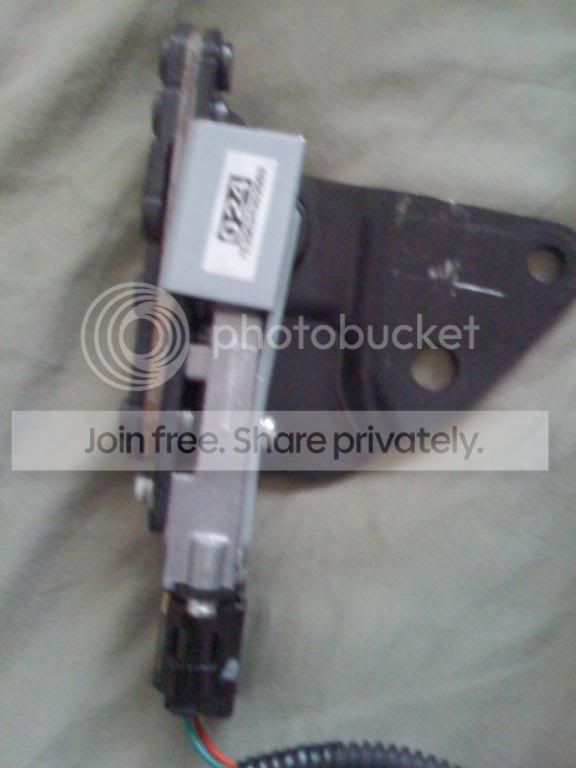
are these the 4 passenger sensors that run into the main box? if so how the heck do it get those out!?!?!?
all 4 lines run into this
line one:
line two:
line three:

line four:

thanks guys and i got the resistors! gonna get them taken care of now!
all 4 lines run into this
line one:
line two:
line three:
line four:
thanks guys and i got the resistors! gonna get them taken care of now!
Senior Member
Scion Evolution
Joined: Oct 2006
Posts: 1,400
From: Alhambra, CA
^^^ now the fun part begins ----taking those out  . Those are the four passenger sensors I was talking about earlier. You have to take all those out. The only way is use two sizes of torx head drivers to disassemble the base of the seat and get those out.
Pain in the *ss, but necessary for the SRS to function normally
Pain in the *ss, but necessary for the SRS to function normally
Thread Starter
Senior Member
SL Member
Joined: Sep 2007
Posts: 6,187
From: You All Ready Know_..
i cannot get the passenger sensor out.. those torqx screws are way too tight.. how did you get them out and exactly which scres did you remove? is it the two on the side and the ove above it where you have to move the fabric?
Senior Member
Scion Evolution
Joined: Oct 2006
Posts: 1,400
From: Alhambra, CA
You would have to carefully unfasten the seat cover underneath to gain more access to the torx screws. You would also need sizes T40 and T30 size torx drivers (if I remember it right)----however, remember what I said how tight they are? Well I had to spray WD40 on them and use an air impact gun to take them out. At first I thought I could just use my mighty-mouse strength but I ended up failing miserably, lol!
I think there are two torx screws that are holding each sensor onto the seatbase. You will end up semi-dismantling the whole passenger seat base by the time you get them all out. Don't worry, it didn't take me long to figure out how to do it so it'll be the same with you...just as long as you have/know somebody who has an impact gun to use
I think there are two torx screws that are holding each sensor onto the seatbase. You will end up semi-dismantling the whole passenger seat base by the time you get them all out. Don't worry, it didn't take me long to figure out how to do it so it'll be the same with you...just as long as you have/know somebody who has an impact gun to use
Thread Starter
Senior Member
SL Member
Joined: Sep 2007
Posts: 6,187
From: You All Ready Know_..
got um out!! took the seats to midas and my friend helped me out!

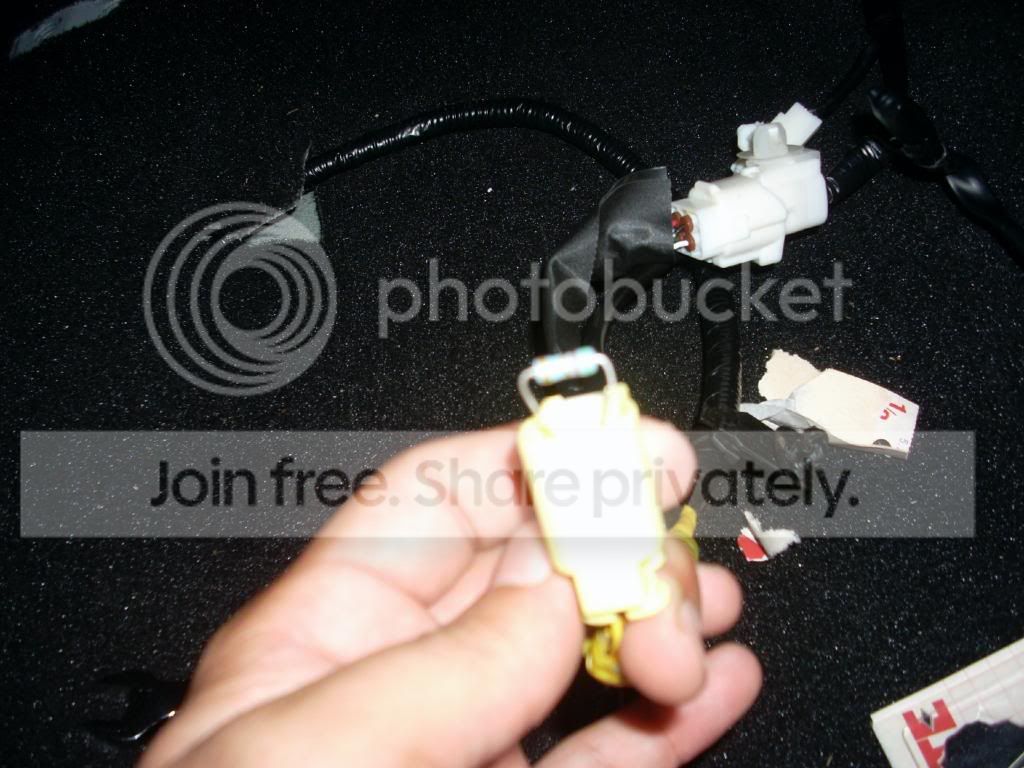
question, can i remove those black things or are they that big?
also can you show me what part needs to be squeezed so i ca try and figure something out? thanks jurasic1!

almost done! ahah
question, can i remove those black things or are they that big?
also can you show me what part needs to be squeezed so i ca try and figure something out? thanks jurasic1!
almost done! ahah
Senior Member
Scion Evolution
Joined: Oct 2006
Posts: 1,400
From: Alhambra, CA
Nice work!
No you can't take out the bracket because that is connected to the sensor by an electronic strip..how it works is since the bracket is connected to the seat cushion, once somebody/something sits on it, the bracket is pressed downward closer to the main sensor.
Based on how you took the pics being front, when you look behind each one you will see a a sort of a circle thingy within an oval guide/channel (pointed by the yellow arrow) ....if you look closely you'll see that the whole thing is made up of two very slightly moveable parts.
What I initially experimented before is, I pressed one unit with my own body weight against somewhere solid (like the carpeted car floor)...while the two parts didn't move/slide very much, the slight pressure did trigger the sensor and changed how the SRS read it, as you will see with the lights.
This afternoon I tried some zipties (represented by the yellow/red lines) and loop them in such a way that when I zip them up the two pieces are pressed together. It did work to some extent because now the SRS senses that something light or a child is sitting on the seat (which shows the AIRBAG OFF + Seatbelt light on/blinking). In order for the airbag to be constantly ON, it has to classify an adult/something much heavier sitting on the seat.
Oh, yeah. Be careful not to snag/damage the harnesses and thin wires. And watch where the zipties will rest on so they don't damage aything else. I also played it safe and labeled (F/R, F/L, R/L, and R/R) each one so I know where each one correctly connects to (I don't know if it matters).
So now I have the "wear seatbelt" and "airbag off" lights on. Somehow I have to find a way to press them even more..maybe a larger ziptie or something so the "Airbag On" light is on...with that I'm stumped. I hope you can think of something too...
Thread Starter
Senior Member
SL Member
Joined: Sep 2007
Posts: 6,187
From: You All Ready Know_..
bro ok.. so i put all the clips in on the seats and did the resistor trick.. but it still says air bag off on the hvac and the airbag light on the dash is still on... is it still going to stay on till i get the passenger sensors corected? i thought at least the dash light would go off but it didnt.. pics in a sec
Senior Member
Scion Evolution
Joined: Oct 2006
Posts: 1,400
From: Alhambra, CA
Even without ziptying the occupant sensors, if you connected everything back + the resistors, the SRS light should be off. If it's still on, try disconnecting the negative terminal of the batt, wait maybe 5 mins to reset the system, then replug the batt. That's what I did the first time I did it...
Thread Starter
Senior Member
SL Member
Joined: Sep 2007
Posts: 6,187
From: You All Ready Know_..
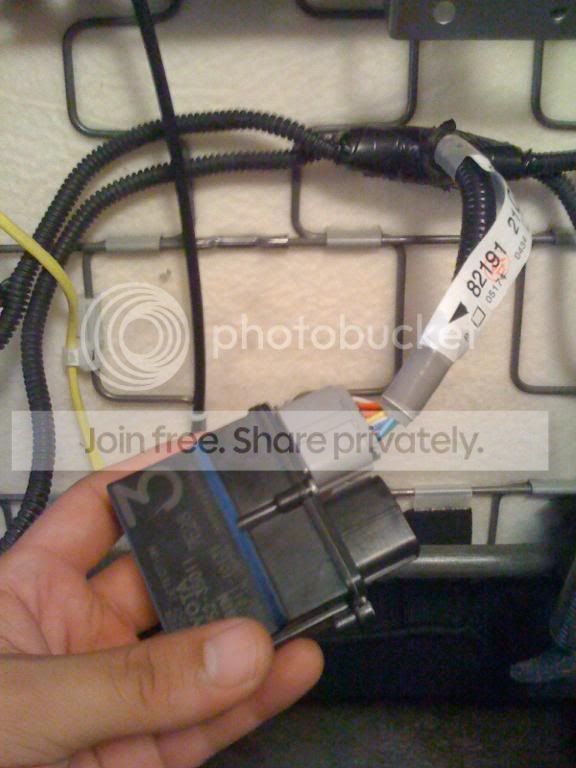
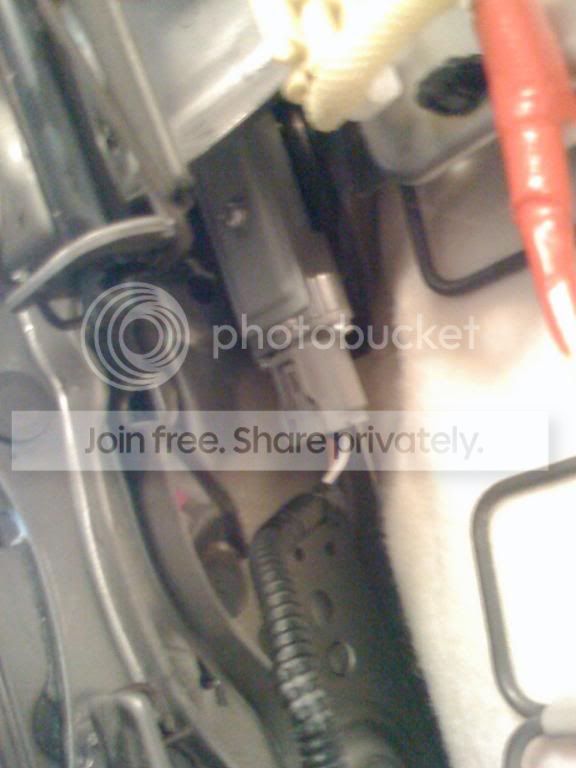
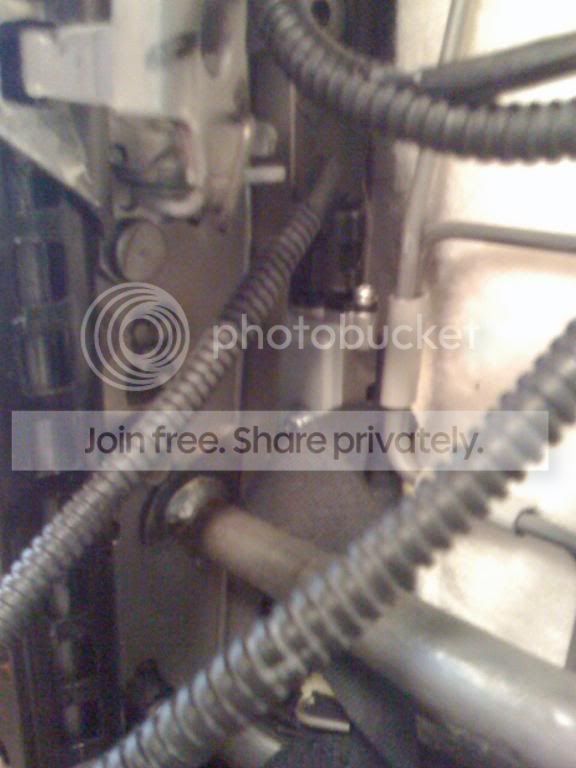
ok.. so i may not have to turn the resistor around?
it could be the placement of the driver sensor.. lemme show you, even though i think this is the only place i can make it happen! haha

pic of the resistors going in:
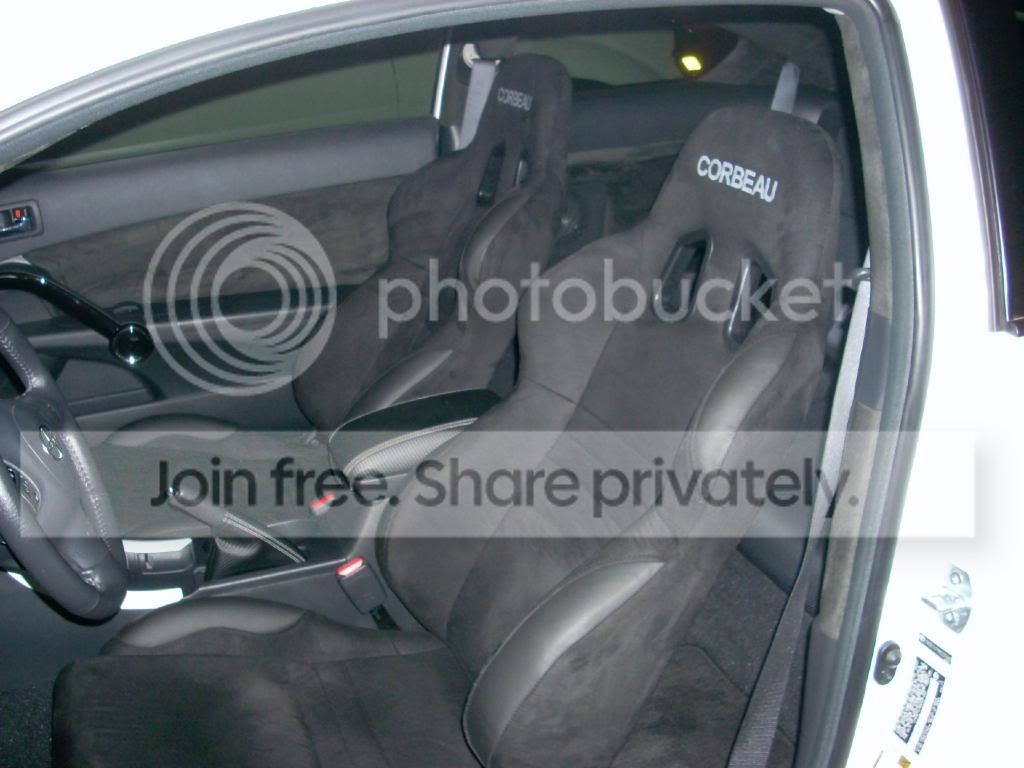
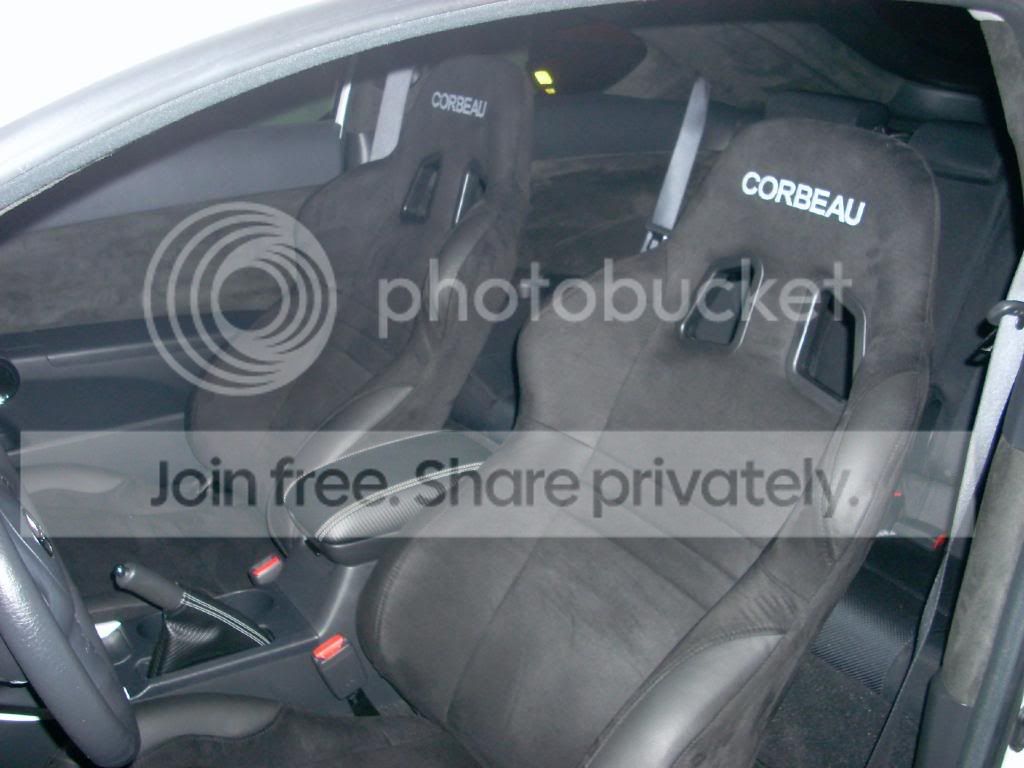
the seats! so much problems!

but yeah imma try disconnect the battery again and hopefully the SRS light goes out.. if not i might have made a mistake or something..
it could be the placement of the driver sensor.. lemme show you, even though i think this is the only place i can make it happen! haha
pic of the resistors going in:
the seats! so much problems!
but yeah imma try disconnect the battery again and hopefully the SRS light goes out.. if not i might have made a mistake or something..