


IMPORTANT PLEASE REPLY INTERIOR PAINT


Junior Member

Scion Evolution
Joined: Mar 2006
Posts: 22
From: Cali

ok so i wrote up a DIY about a year ago, so i hope this help you out man
------------------------------------------------------------------------
Ok guys....i know you want a DIY for the painted interior...its a little hard to do it since i dont have any images...i didnt anticipate doing this and i dont have a digital camera...i apologize in advance...howeer its very simple so just sit back, read, relax, and enjoy
step 1- remove all parts that you want to paint
Door Handles-now the door handles are especially easy, as much of the parts are to take out. If you have fingernails, wedges them inbetween the door panel and the tiny crease you will see that separates the panel from the handles..try this at the very top of the handles and pul your way down, it should pop right out. Repeat on other side
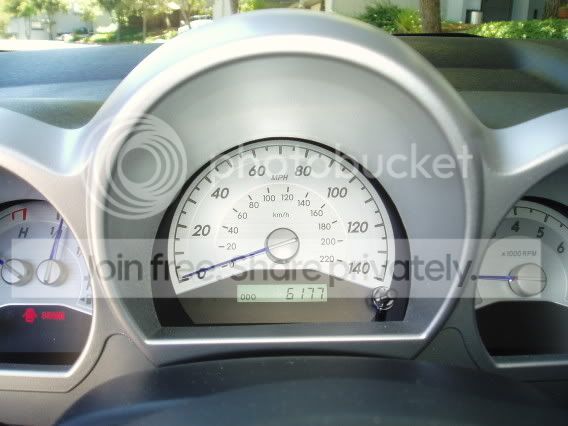
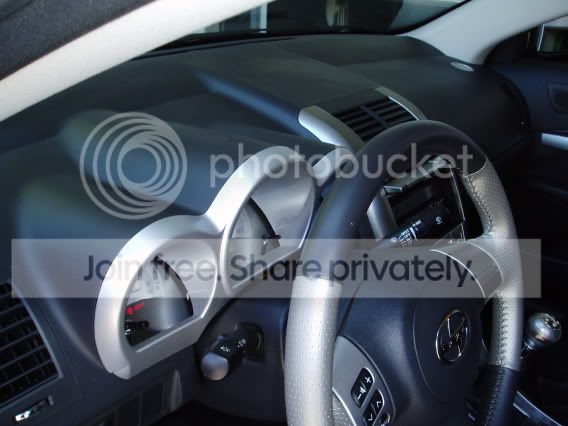
Gauge cluster surrounding-this is easy as well... move steering wheel down as far as possibly and move turn signal and windshield wipers down as well...apply pressure from the middle of the piece and gentle pull toward you...it should pop out with ease
Vents-This will be a little more difficult. Make sure you get something to pry the vents out with, they are very stingy to come out at first so you will have to apply pressure....grap your tool(exacto knife, flat head ect...) anything that you can wedge in between the base of the dash and the lip of the vent. The way you get it in there is push the dash down a little bit around the vent in order to get separation so you can wedge whatever tool you have inbetween...when you have it wedged gentle pry out...stop when you see it come out a little bit because this piece is very fragile..move your tool around the vent and wedge it out all the way around..DO NOT ATTEMPT TO WEDGE OUT EXTIRELY FROM ONE ANGLE...THIS PIECE WILL BREAK IF NOT CAREFUL! once popped out move to other vent and repeat...Once finished move all parts to a safe location( perferably in a garage) Please take note to the direction the vents are facing so when you put them back in, its in the right direction
Step 2-Sanding and priming!!!
first pop out the chrome ring on the door handles...turn them around and you will see the pins in the handle...just push them out and it will pop out...very easy!
After you have your pieces out...its time for them to be sanded...I used 600 and 1000 grit wet/dry sand on mine. first make sure the piece is clean...you can used any interior car cleaner ( armor all will work) just make sure there is no dirt on it...next step is to begin sandng the piece with 600grit very gently in a smooth motion...make sure you get all of the piece...no water is required for this sanding job! when finished it should look a lighter grey color...now your set for priming! Take your primer of your choice ( mine was Dupli-color Sandable primer) and spray generously on the piece...make sure you use even strokes and are at least 8-12 inches away from the piece while spraying! After you spray, take the 1000grit sand paper and VERY GENTLY, sand the primer! Blow off all the excess primer you take off and repeat by spraying the piece one more time with primer and resanding it GENTLY!!! the 1000grit itself is very gentle, however you still do not need a lot of pressure while sanding. after you are finished sanding, you are ready for painting. Make sure the pieices are free of all excess primer that was previously sanded.
Painting
For the interior, I used Dupli-Color Import Auto Spray...its comes in a small 5 oz. can...i needed 3 of them to finish the job....they work great and you can buy them at Kragen, AutoZone, and probably any auto store that carries spraypaint. Just like the primer, make sure you are in a garage and a well ventilated one at that..make sure the piece is dust free...8 to 12 inches away and spray in a sweeping motion...it will be hard to get inside the gauge cluster piece...so when you finish the top part and it drys completely( give at least 45 mintues after final coat...) then turn it upside down and spray the inside of the piece...it will be difficult so be patient and make sure you use even strokes so you dont get runs in the paint...i put about 4 coats of color on before i moved on to clear coat....the door handle is the easiest of the 3 to paint...its a simple piece of plastic, no hidden spots to paint, no vents in the way...when you get to the vents....make sure your strokes are in the same direction as the vents are going...you may want to rotate the vent 180 degress for each coat so you get inside every crack and crevice
* note is you make a mistake...do not try to repaint it...it will look bad...take the time to grab the 600 grit...sand it off as good as possible, re-primer, re-sand, and repaint...its tedious i know but if you want it done the right way, follow these steps!
Follow up the paint with 4 or 5 very light coats of clear coat to give it a little gloss look...make sure its not layed on heavy or your color might look darker then it is supposed to be in certain spots...let the pieces dry for about 2 hours before reassembling!
when reassmebling...do so with care...the gauge cluster piece will be difficult to wedge in without hitting the steering wheel column or the turn signal...hitting and rubbing may cause paint damage so do so with care and caution...do it slow if need be...for the door handles...reapply the chrome ring and place back on the door, its as easy as that! Finally put the vents back in place..make sure you put them in the same direction they came out!
Lastly, enjoy your finished project...
*PLEASE NOT THAT I AM NOT RESPONSIBLE FOR ANY DAMAGE DONE TO YOUR CAR DURING THE PROCESS OF THIS PROJECT, HOWEVER YOU CAN FEEL FREE TO EMAIL ME ABOUT THE COMPLIMENTS YOU RECEIVE AND THE SELF GRATIFICATION YOU NOW HAVE IN DOING SUCH A PROJECT.
YOU'VE JUST BEEN PIMPED
-TJ
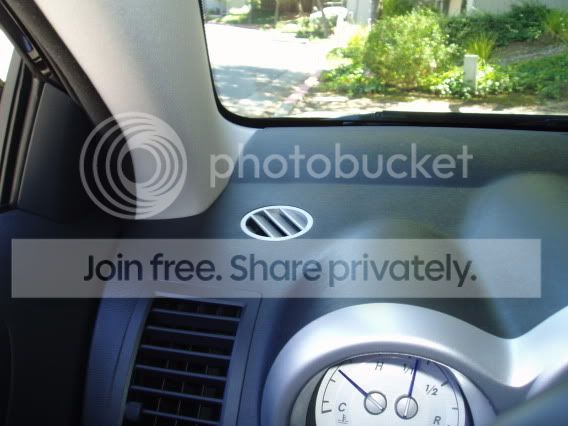
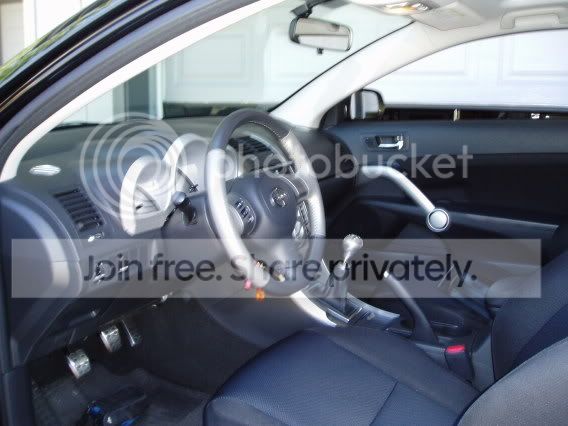
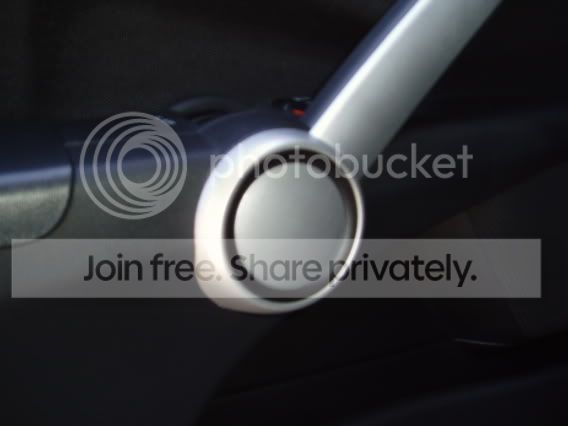
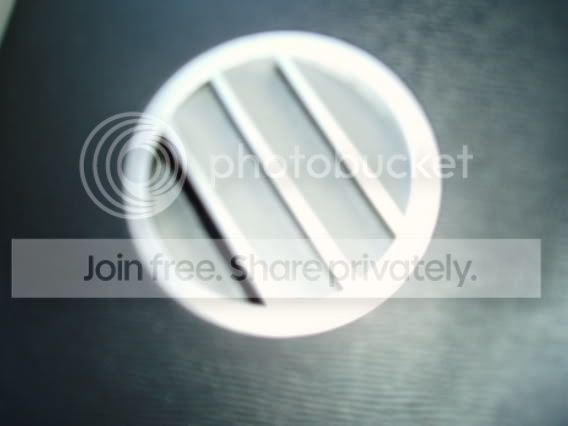
same deal if you want to do your engine cover...just mask tape the VVTI and the logo and your all set

------------------------------------------------------------------------
Ok guys....i know you want a DIY for the painted interior...its a little hard to do it since i dont have any images...i didnt anticipate doing this and i dont have a digital camera...i apologize in advance...howeer its very simple so just sit back, read, relax, and enjoy
step 1- remove all parts that you want to paint
Door Handles-now the door handles are especially easy, as much of the parts are to take out. If you have fingernails, wedges them inbetween the door panel and the tiny crease you will see that separates the panel from the handles..try this at the very top of the handles and pul your way down, it should pop right out. Repeat on other side
Gauge cluster surrounding-this is easy as well... move steering wheel down as far as possibly and move turn signal and windshield wipers down as well...apply pressure from the middle of the piece and gentle pull toward you...it should pop out with ease
Vents-This will be a little more difficult. Make sure you get something to pry the vents out with, they are very stingy to come out at first so you will have to apply pressure....grap your tool(exacto knife, flat head ect...) anything that you can wedge in between the base of the dash and the lip of the vent. The way you get it in there is push the dash down a little bit around the vent in order to get separation so you can wedge whatever tool you have inbetween...when you have it wedged gentle pry out...stop when you see it come out a little bit because this piece is very fragile..move your tool around the vent and wedge it out all the way around..DO NOT ATTEMPT TO WEDGE OUT EXTIRELY FROM ONE ANGLE...THIS PIECE WILL BREAK IF NOT CAREFUL! once popped out move to other vent and repeat...Once finished move all parts to a safe location( perferably in a garage) Please take note to the direction the vents are facing so when you put them back in, its in the right direction
Step 2-Sanding and priming!!!
first pop out the chrome ring on the door handles...turn them around and you will see the pins in the handle...just push them out and it will pop out...very easy!
After you have your pieces out...its time for them to be sanded...I used 600 and 1000 grit wet/dry sand on mine. first make sure the piece is clean...you can used any interior car cleaner ( armor all will work) just make sure there is no dirt on it...next step is to begin sandng the piece with 600grit very gently in a smooth motion...make sure you get all of the piece...no water is required for this sanding job! when finished it should look a lighter grey color...now your set for priming! Take your primer of your choice ( mine was Dupli-color Sandable primer) and spray generously on the piece...make sure you use even strokes and are at least 8-12 inches away from the piece while spraying! After you spray, take the 1000grit sand paper and VERY GENTLY, sand the primer! Blow off all the excess primer you take off and repeat by spraying the piece one more time with primer and resanding it GENTLY!!! the 1000grit itself is very gentle, however you still do not need a lot of pressure while sanding. after you are finished sanding, you are ready for painting. Make sure the pieices are free of all excess primer that was previously sanded.
Painting
For the interior, I used Dupli-Color Import Auto Spray...its comes in a small 5 oz. can...i needed 3 of them to finish the job....they work great and you can buy them at Kragen, AutoZone, and probably any auto store that carries spraypaint. Just like the primer, make sure you are in a garage and a well ventilated one at that..make sure the piece is dust free...8 to 12 inches away and spray in a sweeping motion...it will be hard to get inside the gauge cluster piece...so when you finish the top part and it drys completely( give at least 45 mintues after final coat...) then turn it upside down and spray the inside of the piece...it will be difficult so be patient and make sure you use even strokes so you dont get runs in the paint...i put about 4 coats of color on before i moved on to clear coat....the door handle is the easiest of the 3 to paint...its a simple piece of plastic, no hidden spots to paint, no vents in the way...when you get to the vents....make sure your strokes are in the same direction as the vents are going...you may want to rotate the vent 180 degress for each coat so you get inside every crack and crevice
* note is you make a mistake...do not try to repaint it...it will look bad...take the time to grab the 600 grit...sand it off as good as possible, re-primer, re-sand, and repaint...its tedious i know but if you want it done the right way, follow these steps!
Follow up the paint with 4 or 5 very light coats of clear coat to give it a little gloss look...make sure its not layed on heavy or your color might look darker then it is supposed to be in certain spots...let the pieces dry for about 2 hours before reassembling!
when reassmebling...do so with care...the gauge cluster piece will be difficult to wedge in without hitting the steering wheel column or the turn signal...hitting and rubbing may cause paint damage so do so with care and caution...do it slow if need be...for the door handles...reapply the chrome ring and place back on the door, its as easy as that! Finally put the vents back in place..make sure you put them in the same direction they came out!
Lastly, enjoy your finished project...
*PLEASE NOT THAT I AM NOT RESPONSIBLE FOR ANY DAMAGE DONE TO YOUR CAR DURING THE PROCESS OF THIS PROJECT, HOWEVER YOU CAN FEEL FREE TO EMAIL ME ABOUT THE COMPLIMENTS YOU RECEIVE AND THE SELF GRATIFICATION YOU NOW HAVE IN DOING SUCH A PROJECT.
YOU'VE JUST BEEN PIMPED
-TJ
same deal if you want to do your engine cover...just mask tape the VVTI and the logo and your all set

Senior Member


SL Member
Joined: Jun 2005
Posts: 1,193
From: South River, NJ
or you could always send the parts to me to paint. They'll turn out a lot better than that shops, I can guarantee that. Check out my link for some pics. And I can custom color match to get whatever colors you want, even the exact OEM Toyota colors if you are interested..
JOE
JOE

Thread
Thread Starter
Forum
Replies
Last Post
Ferretgrrl
Scion iQ Owner's Lounge
2
Oct 15, 2018 02:50 AM
