
Tutorial: How to Install the PAC SWI-ALP


Thread Starter
Member
Joined: Apr 2006
Posts: 45
From: Mooresville, NC
I recently installed the PAC SWI-ALP in my tC. The install was not too difficult, but this should be helpful to those of you who wish to install one of these so you can keep your steering wheel controls when you install an Alpine head unit.
I have the CDA-9857, which has a jack in the back of the head unit that the PAC SWI-ALP plugs right into. Some of the Alpine head units don't have this feature, and you'll need an infared transmitter that I know nothing about :D
The first thing you want to do is go ahead and wire up your aftermarket harness just like you were going to install your Alpine head unit without the PAC SWI-ALP. However don't connect the ground wires yet, you need them undone for now.
The PAC SWI-ALP needs ground and hot, and it's easier to tap into the aftermarket harness for this because the black is ground and the red is switched 12V hot.
Ok so the back of your stock head unit has several places where the factory harnesses plug into it. It looks like this:
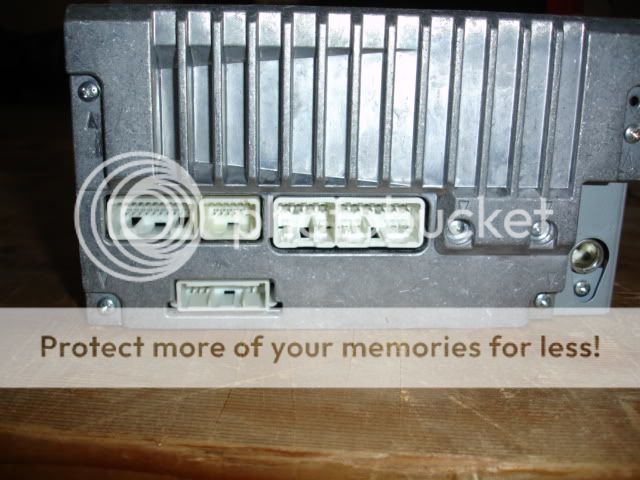
The harness on the far left is the one that transmits your steering control commands to your head unit. The others are for the speakers and I also have one that was for my Ipod.
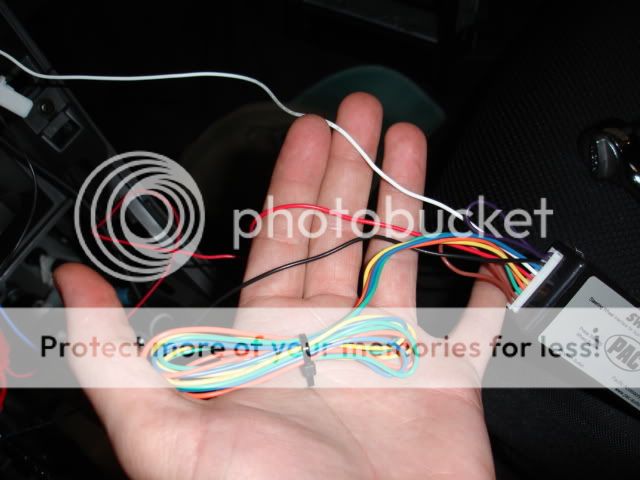
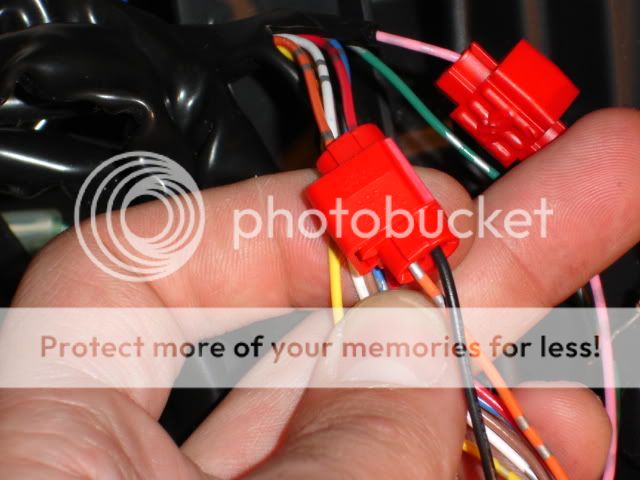
When you whip out your PAC SWI-ALP, there are a bunch of wires that come from the harness. You are only concerned with 3. They are the Black, the Red, and the White wire.
The first thing I did was provide ground for the PAC SWI-ALP.
The instructions that come with the PAC SWI-ALP tell you to connect pin 6 wire to ground.
Take a look at the harness that used to provide commands to your factory head unit and you'll see that it has a total of 20 places where wires can go into the harness.
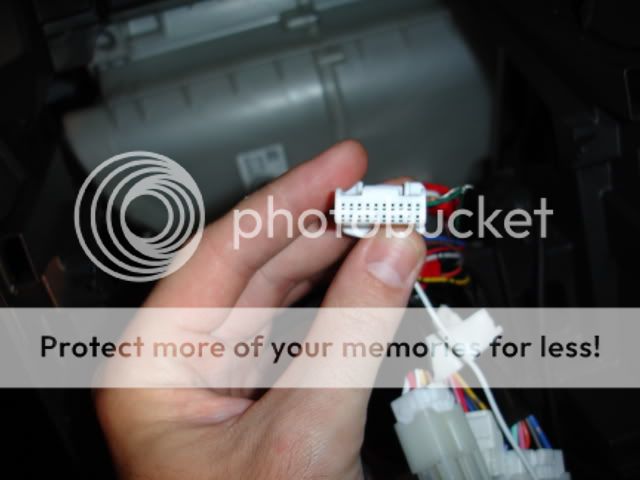
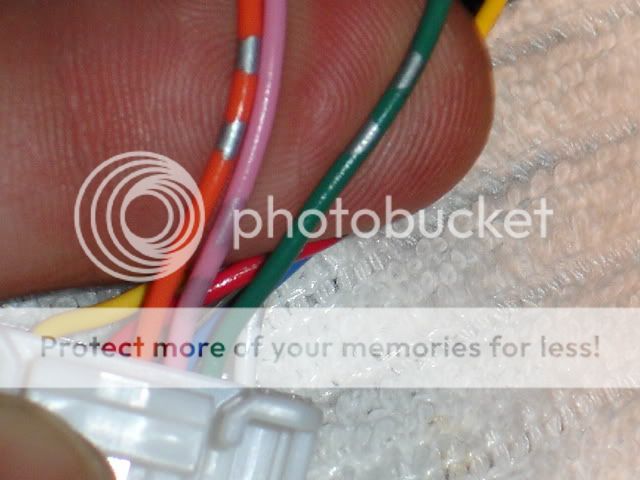
On the top side of the harness you'll see three wires, they are the only three wires from the factory harness that we are going to use. They are orange, pink and green.
The orange wire is the wire that the instructions refer to as pin 6.
Take a squeeze connector and tap into the orange wire and place the end of the black ground from the PAC SWI-ALP in the other side like this:
Ok now you are halfway there on providing ground for the PAC SWI-ALP.
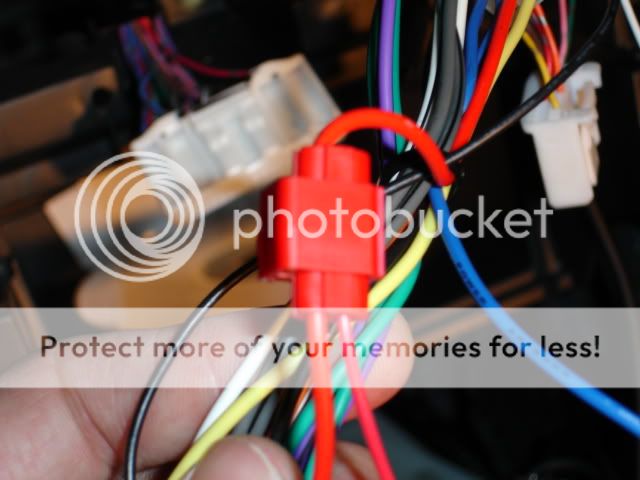
Go ahead and place a butt connector onto the end of the black wire coming from the Alpine harness. Instead of just crimping in the black wire from you aftermarket tC harness, we are going to splice in the ground wire from the PAC SWI-ALP.
Cut the ground wire from the PAC SWI-ALP harness in half and strip off both ends. Twist them up with the ground wire from your aftermarket tC harness and place them in the open end of the butt connector like so:

The wire on the bottom is the ground from the Alpine harness that comes with your head unit, the larger black wire on the top is the ground from the tC aftermarket harness and the two small black wires used to be one wire coming from the PAC SWI-ALP and going to the squeeze connector.
Ok now you have ground.
Now let's hook up the 12v switched hot. To do this, just use another squeeze connector and tap in to the red wire on your Alpine harness. Here's mine:
Ok now this is the tricky part. I'll describe what to do then show you the pic.
First, you take the white wire from the PAC SWI-ALP and use a squeeze connector to spice into the pink wire from your factory steering wheel control head unit.
Do this on the pink wire about 2 and 1/2 inches from the plastic harness. You need to allow yourself room to solder on a 150 ohm resistor.
You have to use a utility knife to peel pack the insulation on the white wire so you can solder on the resistor. Then you have to connect the other end of the resistor to the green wire in the harness, also after you have peeled back the insulation. Here's mine:
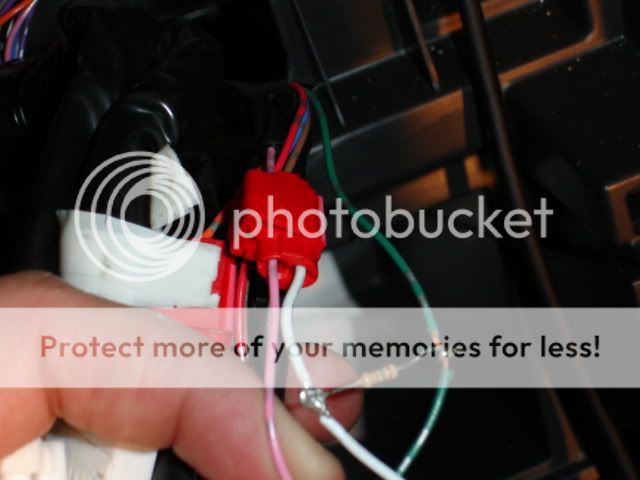
Just a quick note about resistors...They must be soldered! Your PAC SWI-ALP needs the resistor, otherwise it will not be able to tell if you are pressing up or down on the steering controls. The resistor in series helps to send the proper signal to the head unit. If you don't solder it on it will most likely come loose and you'll have problems. It is very easy and just takes a little patience.
After you're done, just wrap some electrical tape around the solder joints. All that you have to do now is program the PAC SWI-ALP, and the instructions on how to do that come with the unit and they are easy to follow. Once it's programmed test it out and shove all the wires back into your dash and finish it all up, it will look like this:
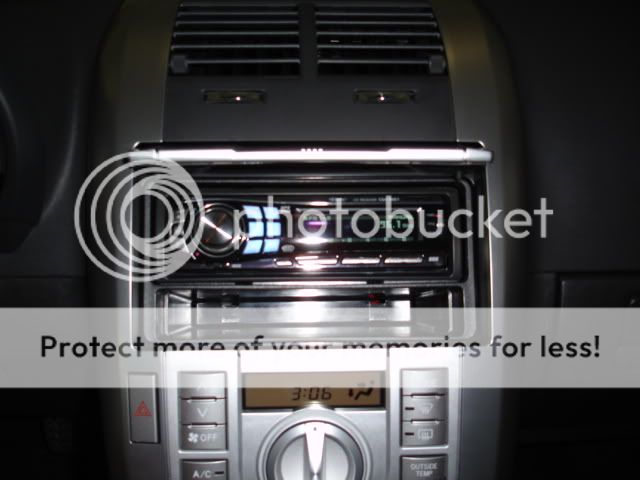
I'm happy with the product, it is a little slower than the factory controls but it does the job.
I have the CDA-9857, which has a jack in the back of the head unit that the PAC SWI-ALP plugs right into. Some of the Alpine head units don't have this feature, and you'll need an infared transmitter that I know nothing about :D
The first thing you want to do is go ahead and wire up your aftermarket harness just like you were going to install your Alpine head unit without the PAC SWI-ALP. However don't connect the ground wires yet, you need them undone for now.
The PAC SWI-ALP needs ground and hot, and it's easier to tap into the aftermarket harness for this because the black is ground and the red is switched 12V hot.
Ok so the back of your stock head unit has several places where the factory harnesses plug into it. It looks like this:
The harness on the far left is the one that transmits your steering control commands to your head unit. The others are for the speakers and I also have one that was for my Ipod.
When you whip out your PAC SWI-ALP, there are a bunch of wires that come from the harness. You are only concerned with 3. They are the Black, the Red, and the White wire.
The first thing I did was provide ground for the PAC SWI-ALP.
The instructions that come with the PAC SWI-ALP tell you to connect pin 6 wire to ground.
Take a look at the harness that used to provide commands to your factory head unit and you'll see that it has a total of 20 places where wires can go into the harness.
On the top side of the harness you'll see three wires, they are the only three wires from the factory harness that we are going to use. They are orange, pink and green.
The orange wire is the wire that the instructions refer to as pin 6.
Take a squeeze connector and tap into the orange wire and place the end of the black ground from the PAC SWI-ALP in the other side like this:
Ok now you are halfway there on providing ground for the PAC SWI-ALP.
Go ahead and place a butt connector onto the end of the black wire coming from the Alpine harness. Instead of just crimping in the black wire from you aftermarket tC harness, we are going to splice in the ground wire from the PAC SWI-ALP.
Cut the ground wire from the PAC SWI-ALP harness in half and strip off both ends. Twist them up with the ground wire from your aftermarket tC harness and place them in the open end of the butt connector like so:
The wire on the bottom is the ground from the Alpine harness that comes with your head unit, the larger black wire on the top is the ground from the tC aftermarket harness and the two small black wires used to be one wire coming from the PAC SWI-ALP and going to the squeeze connector.
Ok now you have ground.
Now let's hook up the 12v switched hot. To do this, just use another squeeze connector and tap in to the red wire on your Alpine harness. Here's mine:
Ok now this is the tricky part. I'll describe what to do then show you the pic.
First, you take the white wire from the PAC SWI-ALP and use a squeeze connector to spice into the pink wire from your factory steering wheel control head unit.
Do this on the pink wire about 2 and 1/2 inches from the plastic harness. You need to allow yourself room to solder on a 150 ohm resistor.
You have to use a utility knife to peel pack the insulation on the white wire so you can solder on the resistor. Then you have to connect the other end of the resistor to the green wire in the harness, also after you have peeled back the insulation. Here's mine:
Just a quick note about resistors...They must be soldered! Your PAC SWI-ALP needs the resistor, otherwise it will not be able to tell if you are pressing up or down on the steering controls. The resistor in series helps to send the proper signal to the head unit. If you don't solder it on it will most likely come loose and you'll have problems. It is very easy and just takes a little patience.
After you're done, just wrap some electrical tape around the solder joints. All that you have to do now is program the PAC SWI-ALP, and the instructions on how to do that come with the unit and they are easy to follow. Once it's programmed test it out and shove all the wires back into your dash and finish it all up, it will look like this:
I'm happy with the product, it is a little slower than the factory controls but it does the job.

Thread Starter
Member
Joined: Apr 2006
Posts: 45
From: Mooresville, NC
not sure if it works exactly the same way, if that head unit has a jack in the back of it that the PAC SWI-ALP plugs into you are good to go, if not you will need the Infared Adapter that goes with it. Not sure how that installs in the car though, so ask your local dealer for help. Glad my little tutorial helped someone, i was wondering if anyone was going to post about it. 

Junior Member
SL Member
Joined: Oct 2005
Posts: 26
The Pac SWI-ALP works with any Alpine, JVC, or Kenwood radio that has wired steering wheel remote inputs. It doesn't just have to be Alpine units with jack in the back.
Read about it http://www.pac-audio.com/products/pr...el%20Interface
Read about it http://www.pac-audio.com/products/pr...el%20Interface
Thread Starter
Member
Joined: Apr 2006
Posts: 45
From: Mooresville, NC
I have now discovered that if you solder the white wire to Pin 7 instead of using the T-Tap and also solder the black ground wire to Pin 6 instead of the T-Tap the PAC SWI ALP works much faster. Just thought I'd update everyone whose trying to do this.


Junior Member
Joined: Sep 2006
Posts: 23
Originally Posted by Tripmasternc
I have now discovered that if you solder the white wire to Pin 7 instead of using the T-Tap and also solder the black ground wire to Pin 6 instead of the T-Tap the PAC SWI ALP works much faster. Just thought I'd update everyone whose trying to do this.
I'm an idiot when it comes to this stuff, so just an FYI to everyone out there. The wire colors on the '06 xA are similar (aqua, pink and orange), but the green/aqua and orange are reversed.
I got mine working last night, but it stopped working when I put it all back in. Turns out one of my solder joints broke. I re-soldered it, but now it won't work at all. I think I might have burnt out the resistor (is that possible?) because it took me forever to get the solder on there, and the resistor got really hot.
I guess I'm going to try to find a place that would sell resistors, and try again.
Senior Member
SL Member
Joined: Dec 2004
Posts: 1,161
From: Southern California
I just wanna say that the Alpine 9857 KICKS ___.. but what you guys are doing.. is a bit too much work!
EDIT: OOPS!! i'm a retard. i didn't read fully.. you guys are talking about the STEERING WHELL CONTROL. anyways...
all i did was get the Alpine KCE-422i cable and plugged it into the back of the 9857head unit. works great. controls your ipod from the headunit, and charges it at the same time.
http://www.alpine-usa.com/en/product...model=KCE-422i

Thread
Thread Starter
Forum
Replies
Last Post
TheRedBox
Scion xA/xB 1st-Gen Drivetrain & Power
31
Dec 2, 2003 04:53 PM