
DIY: LED DRL's


Senior Member
SL Member
Joined: Apr 2011
Posts: 135
From: New Orleans
The only thing i dont like about that idea is because of the wire reaching across the engine like that. Looks unclean. I guess i can get some plastic wire cover and run it along the side and down to that hole.
Thread Starter
Senior Member
SL Member
Joined: Jun 2011
Posts: 752
From: Houston, TX
Yeah, or paint it dark so the wire isent so odvious. Im switching my routing this weekend to match MightyP's. Right now it is hidden well under the hood catch track on the drivers side....that is untill you open my drivers side door....then BAMB! Bright red wire all in you face......
Senior Member
SL Member
Joined: Apr 2011
Posts: 135
From: New Orleans
Yeah, or paint it dark so the wire isent so odvious. Im switching my routing this weekend to match MightyP's. Right now it is hidden well under the hood catch track on the drivers side....that is untill you open my drivers side door....then BAMB! Bright red wire all in you face......

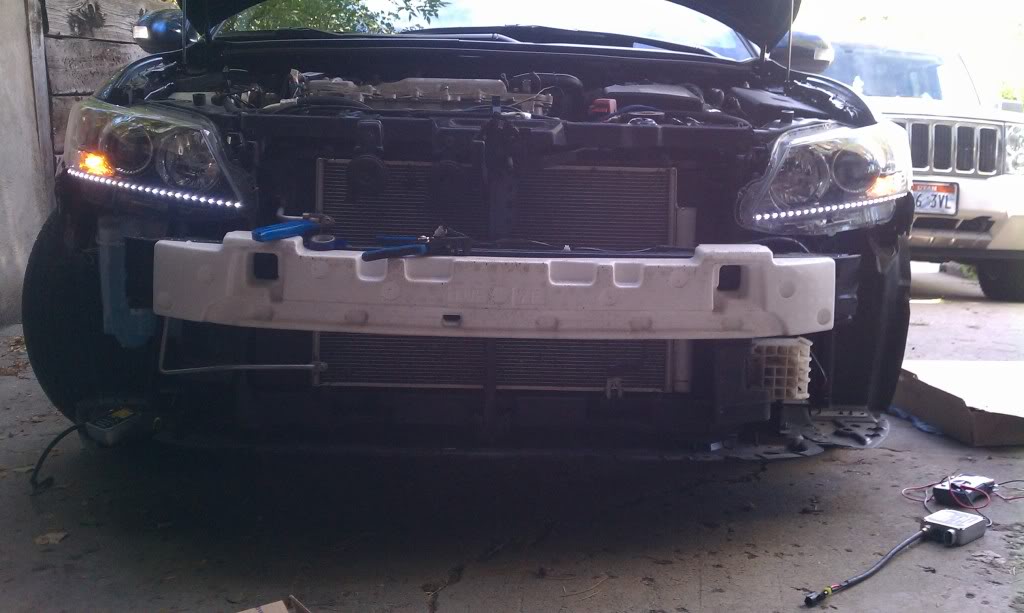
It's a really good place to go through the firewall! So good, in fact, it's where Toyota used.  And don't look at how I have the wire routed. It is like that just for the pictures. I will be rerouting the wire when I get back in town. It will look clean when it's done.
And don't look at how I have the wire routed. It is like that just for the pictures. I will be rerouting the wire when I get back in town. It will look clean when it's done.
Senior Member
SL Member
Joined: Apr 2011
Posts: 135
From: New Orleans
It's like a two man job lol
Senior Member
SL Member
Joined: Apr 2011
Posts: 135
From: New Orleans
No no, don't do that. I've found a way! Just take a screwdriver or some tool and push the rubber peice from the inside and there will be an opening. Make sure the opening can stay open for a while as you route the wire from the outside through it(or route it from the inside, whatever you want). Then just close it back up. Wala! No cutting

Senior Member
SL Member
Joined: May 2011
Posts: 143
From: Chino Hills, CA
Great job bro!!! I actually just tapped into the corner lights wires. Good thing about LED it uses very little power. You just use '3M quick connects' (no cutting or splicing) for the connections. LED positive goes to corner lights positive and LED negative goes to corner lights negative. The LED strips will be on when you turn on parking/corners lights and stays on when headlights are on.
Thread Starter
Senior Member
SL Member
Joined: Jun 2011
Posts: 752
From: Houston, TX
None taken DtrTc2. Like I said at the end of the DIY, I know there were other/better/worse ways of doing this. I just explained the route I went for people who dont want to tap/splice/cut into thier cars' wires.
The 3M connectors are great, but if I had ever removed them, there would forever be little cuts in my wire sheilding that I would have to tape over or heat shrink, and I dident want to do anything that couldent be removed 100%.
The 3M connectors are great, but if I had ever removed them, there would forever be little cuts in my wire sheilding that I would have to tape over or heat shrink, and I dident want to do anything that couldent be removed 100%.

Senior Member
SL Member
Joined: Mar 2009
Posts: 184
as far as the firewall goes, i used a pair of long needle nose pliers, insert it in the passenger side grommet then open the pliers up. use a wire hanger or extra piece of wire and pass it through, once you get everything wired and ready to go, tape the H#$L out if it to the hanger or spare wire and pull it through from the engine bay. i did this for my gauge install and it saved me a lot of time.
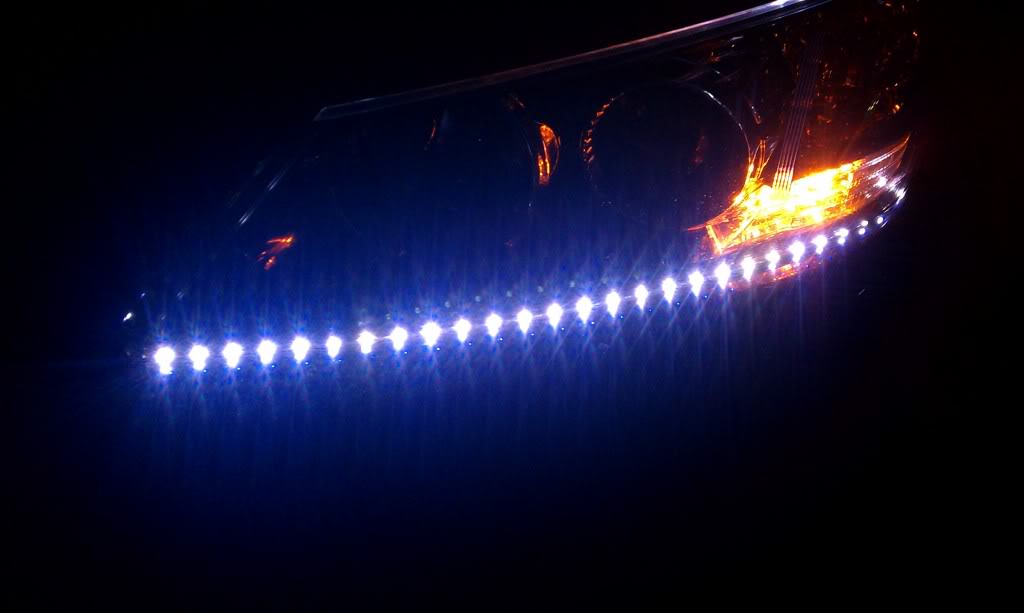
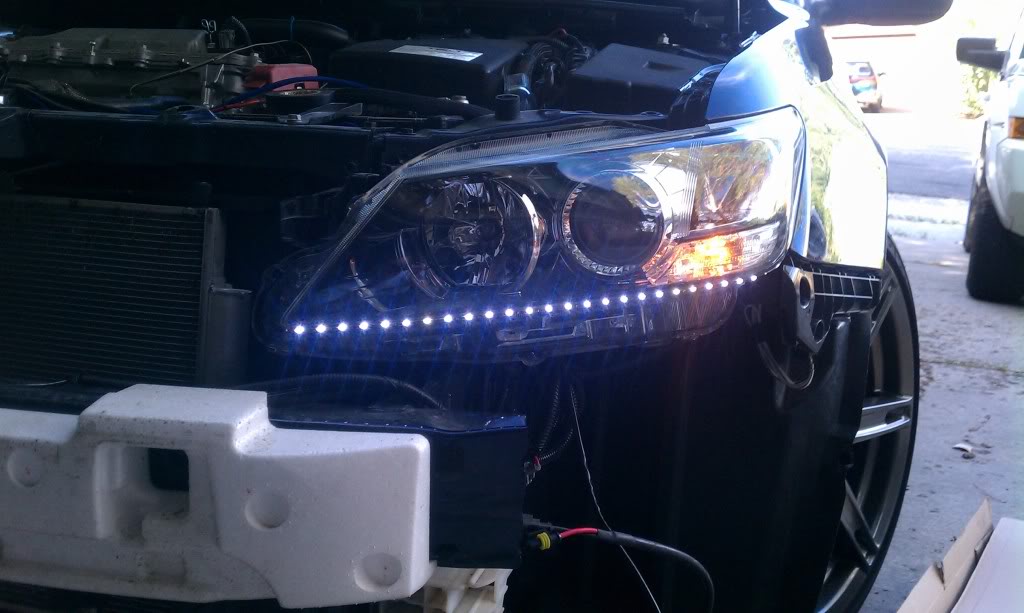
i also found a bunch of "side emmiting" LED strips on-line that are designed for this kind of application, pictures of them looked pretty good
i also found a bunch of "side emmiting" LED strips on-line that are designed for this kind of application, pictures of them looked pretty good
Last edited by BeloZero; Aug 11, 2011 at 12:07 PM.
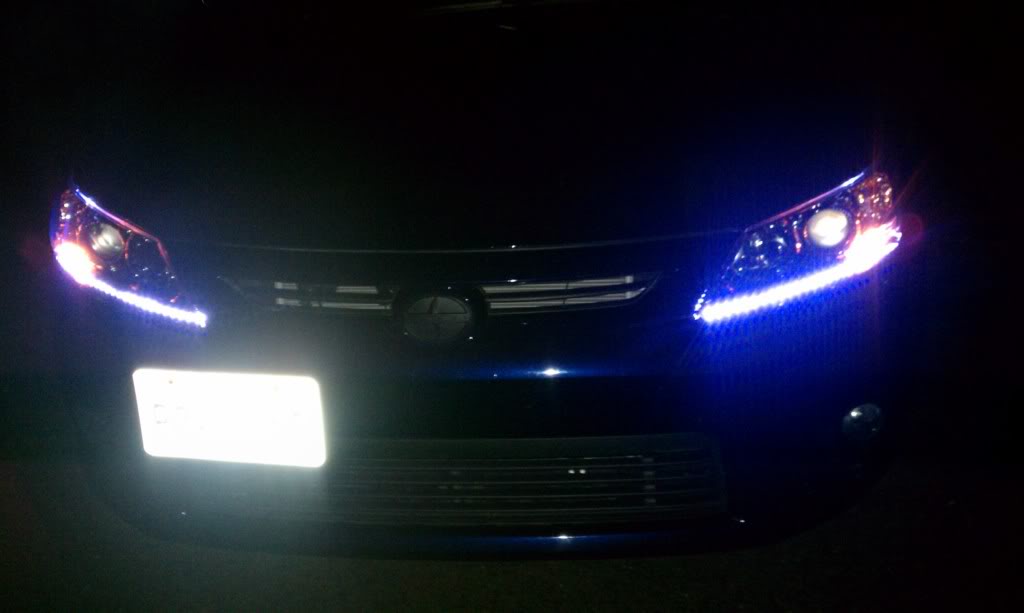
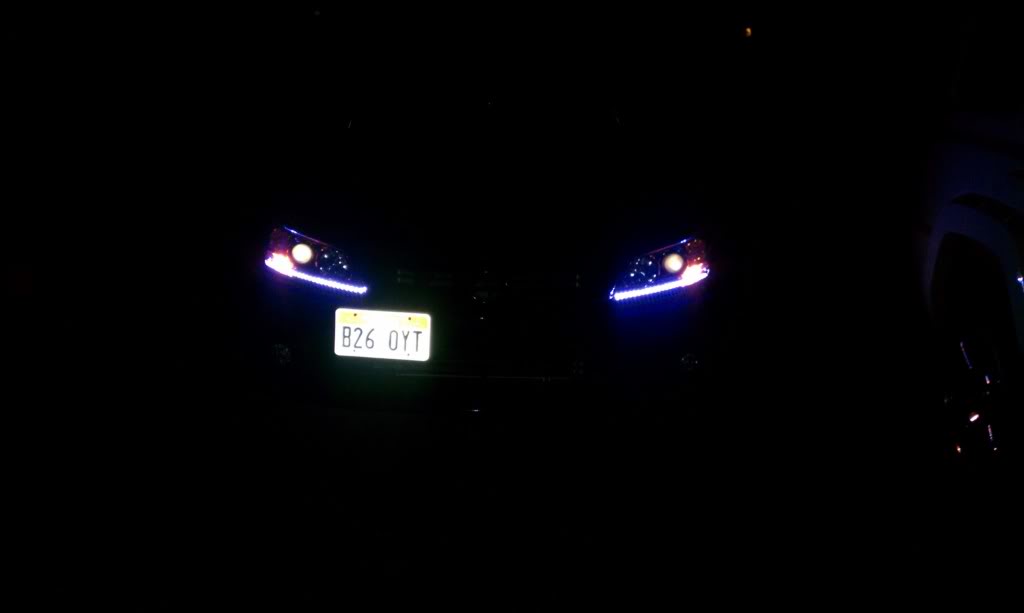
After a couple weeks with these, I'm very happy. They work great and are visible even at a distance. I get lots of compliments on them. Notice both of these pictures were taken during a bright, sunny day.
Last edited by MR_LUV; Nov 16, 2017 at 11:17 PM.
Senior Member
SL Member
Joined: Mar 2009
Posts: 184
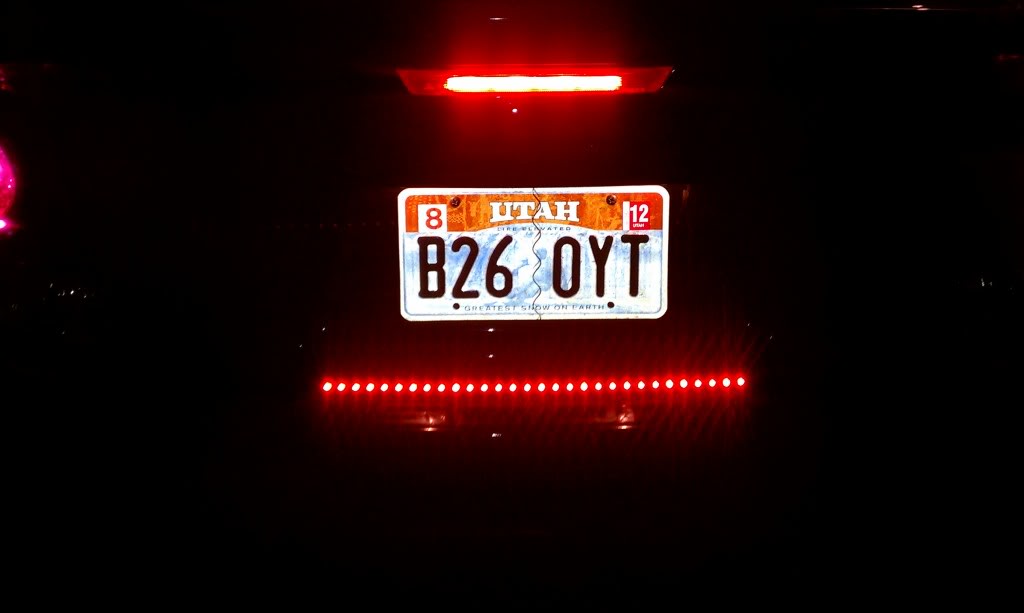
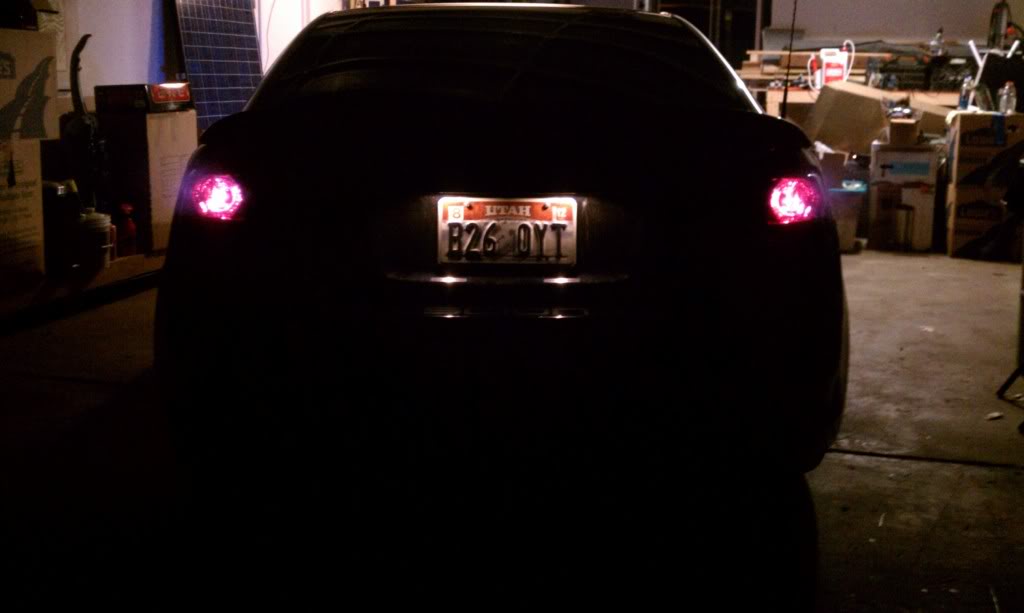
so i got my side emitting LED's today so ill be doing mine but i took it one step further my tails are tinted and im afraid ill get pulled over or rear-ended so i ordered another side emitting strip in red that im going to tap into the brakes and mount the strip in between the bumper and deck lid. hopefully it all comes out ok. ill post pics when i get it all done over the next couple days
my tails are tinted and im afraid ill get pulled over or rear-ended so i ordered another side emitting strip in red that im going to tap into the brakes and mount the strip in between the bumper and deck lid. hopefully it all comes out ok. ill post pics when i get it all done over the next couple days
Senior Member
SL Member
Joined: Mar 2009
Posts: 184