
The very slow Magnetic Grey Metallic Build


Thread Starter
Senior Member
SL Member
Joined: Oct 2012
Posts: 366
From: West Viginia
No 369$ cheaper because they only lower. They don't have camber or dampening adjustment. They are basically for person with a DD that wants an adjustable spring and strut setup.
Sent from my ADR6400L using Tapatalk 2
Sent from my ADR6400L using Tapatalk 2
Thread Starter
Senior Member
SL Member
Joined: Oct 2012
Posts: 366
From: West Viginia
Last edited by Tc13; Feb 6, 2013 at 10:42 PM.
Thread Starter
Senior Member
SL Member
Joined: Oct 2012
Posts: 366
From: West Viginia
Ok man i posted the wrong link. I edited the last post it brings you to the page that lists all the coilovers for Scions. One of them says TC2. The pictures all look the same but ya the coilover setup for the TC2 is different than the Tc1. TC2 rear assembly isnt a spring with a strut in the center. They are seperate. But im sure youve noticed that. But ya they are only 369$. HIT that link up again  and check it out
and check it out

Senior Member
SL Member
Joined: Jul 2012
Posts: 678
yep i just figured that out as you fixed the link. good stuff. once you get them, I'd be interested in the review.
Personally I'm not replacing my springs and shocks just yet. but I'll probably do it sooner than 60,000 miles. I hear that's about when the stock springs and / or shocks start being lame. Going with aftermarket stuff when I get around to it. So its either going to be TRD springs, or something like this coilover deal you found.
Personally I'm not replacing my springs and shocks just yet. but I'll probably do it sooner than 60,000 miles. I hear that's about when the stock springs and / or shocks start being lame. Going with aftermarket stuff when I get around to it. So its either going to be TRD springs, or something like this coilover deal you found.
Thread Starter
Senior Member
SL Member
Joined: Oct 2012
Posts: 366
From: West Viginia
Ya I'm going to keep all the factory parts just incase I need to switch back.
I'm deffinetly going to do a full write up on the coil over installation havent decided yet if I'm going to record with video or just take pictures. Kinda leaning towards video.
I saw where u responded to my post about the supertek SS. I can't wait to put my order in. Quick question where do the TWM bushings go?
Sent from my ADR6400L using Tapatalk 2
Senior Member
SL Member
Joined: Jul 2012
Posts: 678
The TWM SS is the more difficult install. you can tell from their PDF installation instructions. I'd still get me a TWM SS if it wasn't over $300...
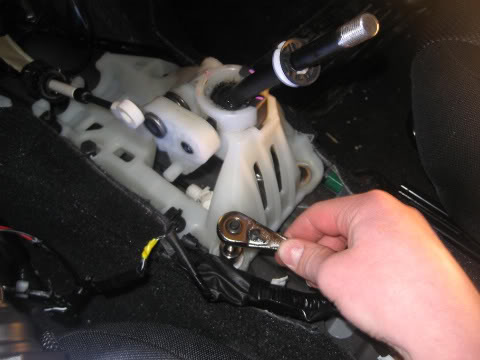
The TWM bushing kit includes two cable bushings (brass colored) and four base bushings (silver). The cable bushings get installed into the shifter cables (the things you will be working with once you do the Supertek shifter install). Cable bushings are quick and easy to install. Then the base bushings are for the actual shifter cage in the center console of your car. To install those, you'll have to basically disassemble the center console (as if you were replacing the shifter), and you will unbolt the shifter cage from the car. Then you change the four rubber stock bushings that are holding the cage to the car with the TWM base bushings. then bolt the shifter cage back on top of those 4 bushings and reassemble the center panels. It simple, and all the instructions are included by TWM. you basically can't mess up as long as you understand where they go.
Here is a pic of that shifter cage(white plastic assembly). The base bushing goes right under where that guy is loosening the bolt. there are 4 total - one bushing on(under) each corner of the cage.
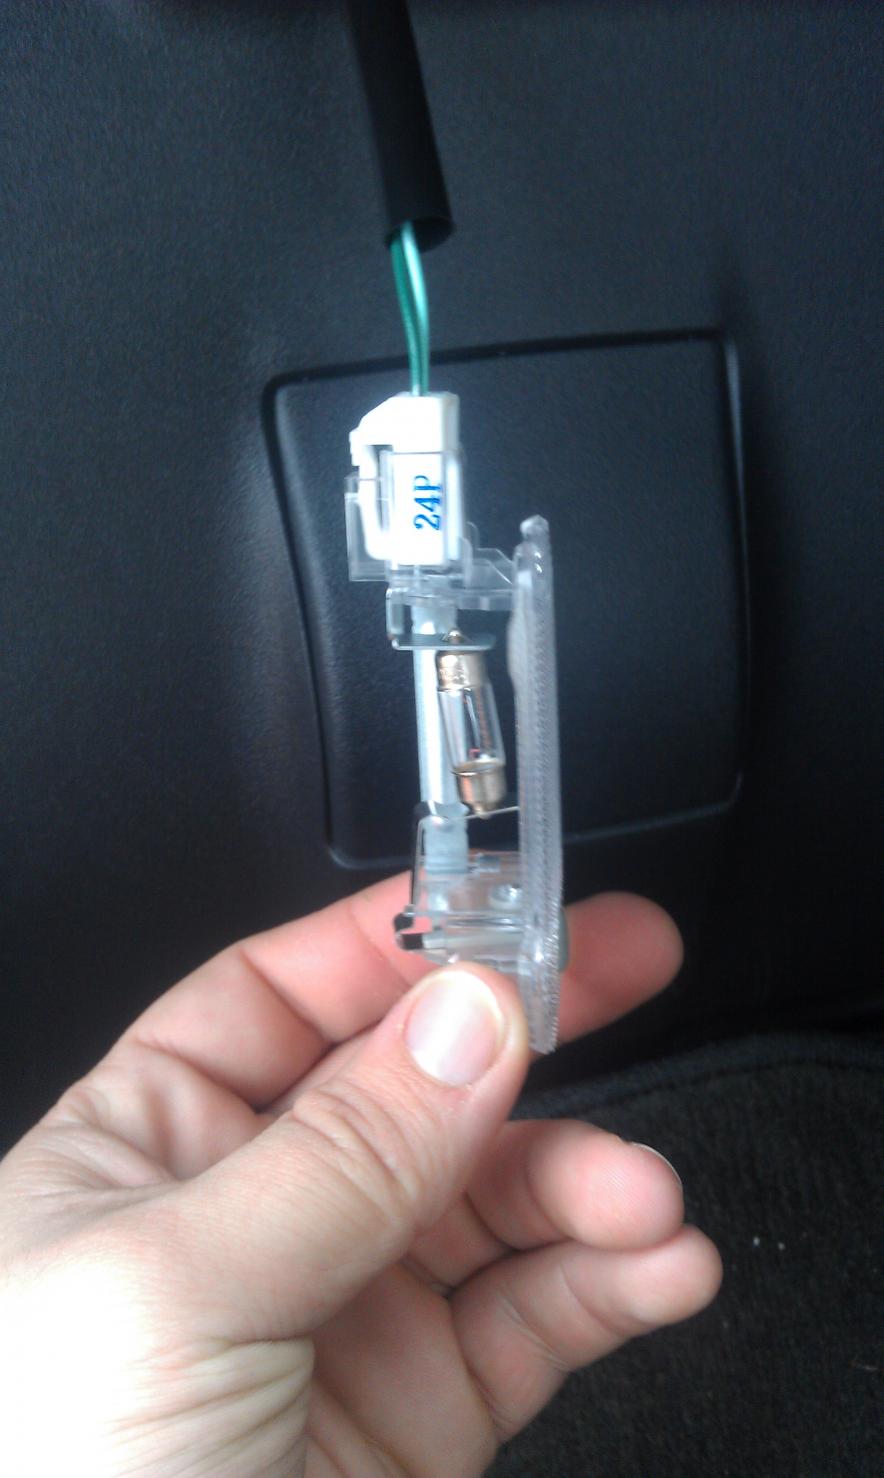
As far as the cable bushings go, this is what the stock bushing looks like - its black rubber

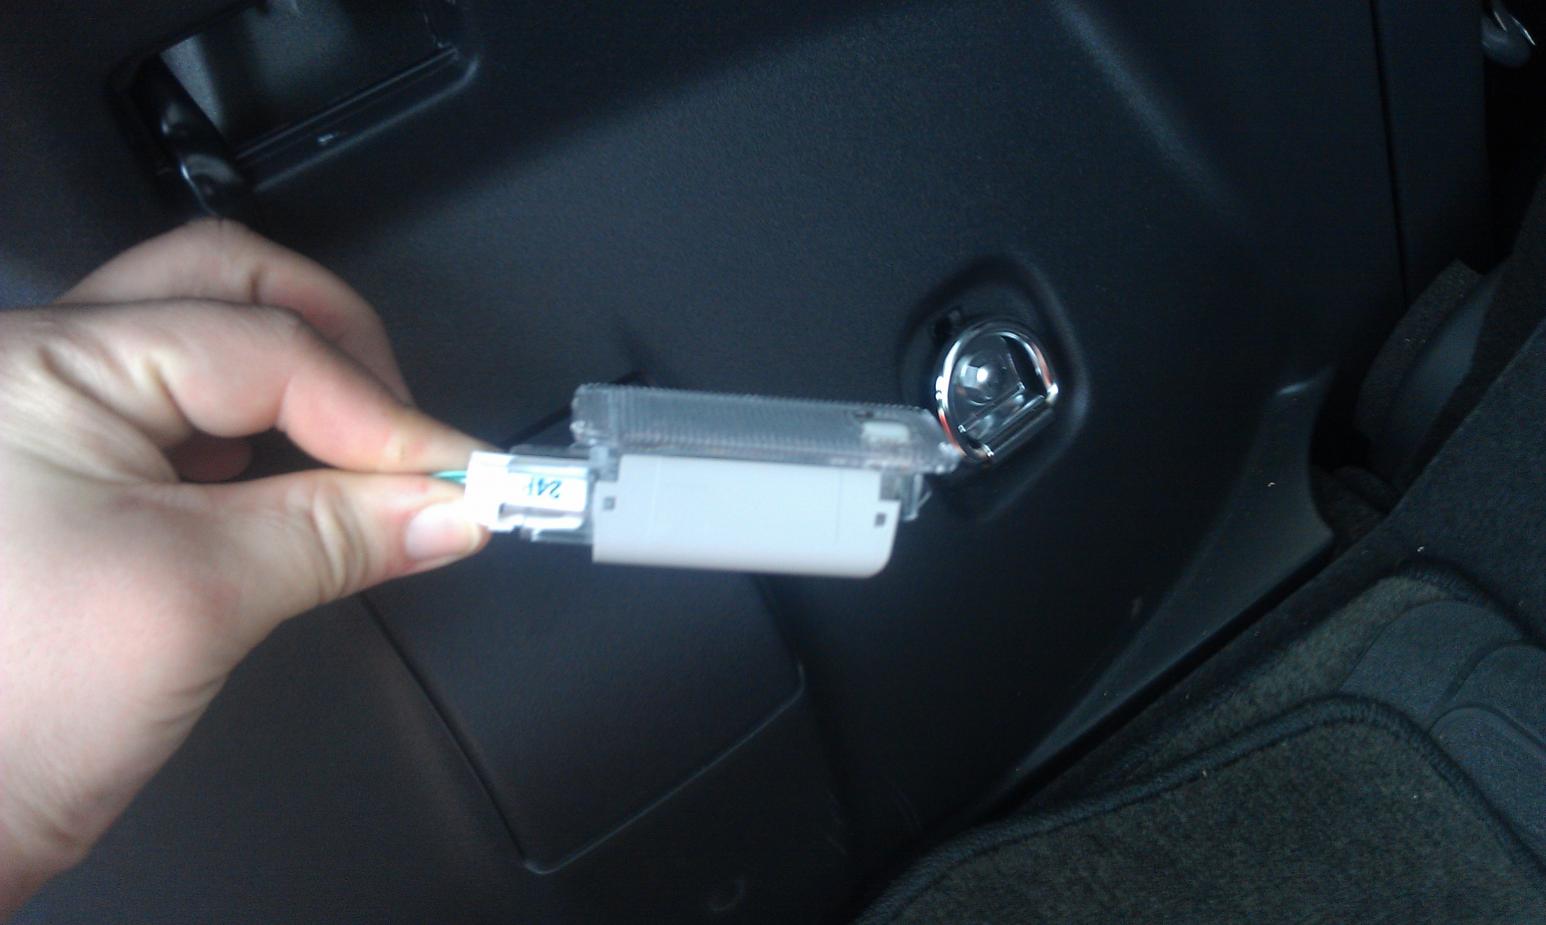
You will be replacing both of them like this (previous pic was probably from another car. the pic below looks like it's from the tc2 and yours will look the same. though the right shifter cable end will have the Supertek component installed when you are done with it)

The TWM bushing kit includes two cable bushings (brass colored) and four base bushings (silver). The cable bushings get installed into the shifter cables (the things you will be working with once you do the Supertek shifter install). Cable bushings are quick and easy to install. Then the base bushings are for the actual shifter cage in the center console of your car. To install those, you'll have to basically disassemble the center console (as if you were replacing the shifter), and you will unbolt the shifter cage from the car. Then you change the four rubber stock bushings that are holding the cage to the car with the TWM base bushings. then bolt the shifter cage back on top of those 4 bushings and reassemble the center panels. It simple, and all the instructions are included by TWM. you basically can't mess up as long as you understand where they go.
Here is a pic of that shifter cage(white plastic assembly). The base bushing goes right under where that guy is loosening the bolt. there are 4 total - one bushing on(under) each corner of the cage.
As far as the cable bushings go, this is what the stock bushing looks like - its black rubber
You will be replacing both of them like this (previous pic was probably from another car. the pic below looks like it's from the tc2 and yours will look the same. though the right shifter cable end will have the Supertek component installed when you are done with it)
Thread Starter
Senior Member
SL Member
Joined: Oct 2012
Posts: 366
From: West Viginia
Just received my interior LEDs in the main this morning. Just got done installing them.
I know its a simple process that most people can accomplish easily but after i get my pictures downloaded to my PC im going to do a slight write up. Reason for the write up is it will be my first " How To"
so wish me luck.
I know its a simple process that most people can accomplish easily but after i get my pictures downloaded to my PC im going to do a slight write up. Reason for the write up is it will be my first " How To"
so wish me luck.
Thread Starter
Senior Member
SL Member
Joined: Oct 2012
Posts: 366
From: West Viginia
Brief interior LED how to.
I would like to apologize in advance for the low quality pictures all I have is my cell phone
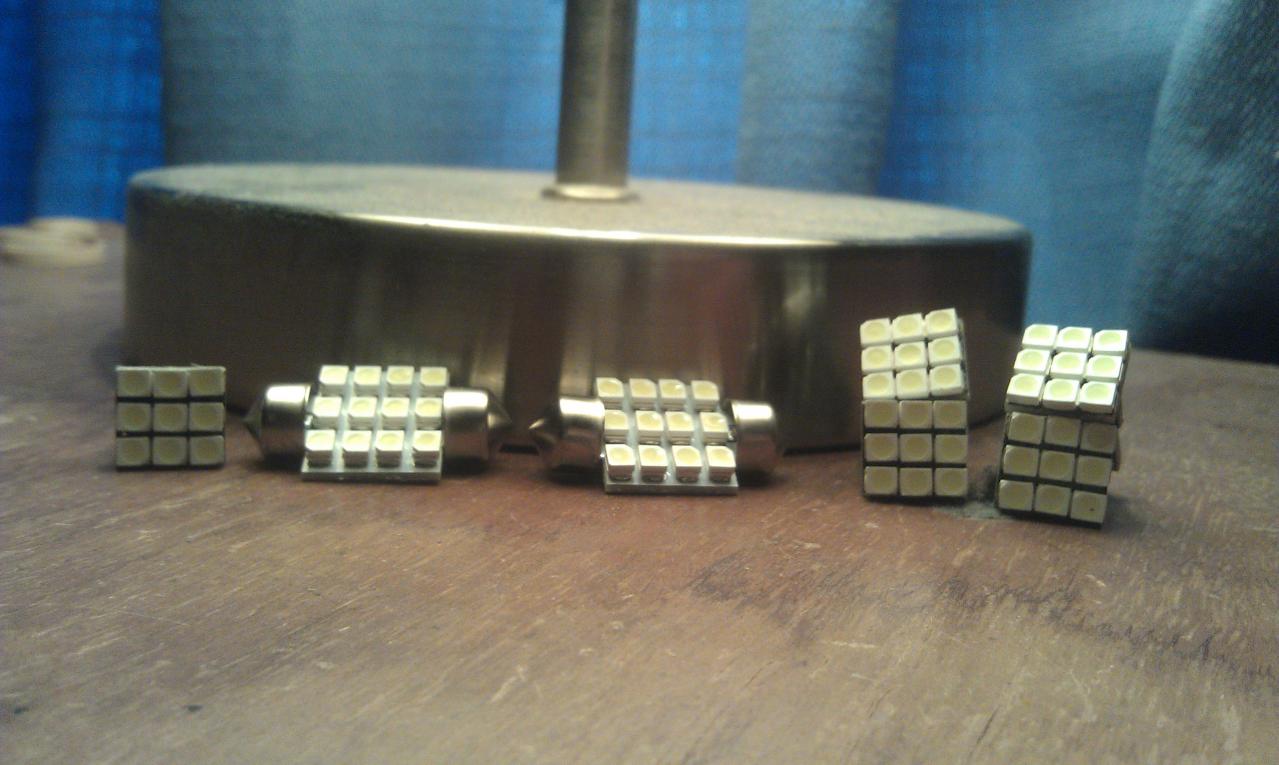
LEDs that came in the package.
Basically it is all simple plug in play.
I used a flat head screw driver to pry the light covers off to access the bulbs.

After the oem bulb is removed you simply place the LED into position.

Then just place the cover back over the LED.
The cargo area bulb is pretty simple as well.
When you remove the light assembly there is little grey casing that needs to be popped off as well so you can access the bulb.
Insert the LED into position.
Then replace the grey cover back over the light assembly. And pop back
into the side of the cargo area.
After it gets dark ill get some pictures of them turned on.
Side note. If you install a LED and they don't power on when you hit the switch simply rotate 180 degrees. That should fix the problem. It always help to test before you put the cover back over the light.
I would like to apologize in advance for the low quality pictures all I have is my cell phone
LEDs that came in the package.
Basically it is all simple plug in play.
I used a flat head screw driver to pry the light covers off to access the bulbs.
After the oem bulb is removed you simply place the LED into position.
Then just place the cover back over the LED.
The cargo area bulb is pretty simple as well.
When you remove the light assembly there is little grey casing that needs to be popped off as well so you can access the bulb.
Insert the LED into position.
Then replace the grey cover back over the light assembly. And pop back
into the side of the cargo area.
After it gets dark ill get some pictures of them turned on.
Side note. If you install a LED and they don't power on when you hit the switch simply rotate 180 degrees. That should fix the problem. It always help to test before you put the cover back over the light.
Thread Starter
Senior Member
SL Member
Joined: Oct 2012
Posts: 366
From: West Viginia
Got a quick question for some one who has tinted there taillights.
Did you tint with a spray tint or with a vinyl?
I talked with the local tint shop (darkside) asked him about it he did not recommend the spray. Just wanting some oppinions.
Did you tint with a spray tint or with a vinyl?
I talked with the local tint shop (darkside) asked him about it he did not recommend the spray. Just wanting some oppinions.

i actually sprayed the tailights on my last tC and it came out pretty nice! it comes out more frosted matte clear then a glossy clear but i never had any problems with it =) Kid Justin did his like that check it out on his thread

Senior Member
SL Member
Joined: Mar 2011
Posts: 1,037
From: OC, CA
Just got my pwjdm shift **** in. Installed it. I'm not sure if I like it.or not.
Benefits? Well you can definitely the weight of the **** makes shifting feel a lot smoother. I enjoy it. I've only.drove the car once since the install, so if I notice anything else I will report it.
Attachment 12668
Attachment 12669
Sent from my ADR6400L using Tapatalk 2
Benefits? Well you can definitely the weight of the **** makes shifting feel a lot smoother. I enjoy it. I've only.drove the car once since the install, so if I notice anything else I will report it.
Attachment 12668
Attachment 12669
Sent from my ADR6400L using Tapatalk 2
Thread Starter
Senior Member
SL Member
Joined: Oct 2012
Posts: 366
From: West Viginia
Just installed my shift kit. I have my review ready and it consist of one word......
EPIC
For the amount involved I am very happy with the outcome. I feel that it definitely reduces the throw more than 30% but thats just how it feels to me.
I did not get the bushings that every one suggests and it still feels great. I just didnt have the money at the moment oh well ill add it to the list of future purchases. But any how i love this shift kit!!!!!!!!!!!!!!! Definitely wish i had a decal to rep supertek
Thread Starter
Senior Member
SL Member
Joined: Oct 2012
Posts: 366
From: West Viginia
Installed my yellow foglights the other day love them!!

Welded up a universal muffler looks Good exhaust is a lil deeper.

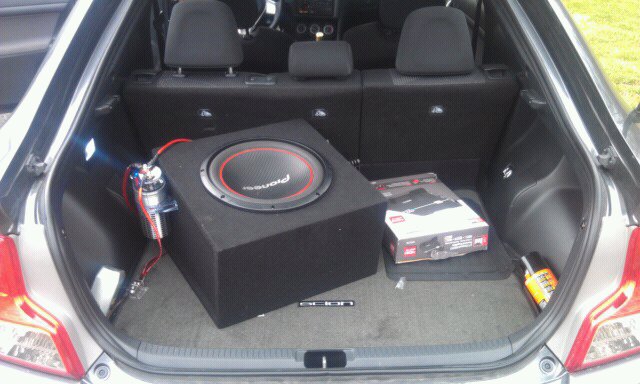
Also bought a 12 sub and amp Along with a capacitor off a friend for a really Good price.

Alot of people hate on pioneer subs but I think it sounds Good and I'm not looking to spend thousands on a system so it's Good for what I'm wanting just a little extra bass
sent from not an iPhone

Welded up a universal muffler looks Good exhaust is a lil deeper.

Also bought a 12 sub and amp Along with a capacitor off a friend for a really Good price.
Alot of people hate on pioneer subs but I think it sounds Good and I'm not looking to spend thousands on a system so it's Good for what I'm wanting just a little extra bass
sent from not an iPhone