
06 XB S/C Install


Thread Starter
Senior Member
SL Member
Joined: May 2008
Posts: 154
From: Alabama
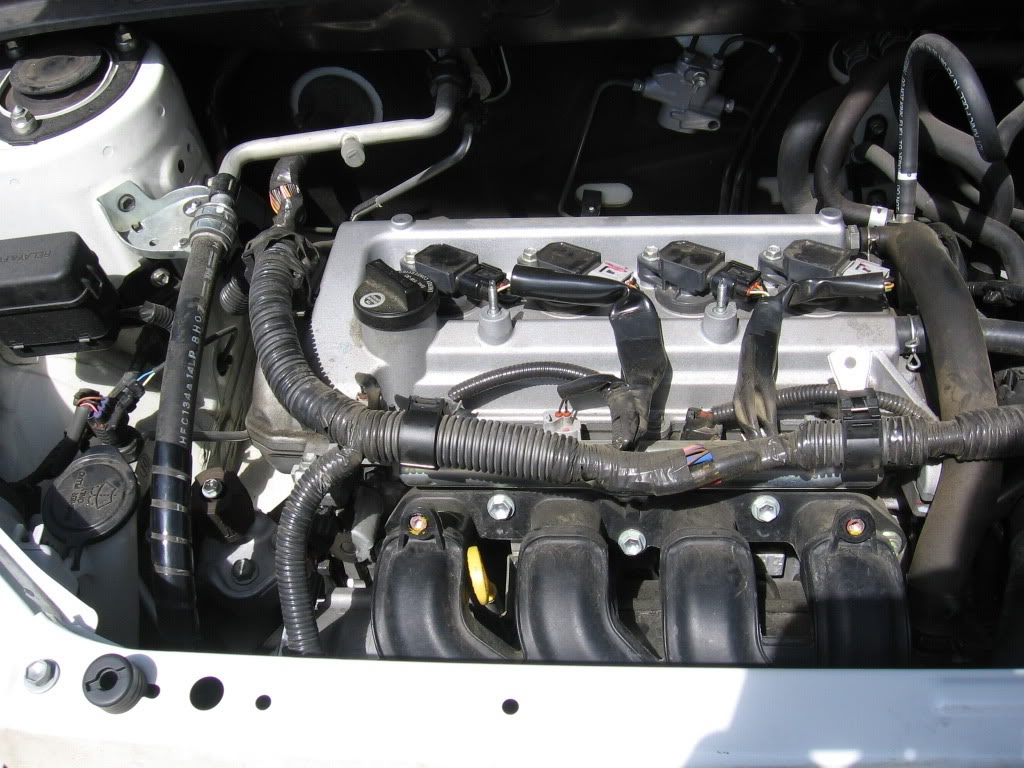
the above is a before pic.
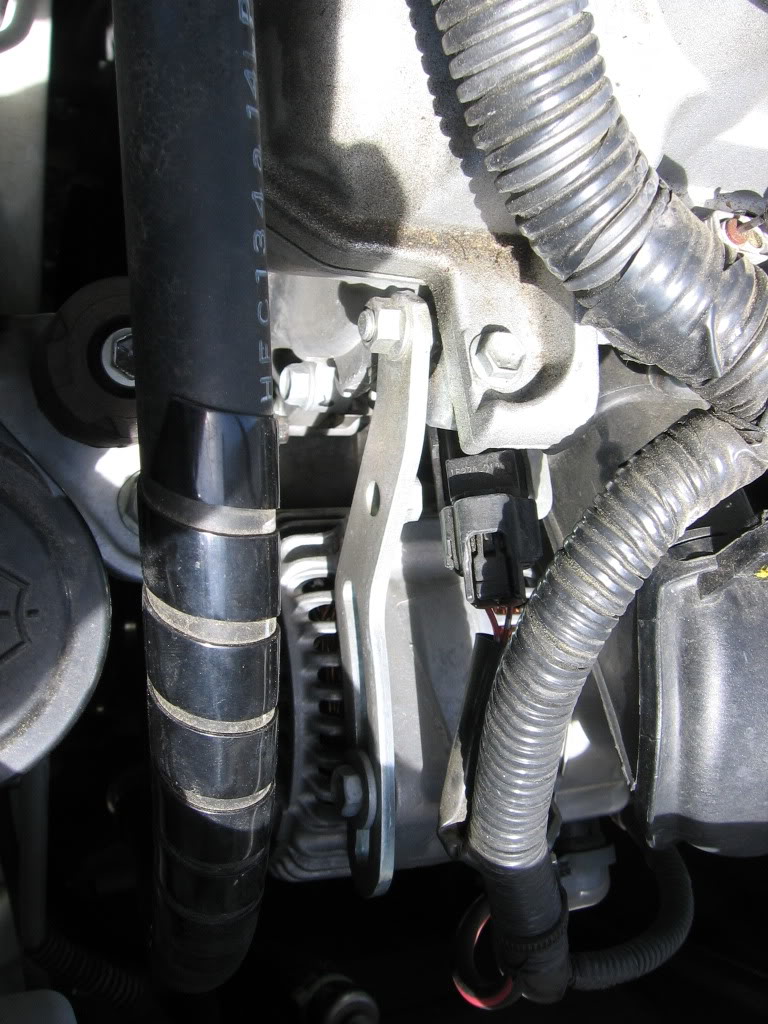
There is one of the ALT bracket. Thought this might be good for reference.
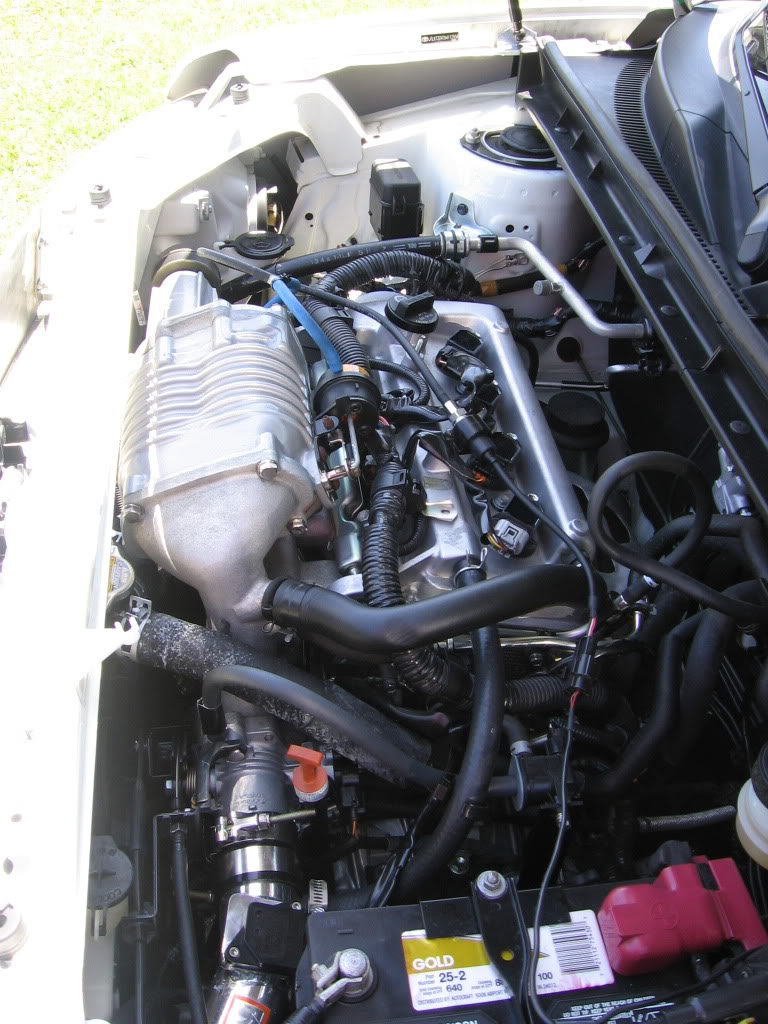
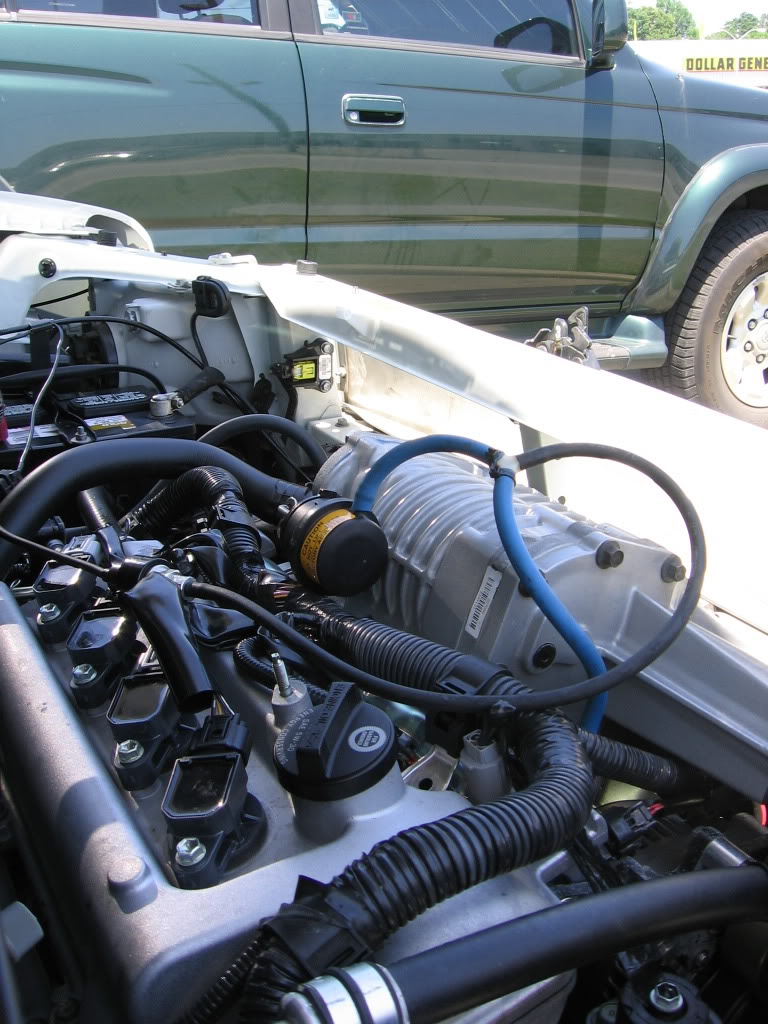
There's an after shot.
You will have to reroute that wiring harness away for that actuator. Make sure the lever that moves down doesn't press on the wiring harness. I have since rerouted the spliced vacuum line for the gauge. I can get a pic if anyone needs it.

I still have to clean up (solder) these wires now that I finally got it wired right.
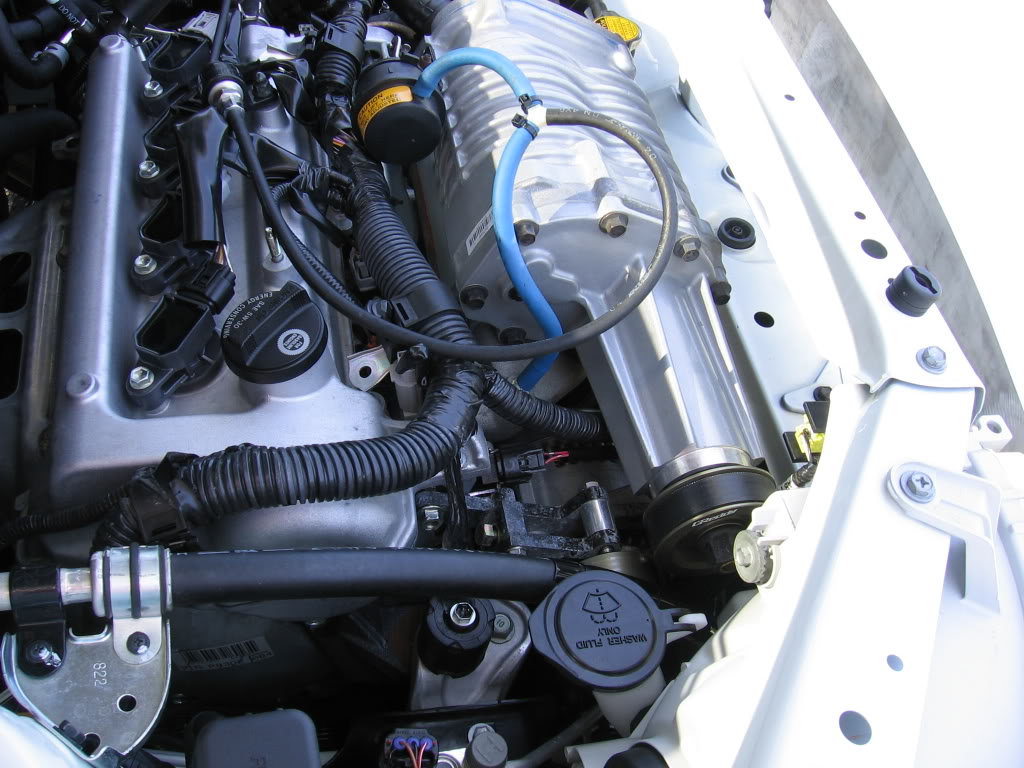
I wanted to show a little detail on the upper pulleys and bracket.
Hope this helps someone. I can take better pics if needed.
There is one of the ALT bracket. Thought this might be good for reference.
There's an after shot.
You will have to reroute that wiring harness away for that actuator. Make sure the lever that moves down doesn't press on the wiring harness. I have since rerouted the spliced vacuum line for the gauge. I can get a pic if anyone needs it.
I still have to clean up (solder) these wires now that I finally got it wired right.
I wanted to show a little detail on the upper pulleys and bracket.
Hope this helps someone. I can take better pics if needed.
Last edited by Bamapolar; May 6, 2010 at 01:38 PM.
Thread Starter
Senior Member
SL Member
Joined: May 2008
Posts: 154
From: Alabama
I bought the kit used. The power is awesome. I can't ever go without it now. I'm spoiled.
I don't have any plans to get an ATF cooler.
I do want to replace my solid stainless grill with another grill that will let some air through. I don't have a gauge to verify but it seems to get hot under there.
The guy I bought it from is on this forum but I don't know his screen name. He pointed out that you should take out the headlight during the s/c install. I couldn't get the headlight out during the install but I had to tighten a few bolts today close to the pulleys and it made the job so much easier. You need to take out the two bumper bolts under the grill and the bolt in the fender well. I'll try to get some pics.
Dennis

Member
SL Member
Joined: May 2009
Posts: 96
From: Hamilton, ON
From what I've been told a cooler is highly recommended on the Auto's.
Although, I probably should have put a clutch in mine when I installed my kit, but it's holding up just fine! A clutch is a lot cheaper than a rebuilt tranny though
My install was a breeze only had trouble with the belt because my car doesn't have A/C. I definitely don't think I could go back to stock power...


Member
SL Member
Joined: May 2009
Posts: 96
From: Hamilton, ON
It was about 4-5 hours for me installing it on my echo. That includes a break to go out and get the proper sized belt. It plugs right in to the factory wiring (Same as the 04/05 xb's) no wiring/splicing is required.


Thread
Thread Starter
Forum
Replies
Last Post
ColonelSanders85
Scion tC 1G Forced Induction
3
Dec 9, 2020 09:44 AM
TheRedBox
Scion xA/xB 1st-Gen Drivetrain & Power
31
Dec 2, 2003 04:53 PM
06, 2006, cc, clutch, enterprise, headlights, install, installing, instructions, power, replace, scion, scionlife, supercharger, xb