
Tikibox S/C install


Thread Starter
Senior Member


SL Member
Scion Evolution
Joined: Oct 2004
Posts: 7,067
From: PNW
So... after holding onto it for about 1yr un-installed... I started the process of installing my Greddy S/C.
So great day to start.. .upper 80's here in Seattle/Tacoma... so my father-n-laws garage was about 95+
figured i'd do this over 2-3 days after work I'd spend a couple hours a night putting this thing on.
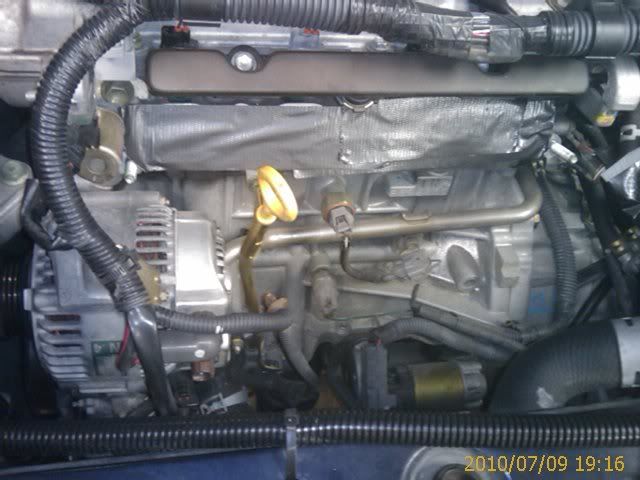
Got the Radiator drained, Fujita Intake removed, throttle body removed, and intake manifold removed before my leg told me it was time to stop.
Throttle body was a pain to get off, directions say to move the ATF dipstick out of the way.. that seemed near impossible since it seems to be a solid tube with a rubber coating.
and the intake manifold was a pain to get off as well.. but i think it was more due to me not getting the radiator hose off that goes over part of it.
tomorrow as long as i don't pass out from the heat, supposed to be 90's outside so garage should be near 100 w/no A/C. I'll work on getting the alt belts loosened and removed removed and start the install process.
does any1 happen to have better pictures than whats on greddy's site for install process?? the ones they have are pretty crappy to say the least.
anyways.. to be continued tomorrow i hope
So great day to start.. .upper 80's here in Seattle/Tacoma... so my father-n-laws garage was about 95+
figured i'd do this over 2-3 days after work I'd spend a couple hours a night putting this thing on.
Got the Radiator drained, Fujita Intake removed, throttle body removed, and intake manifold removed before my leg told me it was time to stop.
Throttle body was a pain to get off, directions say to move the ATF dipstick out of the way.. that seemed near impossible since it seems to be a solid tube with a rubber coating.
and the intake manifold was a pain to get off as well.. but i think it was more due to me not getting the radiator hose off that goes over part of it.
tomorrow as long as i don't pass out from the heat, supposed to be 90's outside so garage should be near 100 w/no A/C. I'll work on getting the alt belts loosened and removed removed and start the install process.
does any1 happen to have better pictures than whats on greddy's site for install process?? the ones they have are pretty crappy to say the least.
anyways.. to be continued tomorrow i hope

Senior Member
SL Member
Joined: May 2008
Posts: 154
From: Alabama
I installed the one on my box.
You are approaching the best part: breaking the bottom alternator bolt loose. You might wanna meditate beforehand. Get ready to cue up the Rocky theme song because you will feel like a champ when you get it loose.
It was suggested to me by Crex149 to remove the passenger side headlight. That would have made things much easier. I was too hasty to remove it during my install.
I also had to remove the front passenger wheel and plastic wheel well to get to some of the pulleys to install the Greddy belt that came with the kit.
Also, the A/C line that runs down by the pulleys will need to be tied back (I used a zip tie) so it doesn't come in contact with the belt.
It's been said before on here but make sure the big harness that runs along the top of the engine that goes to the injectors is pulled out of the way so that the bypass arm on the supercharger doesn't rub the harness. I feel like I could have worded that better.
I didn't take that many pics of the actual install but I can get you pics of it installed if you need them for reference.
Let me know if I can help.
Dennis

Member
Joined: Jun 2009
Posts: 48
From: Springfield, MA
Looking forward to progress pics =) I am debating this over a turbo but I am worried about the xA's bottom end. Are the xB rods the same powdered steel crap as the xA? Also how does the 3 stage switch work? (the blitz has this not sure about the greddy one) does it activate via the throttle? Thanks and best of luck!

Member
SL Member
Joined: May 2009
Posts: 96
From: Hamilton, ON
http://yarisfans.com/forum/default.aspx?g=posts&t=24
I took a couple pics while installing mine and tried explaining the steps. Some were missed especially on the install end but the disassembly is better. It is a little different being an echo, but might help a bit.
I took a couple pics while installing mine and tried explaining the steps. Some were missed especially on the install end but the disassembly is better. It is a little different being an echo, but might help a bit.
Thread Starter
Senior Member
SL Member
Scion Evolution
Joined: Oct 2004
Posts: 7,067
From: PNW
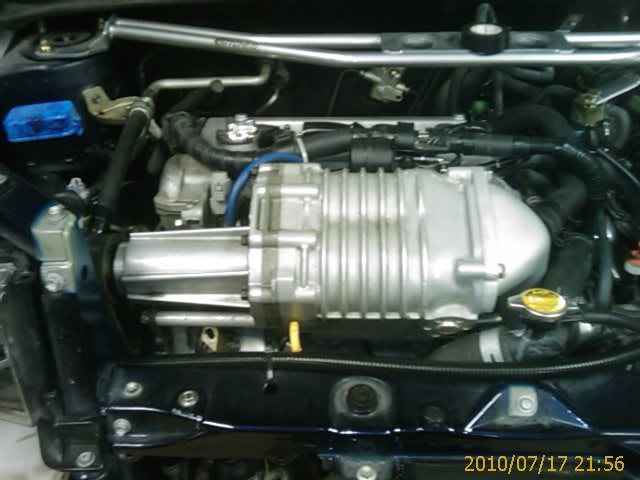
Ok... well that took hella longer than i thought. started about 6-630pm, got done about 1145pm. and i already had most of the dismantling done on wednesday, cept for the alternator!! what a pain that was... first trying to get a socket or wrench down over the bold to losen that up. then to get the ALT is self off.. was a pain.. took about 1hr of randomly beating on it, prying it, wiggling it, rocking it and using the FORCE to try and will it off..
finally it came off with a good yank straight up and bashed my thumb into some bracket and drew blood.. no blood while wrenching guess your doing it wrong!! right??
btw just for the record it was 95-100 in the garage.. lol
also a challenge was trying to bold in the S/C when its already assembled, i believe the directions have you bolt it on in sections..
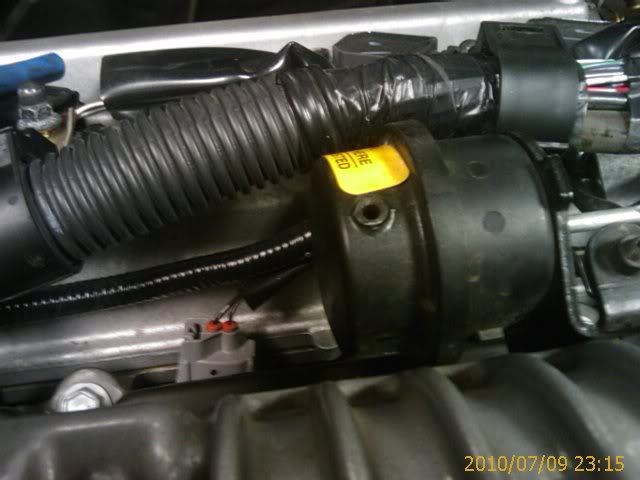
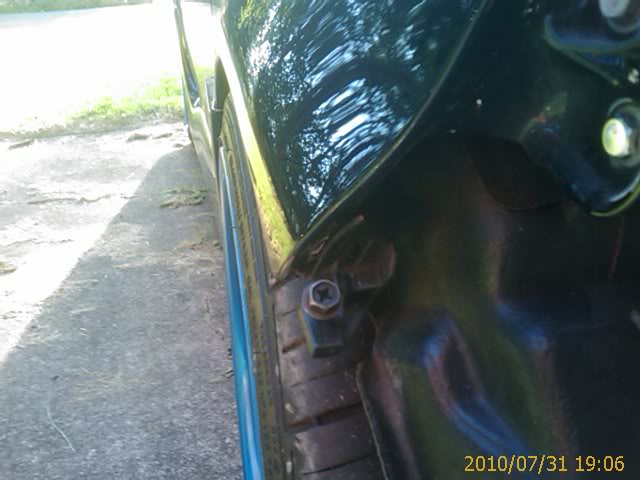
does anyone know if you can order that black thing (pictured below) the part you connect the boost hose to was broken off and still in the blue tube..
we got some epoxy on it and its setting now.. hopefully in the morning it will be good to go... so i can take it to Formula D tomorrow, if not.. it'll just dry/set a little longer.
and as i type this up.. the wife just reallized what i installed... so far the only complaint was... "don't you need interior first??" went over better than i thought... tho maybe it hasn't set in fully yet...
anyways
here are some pic's...
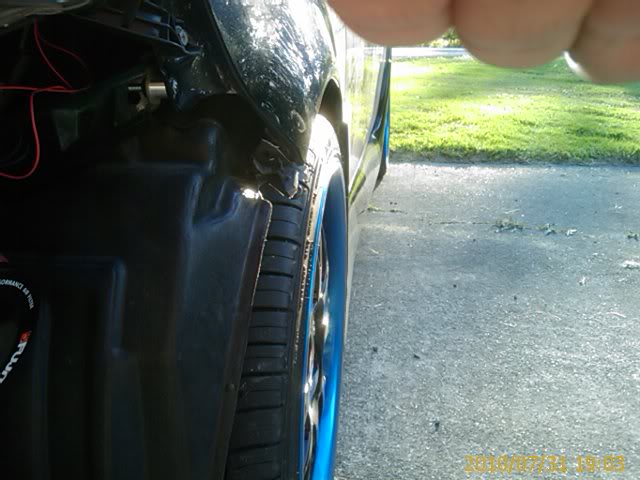
most every thing removed first... cept for the damn ALT.. talk a bout a pain in the butt to remove
ruh-roh... whats this??
broken part
is it good when your making sure hoses are pluged in and you have a extra one (blue in this case) and your holding the free end sayin "where does this go?" then notice the piece it is supposed to connect too is stuck in the hose
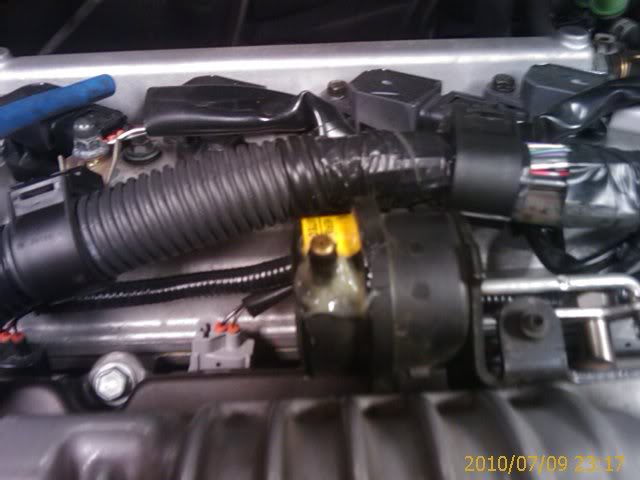
epoxy job.. hope it sets by morning time so can drive it
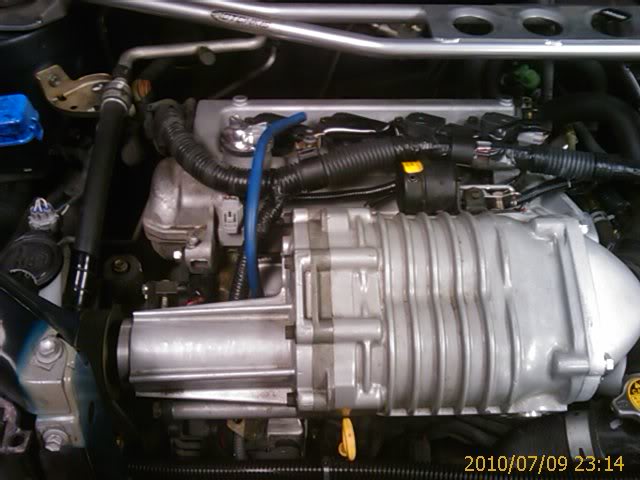
with the exception of that hose being pluged in, got the throttle body on, intake back in, coolant filled up (tossed in a bottle of royal purple coolant additive). E-manage hooked up (tho still need to find a better place than on the floor)
started the car up... nothing blew up, nothing leaked, and best of all no red lights on e-manage and no check engine light.. had it running for about 15min. so hopefully all is good.
finally it came off with a good yank straight up and bashed my thumb into some bracket and drew blood.. no blood while wrenching guess your doing it wrong!! right??
btw just for the record it was 95-100 in the garage.. lol
also a challenge was trying to bold in the S/C when its already assembled, i believe the directions have you bolt it on in sections..
does anyone know if you can order that black thing (pictured below) the part you connect the boost hose to was broken off and still in the blue tube..
we got some epoxy on it and its setting now.. hopefully in the morning it will be good to go... so i can take it to Formula D tomorrow, if not.. it'll just dry/set a little longer.
and as i type this up.. the wife just reallized what i installed... so far the only complaint was... "don't you need interior first??" went over better than i thought... tho maybe it hasn't set in fully yet...
anyways
here are some pic's...
most every thing removed first... cept for the damn ALT.. talk a bout a pain in the butt to remove
ruh-roh... whats this??
broken part
is it good when your making sure hoses are pluged in and you have a extra one (blue in this case) and your holding the free end sayin "where does this go?" then notice the piece it is supposed to connect too is stuck in the hose
epoxy job.. hope it sets by morning time so can drive it
with the exception of that hose being pluged in, got the throttle body on, intake back in, coolant filled up (tossed in a bottle of royal purple coolant additive). E-manage hooked up (tho still need to find a better place than on the floor)
started the car up... nothing blew up, nothing leaked, and best of all no red lights on e-manage and no check engine light.. had it running for about 15min. so hopefully all is good.
Thread Starter
Senior Member
SL Member
Scion Evolution
Joined: Oct 2004
Posts: 7,067
From: PNW
well.. bad news, epoxy still hasn't set and probly wont... good news.. found i can supposedly order a replacement part for under $50... emailed the company but they are closed on sunday... so hopefully monday i'll have some more info
Thread Starter
Senior Member
SL Member
Scion Evolution
Joined: Oct 2004
Posts: 7,067
From: PNW
Got the new bypass actuator Friday. installed it today, haven't started it yet, got to late and had other things to do.. so tomorrow will start it up and see how it sounds
in the middle of a brake job now so cant road test it yet (damn it)
father in law broke out some mid-evil old skool knowledge and used a chissel and small hammer to break the 2 stripped allen head screws out holding it in.

in the middle of a brake job now so cant road test it yet (damn it)
father in law broke out some mid-evil old skool knowledge and used a chissel and small hammer to break the 2 stripped allen head screws out holding it in.
Thread Starter
Senior Member
SL Member
Scion Evolution
Joined: Oct 2004
Posts: 7,067
From: PNW
it still sits... waiting on spacers for my brakes...  ... started the brakes while waiting for the replacement bypass actuator, then found i needed spacers to clear... so spacers have been ordered.. just waiting for them to arrive was supposed to be tuesday i thought.. but wednesday has come and gone and still no spacers
Thread Starter
Senior Member
SL Member
Scion Evolution
Joined: Oct 2004
Posts: 7,067
From: PNW
Well..... after late start, some ibuprofen.. and a run to the parts store...finally got the brakes installed, with a set of H&R 15mm spacers & studs to clear the calipers
bled the brakes, think will need to do again in am.. still felt a bit soft, took it for a quick run up/down the street.... also tested out the S/C...
2 things besides needing to bleed the brakes again... 1) s/c belt squeals... need to figure out how to lessen that.
2) and even more important.... after having your car apart, make sure you at least put the hood latch brace back on... or else when you stomp on the gas
THIS HAPPENS (pic taken after the fact, much more scary when it just flops up while driving)
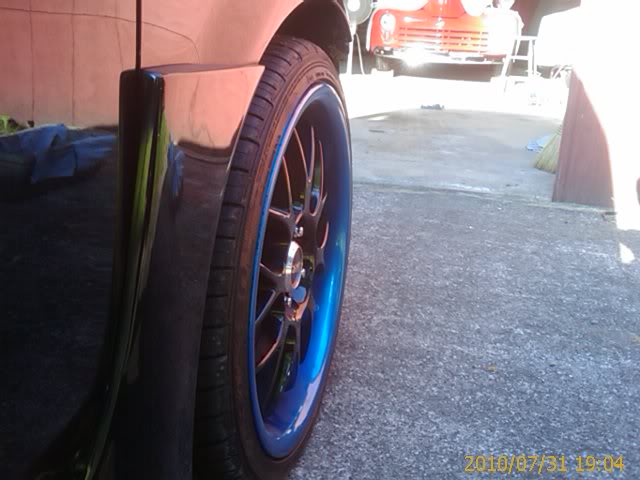
and here are the brakes installed w/spacers
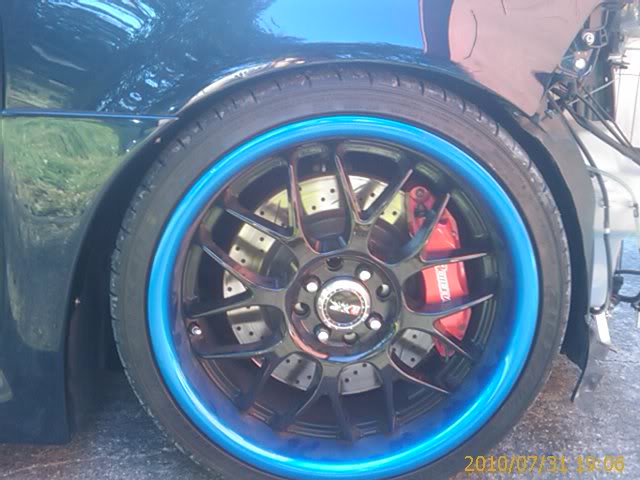
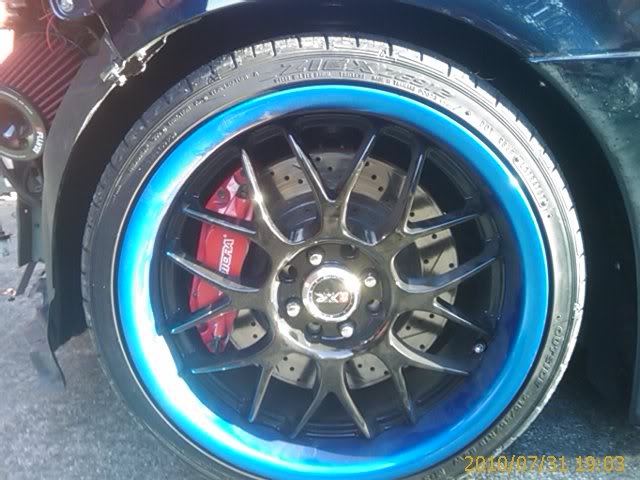
think this sits just perfect imo
So.. yeah... no pic's of the S/C... can only take so many pics of it... and nothing else flashy... lol.... any tips on how to cut down the squealing? i know its gonna make some noise, but more of a whine.. not a belt squeal.
seems to have a lag when jumping on the gas... maybe its still learning, since we have a "smart" ecu... but does seem to get up and go better than before
bled the brakes, think will need to do again in am.. still felt a bit soft, took it for a quick run up/down the street.... also tested out the S/C...
2 things besides needing to bleed the brakes again... 1) s/c belt squeals... need to figure out how to lessen that.
2) and even more important.... after having your car apart, make sure you at least put the hood latch brace back on... or else when you stomp on the gas
THIS HAPPENS (pic taken after the fact, much more scary when it just flops up while driving)
and here are the brakes installed w/spacers
think this sits just perfect imo
So.. yeah... no pic's of the S/C... can only take so many pics of it... and nothing else flashy... lol.... any tips on how to cut down the squealing? i know its gonna make some noise, but more of a whine.. not a belt squeal.
seems to have a lag when jumping on the gas... maybe its still learning, since we have a "smart" ecu... but does seem to get up and go better than before

Senior Member
SL Member
Joined: Apr 2010
Posts: 123
From: Oklahoma City
I know it's a little after the fact, but if you have access to a tap and die set, you could have used a brass fitting from you local auto/hardware store. In case anyone gets in a bind or can't find a replacement part.
Member
SL Member
Joined: May 2009
Posts: 96
From: Hamilton, ON
Just increase the tension on the s/c tensioner, If it's already really tight then you need a new belt. The lag in accel is probably cause by the belt slipping. Brakes look damn good though, it does sit perfect.


Thread
Thread Starter
Forum
Replies
Last Post
ColonelSanders85
Scion tC 1G Forced Induction
3
Dec 9, 2020 09:44 AM
TheRedBox
Scion xA/xB 1st-Gen Drivetrain & Power
31
Dec 2, 2003 04:53 PM