
Carputer: WIP

Thread Starter
Senior Member
Fail, INC
SL Member
Scinergy
Joined: Apr 2008
Posts: 956
From: Kansas City, MO
Interesting... I found something for those looking into a carputer of their own.
http://cgi.ebay.com/ws/eBayISAPI.dll...=263602_263622
Essentially, it's the same case, upgraded motherboard, same wattage DC-DC power supply, no operating system with half the size hard drive... possibly slower speed. The motherboard is the Intel D510MO, it uses the dual core Atom processor. Plenty of power for full H.264 video. It's got everything you need in the computer element. From there, you just need the touch screen and any other modules you want to add.
How I would start the build, look into the monitor first. From there, you will know the rest of the hardware you need. You can get monitors as cheap as 160 if you look around.
If you want to build your own, the three major elements you need are the motherboard, dc-dc power supply, computer case. The other components (memory, hard drive, monitor, etc) may be necessary, but the primary three will get you started.
Thread Starter
Senior Member
Fail, INC
SL Member
Scinergy
Joined: Apr 2008
Posts: 956
From: Kansas City, MO
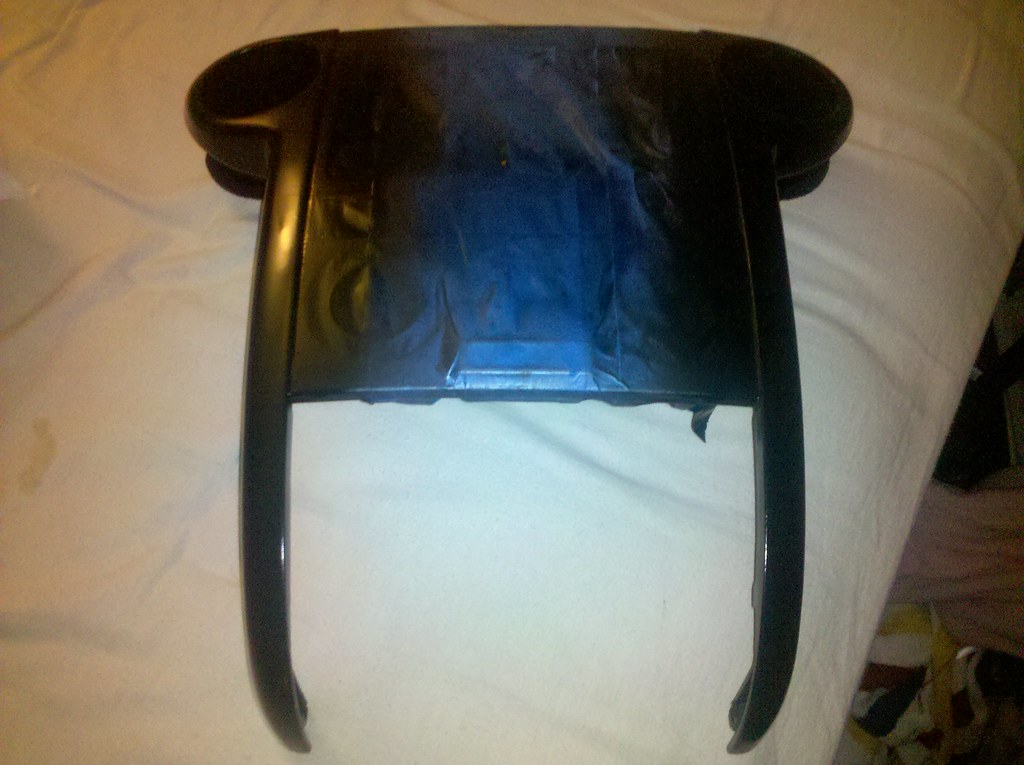
So here's an update on the fabbing process. This is my first time working with fiberglass so keep that in mind. I've done tons of sanding trying to get the area smooth but it looks like I might have to add another layer.
Any pointers on how I could clean this up would be great.
Any pointers on how I could clean this up would be great.


Senior Member

Scikotics
SL Member
Joined: Dec 2006
Posts: 2,476
From: Patuxent River, MD
Just FYI, I did a similar fill plate in my dash. Instead of using all fiberglass, I used a dremel with a cut-off bit and made a plate out of sheet steel. Only had to fill the seams then.
Thread Starter
Senior Member
Fail, INC
SL Member
Scinergy
Joined: Apr 2008
Posts: 956
From: Kansas City, MO
Thanks Don... I'll go see what I can find. Going to try and finish this project (installed) over the next two weeks. This means gutting the car again to achieve what I'm after... but it should be awesome to have it all in place finally.
I've decided to nix the idea of removing the HVAC due to the cost and time. The groundwork for the system software is written, so perhaps a mod to be done later.
I've decided to nix the idea of removing the HVAC due to the cost and time. The groundwork for the system software is written, so perhaps a mod to be done later.
Thread Starter
Senior Member
Fail, INC
SL Member
Scinergy
Joined: Apr 2008
Posts: 956
From: Kansas City, MO
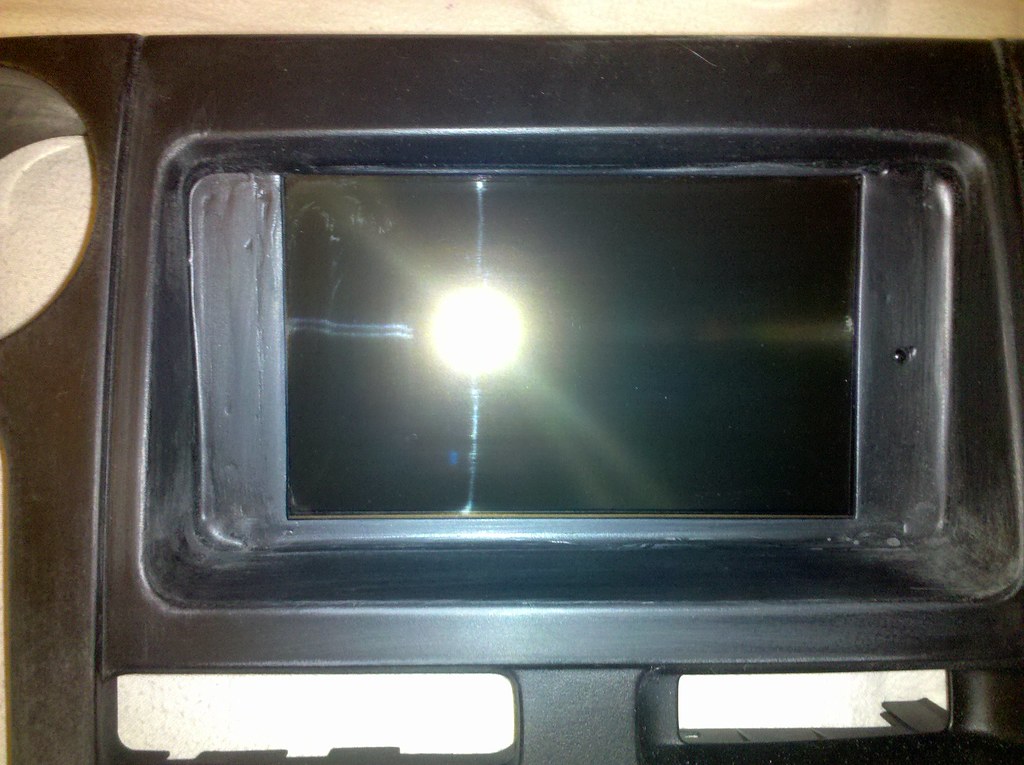
I used a plate for the monitor mount... All I have left is the final touches to make everything look finished.
Thread Starter
Senior Member
Fail, INC
SL Member
Scinergy
Joined: Apr 2008
Posts: 956
From: Kansas City, MO
Second layer is on and sanded. Did a quick wet coat to see how well it worked out... Very smooth, nearly flat. Time for another round of 80 grit shaping then it's on to the full on 2000 grit wet.
Thread Starter
Senior Member
Fail, INC
SL Member
Scinergy
Joined: Apr 2008
Posts: 956
From: Kansas City, MO
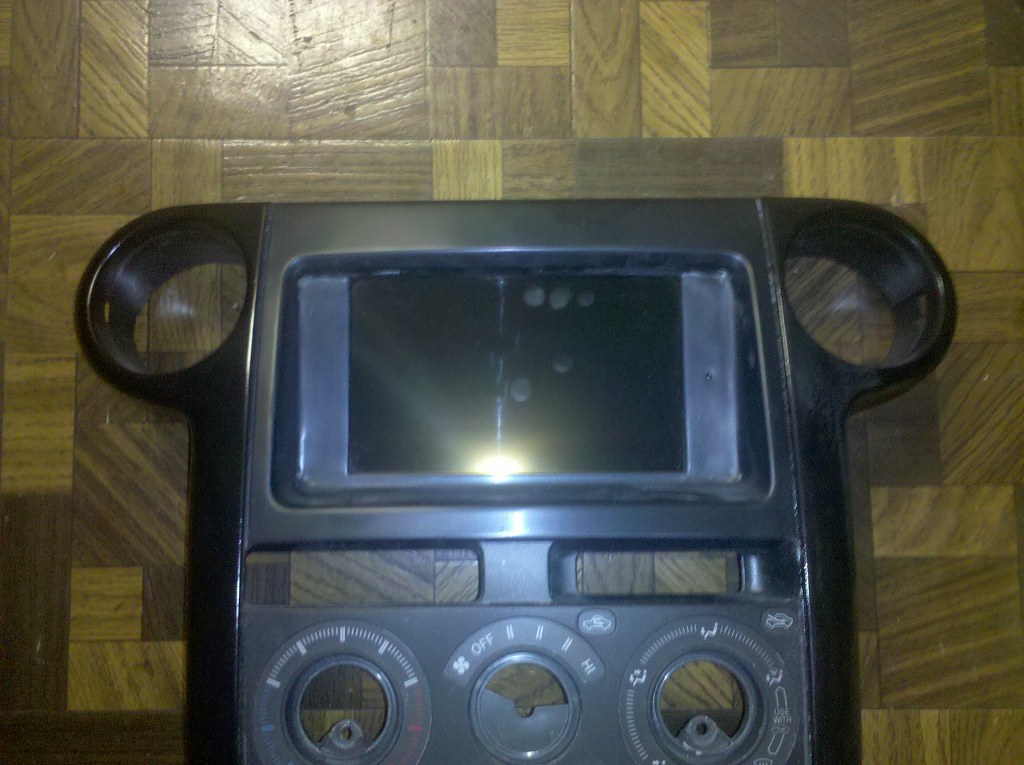
So far I have about five coats of paint and three coats of clear on the side pieces. I can make out very clean details in the reflection on the side parts (the matte silver area). I'm starting to run out of sandpaper. The center section is going to remain an oem matte black though.
Thread Starter
Senior Member
Fail, INC
SL Member
Scinergy
Joined: Apr 2008
Posts: 956
From: Kansas City, MO
Out of curiousity... does anyone have a template made of the flat surface area in the back of the box? I'd like to add a sheet of MDF to cover the floor. Obviously there will be a cover over the top of that.
Thread Starter
Senior Member
Fail, INC
SL Member
Scinergy
Joined: Apr 2008
Posts: 956
From: Kansas City, MO
Stress test on the carputer is complete. I pulled the plug on the fans and ran a video loop for a few hours. The highest temp on the system after four hours of solid running was 68C on the video chipset. Safety shutdown is set for 75C which is under all the operating temp restrictions.
You got pm(s)'d don.
You got pm(s)'d don.

Member
Joined: Mar 2009
Posts: 22
From: Wi
i do not have a template of the area u r requesting but when i mdf'ed under my false floor in the rear i found it wasnt difficult to make one in just a few minutes with some cardboard and some tape....i cut all the edges and taped em together to get a real nice tight fit..i have 2 amps,electronic crossover and my carputer installed in a metal PSP suitcase mounted on top of the mdf...also u will have to make a brace in the middle to support weight on top of the false floor...i made a 5 3/4 inch block on the top middle and bottom middle to support where the two sides meet in the middle

Thread Starter
Senior Member
Fail, INC
SL Member
Scinergy
Joined: Apr 2008
Posts: 956
From: Kansas City, MO
Thanks Smitty... good information to know. I'm getting ready to start gutting the car once again. The amps and all of the carputer components will be going under the floor. The only additional component I'm adding is the powered USB hub which will be accessible from one of the two removable panels in the back.

Member
SL Member
Joined: May 2006
Posts: 56
From: seattle, wa
Holy crap I can't wait for it to be done. Are you going to tally up the parts and/or where you got them so I can start amassing? I know I can find them fairly easily, but I always enjoy when people just say where they got stuff because you never know if you're using the best places.
I know I can find them fairly easily, but I always enjoy when people just say where they got stuff because you never know if you're using the best places.
Thread Starter
Senior Member
Fail, INC
SL Member
Scinergy
Joined: Apr 2008
Posts: 956
From: Kansas City, MO
Holy crap I can't wait for it to be done. Are you going to tally up the parts and/or where you got them so I can start amassing? I know I can find them fairly easily, but I always enjoy when people just say where they got stuff because you never know if you're using the best places.
I know I can find them fairly easily, but I always enjoy when people just say where they got stuff because you never know if you're using the best places.Computer Equipment (My current build)
- Intel D945GCLF2 (discontinued)
- Corsair 2GB (short height)
- VoomPC2 Case (modification needed on hard drive tray)
- M2-ATX-HV DC-DC Power Supply
- 300GB Hitachi 7200RPM drive
- Intel BOXD510MO (http://www.newegg.com/Product/Produc...82E16813121399)
- Corsair 2GB (short height)
- VoomPC2 Case (http://www.logicsupply.com/products/voompc_2)
- M2-ATX-HV DC-DC Power Supply (http://store.mp3car.com/M2_ATX_HV_14..._p/pwr-027.htm)
- Any SATA 2.5" drive, high cache to help with writes/reads
- Zotac NM10-B-E-ION(http://www.newegg.com/Product/Produc...82E16813500055)
- Any Memory (recommended 2GB+)
- Micro ATX case, modified (needs at least one open half height slot for video card)
- DSATX DC-DC Power Supply (http://store.mp3car.com/Mp3Car_DSATX_p/pwr-023.htm)
- SSD Hard drive for speed
This is greatly dependant on what you are wanting more than anything. I'm using the guts of a Lilliput EYB-701-NP with a Bybyte doubledin frame that I glassed into the center bezel. I gutted the Lilliput as the full monitor would not fit into the dash and look OEM. I took the Bybyte doubledin frame and found it would not work either as the frame was too big. So some cutting and dremeling was done to the frame and then I glassed it in since I was not able to find a way to mount it in dash. There are several screens to choose from so I'm not going to recommend one over the other. Have a look through the monitors and touchscreens available at the MP3car shop (http://store.mp3car.com/Monitors_and...reens_s/21.htm).
Extras so far (Due to the mounting location, I had to do the following)
- 10' USB Extension Cable
- 10' VGA Extension Cable
- Spool of 10AWG stranded Black (used about 3' total so far)
- Spool of 10AWG stranded Red (about 30' used, one power switched, one power constant)
- DC Powered USB hub
The current software offerings are quite large. If you want the fastest possible cold boot times, you should use the Linux distribution OpenICE. Even on my modest little set up, the boot time to audio is only 18s (highly modified). If you have a good battery (Gel Cell type) and a secondary battery circuit for powering the carputer while the car is on ACC or if the carputer is on S3 (sleep), then you can get near instant audio going in about 5s. If you need to go the Windows route, the open frontend platform is called RideRunner. If you want a closed source front end then Centrafuse Auto would be good but you are looking at 80-130 smackers. Centrafuse markets to OEM builders of existing cars. They custom tailor graphics and operations for some of the NAV systems that are already OEM.
Additional Information
I've done a few extra things for my system to customize it the way I want it to work.
- External USB Sound Card (better overall sound and DSP)
- Sirius/XM tuner (MJS-SC-C1 bridge)
- External USB Wifi (Linksys WUSB600N)
- Dashcam (Logitech Quickcam Pro 9000)
- GPS (GlobalSAT BU-353 receiver)
- Custom glow controller (not complete)
The carputer does not integrate very easily into an existing radio for the onboard amp. It can be done through the use of AUX-IN and either relocating the aftermarket head unit or changing the location of where you put the touchscreen. I'm using external amplifiers myself. Also, if you go through this post very carefully you will notice one thing missing from the entire build... I'm not going to have an FM/AM tuner.
The best information I've found for any research on building your own carputer is over at mp3car.com forums. There are current builds, recommended systems for specific tasks, suggested software tweaks etc. It's where I have gathered a great majority of the information I used to build my own. I'd be interested in any others who want to chime in for recommendations of their own carputers they have.