
Energy Suspension End Link Bushings installed!!!!

Senior Member

SL Member
Joined: Nov 2005
Posts: 1,527
From: Surf City SoCal
I did mine last night. Here is a copy of the DIY I did for my club, Scinergy So Cal:
The sway bar bushing that come standard on the xB leave more than a little to be desired. They are small and compact easily leaving slack and play in the sway bar end links. This DIY will show you how to replace the stock bushings with new and better polyurethane bushings from Energy Suspension.
PLEASE READ AND FOLLOW ALL DIRECTIONS CAREFULLY. I ACCEPT NO RESPONSIBILITY IF YOU SCREW UP YOUR CAR. IF YOU HAVE ANY QUESTIONS...ASK ME!
You will need the following tools to complete this DIY:
1. 10 mm wrench
2. 12 mm wrench
3. 12 mm deep socket
4. 9/16" wrench
5. 9/16" deep socket
6. Energy Suspension Performance Sway Bar End Link Bushings
(part no. 9.8105R) Available at Auto Zone among other places
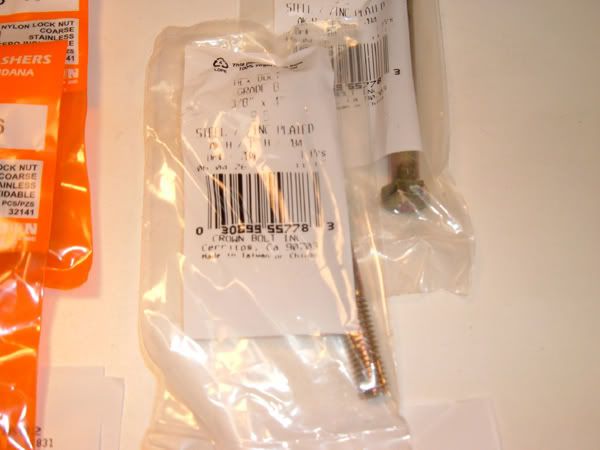
7. (2) Grade 8 bolts size 3/8" X 4"
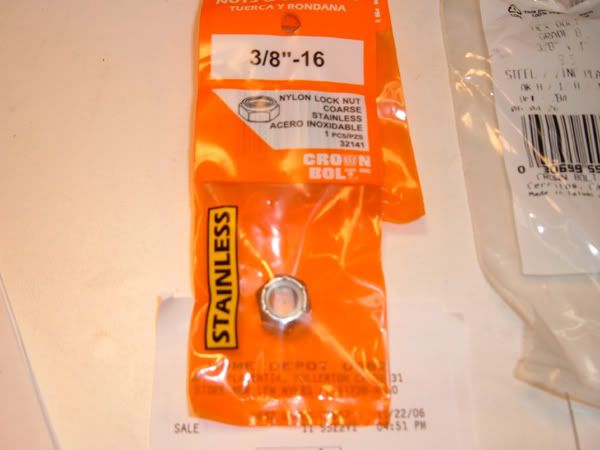
8. (2) Nylon Lock Nuts size 3/8"
9. Lubricating grease
First either jack up your vehicle or use ramps
If using a jack on your vehicle always use a jack stand before getting under it.
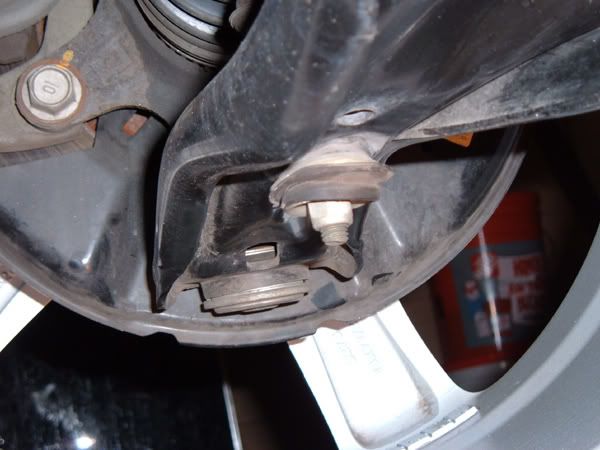
Locate the stock sway bar end link assembly and notice the condition of the bushings. (these only have 18,000 miles on them)
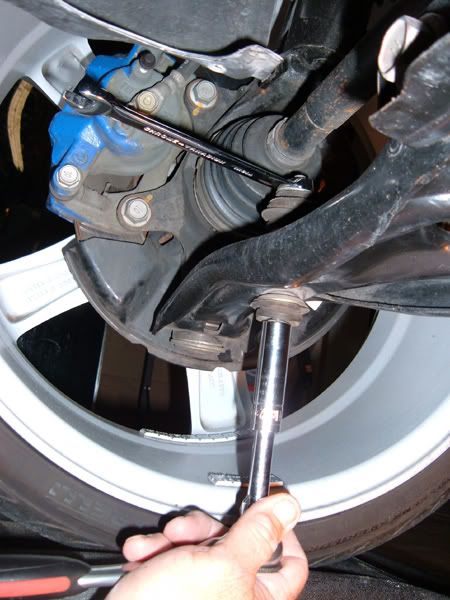
Now remove the stock bushings by loosening the two 14mm nuts. You can do this easily by holding the top nut with a 14mm open end wrench and turning the bottom nut with a 14mm deep socket.
To remove the top nut, use a 10mm open end wrench and hold the stock end link bolt while turning the top nut with a 14mm open end wrench.
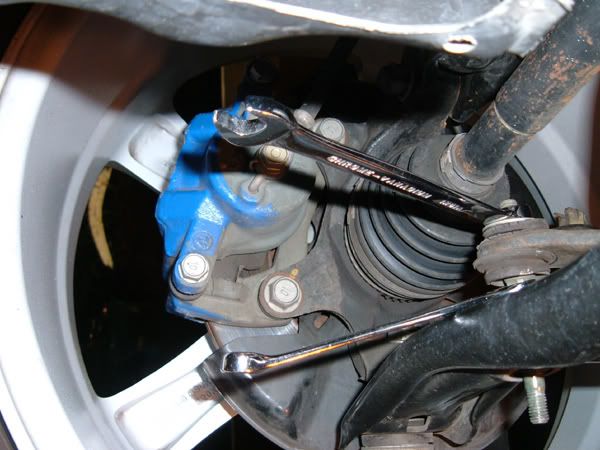
(You can also use a pair of vise grips to hold the stock bolt while turning the top nut but I found this way to be easier)
Unbolt both sides of the sway bar end links to ease in the removal of the bolts. I did not remove the wheels when I replaced mine.
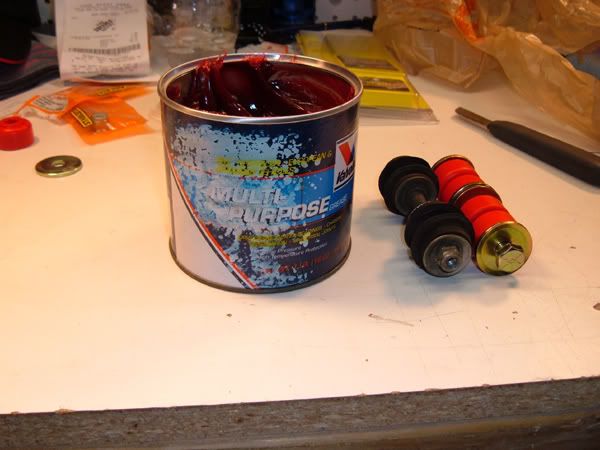
Here are the replacement end link bushings from Energy Suspension:

I purchased them from Auto Zone for $13.00. You can find them at other auto parts stores and on line as well.
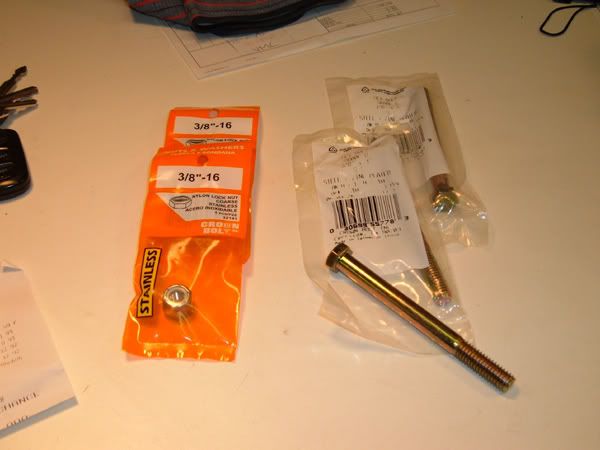
Here are the replacement bolts and nuts. I purchased these at Home Depot. You can find them at any home improvement store or hardware store.
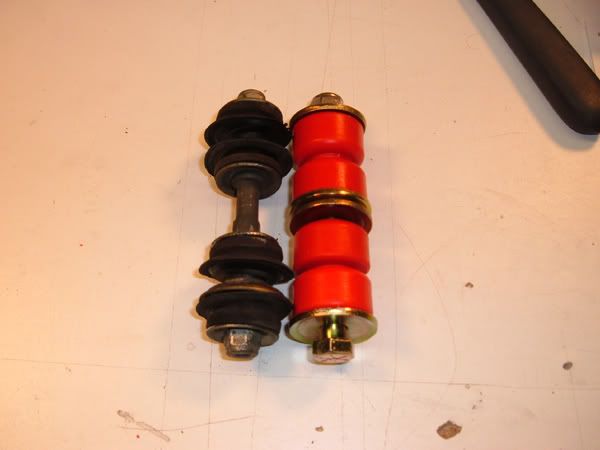
Notice the difference in size between the stock bushings and the replacement Energy Suspension bushings.
Before reinstalling the bolts, nuts and bushings in the end link, you may want to apply a small amount of grease to the bushings to prevent any squeaking noise where the bushings rub against the end links.
All greased up and ready to go
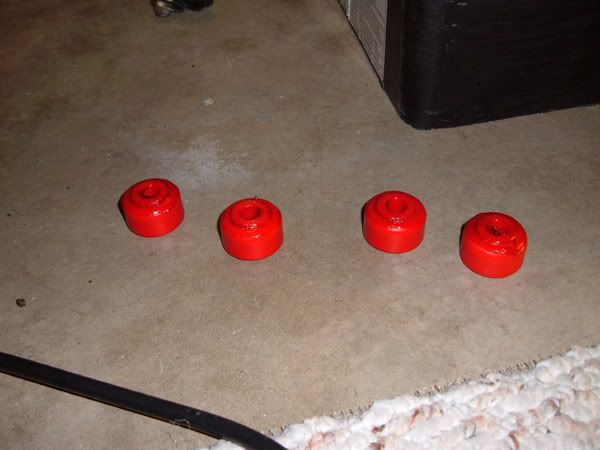
The installation is just the reverse of the removal. Place the new bolt in from the top with a washer, a bushing...the sway bar...a bushing, a washer, a washer, a bushing, the end link, a bushing, a washer and the nylon lock nut.
Tighten the lower nylon lock nut by using an open end 9/16" wrench on the top of the bolt and a 9/16" deep socket on the bottom. Tighten the bolt until the bushing starts to compress just a little.
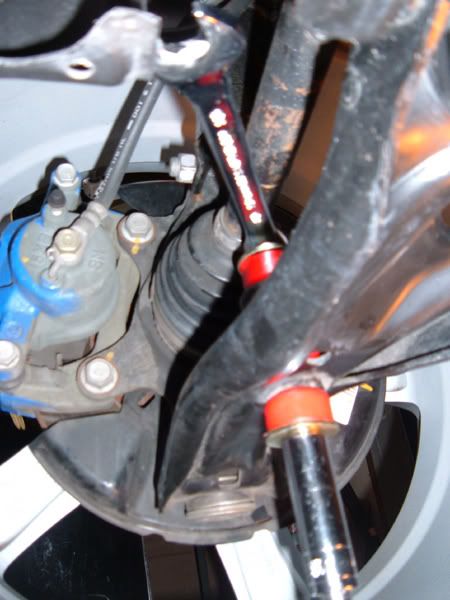
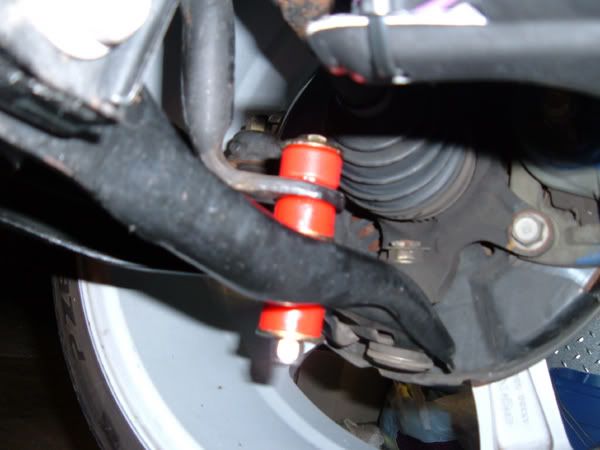
Here is the end result, a much stronger set of sway bar end link bushings.
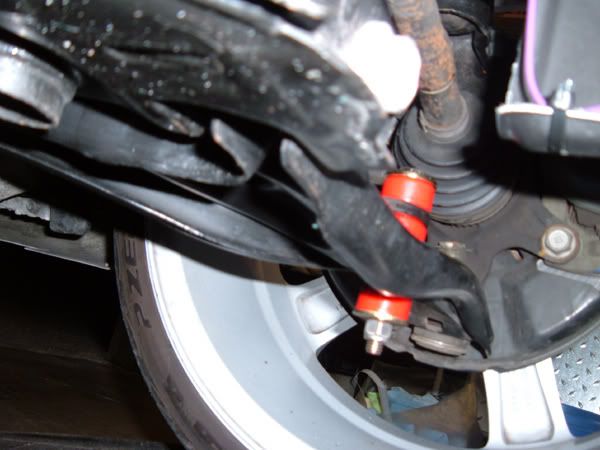
The total cost of the modification was less than $17.00. I found on the test drive that the front end felt much more secure and there was less tracking on the grooves in the road. This is how the front suspension should have felt from day one in my opinion.
If you have any questions regarding this DIY feel free to send me a PM.
The sway bar bushing that come standard on the xB leave more than a little to be desired. They are small and compact easily leaving slack and play in the sway bar end links. This DIY will show you how to replace the stock bushings with new and better polyurethane bushings from Energy Suspension.
PLEASE READ AND FOLLOW ALL DIRECTIONS CAREFULLY. I ACCEPT NO RESPONSIBILITY IF YOU SCREW UP YOUR CAR. IF YOU HAVE ANY QUESTIONS...ASK ME!
You will need the following tools to complete this DIY:
1. 10 mm wrench
2. 12 mm wrench
3. 12 mm deep socket
4. 9/16" wrench
5. 9/16" deep socket
6. Energy Suspension Performance Sway Bar End Link Bushings
(part no. 9.8105R) Available at Auto Zone among other places
7. (2) Grade 8 bolts size 3/8" X 4"
8. (2) Nylon Lock Nuts size 3/8"
9. Lubricating grease
First either jack up your vehicle or use ramps
If using a jack on your vehicle always use a jack stand before getting under it.
Locate the stock sway bar end link assembly and notice the condition of the bushings. (these only have 18,000 miles on them)
Now remove the stock bushings by loosening the two 14mm nuts. You can do this easily by holding the top nut with a 14mm open end wrench and turning the bottom nut with a 14mm deep socket.
To remove the top nut, use a 10mm open end wrench and hold the stock end link bolt while turning the top nut with a 14mm open end wrench.
(You can also use a pair of vise grips to hold the stock bolt while turning the top nut but I found this way to be easier)
Unbolt both sides of the sway bar end links to ease in the removal of the bolts. I did not remove the wheels when I replaced mine.
Here are the replacement end link bushings from Energy Suspension:
I purchased them from Auto Zone for $13.00. You can find them at other auto parts stores and on line as well.
Here are the replacement bolts and nuts. I purchased these at Home Depot. You can find them at any home improvement store or hardware store.
Notice the difference in size between the stock bushings and the replacement Energy Suspension bushings.
Before reinstalling the bolts, nuts and bushings in the end link, you may want to apply a small amount of grease to the bushings to prevent any squeaking noise where the bushings rub against the end links.
All greased up and ready to go
The installation is just the reverse of the removal. Place the new bolt in from the top with a washer, a bushing...the sway bar...a bushing, a washer, a washer, a bushing, the end link, a bushing, a washer and the nylon lock nut.
Tighten the lower nylon lock nut by using an open end 9/16" wrench on the top of the bolt and a 9/16" deep socket on the bottom. Tighten the bolt until the bushing starts to compress just a little.
Here is the end result, a much stronger set of sway bar end link bushings.
The total cost of the modification was less than $17.00. I found on the test drive that the front end felt much more secure and there was less tracking on the grooves in the road. This is how the front suspension should have felt from day one in my opinion.
If you have any questions regarding this DIY feel free to send me a PM.
Junior Member
Joined: Oct 2006
Posts: 7
From: marysville, ca
Very nice pics. I wasn't able to get the bolt to come in from the top like you. Very easy to put the bolt up from the bottom. And I used a channel lock (from rear) to squeeze the bar closer to the frame.  this was on the second side I attatched, greasy fingers beware !


Senior Member
SL Member
Joined: Nov 2005
Posts: 1,527
From: Surf City SoCal
I noticed upon further inspection that the nylon lock nuts I purchased were not Grade 8. I picked up a 3/8" Grade 8 nut for each bolt and put them on, then added the nylon lock nut after that. I think this will be a more secure solution if you are not able to find a Grade 8 nylon lock nut.


Senior Member
SL Member
Joined: Sep 2005
Posts: 973
From: New Hampshire
in tototal this has cost me about $20 but i live in a different state once i get it installed well see. should provide a nice improvent for the price i'm guessing. low cost mods are great.

Senior Member
SL Member
Team ScioNRG
Joined: Nov 2004
Posts: 409
From: South Jersey
Wow! I just did this mod. What a difference! I have 27K on my car and the stock bushing were little rubber pancakes. Probably the best $15 mod out there.
Thanks for the great write up!
Thanks for the great write up!

Junior Member
Joined: Dec 2006
Posts: 2
I didn't see this anywhere else - thought you guys might really be interested as right now you're really just stuck with Universal bushings.
Energy Suspension is looking for Scions for R&D! Check it out here:
http://www.energysuspension.com/pages/r&d4you.html
Energy Suspension is looking for Scions for R&D! Check it out here:
http://www.energysuspension.com/pages/r&d4you.html


Senior Member
SL Member
Joined: Dec 2003
Posts: 232
From: San Diego, CA
Got around to doing this finally and I have a few comments to add....
Firstly, this mod was not as easy at it looked...At least not with the car lowered. Not difficult, but more cussing than I expected. Those bushings are super slippery when lubricated!
Anyhow, I used a 3/8" x 4"L, grade 8, coarse thread bolt like most. To mate with this bolt, you should use at the very least a grade C, nylock nut. I have noticed that some people have not been doing this. With a plain (grade A, unmarked) nylock nut, the threads on the nut would strip before the grade 8 bolt gave away. This defeats the purpose of using the high strength grade 8 bolt. Note that these grade C nuts can be found at Lowes and are pretty expensive (Home Depot does not have these nylock nuts in our area). I would check a Harley dealer next time as they are usually a good source for nylock hardware (shaking and all). Also note that coarse threads are typically recommended on suspension parts as the threads are less suseptable to damage.
The other thing to add is that I reused the lower bushing cup that came with the stock bushings. I think that this should be reused as the lower bushing has very high loading (local pressure) without it. The bushing cup spreads the force over a larger area. You can see that some have used (see it above the lower bushing in Echo B's picture on page 2 of this thread).
Senior Member
SL Member
Joined: Nov 2005
Posts: 1,527
From: Surf City SoCal
Originally Posted by jomo
Got around to doing this finally and I have a few comments to add....
Firstly, this mod was not as easy at it looked...At least not with the car lowered. Not difficult, but more cussing than I expected. Those bushings are super slippery when lubricated!
Anyhow, I used a 3/8" x 4"L, grade 8, coarse thread bolt like most. To mate with this bolt, you should use at the very least a grade C, nylock nut. I have noticed that some people have not been doing this. With a plain (grade A, unmarked) nylock nut, the threads on the nut would strip before the grade 8 bolt gave away. This defeats the purpose of using the high strength grade 8 bolt. Note that these grade C nuts can be found at Lowes and are pretty expensive (Home Depot does not have these nylock nuts in our area). I would check a Harley dealer next time as they are usually a good source for nylock hardware (shaking and all). Also note that coarse threads are typically recommended on suspension parts as the threads are less suseptable to damage.
The other thing to add is that I reused the lower bushing cup that came with the stock bushings. I think that this should be reused as the lower bushing has very high loading (local pressure) without it. The bushing cup spreads the force over a larger area. You can see that some have used (see it above the lower bushing in Echo B's picture on page 2 of this thread).
Firstly, this mod was not as easy at it looked...At least not with the car lowered. Not difficult, but more cussing than I expected. Those bushings are super slippery when lubricated!
Anyhow, I used a 3/8" x 4"L, grade 8, coarse thread bolt like most. To mate with this bolt, you should use at the very least a grade C, nylock nut. I have noticed that some people have not been doing this. With a plain (grade A, unmarked) nylock nut, the threads on the nut would strip before the grade 8 bolt gave away. This defeats the purpose of using the high strength grade 8 bolt. Note that these grade C nuts can be found at Lowes and are pretty expensive (Home Depot does not have these nylock nuts in our area). I would check a Harley dealer next time as they are usually a good source for nylock hardware (shaking and all). Also note that coarse threads are typically recommended on suspension parts as the threads are less suseptable to damage.
The other thing to add is that I reused the lower bushing cup that came with the stock bushings. I think that this should be reused as the lower bushing has very high loading (local pressure) without it. The bushing cup spreads the force over a larger area. You can see that some have used (see it above the lower bushing in Echo B's picture on page 2 of this thread).

Senior Member
SL Member
Joined: Nov 2005
Posts: 1,282
From: SoCal
Just did mine today! Easy mod, took way less than an hour, going slow. Well worth the $$.
My .02
Someone mentioned that they could not get the bolts in from the top. I used a jack under the center of the car. Jacking higher/lower helped install the bolt and bushings as it changes the distance between the drive shaft, A-arm and sway bar.
Also, I used grade 8 nuts-two per side-as jam nuts. Red locktite also was used. I tightened it up until about 1/8" of bolt stuck out past the last nut.
Some posters said that their ride improved. I'm with them. Seems like some of the harshness over ruts/transitions and ripples is lessened. I attribute this to much more cushioning (1/4"? vs 3/4"+ each) due to the thicker bushings.
Finally, thanks to all who posted their DIY, comments and p/ns!
Senior Member
SL Member
Joined: Dec 2003
Posts: 232
From: San Diego, CA
First hard corner with the new bushings and I have to say that understeer is back. These bushings certainly bring the front sway bar into action earlier and a little stronger. Steering seems to feel more direct as well. Unfortunately, if you had a pretty balanced setup (like I did), they can add understeer. Looks like I'm going to have to add some front camber to get back some front to rear balance. I guess it is all for the good in the end....


Senior Member
SL Member
Team ScioNRG
Joined: Nov 2004
Posts: 409
From: South Jersey
Originally Posted by jomo
First hard corner with the new bushings and I have to say that understeer is back.
Senior Member
SL Member
Joined: Dec 2003
Posts: 232
From: San Diego, CA
Originally Posted by Epitrochoid
Originally Posted by jomo
First hard corner with the new bushings and I have to say that understeer is back.
I have a progressive rear sway. I have a corner I hit hard every evening after work. Before the mod, it was all four wheels sliding in unison. Fun... After the mod, the front was plowing a bit. Nothing serious, it's just that I have to get a little more front grip. I figure the easiest thing to do is to add a little negative camber up front. The end result of all this should be higher limits than what I had before...This is good.

Senior Member
SL Member
Joined: Aug 2006
Posts: 194
From: St Petersburg, FL
If you want more suspension upgrades, R&D of energy suspension is looking for our cars(xA,xB,tC). this is one mod, imagine a master set for us. But since i'm from PR, i can't leave my xB with them. But if you don't trust me:
http://www.energysuspension.com/pages/r&d4you.html
http://www.energysuspension.com/pages/r&d4you.html