*DIY* - Tail dissassembly and Redout... yes, yet another way


 06-14-2005, 02:51 PM
#22
Member
SL Member
Join Date: Feb 2005
Location: Seattle, WA
Posts: 60
Nice! The pics really helped. Thanks Sauce! I didn't cut my tabs and was able to take mine apart without any cracks. Got mine masked and painted last night. I should finish up tonight. Maybe pics tomorrow.

 06-16-2005, 03:25 AM
#25
Member
SL Member
Join Date: Feb 2005
Location: Seattle, WA
Posts: 60
I got another can of black paint and I'm working on finishing the housing up tonight. Lenses are done though. Check them out.

I used Red and Orange 'Krylon Stained Glass Color' (I ordered it from a place online since I couldn't find it locally). The red will probably will look even darker when assembled in my Max2k style black painted housing.
...now to distract myself so I'm not tempted to re-assemble the lights before the paint is completely dry.
06-17-2005, 12:57 AM
#26
Member
SL Member
Join Date: Feb 2005
Location: Seattle, WA
Posts: 60
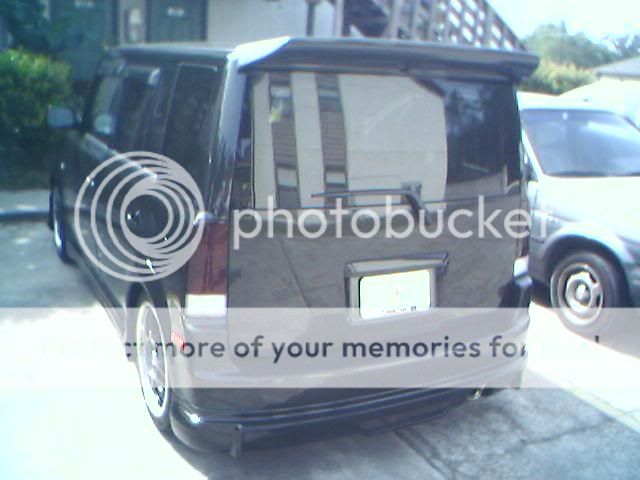
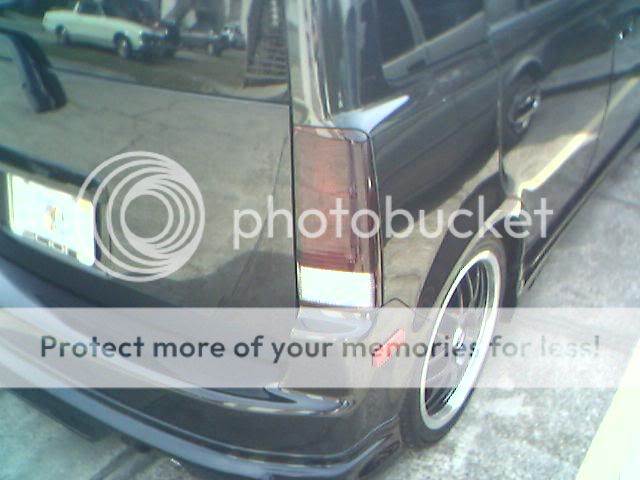
Finally finished and installed!!
Lights off:

All on (...sorta, not full brakelight intensity and I think my timing was a little off trying to catch the turn signal):

Full view:

The orange part shows up a little more than it does in the top pic but overall, it has that nice dark almost smoked look to it. I'm pleased with the results. Next, I think I'll get the BlueBatmobile smoked overlays for the rear bumper sidemarkers.
Thanks again for your tutorial, it gave me the courage to try again after cracking one of my lenses.
Lights off:
All on (...sorta, not full brakelight intensity and I think my timing was a little off trying to catch the turn signal):
Full view:
The orange part shows up a little more than it does in the top pic but overall, it has that nice dark almost smoked look to it. I'm pleased with the results. Next, I think I'll get the BlueBatmobile smoked overlays for the rear bumper sidemarkers.
Thanks again for your tutorial, it gave me the courage to try again after cracking one of my lenses.
02-05-2006, 03:25 AM
#28
Senior Member
SL Member
Team ScioNRG

Join Date: Feb 2004
Location: Elmira, NY
Posts: 2,140
Originally Posted by Max2k
The redout ...looks better, so I would reccomend using the VHT tint that this guy used.
 04-20-2006, 03:11 AM
#30
Senior Member
SL Member

Join Date: Oct 2005
Location: Manassas, Virginia
Posts: 120
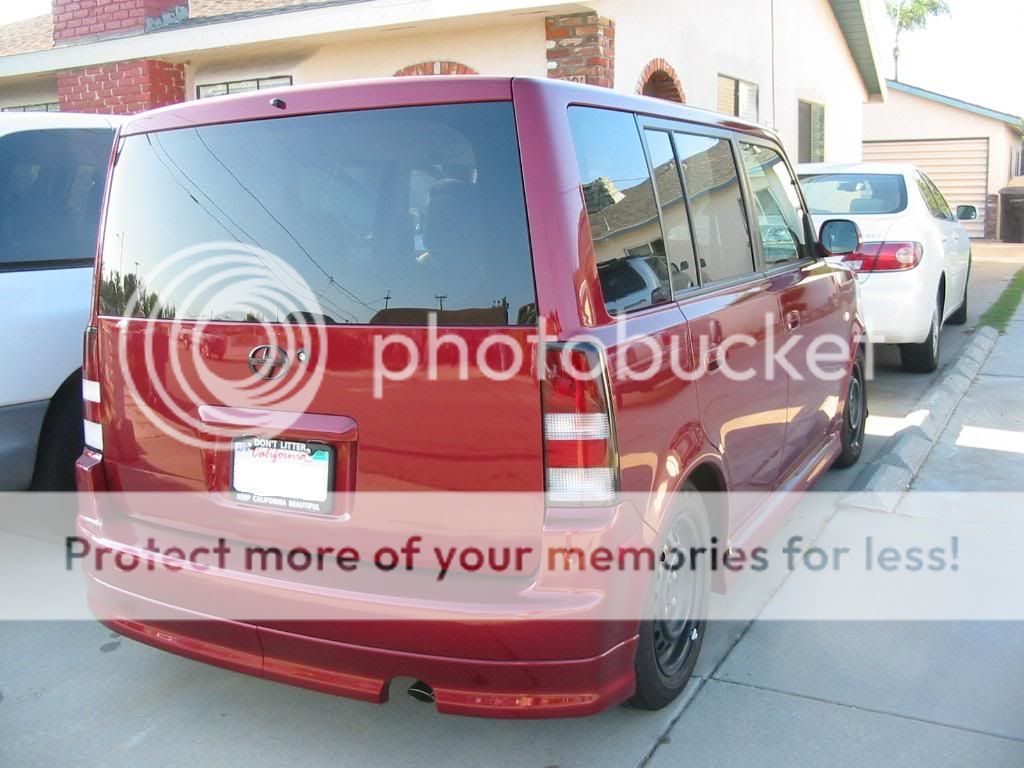
Here is my version of "redout" tails. They came out EXCELLENT. The lights look great at night. I'm using the stock bulbs but the brake light has the red cover removed. The lights are a nice, cherry red. No hint of pink at night time at all.
Here are pics. Enjoy.
Here's a decent side shot.

Here is a comparsion of the stock vs. my version of the "redout".

Here's a nice rear-end shot.

And finally a good, artsy angle.

Here are pics. Enjoy.
Here's a decent side shot.
Here is a comparsion of the stock vs. my version of the "redout".
Here's a nice rear-end shot.
And finally a good, artsy angle.
 06-14-2006, 05:50 PM
#33
Senior Member
SL Member

Join Date: Jun 2004
Location: USA
Posts: 108
I had obtained an extra set of stock tail lights from a friend that used to work at a local dealership. He said they just threw away the stock ones when someone got the upgrades there, so he saved them for me....
Long story short, I disassembled them in the middle of winter, and let them sit till about a month ago. I used a candy apple red transparent spray, and painted the inside of the lenses. Well, it looks pretty good so far, except for 1 little finger print smudge I made when I accidentally touched the paint when it was drying... That will be easy to fix. I also painted the housings black, with the hopes it will match the car ok. I masked off the silver part of the inside of the housing.
THEN, I later realized that in my haste, I neglected to mask off a portion of the lens for the reverse light. So, basically, I have a COMPLETLY red tail lense... I am hoping that I might be able to use SOMETHING to remove the paint from that part. If that won't work, how hard would it be to wire up a second set of reverse lights in the bumper?
06-14-2006, 10:23 PM
#34
Senior Member
SL Member
iTrader: (1)

Join Date: Oct 2005
Location: Nor Cal Native in Okinawa
Posts: 1,263
ok, check out the directions on the back of the can to see what will remove it, and then tape off the are around the reverse light and apply it with a sponge or damp cloth. Good luck.
06-15-2006, 03:54 PM
#35
Senior Member
Scikotics
SL Member
Join Date: May 2004
Location: Minneapolis, MN
Posts: 631
Sorry to burst your bubble, but you don't have to pry or cut your tails at all to open them up.
If you use a heat gun to warm (not cook) the bottom, top, and outside egde of the lens and the grey plastic housing, they lens will simply lift off the the tail light housing.
I have taken my tails apart 3 times now to try different things with them and in 5 min with no cutting, no prying, and no damage, I can have my tails apart and ready for paint.
06-15-2006, 08:59 PM
#36
Senior Member
SL Member

Join Date: Apr 2006
Location: Baton Rouge, LA
Posts: 199
I didn't even use heat. All I used was 2 small flathead screwdrivers and a steady hand. Once you get the tabs unlocking the rest is cake. Took me less than hour to remove, disassemble, tape, paint, and reassemble and install my tails. They look like they come from the dealer that way.
06-16-2006, 01:42 AM
#37
Senior Member
SL Member

Join Date: May 2004
Location: Tampa/Brandon, FL
Posts: 258
Originally Posted by RaginCajun
I didn't even use heat. All I used was 2 small flathead screwdrivers and a steady hand. Once you get the tabs unlocking the rest is cake. Took me less than hour to remove, disassemble, tape, paint, and reassemble and install my tails. They look like they come from the dealer that way.
I'm trying to figure out which route I want to go with my RS 3.0. I strongly dislike the 90's clear tailight look. We candied the tail lights on my former BSP xB...they looked great against the black. My main issue is the fear of red tails on the RS 3.0 would look too much like a rolling Christmas decoration. I'm thinking about smoked, but again I'm not too sure how the dark tails would look against the bright paint...seems like they may look odd.
08-08-2006, 05:47 PM
#38
Junior Member

Join Date: Mar 2005
Posts: 22
i did mine just using two screwdrivers and no dremel. the first tail light took me
half an hour to open and i cracked a little piece on the inside
but the second tail light i got open in 2 minutes.
Thanks XBino and Max2k, your write-ups really helped.
i painted mine using Krylon Stained Glass and i also painted a black border around the entire light. turned out quite nice.
half an hour to open and i cracked a little piece on the inside
but the second tail light i got open in 2 minutes.
Thanks XBino and Max2k, your write-ups really helped.
i painted mine using Krylon Stained Glass and i also painted a black border around the entire light. turned out quite nice.
