*DIY* - Tail dissassembly and Redout... yes, yet another way


 08-17-2006, 07:33 PM
#42
Senior Member

SL Member
Thread Starter

Join Date: Mar 2005
Location: San Francisco, CA
Posts: 963
Excellent work you guys! Looks AWESOME!!!
I'm glad some of you were able to take them apart w/o the dremel... i don't know what my problem is LOL
i kept breaking the lenses with or without heat until I tried this.
I'm glad some of you were able to take them apart w/o the dremel... i don't know what my problem is LOL
i kept breaking the lenses with or without heat until I tried this.

 11-21-2006, 03:52 PM
#45
Senior Member
SL Member

Join Date: Oct 2005
Location: Cupertino, CA
Posts: 2,208
Originally Posted by xBino
DISCLAIMER: Use this tutorial at your own risk! I am not responsible if you break your tail lenses using the this method. Take your time taking those things apart, the front lenses are soooooo fragile. Follow my notes and with any luck, you will make from start to finish without any cracks. Enough chatter, on with the walkthrough!
Tools Required:
1) 3 small/thin screwdrivers
2) Rotary/Dremel tool
3) Degreaser/Glass cleaner and microfiber cloth
4) Needle nose pliers
5) Socket wrench (extension optional) and 10mm socket
6) VHT Red Translucent Metal Tint (SP-232 RED)
7) Masking tape
8.) Acetone/Rubbing Alcohol and Qtips
EDIT: People have been having bad experiences with Acetone on their tails. Be advised.
Optional:
1) Plastic Polish � to remove tape residue and tint overspray
2) 2nd set of stock tails � so you can take your time w/o feeling rushed
INTRODUCTION:
Tinting the inside of your tails has obvious advantages to painting the outside for that �candied tail� look. For the most part it will look OEM, be protected from the elements, retain a shiny and smooth texture, and doesn�t require all the work of wetsanding and clearcoating as paint needs prep and protection. The trick is removing the front lens without cracking the darn thing.
If you're special like me , you may have been having trouble removing the clear, front lens from the tail light assembly without breaking it. Or you've been having trouble removing the white, plastic sheet from the back of the light without tearing it to put the assembly in the oven. Or you've been having trouble with the oven and ending up with a "wavy" tail from too long or too hot of an exposure. Or you may have done all of the above and found yourself frustrated with the results!
For those of you who are have struggled with the available oven and clearcoat/wetsand methods, I offer you an alternative method to dismantle and paint your rear tails with minimal fuss and effort. So here we go!
NOTE � VHT Red Metal Tint: On my first set of tails, I used Testors candy apple red paint as others suggested and used, but found that it didn�t dry completely transparent. It always seemed to end up slightly cloudy and I didn�t like the effect it gave� it always looked too �plasticky,� if there ever is such a word. I prefer VHT metal tint to Testors for a number of reasons:
1) VHT dries completely transparent not clouding a bit
2) Has a very high temperature tolerance (can be used on engine parts)
3) Comes in a standard bottle size that�s at least 2x bigger than the mini-me Testors bottle
4) VHT metal tint is inexpensive and easily found at AutoZone or Pepboys for around $8, making it the cheaper buy for the cost conscious do-it-yourselfer. 1 bottle of VHT at $8 vs. 2 bottles of Testors at $15� yeah, I�m a cheap bastard! Auto supply stores happen to be more accessible than craft/hobby stores in my area, but your mileage may vary.
WALKTHROUGH:
1) Start by removing the grilled panel behind the tail lights in the rear hatch. Unlatch the turn signal bulbs by turning them counter clockwise. It will click and fall out of the housing. Then remove the rear tails using a socket wrench and 10mm socket. You may or may not need an extension to reach the two bolts on the back of each tail, I didn�t happen to need to.
2) Remove both L and R tails but leave the turn signal bulb behind attached to all the wires in the car. Take the brake and reverse bulbs out to prevent breaking them while handling the tails. Put them in a safe place for now.
3) Take a closer look at the tail light. There are 7 tabs that secure the front lens to the gray core � 2 on the bottom, 4 on the side, and 1 on top. The front lens cover opens up like a clam when the 4 tabs on the side are removed.
4) Take your rotary tool and dremel the bottom two notches of the gray core in the following manner. (fig. 1).

This allows us room to work and easy removal of the 4 tabs on the side. Even with 5 tabs leftover at the end, the front lens cover is still very tight and sealed when re-installed later when you finish. The 4 side tabs on the side is where most of the clamping force happens anyway.
5) Start with the lowest tab on the tail next to the reverse light (the picture is at the brake light for example only, start at the reverse light). Using your 1st screwdriver, place it in the following manner (fig. 2).

The idea is, by pressing down with driver 1, you are lifting up the notch on the gray core and pressing down on the lens� tab, creating room for the tab to squeeze through and unlatch from the core. Work on both sides of the notch. You will have to apply moderate force to slowly force the notch upwards to make room for the tab. Work slowly and carefully. The gray core will flex and bend but will not crack like the front lens.
6) You can use the 2nd driver to release pressure and aid your efforts, by placing it here by carefully using light pressure (fig. 3).

NOTE: Putting pressure on this area of the lens in ANY OTHER WAY will result in cracking. I�ve cracked this before, believe me when I say the front lens is veeeeery fragile!
7) When you�ve created enough clearance for the tab to clear the notch, use your 2nd driver and place it here (fig.4).

By applying force to this 2nd driver along with the 1st maintaining the clearance, you can push the lens tab out of the notch, releasing it from the core. If you get frustrated, resist the urge to apply pressure to the anywhere on the front lens itself. It WILL crack!!! Work slowly and carefully, and the core will eventually bend/flex to create enough clearance.
8.) Once you�ve cleared the tab and it released from the notch, place your 3rd driver in the valley that�s created as you begin to separate the lens from the core (fig.5).

However tempting it may be, do not place any pressure onto the lip of the lens with the 3rd driver, it WILL crack! The placement of this driver will prevent the lens from snapping back onto the core saving you the trouble of doing the same thing over again.
9) Repeat this procedure on all the remaining side tabs, working your way up towards the final tab near the brake light. Take your time and work slowly and carefully.
9) Once all 4 tabs have been released, now lift up the side of the lens with your fingers until the lens opens like a clam. Once the side tabs are removed, the tab on top will simply lift off since you�ve relieved pressure by dremeling the bottom notches.
10) Now repeat steps 4-9 on the other tail light.
11) Put the cores away in a safe place and prep the areas to paint on the interior of the lens with a degreaser/glass cleaner and microfiber to remove any oil, dust, or dirt that may have accumulated. Using microfiber will help reduce the chances of lint or fibers being left behind.
11) Using masking tape, mask any areas you DON�T want red on the interior of the lens. For example, if you want the reverse light to remain clear, mask that area. I would mask off the exposed/unpainted side of the lens as well to prevent overspray to that area. Apply the masking tape well to prevent bleed!!!
12) Using the VHT metal tint, spray thin, even coats at 15min intervals. The can says 3min, but it doesn�t adhere very well at 3min on the textured plastic and begins to pool. I used 6~7 very thin even coats on my tails. Place the lenses tint-side-down between coats to prevent dust and debris from settling on the tint. NOTE: I would tint the interior of both lenses at the same time to ensure even and uniform tint coverage on both lenses. It�s also just easier to tint them together than one at a different time than another.
13) Place the lenses tint-side-down in a safe place to dry overnight. It helps to have an extra set of stockers so you can still drive around to get stuff to eat, pickup grandma, etc� but it�s great insurance knowing you can take your time and not feel sunk if you fumble it and break anything. I got my extra set on ebay for $34 including shipping and the cost was most definitely worth the trouble.
14) I hope you paid attention to detail with the masking tape! Remove the masking tape and using alcohol with Qtips, rub out any bleed that has occurred. I used 90% rubbing alcohol and it was a little tedious to get the bleed out. I normally use Acetone for paint bleed, but others have been having bad experiences with acetone so be advised.
15) Pick up your core and turn it over to look at the back. As an option, you can remove the red cap that goes over the brake light now that the lens is red in color. Using needle nose pliers, squeeze the top tab above the brake light bulb to pop it off (fig. 6).

The bottom tab needs some persuading, but you can more or less pull the cap off from the front. If left on, it will leave a weird, dark spot that appears strange when you look at the assembled tail.
16) Reassemble your tails by snapping the lenses back onto the cores and reinserting the bulbs. Apply a plastic polish to the exterior of your tails to remove any residual tape residue or red tint overspray. Buff them to a high shine. Clay Bar also does a great job of removing overspray if you don�t have polish.

17) Reinstall your tinted tails and marvel at your mad �candying� skills. Take a spin around the block and show off to your friends!

CONCLUSION:
So that concludes this walkthrough. Now wasn�t that fun? I hope this guide gave some practical tips and techniques for an alternative way to dismantle the lens cover on your tails. Please feel free to PM me if you have any questions or concerns. Now stop reading this and hit up those tails!
Cheers!
Special
Tools Required:
1) 3 small/thin screwdrivers
2) Rotary/Dremel tool
3) Degreaser/Glass cleaner and microfiber cloth
4) Needle nose pliers
5) Socket wrench (extension optional) and 10mm socket
6) VHT Red Translucent Metal Tint (SP-232 RED)
7) Masking tape
8.) Acetone/Rubbing Alcohol and Qtips
EDIT: People have been having bad experiences with Acetone on their tails. Be advised.
Optional:
1) Plastic Polish � to remove tape residue and tint overspray
2) 2nd set of stock tails � so you can take your time w/o feeling rushed
INTRODUCTION:
Tinting the inside of your tails has obvious advantages to painting the outside for that �candied tail� look. For the most part it will look OEM, be protected from the elements, retain a shiny and smooth texture, and doesn�t require all the work of wetsanding and clearcoating as paint needs prep and protection. The trick is removing the front lens without cracking the darn thing.
If you're special like me
For those of you who are have struggled with the available oven and clearcoat/wetsand methods, I offer you an alternative method to dismantle and paint your rear tails with minimal fuss and effort. So here we go!
NOTE � VHT Red Metal Tint: On my first set of tails, I used Testors candy apple red paint as others suggested and used, but found that it didn�t dry completely transparent. It always seemed to end up slightly cloudy and I didn�t like the effect it gave� it always looked too �plasticky,� if there ever is such a word. I prefer VHT metal tint to Testors for a number of reasons:
1) VHT dries completely transparent not clouding a bit
2) Has a very high temperature tolerance (can be used on engine parts)
3) Comes in a standard bottle size that�s at least 2x bigger than the mini-me Testors bottle
4) VHT metal tint is inexpensive and easily found at AutoZone or Pepboys for around $8, making it the cheaper buy for the cost conscious do-it-yourselfer. 1 bottle of VHT at $8 vs. 2 bottles of Testors at $15� yeah, I�m a cheap bastard! Auto supply stores happen to be more accessible than craft/hobby stores in my area, but your mileage may vary.
WALKTHROUGH:
1) Start by removing the grilled panel behind the tail lights in the rear hatch. Unlatch the turn signal bulbs by turning them counter clockwise. It will click and fall out of the housing. Then remove the rear tails using a socket wrench and 10mm socket. You may or may not need an extension to reach the two bolts on the back of each tail, I didn�t happen to need to.
2) Remove both L and R tails but leave the turn signal bulb behind attached to all the wires in the car. Take the brake and reverse bulbs out to prevent breaking them while handling the tails. Put them in a safe place for now.
3) Take a closer look at the tail light. There are 7 tabs that secure the front lens to the gray core � 2 on the bottom, 4 on the side, and 1 on top. The front lens cover opens up like a clam when the 4 tabs on the side are removed.
4) Take your rotary tool and dremel the bottom two notches of the gray core in the following manner. (fig. 1).
This allows us room to work and easy removal of the 4 tabs on the side. Even with 5 tabs leftover at the end, the front lens cover is still very tight and sealed when re-installed later when you finish. The 4 side tabs on the side is where most of the clamping force happens anyway.
5) Start with the lowest tab on the tail next to the reverse light (the picture is at the brake light for example only, start at the reverse light). Using your 1st screwdriver, place it in the following manner (fig. 2).
The idea is, by pressing down with driver 1, you are lifting up the notch on the gray core and pressing down on the lens� tab, creating room for the tab to squeeze through and unlatch from the core. Work on both sides of the notch. You will have to apply moderate force to slowly force the notch upwards to make room for the tab. Work slowly and carefully. The gray core will flex and bend but will not crack like the front lens.
6) You can use the 2nd driver to release pressure and aid your efforts, by placing it here by carefully using light pressure (fig. 3).
NOTE: Putting pressure on this area of the lens in ANY OTHER WAY will result in cracking. I�ve cracked this before, believe me when I say the front lens is veeeeery fragile!
7) When you�ve created enough clearance for the tab to clear the notch, use your 2nd driver and place it here (fig.4).
By applying force to this 2nd driver along with the 1st maintaining the clearance, you can push the lens tab out of the notch, releasing it from the core. If you get frustrated, resist the urge to apply pressure to the anywhere on the front lens itself. It WILL crack!!! Work slowly and carefully, and the core will eventually bend/flex to create enough clearance.
8.) Once you�ve cleared the tab and it released from the notch, place your 3rd driver in the valley that�s created as you begin to separate the lens from the core (fig.5).
However tempting it may be, do not place any pressure onto the lip of the lens with the 3rd driver, it WILL crack! The placement of this driver will prevent the lens from snapping back onto the core saving you the trouble of doing the same thing over again.
9) Repeat this procedure on all the remaining side tabs, working your way up towards the final tab near the brake light. Take your time and work slowly and carefully.
9) Once all 4 tabs have been released, now lift up the side of the lens with your fingers until the lens opens like a clam. Once the side tabs are removed, the tab on top will simply lift off since you�ve relieved pressure by dremeling the bottom notches.
10) Now repeat steps 4-9 on the other tail light.
11) Put the cores away in a safe place and prep the areas to paint on the interior of the lens with a degreaser/glass cleaner and microfiber to remove any oil, dust, or dirt that may have accumulated. Using microfiber will help reduce the chances of lint or fibers being left behind.
11) Using masking tape, mask any areas you DON�T want red on the interior of the lens. For example, if you want the reverse light to remain clear, mask that area. I would mask off the exposed/unpainted side of the lens as well to prevent overspray to that area. Apply the masking tape well to prevent bleed!!!
12) Using the VHT metal tint, spray thin, even coats at 15min intervals. The can says 3min, but it doesn�t adhere very well at 3min on the textured plastic and begins to pool. I used 6~7 very thin even coats on my tails. Place the lenses tint-side-down between coats to prevent dust and debris from settling on the tint. NOTE: I would tint the interior of both lenses at the same time to ensure even and uniform tint coverage on both lenses. It�s also just easier to tint them together than one at a different time than another.
13) Place the lenses tint-side-down in a safe place to dry overnight. It helps to have an extra set of stockers so you can still drive around to get stuff to eat, pickup grandma, etc� but it�s great insurance knowing you can take your time and not feel sunk if you fumble it and break anything. I got my extra set on ebay for $34 including shipping and the cost was most definitely worth the trouble.
14) I hope you paid attention to detail with the masking tape! Remove the masking tape and using alcohol with Qtips, rub out any bleed that has occurred. I used 90% rubbing alcohol and it was a little tedious to get the bleed out. I normally use Acetone for paint bleed, but others have been having bad experiences with acetone so be advised.
15) Pick up your core and turn it over to look at the back. As an option, you can remove the red cap that goes over the brake light now that the lens is red in color. Using needle nose pliers, squeeze the top tab above the brake light bulb to pop it off (fig. 6).
The bottom tab needs some persuading, but you can more or less pull the cap off from the front. If left on, it will leave a weird, dark spot that appears strange when you look at the assembled tail.
16) Reassemble your tails by snapping the lenses back onto the cores and reinserting the bulbs. Apply a plastic polish to the exterior of your tails to remove any residual tape residue or red tint overspray. Buff them to a high shine. Clay Bar also does a great job of removing overspray if you don�t have polish.
17) Reinstall your tinted tails and marvel at your mad �candying� skills. Take a spin around the block and show off to your friends!
CONCLUSION:
So that concludes this walkthrough. Now wasn�t that fun? I hope this guide gave some practical tips and techniques for an alternative way to dismantle the lens cover on your tails. Please feel free to PM me if you have any questions or concerns. Now stop reading this and hit up those tails!
Cheers!
Special
awesome work tho. hope that made ya laff,
- sh00k
12-04-2006, 03:40 PM
#46
Member
SL Member
Join Date: Sep 2005
Location: North Alabama
Posts: 90
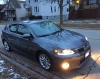
I took encouragement from this thread and did a new set of tails for my xB. I used the oven to warm them up as described above. I only used 230 degrees for 5 minutes which was just enough heat to be hard to handle for a few seconds but softened the gray plastic enough to work well. I laid the tail clear side up and placed a flat tip screwdriver down into the slot flat against the side where the clear tab is at and pushed the tip between the tab and the gray plastic. I then pushed the handle of the screw driver away from the side to apply upward pressure on the clear plastic tab. Move to the next tab and do the same. You have a good 5 minutes to work with the tail after it has been warmed. DO NOT TRY THIS on a room temp tail..... CRACK!!!!!! Take your time and reheat as needed. Use light pressure at ALL TIMES!
Here is my out come:
http://www.cardomain.com/ride/2145264/2
Here is my out come:
http://www.cardomain.com/ride/2145264/2
 04-15-2007, 10:38 PM
#48
Senior Member
SL Member

Join Date: Mar 2007
Location: Mesa, AZ
Posts: 417
I used 6 plain old household kitchen knives to remove the lens. Screwdriver shafts are too thick and bend the housing way more than necessary. I didn't use an oven either, just 30 seconds with a hairdryer at each tab before wedging the knife in.
I used Krylon Red stained glass paint, three coats, after masking off the backup light area and the entire outside of the lens.
I bought some 7440 clear bulbs to replace the amber turn signal bulbs, and also removed the now redundant red cover over the taillight/stoplight.


I used Krylon Red stained glass paint, three coats, after masking off the backup light area and the entire outside of the lens.
I bought some 7440 clear bulbs to replace the amber turn signal bulbs, and also removed the now redundant red cover over the taillight/stoplight.
03-09-2008, 05:21 AM
#49
Senior Member
SL Member

Join Date: Dec 2007
Location: theValley, SoCal
Posts: 240
yeah i'm gonna give this a try
but i had a hard time finding the VHT metal translucent red paint,
but i see that some people used the Krylon Red stained glass paint.
did it work out for everybody?
nice write-up BTW. i like it, i like it a loht.
but i had a hard time finding the VHT metal translucent red paint,
but i see that some people used the Krylon Red stained glass paint.
did it work out for everybody?
nice write-up BTW. i like it, i like it a loht.
 03-14-2008, 04:15 AM
#53
Junior Member

Join Date: Feb 2008
Posts: 25
well i bought the wrong vht paint. I got fire engine red and i dont feel like risking it so im headed back to the store. So for everyone looking for the most popular paint i cleared it up
Testors Candy Red spray paint
Krylon stained glass paint
VHT Red translucent metal tint sp 232 red
Testors Candy Red spray paint
Krylon stained glass paint
VHT Red translucent metal tint sp 232 red
03-19-2008, 04:35 AM
#54
Senior Member
SL Member
Join Date: Dec 2007
Location: theValley, SoCal
Posts: 240
woooo
so i grew the gonads to take the tails apart..
used a blow dryer, 30 seconds per tab. and stuck butter knives in them to where u see it in front of the tab. then used a screwdriver to pry them open through the top and bottom. and they just came off!
so now i'm painting them (krylon stained glass).
3 coats.
i'll take pics tomorrow.


Thread
Thread Starter
Forum
Replies
Last Post
umnitza
Exclusive Sponsored Sales
1
07-25-2015 07:54 PM