
Tech: HOW TO: Installing Wade In-Channel Vent Shades


Thread Starter
Member
SL Member
Joined: Oct 2005
Posts: 65
From: Lehigh Valley, PA
HOW TO: Installing Wade In-Channel Vent Shades
Ride: 2005 Camo Metallic xB
Install time: 10-30 minutes
Difficulty (1-10): 1 unless they don't fit, then 2
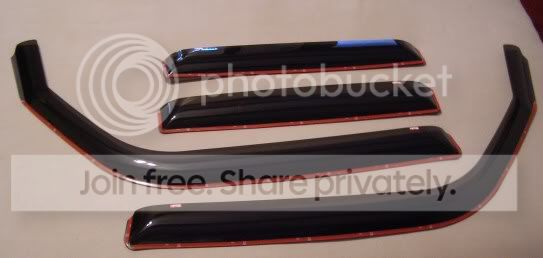
Not difficult at all, but a tutorial could come in handy. Didn't see a how-to for this in the Tech section, so here we go. I bought a set of Wade In-Channel Vent Shades off eBay, about $30 shipped. Parts came in a flat Wade box, packed and padded fairly well.
1. UNPACKING. Inspected for damage, none found. Box included pieces for driver's front and rear and pasenger's front and rear, two alcohol wipes, and a one-page instruction sheet.
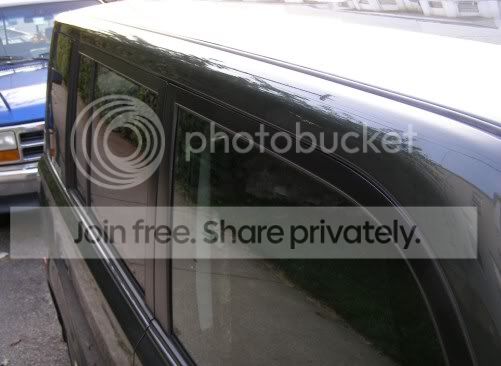
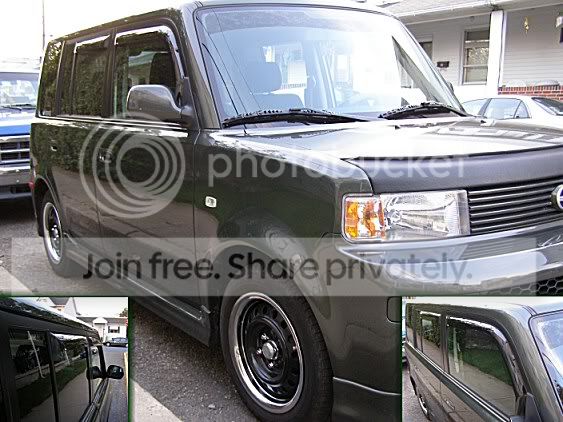
2. BEFORE. Here's the "before" picture. Roll down all four windows completely.
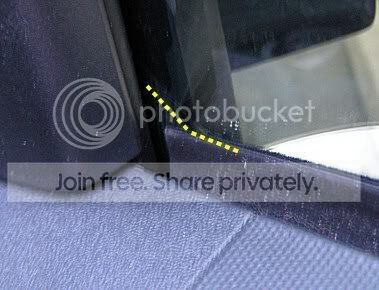
3. TESTING FRONT. Before removing the sticky tape, test-fit the parts to decide how best to jam them in the window channel. I found that starting near the pillar and working toward the mirror was easiest for the front.
4. NOTE. Fit (I hate "fitment") was not perfect; some of the tape was exposed. Hope I can minimize that later.
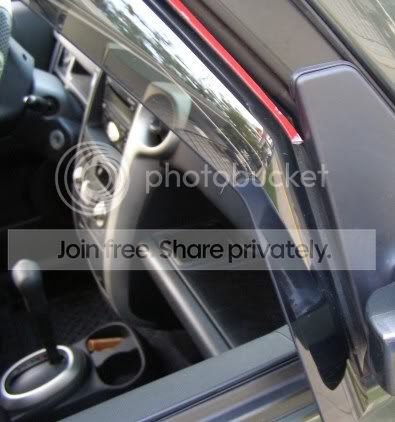
5. CULPRIT. Found why mine didn't fit so well. The bottom corner where the window channel is closest to the mirrors is just a hair too long and scrapes against the door moulding. I used a plastic saw (for cutting model airplane Styrene) to trim about 1/4" off the bottom of the angle. Cut is not noticeable and looks factory, and helped the fit a great deal. That's why you test-fit all parts first!
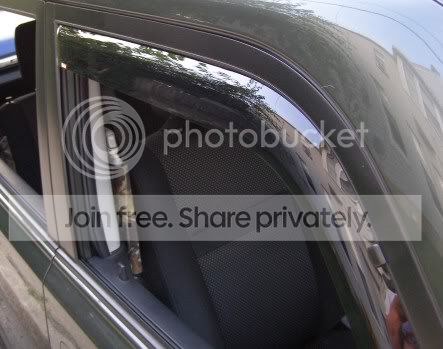
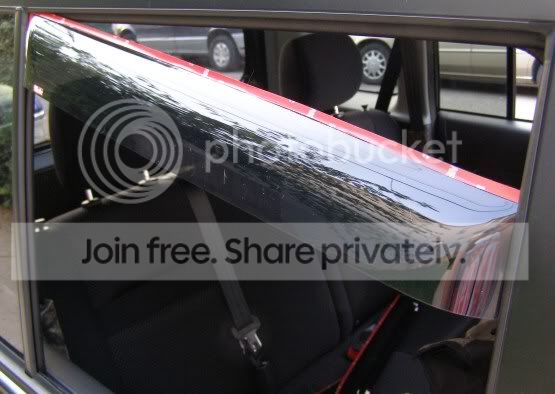
6. TESTING REAR. Also test-fit the rear pieces before removing the 3M tape covers. Insert at a 45-degree angle, push one corner up into place, then the other slides in. No fit problems.
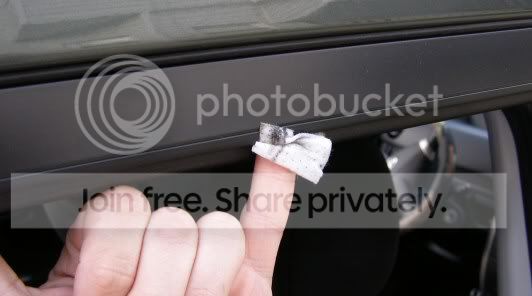
7. CLEANING. Remove the test-fit pieces and open the alcohol wipes. Clean the inside of the window channel where the 3M tape will be pressed on. One pad should do front and rear on one side.
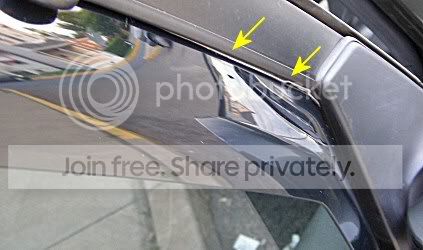
8. INSTALLING. Fit the pieces into the window channels just like you did in the test-fits above. The set I got was still not a perfect fit. The yellow arrows below point to a thin sliver of 3M tape visible from behind the vent shade. Not very noticeable unless you're right on it. Later I'll try to remove it using an X-Acto knife and Goo Gone.
9. WINDOWS. This is a tricky part and I couldn't take pictures while doing it. You now have to roll up your windows 5 times, each time "assisting" the window all the way up. How many hands have you got, Shiva? I had only two, so unless you're really bendy or have a friend, this required use of chest, foot, forehead, or some other part to manipluate the glass and switch at the same time. Once this is done, repeat with the other three windows.
10. AFTER. Installed! Looks tight. Have to keep my windows rolled up for 3 days, but there's no increase in wind noise and no rattling. Approved!
Now, if only they made these in Mossy Oak...
Ride: 2005 Camo Metallic xB
Install time: 10-30 minutes
Difficulty (1-10): 1 unless they don't fit, then 2
Not difficult at all, but a tutorial could come in handy. Didn't see a how-to for this in the Tech section, so here we go. I bought a set of Wade In-Channel Vent Shades off eBay, about $30 shipped. Parts came in a flat Wade box, packed and padded fairly well.
1. UNPACKING. Inspected for damage, none found. Box included pieces for driver's front and rear and pasenger's front and rear, two alcohol wipes, and a one-page instruction sheet.
2. BEFORE. Here's the "before" picture. Roll down all four windows completely.
3. TESTING FRONT. Before removing the sticky tape, test-fit the parts to decide how best to jam them in the window channel. I found that starting near the pillar and working toward the mirror was easiest for the front.
4. NOTE. Fit (I hate "fitment") was not perfect; some of the tape was exposed. Hope I can minimize that later.
5. CULPRIT. Found why mine didn't fit so well. The bottom corner where the window channel is closest to the mirrors is just a hair too long and scrapes against the door moulding. I used a plastic saw (for cutting model airplane Styrene) to trim about 1/4" off the bottom of the angle. Cut is not noticeable and looks factory, and helped the fit a great deal. That's why you test-fit all parts first!
6. TESTING REAR. Also test-fit the rear pieces before removing the 3M tape covers. Insert at a 45-degree angle, push one corner up into place, then the other slides in. No fit problems.
7. CLEANING. Remove the test-fit pieces and open the alcohol wipes. Clean the inside of the window channel where the 3M tape will be pressed on. One pad should do front and rear on one side.
8. INSTALLING. Fit the pieces into the window channels just like you did in the test-fits above. The set I got was still not a perfect fit. The yellow arrows below point to a thin sliver of 3M tape visible from behind the vent shade. Not very noticeable unless you're right on it. Later I'll try to remove it using an X-Acto knife and Goo Gone.
9. WINDOWS. This is a tricky part and I couldn't take pictures while doing it. You now have to roll up your windows 5 times, each time "assisting" the window all the way up. How many hands have you got, Shiva? I had only two, so unless you're really bendy or have a friend, this required use of chest, foot, forehead, or some other part to manipluate the glass and switch at the same time. Once this is done, repeat with the other three windows.
10. AFTER. Installed! Looks tight. Have to keep my windows rolled up for 3 days, but there's no increase in wind noise and no rattling. Approved!
Now, if only they made these in Mossy Oak...

Senior Member
SL Member
Joined: Aug 2006
Posts: 104
From: New Hope, MN
Thanks for the write up! I installed a set of the Wades today. Took no more than 10 minutes and they look great.
I did remove the little red Wade stickers. They were messing up my black on black theme
I did remove the little red Wade stickers. They were messing up my black on black theme

Senior Member
SL Member
Joined: Oct 2005
Posts: 380
From: Long Beach, CA
lol, never thought this would be something that would need a how-to.
Its super easy to do guys, but heres my tip:
Use a few dabs of black silicone adhesive every few inches on the edge (over the 3m tape). No matter how clean you get the channel, there will be areas that just won't stick in the long run.
Its super easy to do guys, but heres my tip:
Use a few dabs of black silicone adhesive every few inches on the edge (over the 3m tape). No matter how clean you get the channel, there will be areas that just won't stick in the long run.
Senior Member
SL Member
Joined: Aug 2006
Posts: 104
From: New Hope, MN
I chose the Wade shades based on the OPs how-to. The install seemed simple and I liked the pics of the finished product.
Even with a how-to, the installs apparently are completely different. I did not have the fit issues that the OP had and I had no problem getting the windows up and down (Just leave the door open so you can reach around and pull the ventshade out while the window is going up.
I also did not take off all of the adhesive backing at once. I just lifted a small tab and then pulled it out once the shades were in place. I have a small area of adhesive showing, but it is toward the rear of the passenger side back door shade. It was easily remidied with a black Sharpie. I guess every one is just a little different.


Thread Starter
Member
SL Member
Joined: Oct 2005
Posts: 65
From: Lehigh Valley, PA
Yeah, mine look to have been cut just a tad large. Once I trimmed the portion nearest the mirror they fit well. No vibration, no problems with wind noise, no fragility. I dig 'em!
Cierrecart - a little more adhesive definitely doesn't hurt. I found some black two-sided heavy duty tape that I'll use on the weak spots (there's no adhesive on the vertical portion nearest the mirror.
Blakout, I like your tip on camouflaging the exposed adhesive with a black sharpie, I'll put it into effect this weekend.
LOL, I figured that if we needed a writeup for installing a battery tie-down, then anything's game.


Thread
Thread Starter
Forum
Replies
Last Post
TheRedBox
Scion xA/xB 1st-Gen Drivetrain & Power
31
Dec 2, 2003 04:53 PM

