


Free Intake Improvement How To


Thread Starter
Senior Member


Scikotics
SL Member
Joined: Aug 2007
Posts: 526
From: Charleston, WV
 Free Intake Improvement How To
I call this an improvement because it takes the hose attached to the airbox out of the engine bay and down lower to cooler air. It will probably be better for those that want to stick with the stock airbox and a hi-flow drop in filter. It's not pretty (really not noticible visually) and it's not gonna give hp/tq increases. But it's free right? So what the hell.
I got this idea from my VW days. One of the easiest things to do was rip off restrictive stuff underneath the airbox to help airflow. Many people added rubber ducting hose that ran from the airbox down to the bumper. So I started looking at what was under the airbox on my xB and was surprised to see it had ducting that went down and curved back up into the engine bay. So my brain started working (for once LOL) and here's what I did.
Oh, and I apologize for some of the pics not being so great.
Disclamer: Do this at your own risk! I'm not responsible if you do this and problems arise as a result. And as always, be careful when working under a jacked up car!
Tools you need:
Jack
Small Flat Head Screw Driver
10mm Socket
Jack the car up and take off the front drivers side wheel
Here's the top behind/under the headlight. The hose comes off the airbox, goes down behind the bumper, then loops back up and the open end is on top of where starts by the airbox. Sorry this pic is the suck.
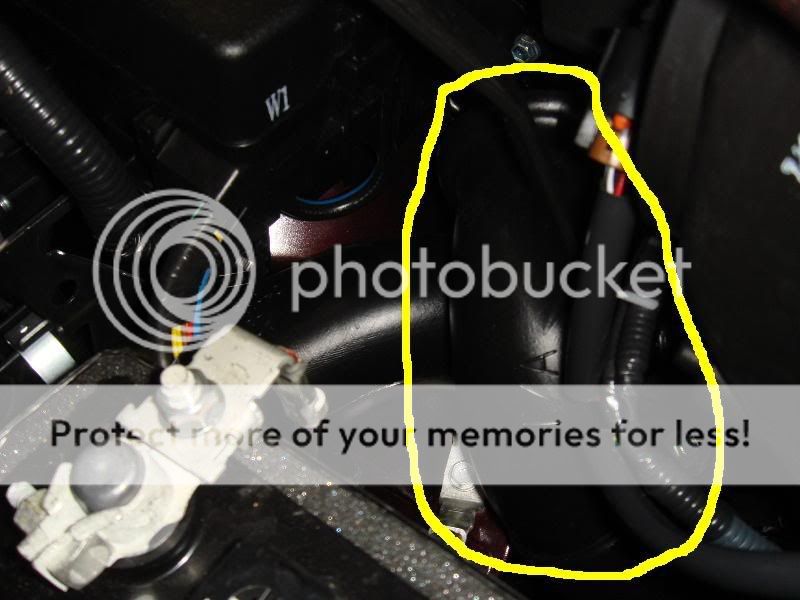
First thing to do is use a flat head screw driver to pop the plastic rivet off this bracket:

I just pulled up and the top snorkle/tube/whatever pulled right out and off the hose. Here's what it looks like:

Next use the 10mm socket and take this bolt out. It's kind of tight down there:

That will free up the top part of the hose, so move to the bottom.
Underneath the driver side corner, use the 10mm socket to remove the two screws, and use the flat head screw driver to pop the plastic rivet off:
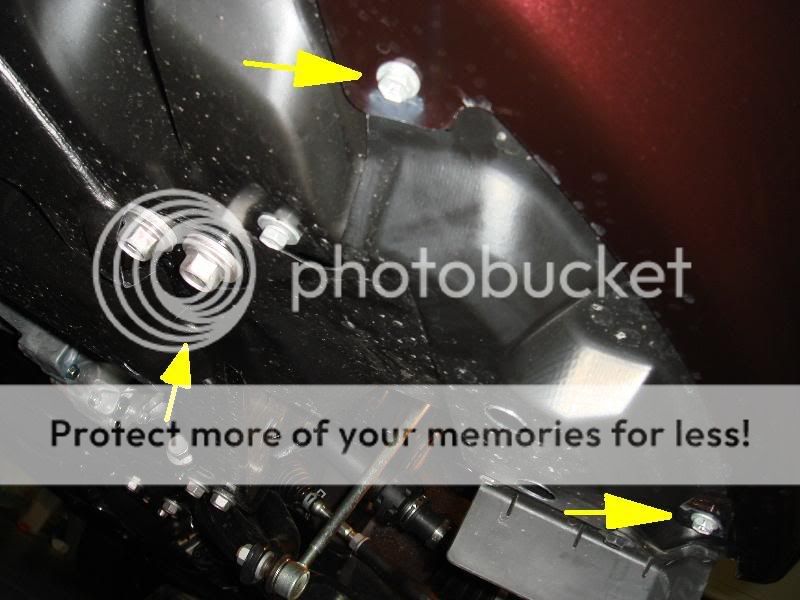
Then move to the fender liner. I just loosened the front section and it pulls away plenty far to get to the hose. Use the flat head screw driver and turn the lower left rivet thing. You'll hear a pop and it should pull right out. I've never seen one like this before, kinda neat. And the one rivet in the middle is pointing straight up, you can't see it in the pic, but the middle arrow is pointing to it.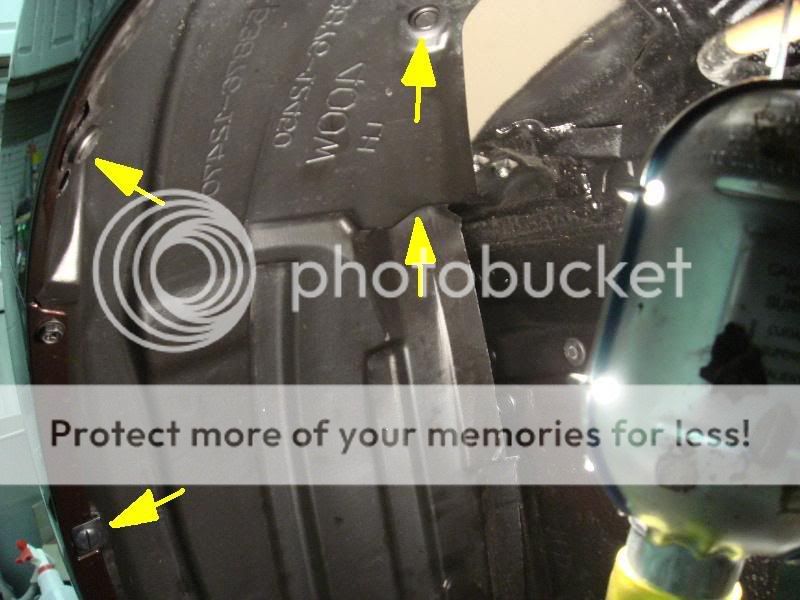
After that you can pull the fender liner back and here's what you should see:
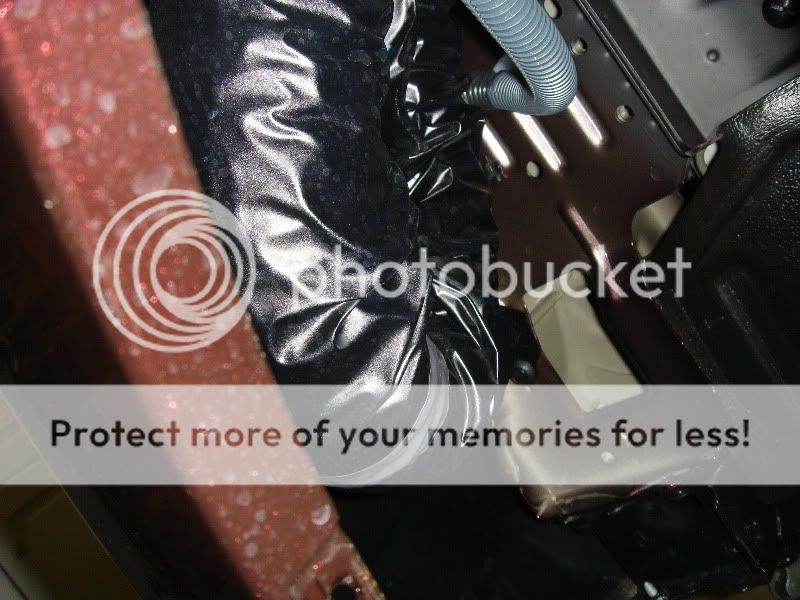
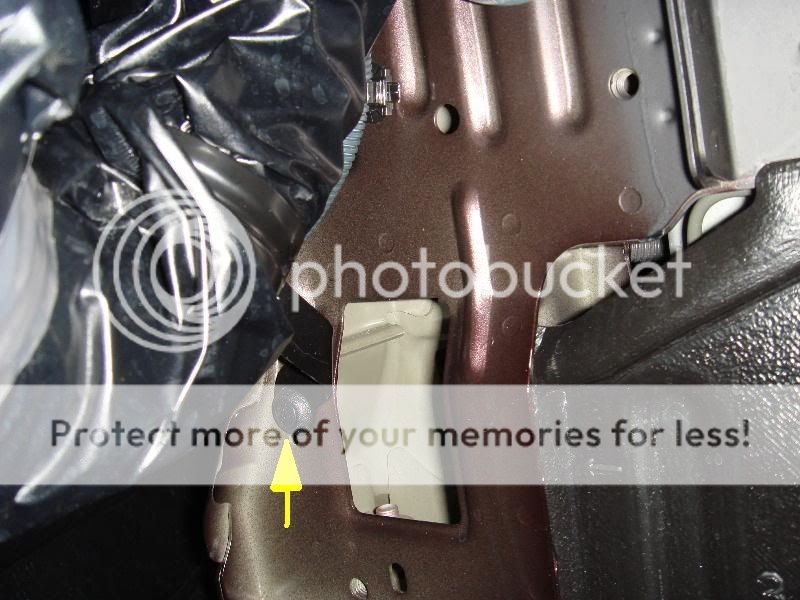
Use the flat head screw driver to pop this rivet out:
The hose will be free and you can pull it down from the top:
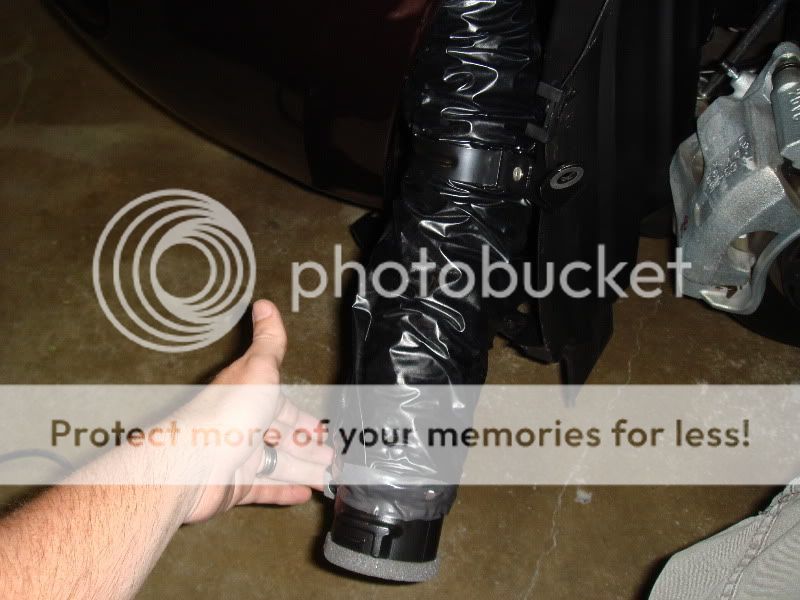
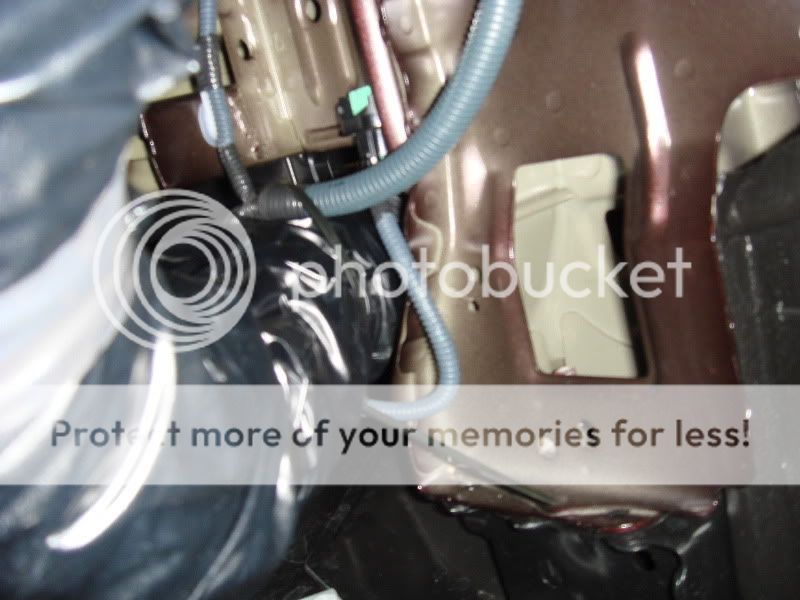
You can place the hose end where ever you like. I put it as far forward as I could. I zip tied it to the foglight harness (I assume that's what it is, just a bundled wire with a plug that goes nowhere). That placed the end pretty close to the lower grill:

That's it!
Just re-install everything the way it came apart. I give mad props to Toyota for the design of their plastic rivet things. They're so easy to remove and put back in. I'm used to the VW ones which have to be destroyed to remove lol.
With this of course there is the question that if it could suck up water and hydrolock, like with CAI's. Anything is possible I suppose, and it depends on where you put the end of the hose. Even then it will have to make it up the hose and through the still restrictive airbox/filter. Still I guess that's a threat.
Just wanted to share this with the community. Hope maybe someone will find it helpful in some way. I figured it's free and easy, so it can't hurt to share.
Thanks,
Mike
I got this idea from my VW days. One of the easiest things to do was rip off restrictive stuff underneath the airbox to help airflow. Many people added rubber ducting hose that ran from the airbox down to the bumper. So I started looking at what was under the airbox on my xB and was surprised to see it had ducting that went down and curved back up into the engine bay. So my brain started working (for once LOL) and here's what I did.
Oh, and I apologize for some of the pics not being so great.
Disclamer: Do this at your own risk! I'm not responsible if you do this and problems arise as a result. And as always, be careful when working under a jacked up car!
Tools you need:
Jack
Small Flat Head Screw Driver
10mm Socket
Jack the car up and take off the front drivers side wheel
Here's the top behind/under the headlight. The hose comes off the airbox, goes down behind the bumper, then loops back up and the open end is on top of where starts by the airbox. Sorry this pic is the suck.
First thing to do is use a flat head screw driver to pop the plastic rivet off this bracket:
I just pulled up and the top snorkle/tube/whatever pulled right out and off the hose. Here's what it looks like:
Next use the 10mm socket and take this bolt out. It's kind of tight down there:
That will free up the top part of the hose, so move to the bottom.
Underneath the driver side corner, use the 10mm socket to remove the two screws, and use the flat head screw driver to pop the plastic rivet off:
Then move to the fender liner. I just loosened the front section and it pulls away plenty far to get to the hose. Use the flat head screw driver and turn the lower left rivet thing. You'll hear a pop and it should pull right out. I've never seen one like this before, kinda neat. And the one rivet in the middle is pointing straight up, you can't see it in the pic, but the middle arrow is pointing to it.
After that you can pull the fender liner back and here's what you should see:
Use the flat head screw driver to pop this rivet out:
The hose will be free and you can pull it down from the top:
You can place the hose end where ever you like. I put it as far forward as I could. I zip tied it to the foglight harness (I assume that's what it is, just a bundled wire with a plug that goes nowhere). That placed the end pretty close to the lower grill:
That's it!
Just re-install everything the way it came apart. I give mad props to Toyota for the design of their plastic rivet things. They're so easy to remove and put back in. I'm used to the VW ones which have to be destroyed to remove lol.
With this of course there is the question that if it could suck up water and hydrolock, like with CAI's. Anything is possible I suppose, and it depends on where you put the end of the hose. Even then it will have to make it up the hose and through the still restrictive airbox/filter. Still I guess that's a threat.
Just wanted to share this with the community. Hope maybe someone will find it helpful in some way. I figured it's free and easy, so it can't hurt to share.
Thanks,
Mike


 .
.
Thread Starter
Senior Member
Scikotics
SL Member
Joined: Aug 2007
Posts: 526
From: Charleston, WV
Thanks guys.
Yeah that hose just goes down behind the bumper and loops back up.
I drove the car yesterday in the rain. I looked at the hose after I got home. There were a few little water drops right at the edge, so I might move it back a little more at some point. But I think it would be fine unless you drove through like two or three feet of water. The inside of the hose looks like some sort of cloth/foam material, so I think it may absorb some water anyways and prevent it from traveling the whole way up.
I ordered a K&N drop in, so moving the hose will help out a little. I haven't noticed a huge change or anything. I think the biggest improvement of this will be after the engine bay is full of heat, it won't be sucking in that hot air.
Yeah that hose just goes down behind the bumper and loops back up.
I drove the car yesterday in the rain. I looked at the hose after I got home. There were a few little water drops right at the edge, so I might move it back a little more at some point. But I think it would be fine unless you drove through like two or three feet of water. The inside of the hose looks like some sort of cloth/foam material, so I think it may absorb some water anyways and prevent it from traveling the whole way up.
I ordered a K&N drop in, so moving the hose will help out a little. I haven't noticed a huge change or anything. I think the biggest improvement of this will be after the engine bay is full of heat, it won't be sucking in that hot air.

Thread Starter
Senior Member
Scikotics
SL Member
Joined: Aug 2007
Posts: 526
From: Charleston, WV
There's the potential for water to get sucked up the intake and do damage when it gets to the engine. I know a ton of people myself included that have had CAI's on other cars for a long time and all sorts of weather and never had any problems at all. I don't personally know anyone that has ever had a problem, only read about it from time to time. I still think you'd have to drive through like 2 feet of water to do it, but people swear their engine hydrolocked in normal rain/wet roads.
On the new xB's, the lower corner is almost completely enclosed. The fender liner goes all the way up to the piece that runs under the bumper. The only openings really are inside by the lower grill. So if you had an open filter CAI down there, I'd say the chance of it even getting a little wet are slim to none. And if you're worried about it, the TRD CAI has an airbox down at the end which is about the closest you could get to a water proof CAI.
On the new xB's, the lower corner is almost completely enclosed. The fender liner goes all the way up to the piece that runs under the bumper. The only openings really are inside by the lower grill. So if you had an open filter CAI down there, I'd say the chance of it even getting a little wet are slim to none. And if you're worried about it, the TRD CAI has an airbox down at the end which is about the closest you could get to a water proof CAI.

Senior Member

SL Member
Joined: Jun 2005
Posts: 2,845
From: El Paso, TX
So I removed the rubber ribbed hose completely from the airbox tube and just have the tube sucking air from the fender well. What I also did was take out the fake side vent and drilled cleaning looking slots through it kind of like the TRD intake replacement and tube pretty much sits above where the air would come through. I might shorten and reconnect the rubber hose so that its directly behind the air vent for maximum effect but I think how it is now is working really well. Also pulled the charcoal filter out of the top of the airbox and plugged the resonator on the rubber TB hose for a little more sound but not much. Hope to get a TRD or K&N drop in soon.

Junior Member
Joined: Oct 2007
Posts: 18
I just wanted to let you all know I was able to do MikeInABox's intake improvement from the top of the engine compartment without having to remove the front wheel and open the wheelwell liner, etc.. It was really pretty easy. After removing the snorkle from the top and the 10mm bolt, I was able to reach down and feel the one place where the duct hose is held in place with a fastener. That fastener is just one of those plastic rivets, and a firm tug on the duct hose at that point easily pulled it free. The only part I couldn't do from the top was fastening/zip-tying the open end of the duct hose in place near the lower grille. It seems to be staying in place just fine without being fastened. But, I'm thinking about removing whatever plastic covers are in the way and then positioning the original snorkle from the top near the lower grille and hooking the duct hose back onto it. I think it would be cool to re-use that snokle to make sort of a "ram-air" effect. The basic job was easier than expected, and I have to thank MikeInABox for providing the idea and the motivation to give this a try.

 Thanks for the write up.


FWIW -- I removed the original intake pipe to the air box, replaced it with an insulated 3" flexible duct, installed a flare at the intake end, a TRD vent in the nose fascia, and a gravity air-flap in the bottom of the air box to protect against Hydrolock. Works great and it definitely impacts both pull and sound. If you want numbers, do it yourself and pay for the Dynanometer runs  !
!
PS. Also installed a TRD air filter and removed the air box carbon filter.
!PS. Also installed a TRD air filter and removed the air box carbon filter.

FWIW -- I removed the original intake pipe to the air box, replaced it with an insulated 3" flexible duct, installed a flare at the intake end, a TRD vent in the nose fascia, and a gravity air-flap in the bottom of the air box to protect against Hydrolock. Works great and it definitely impacts both pull and sound. If you want numbers, do it yourself and pay for the Dynanometer runs !
PS. Also installed a TRD air filter and removed the air box carbon filter.
!PS. Also installed a TRD air filter and removed the air box carbon filter.

Member
SL Member
Joined: May 2009
Posts: 93
From: Pukalani, Maui, HI
ok i did this and it makes a very dif noise especially after clogging the resonator hole but it might just be my imagination but fells a tiny but zippier. but any way not what i intended to really post what i was gunna really say is for those of you who are worried about hydrolocking we just had like really bad rain here on maui like nonstop for 3 days and every day after getting home i checked the hose and the outside had few to no wetness and the sponge stuff inside was dry and cold. i feel my car is happy getting that cold dense air compared to that hot air from the engine bay

Senior Member
SL Member
Joined: Aug 2007
Posts: 372
From: SoCalifornia
This looks similar to a Doc. Iso GFI.
There's little chance of hydro lock
-the filter is up high so there is no straw-effect like the down-low filter on a CAI
-in the airbox housing, there is likely a "drain hole" (I know my tC has one)
Another weak link mentioned by Doc is that the intake tube from the TB to the airbox is not thermal resistant and it is best to replace it with Spectra parts.
There's little chance of hydro lock
-the filter is up high so there is no straw-effect like the down-low filter on a CAI
-in the airbox housing, there is likely a "drain hole" (I know my tC has one)
Another weak link mentioned by Doc is that the intake tube from the TB to the airbox is not thermal resistant and it is best to replace it with Spectra parts.

Thread
Thread Starter
Forum
Replies
Last Post
BloxRacing
Regional - Pacific Mid
0
Apr 17, 2015 10:17 PM
carid
Exclusive Sponsored Sales
2
Mar 30, 2015 07:08 AM
carid
Exclusive Sponsored Sales
0
Jan 8, 2015 11:33 AM
