
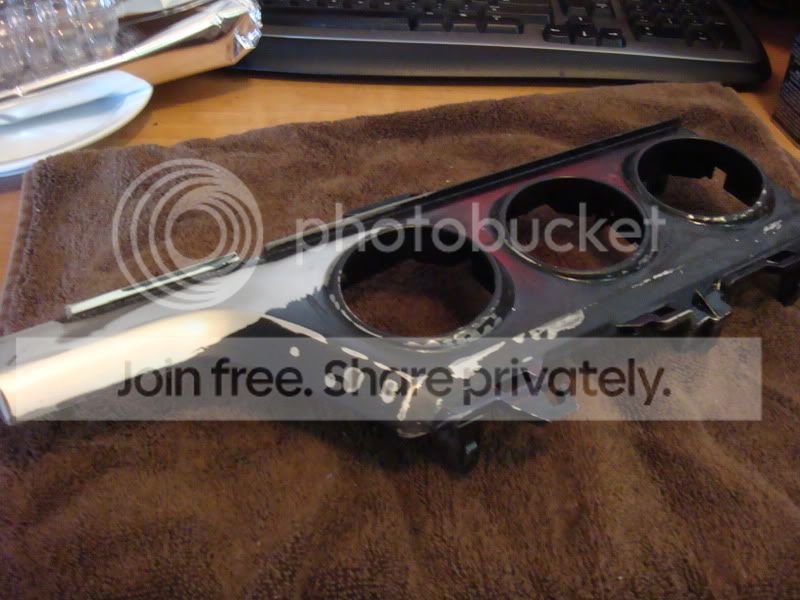
Painting the trim pieces

Senior Member
SL Member
Joined: Jul 2007
Posts: 360
From: Corona, CA
Originally Posted by Whispaz
correct. or you can just paint over all the old layers but i'd sand for it to adhere better
what kind of paper should i get?

Senior Member

SL Member
Team ScioNRG
Joined: May 2004
Posts: 2,337
Soak the parts in brake fluid. It will remove the paint without hurting the plastic. Depending on the paint it could take up to a week for it to come off. Better slow than damaged.
For sandpaper I recommend using 400 or maybe 600 grit that is water resistant. The paper will last longer and the surface usually comes out smoother when wet sanding.
If you use Fusion paint, you don't have to prime. For any other paint find a good primer and be sure to wet sand before painting for a smooth surface.
Senior Member
SL Member
Joined: Jul 2007
Posts: 360
From: Corona, CA
Originally Posted by chadfo
Soak the parts in brake fluid. It will remove the paint without hurting the plastic. Depending on the paint it could take up to a week for it to come off. Better slow than damaged.
For sandpaper I recommend using 400 or maybe 600 grit that is water resistant. The paper will last longer and the surface usually comes out smoother when wet sanding.
If you use Fusion paint, you don't have to prime. For any other paint find a good primer and be sure to wet sand before painting for a smooth surface.
For sandpaper I recommend using 400 or maybe 600 grit that is water resistant. The paper will last longer and the surface usually comes out smoother when wet sanding.
If you use Fusion paint, you don't have to prime. For any other paint find a good primer and be sure to wet sand before painting for a smooth surface.
Senior Member
SL Member
Team ScioNRG
Joined: May 2004
Posts: 2,337
It depends on your first paint job. If it just looks bad but is well adhered, you can just sand smooth and repaint. If you are unsure or if it's easy to scratch, take it back to bare plastic. Good paint over bad paint equals a short life for your good paint and having to start over. It's better to take the time to do it right now then to have to redo it all over again later.

Senior Member
Utah Scions
SL Member
Joined: Aug 2007
Posts: 4,139
From: City of Salt, Utah
I'd recommend wet sanding whatever you want painted with some 500grit. I've done it before on other cars... It's not that hard. But then again, I was using automotive paint...
If you want to paint something with a texture, and do not want that texture, then of course you'll have to sand off the texture. After sanding off the texture, I'd recommend a prime and guidecoat. It all depends on how you want the final result to be.
But 500grit wet. If I do any parts on my car, that's what I'll do. Just enough of a sand so water won't glide off of and it's not glossy. It'll give the paint a tooth to adhere to.


Senior Member
Scikotics
SL Member
Joined: Dec 2007
Posts: 766
From: GA
Here are the steps I took:
sand with 800 grit
wet sand with 1000 grit
dip in distilled water bath, wipe down with clean rag
spray 2 coats of plastic adhesion promoter
plastic primer
4 coats of base white
wet sand with 2000 grit
distilled water bath and wipe down
6 coats of pearl white
wet sand with 2000 grit
distilled water bath and wipe down
4 coats of clear coat
wet sand with 2000 grit
distilled water bath and wipe down
install and be amazed

Senior Member
SL Member
Joined: Jul 2007
Posts: 360
From: Corona, CA
Originally Posted by coryjames
um get some say 320 grit sand it down go light on corners take your time with lighter coats its not really that hard just got to be patient
whats the best paint to use? im using krylon plastic paint

Senior Member
SL Member
Joined: Aug 2006
Posts: 1,066
From: Vegas baby!
inside trim duplicolor metalcast
light sanding w/320
clean clean clean
coat of adhesion promoter (per direction on the can)
light coats of metalcast 'groundcoat'
let dry per package
light coats of metalcast blue
let cure for about a week
duplicolor clear

underhood
light sand w320
clean clean clean
light coats of krylon fusion blue
let cure for about a week
krylon clear
apply randodes chrome lettering
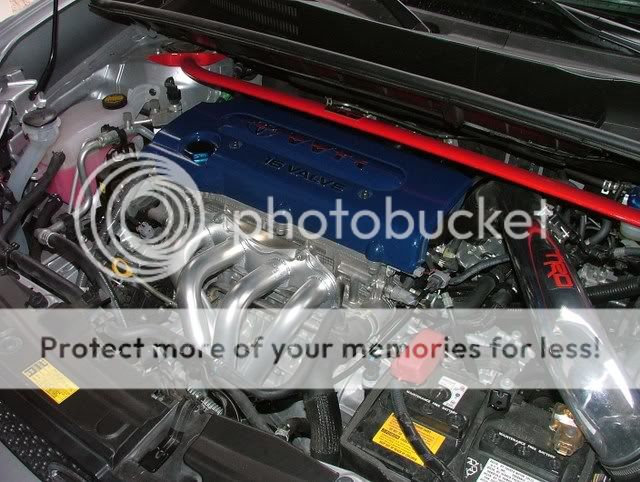
after almost 6 months no peeling, cracking etc...
light sanding w/320
clean clean clean
coat of adhesion promoter (per direction on the can)
light coats of metalcast 'groundcoat'
let dry per package
light coats of metalcast blue
let cure for about a week
duplicolor clear
underhood
light sand w320
clean clean clean
light coats of krylon fusion blue
let cure for about a week
krylon clear
apply randodes chrome lettering
after almost 6 months no peeling, cracking etc...
Senior Member
SL Member
Joined: Aug 2006
Posts: 1,066
From: Vegas baby!
Originally Posted by xbean
heres my steps...
-paint with krylon plastic paint
-dry
-fail miserably
-have a fit
-wonder where to go from there....
any ideas?
-paint with krylon plastic paint
-dry
-fail miserably
-have a fit
-wonder where to go from there....
any ideas?
do the brake fluid and get back to a clean surface.
Originally Posted by lvbitwiz
inside trim duplicolor metalcast
light sanding w/320
clean clean clean
coat of adhesion promoter (per direction on the can)
light coats of metalcast 'groundcoat'
let dry per package
light coats of metalcast blue
let cure for about a week
duplicolor clear
underhood
light sand w320
clean clean clean
light coats of krylon fusion blue
let cure for about a week
krylon clear
apply randodes chrome lettering
after almost 6 months no peeling, cracking etc...

Thread Starter
Member
AlphaSquad
SL Member
Joined: Jan 2008
Posts: 90
From: Los Angeles, CA
Hey thanks guys well i used some plastic parts 2 practice on and those where the one's that i said when i put my nail on it they would scratch well i sanded one and the other i just painted over
Well right now after 2 days i tried again 2 scratch the one that i didnt sand did scratch but the one that i did sand down did scratch now i know what ima be doing for spring break lol
Well right now after 2 days i tried again 2 scratch the one that i didnt sand did scratch but the one that i did sand down did scratch now i know what ima be doing for spring break lol