DIY- Radiator Removal w/Pictures
#1
Help! How do I remove the Radiator?
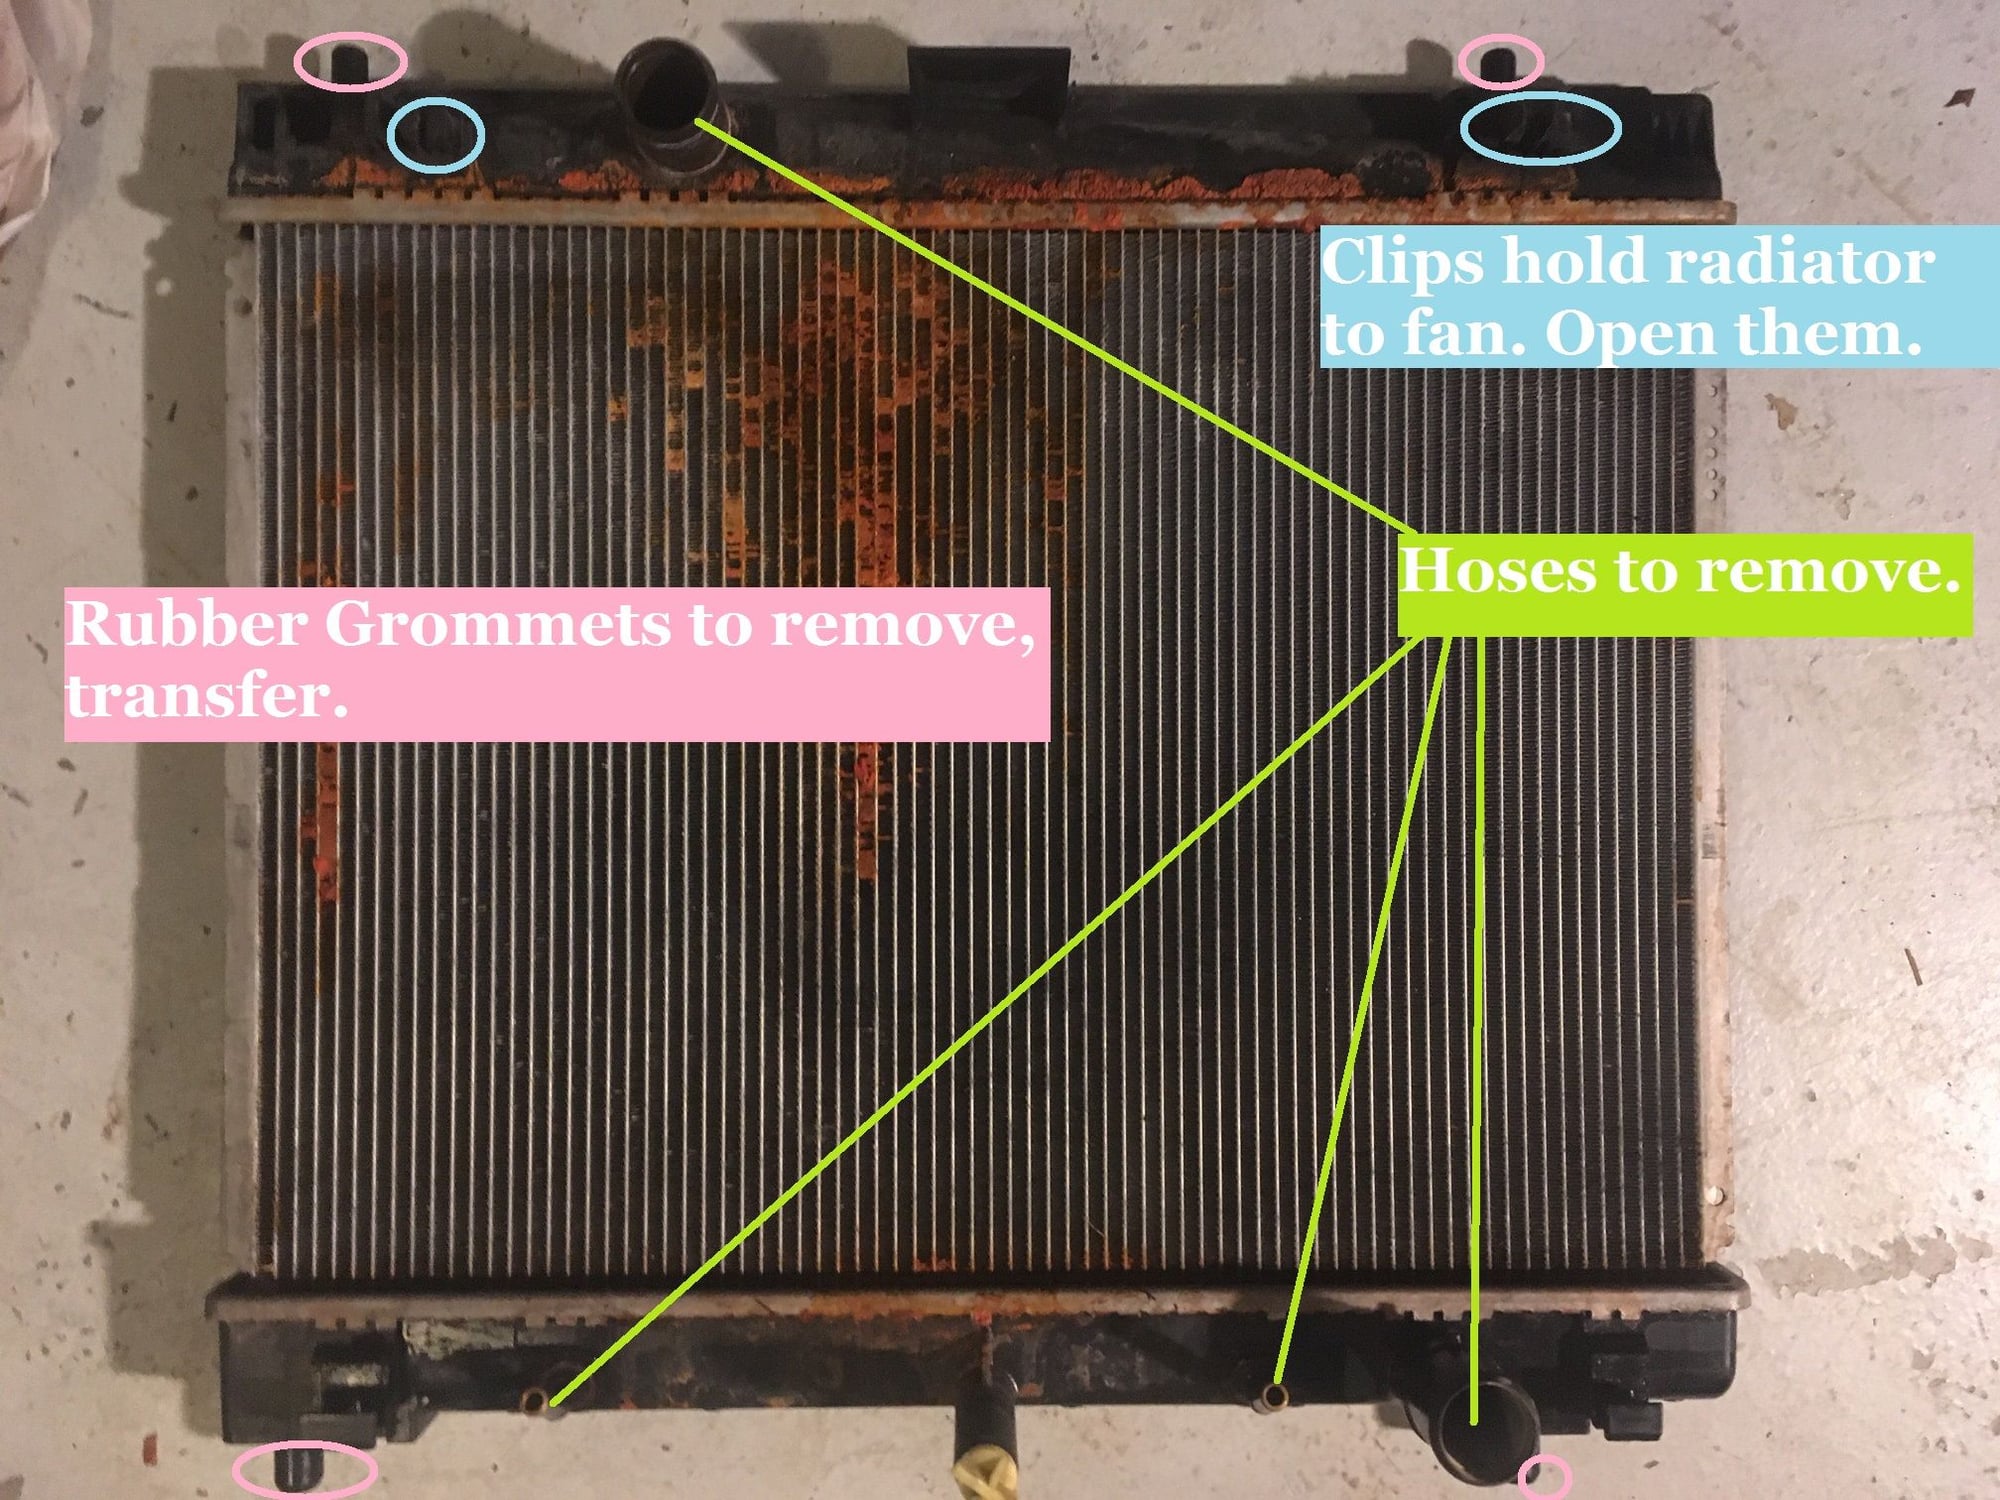
I have removed the bottom hoses and upper hose. But what is holding the Radiator in place?
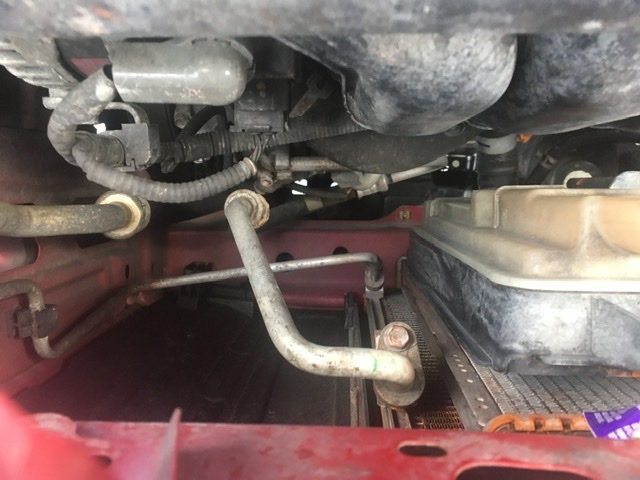
I donít see a retaining bracket like in other cars. There are also two extra lines going into the Radiator that I donít recognize.
I've searches YouTube and Google without finding info on the xD.
Help appreciated.
____
Last edited by MR_LUV; 03-06-2020 at 06:04 PM. Reason: Becomes a Sticky
#3
I haven't tried to replace a Radiator in an xD, but Toyota often has bolts going into the Radiator from the side.
Look at the sides of the Radiator, top and bottom, for what I'm guessing will be 12mm bolt heads.
_____
Last edited by MR_LUV; 03-03-2020 at 11:43 PM. Reason: Awarded 10 Yr Badge
#4
Those two extra lines are transmission fluid. The Radiator also contains a Transmission cooler. I haven't tried to replace a Radiator in an xD, but Toyota often has bolts going into the Radiator from the side.
Look at the sides of the Radiator, top and bottom, for what I'm guessing will be 12mm bolt heads.
Look at the sides of the Radiator, top and bottom, for what I'm guessing will be 12mm bolt heads.
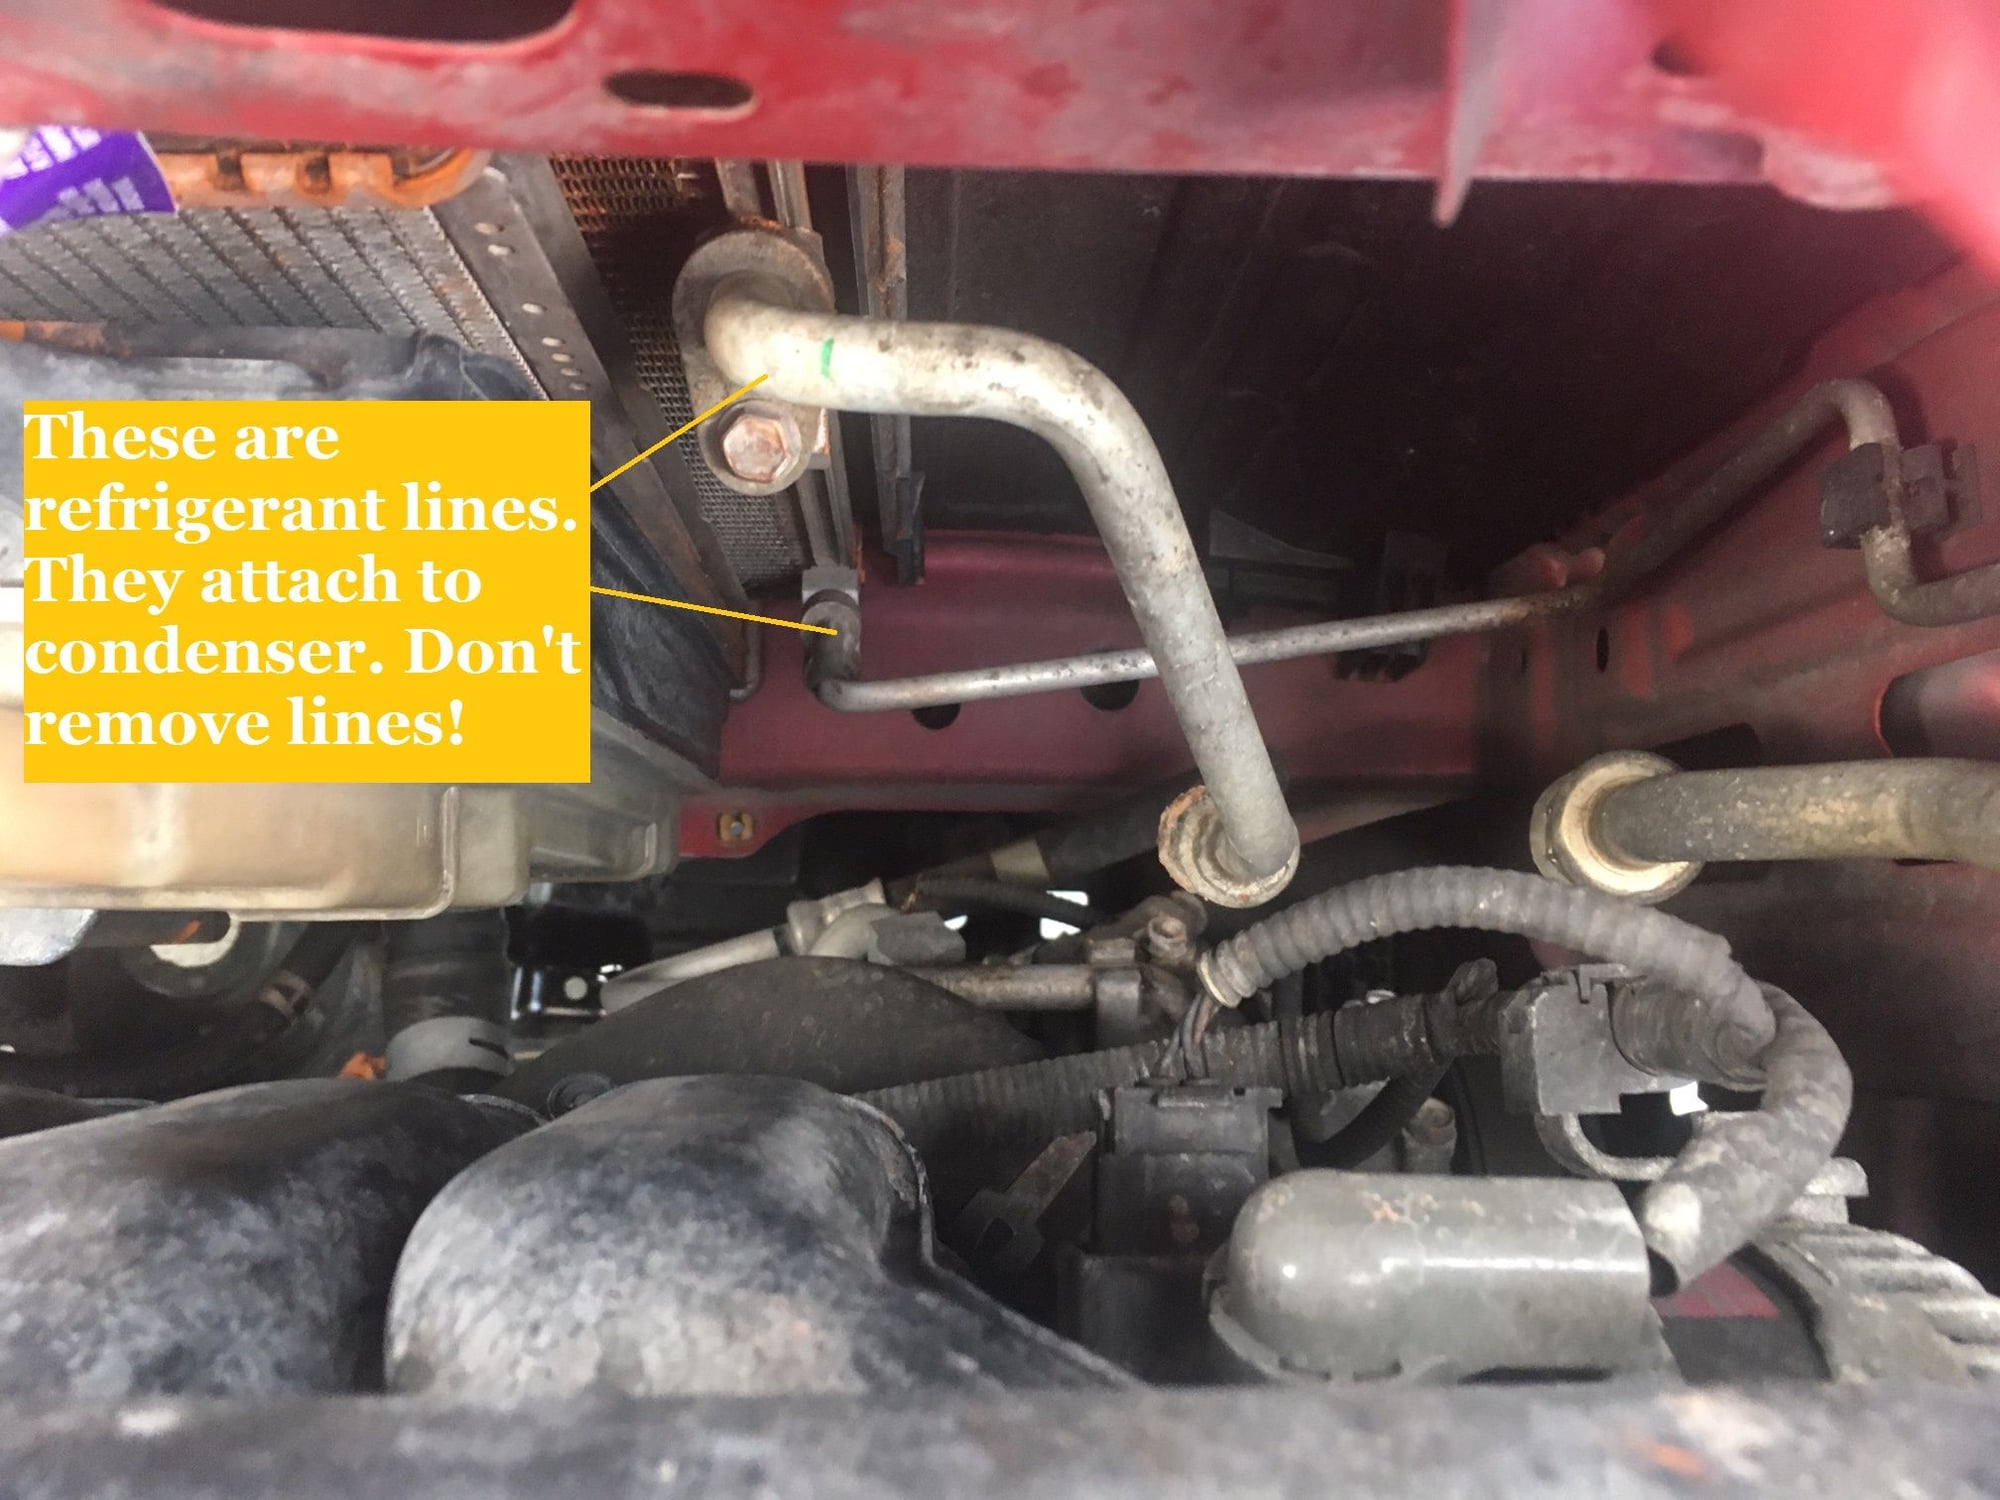
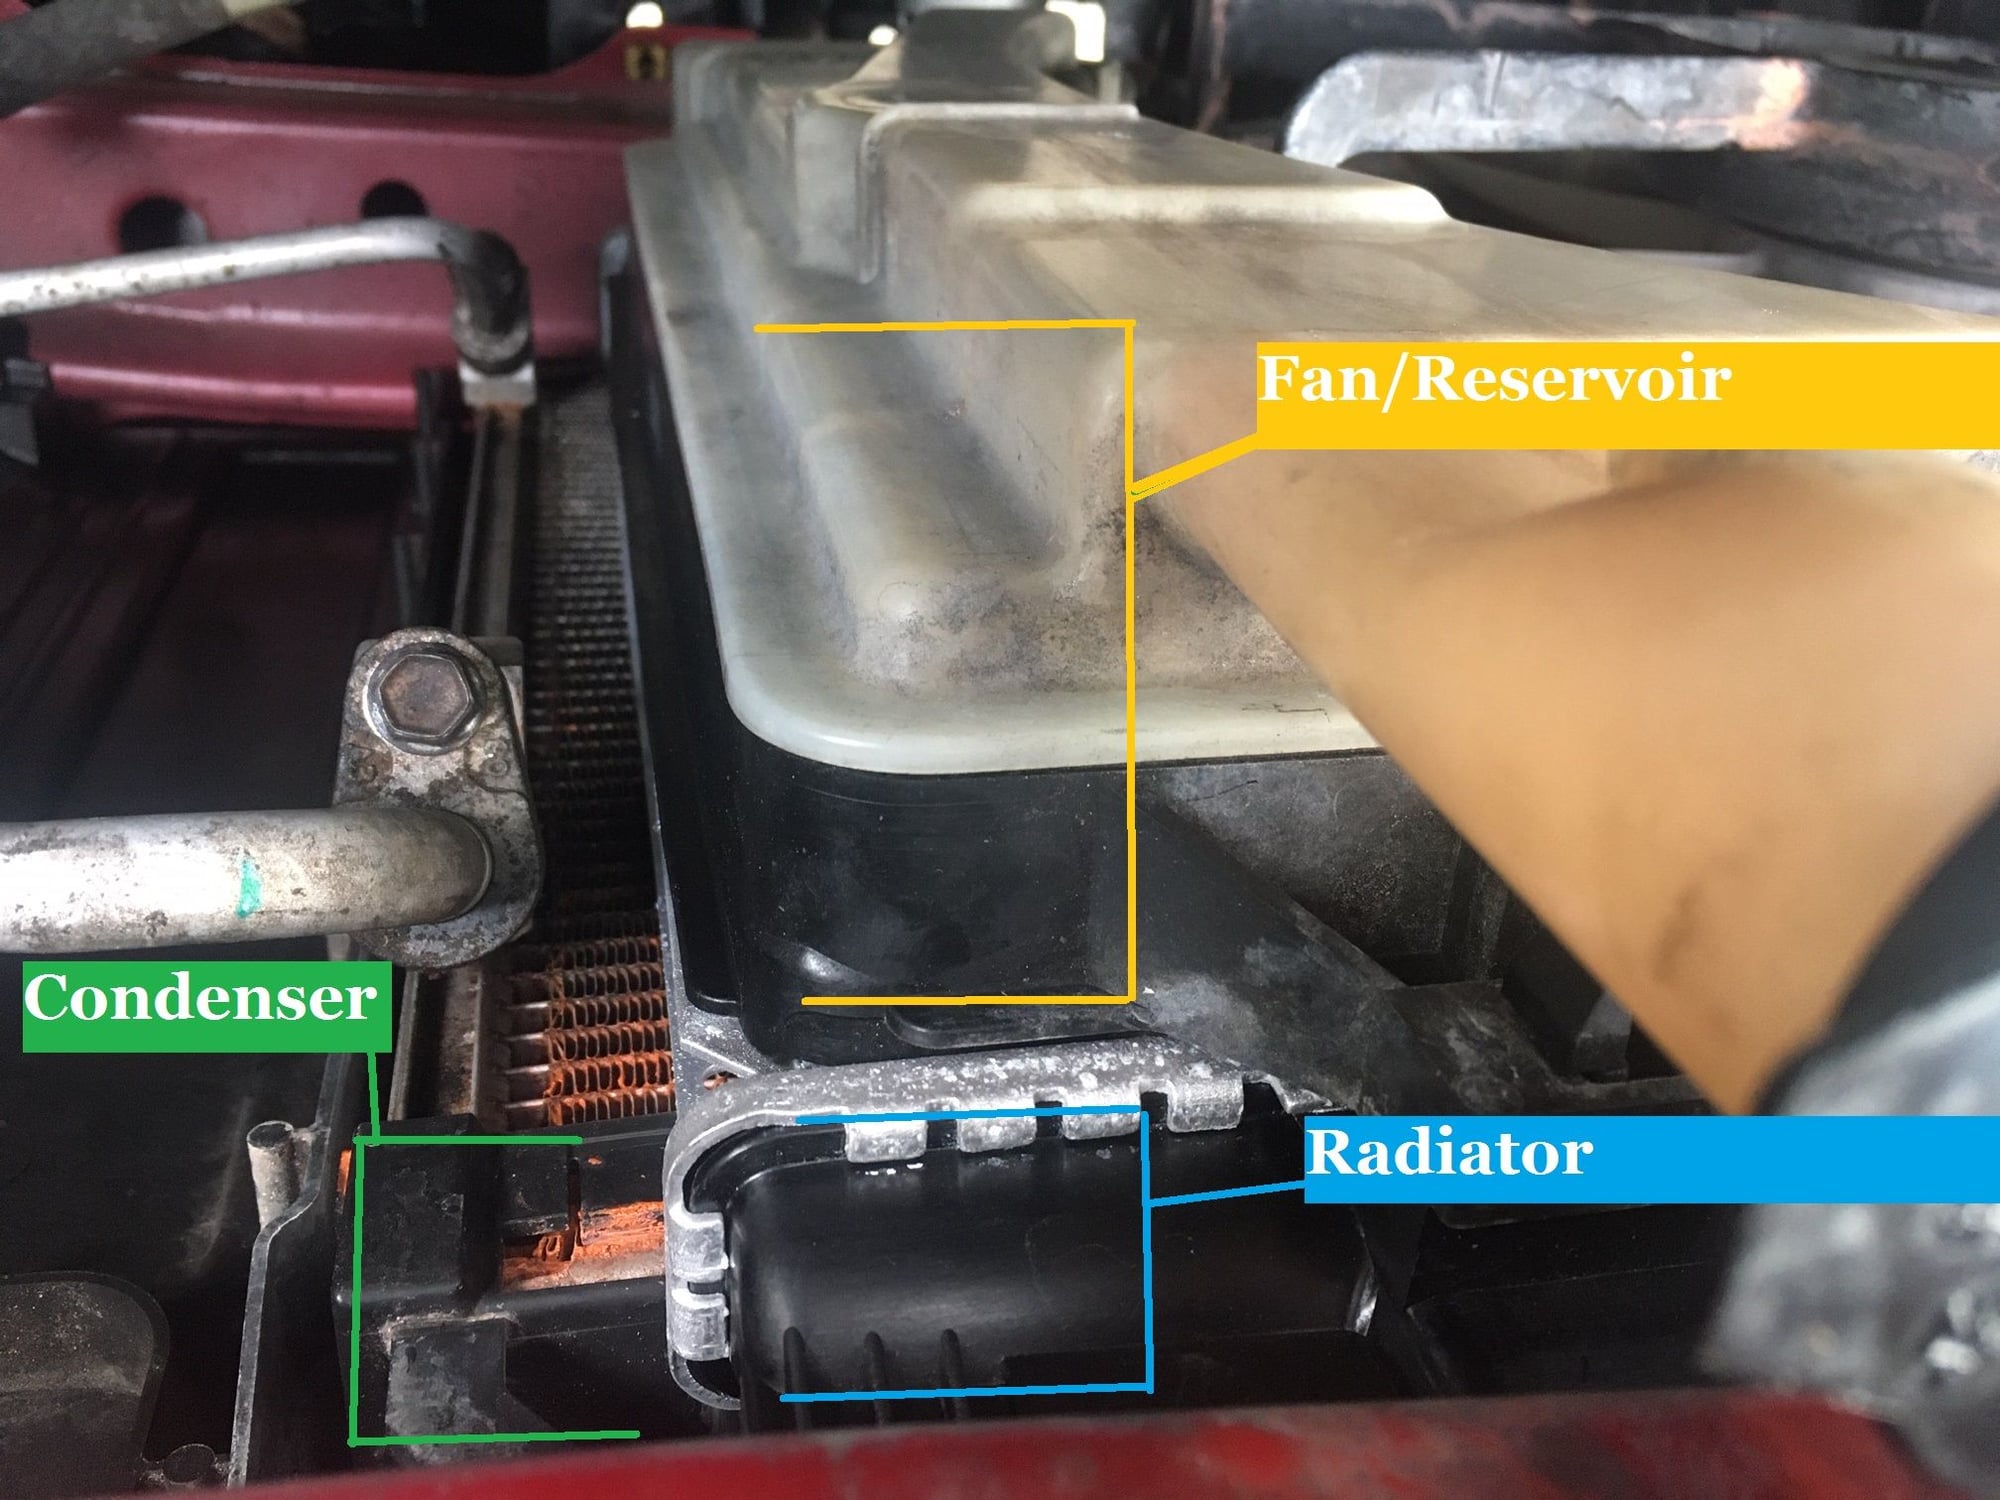
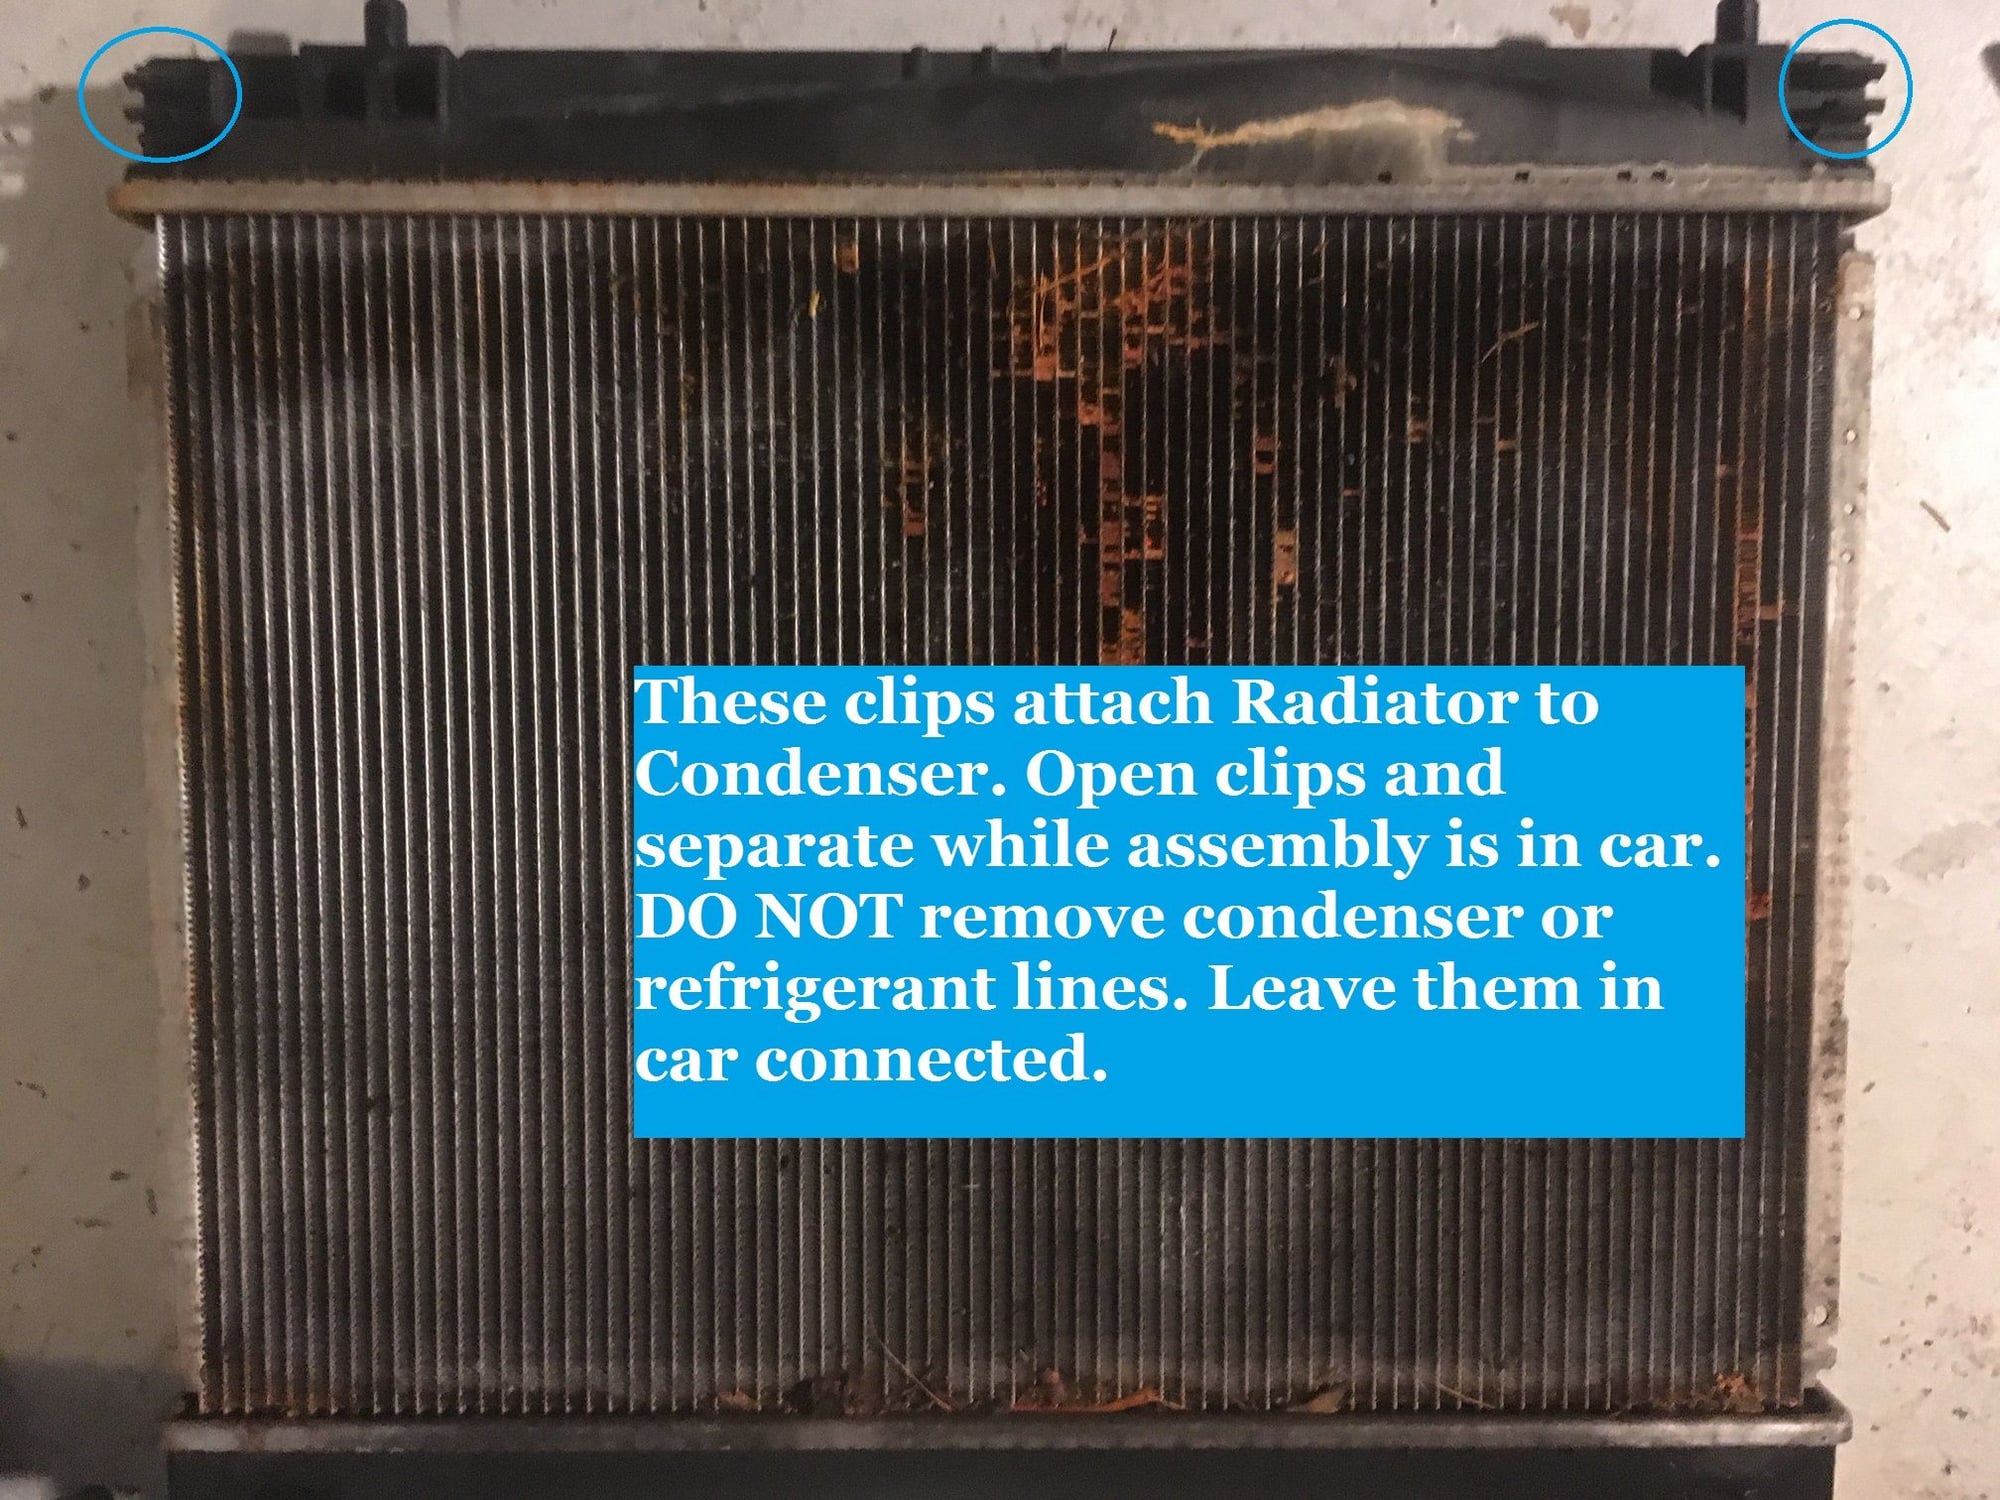
Those two lines are REFRIGERANT LINES. I made the fatal error myself. The Radiator and the A/C Condenser are sandwiched together by clips. (And they look exactly alike, by the way.) Those two lines look like they are going into the Radiator,
but they actually are going into the Condenser that is attached to the Radiator. You must unclip the Radiator and the Condenser from each other and leave the Condenser there WITHOUT removing the lines. (Or all of the refrigerant will leak into the atmosphere.)
For future Scion xDers, let me tell you how the Radiator is bolted to the car. (I may even make a video for YouTube walking you through it.)
1. You must remove four hoses, just like in every other car.
2. Disconnect negative battery terminal.
3. Drain Radiator
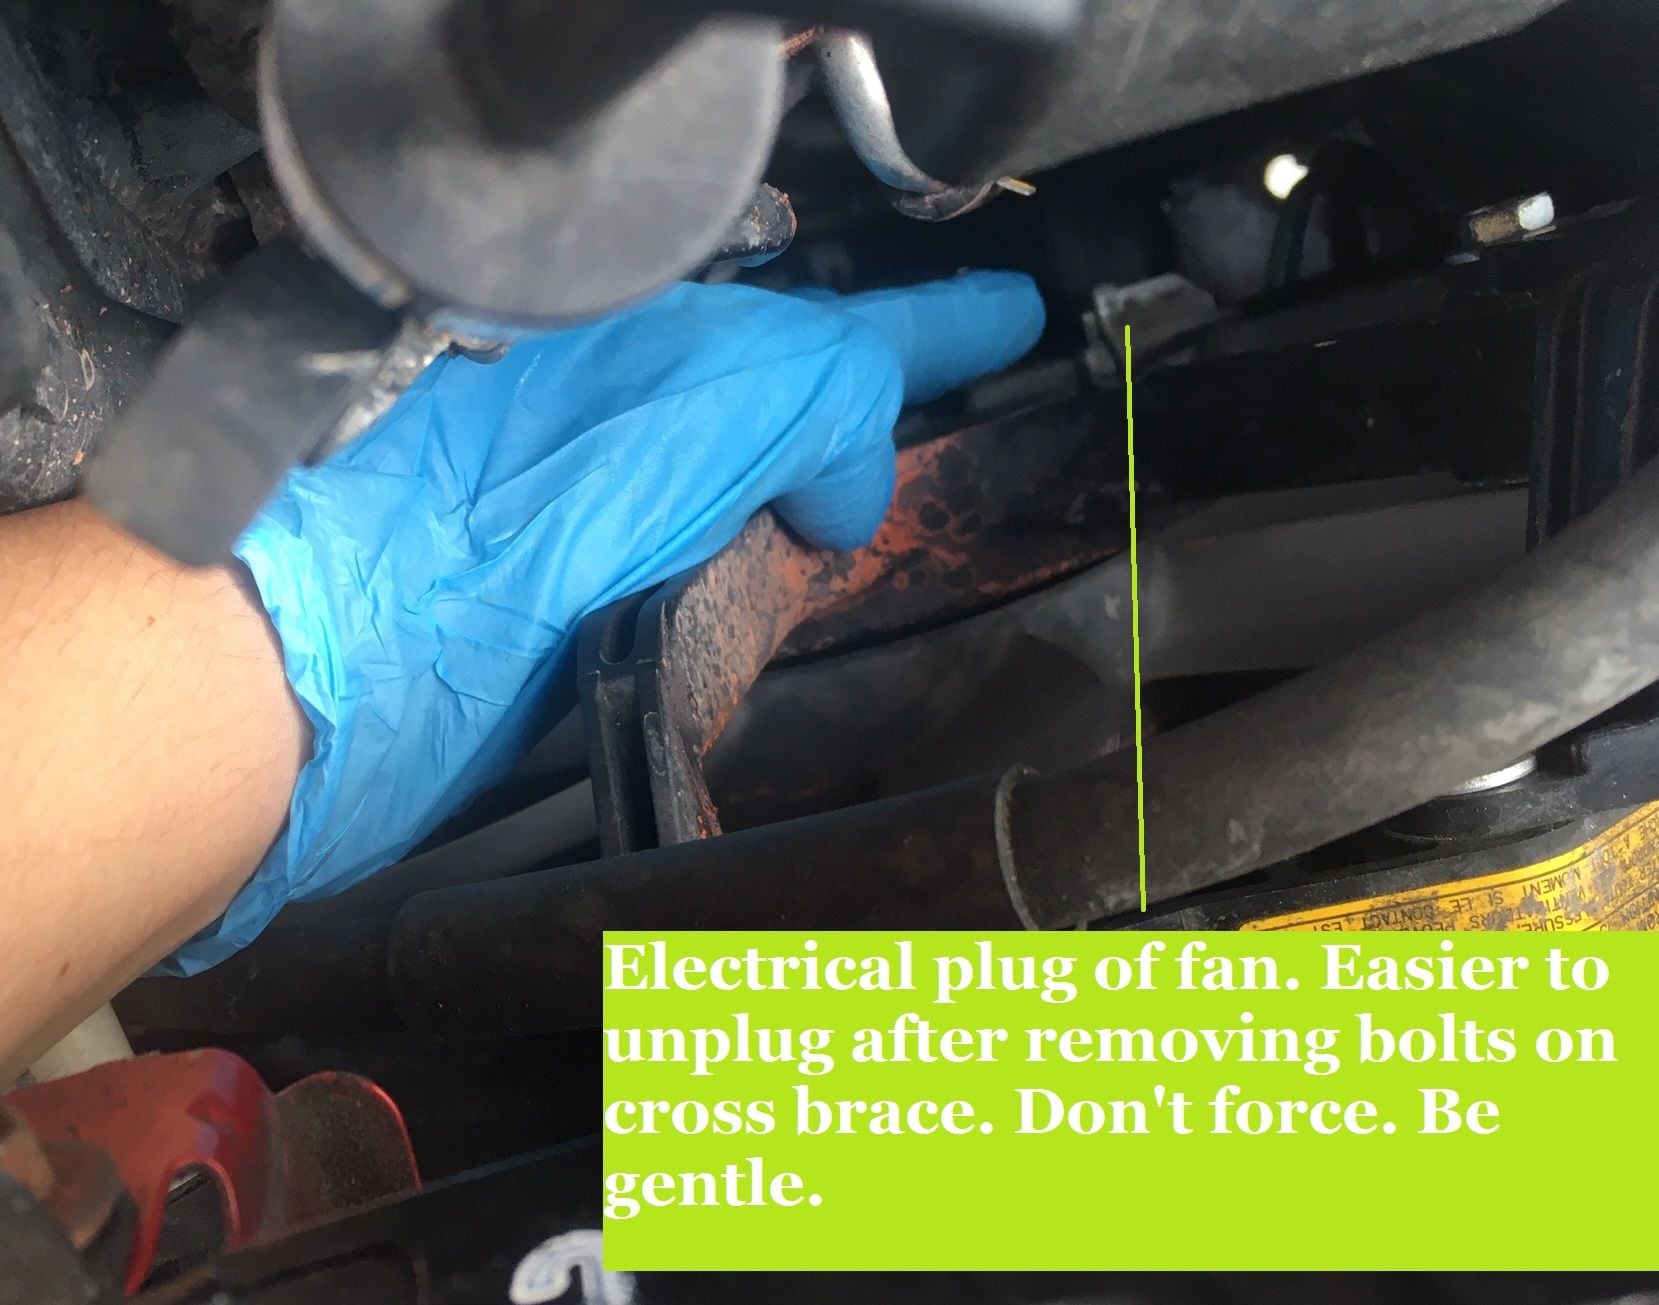
4. Disconnect electrical plug for fan
This is where it gets Scion-fun:
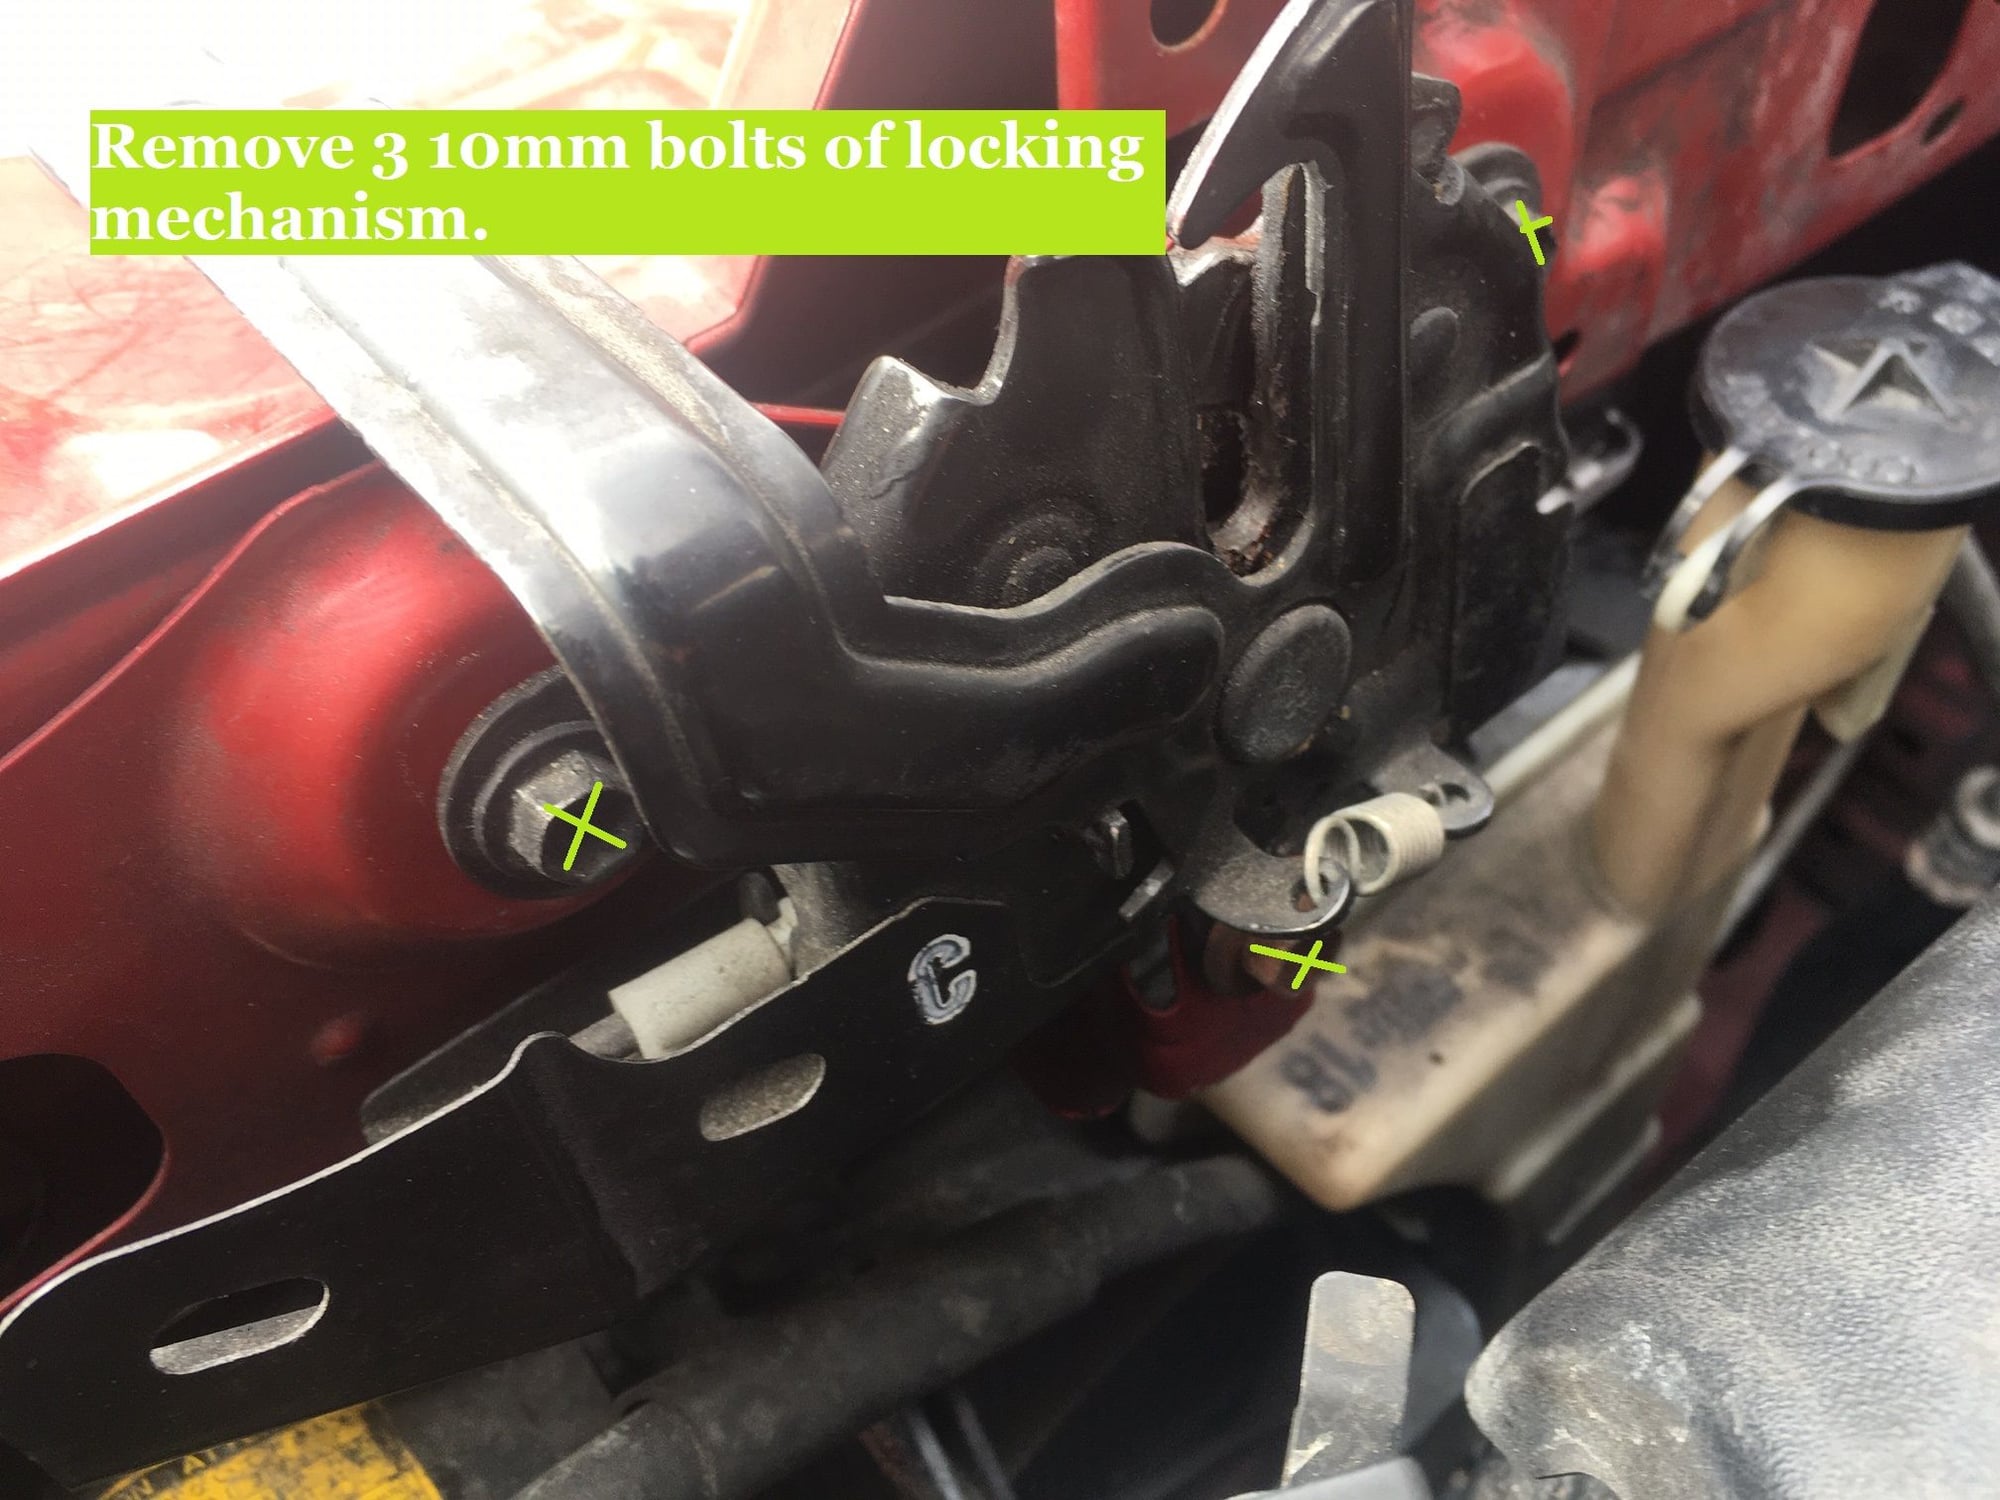
4. Remove the bottom part of the locking mechanism for the hood. Three 10mm bolts.
5. Pull off the plastic fender (10mm bolts under car, plastic pop rivets everywhere else)
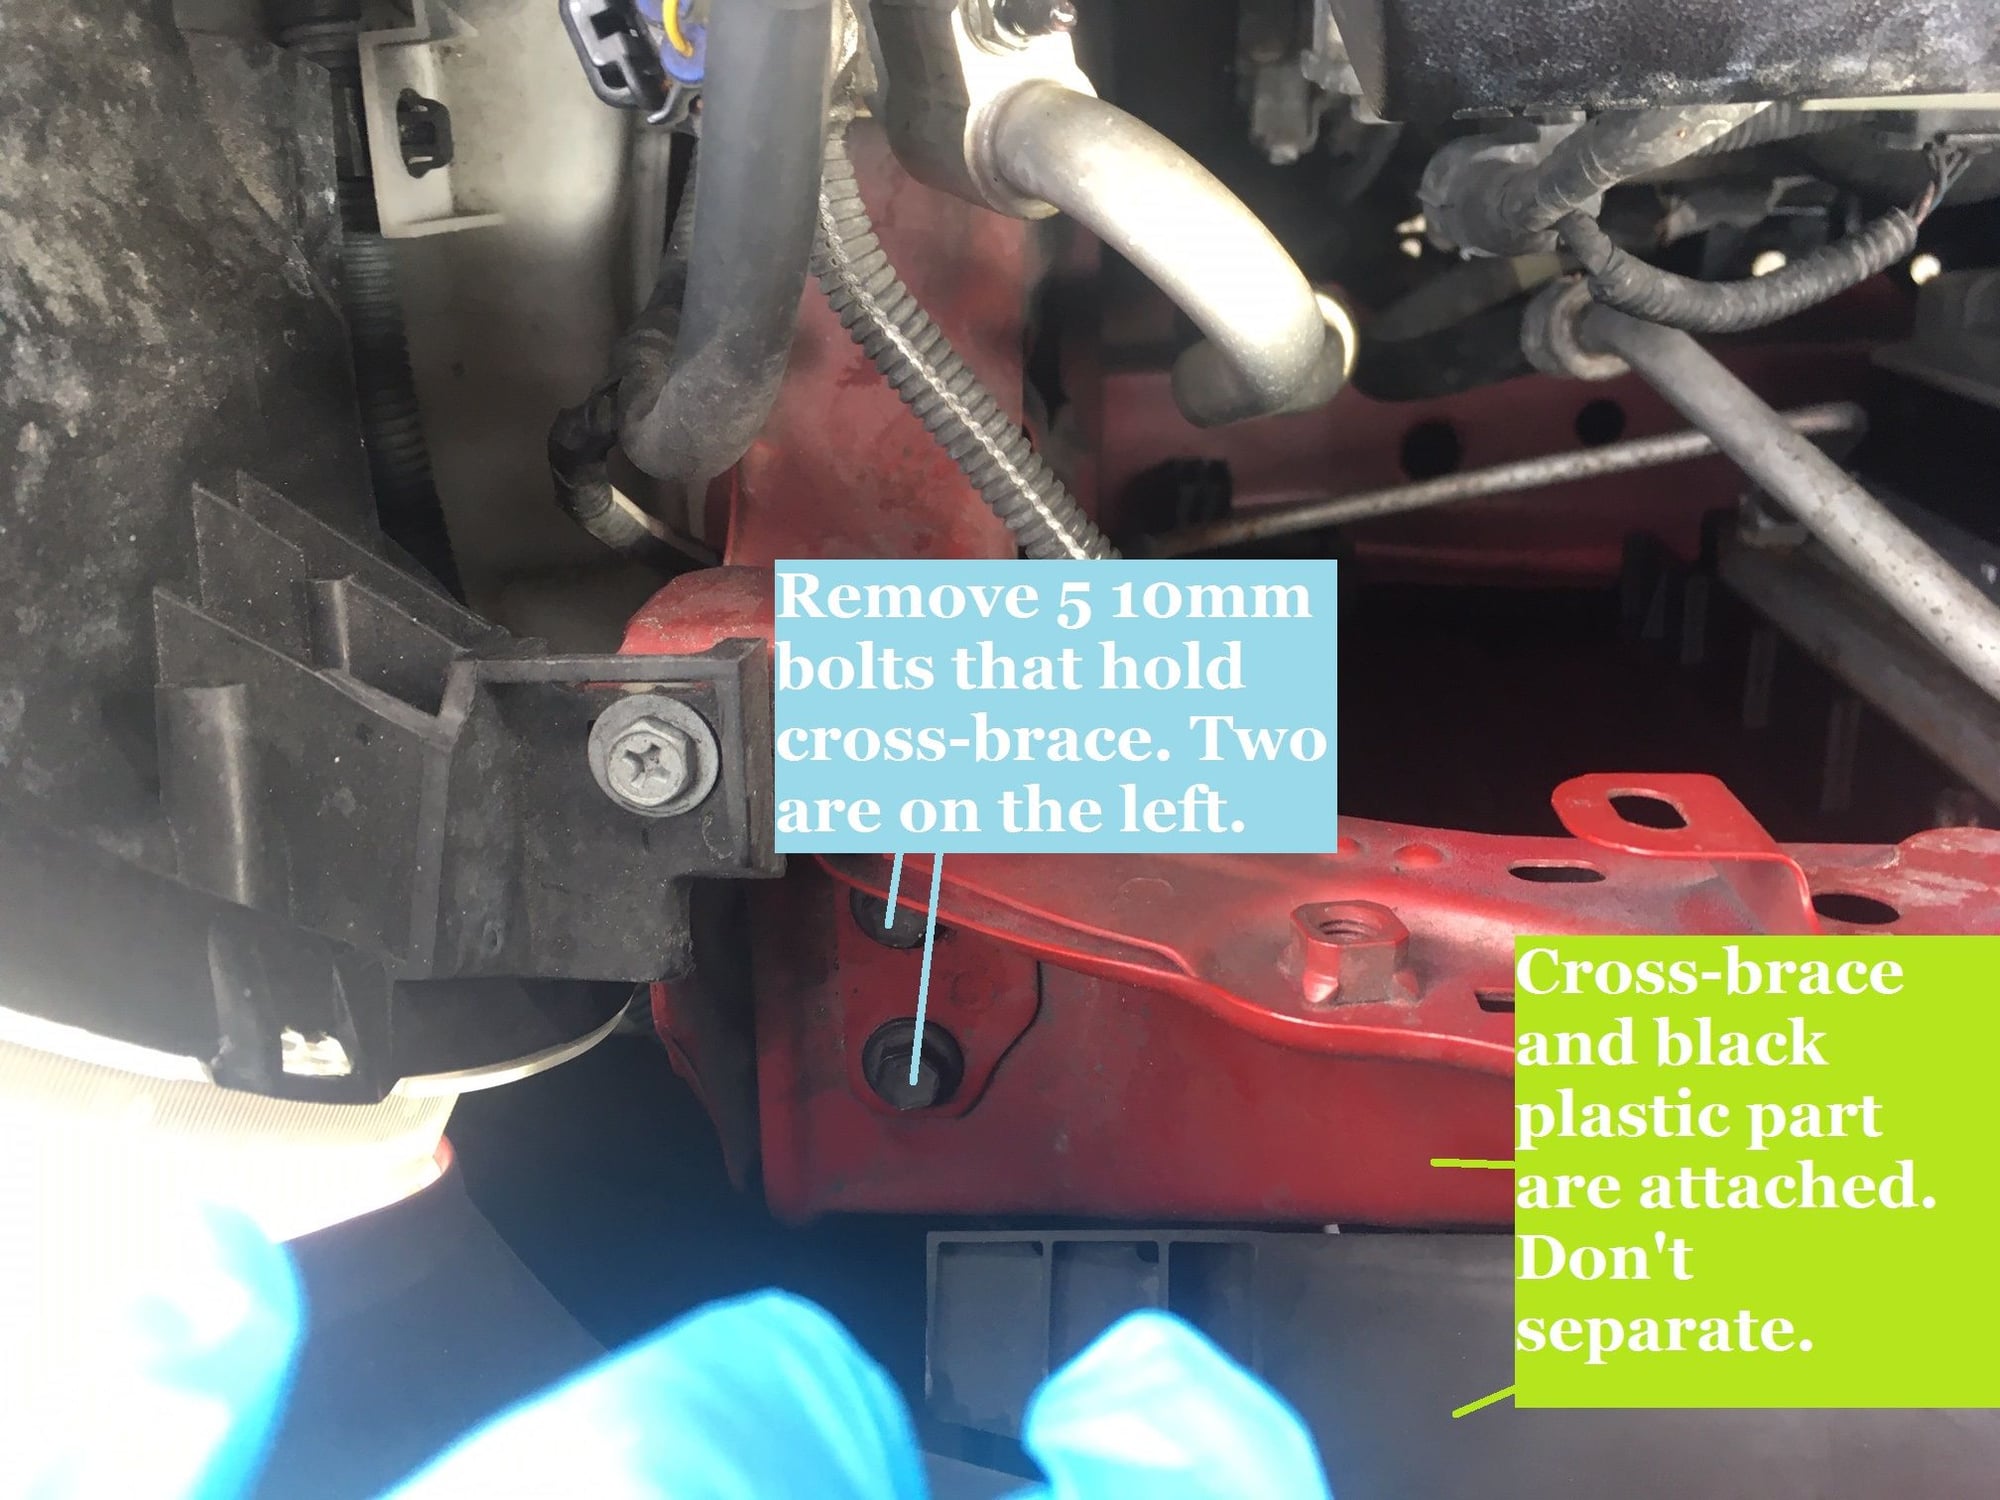
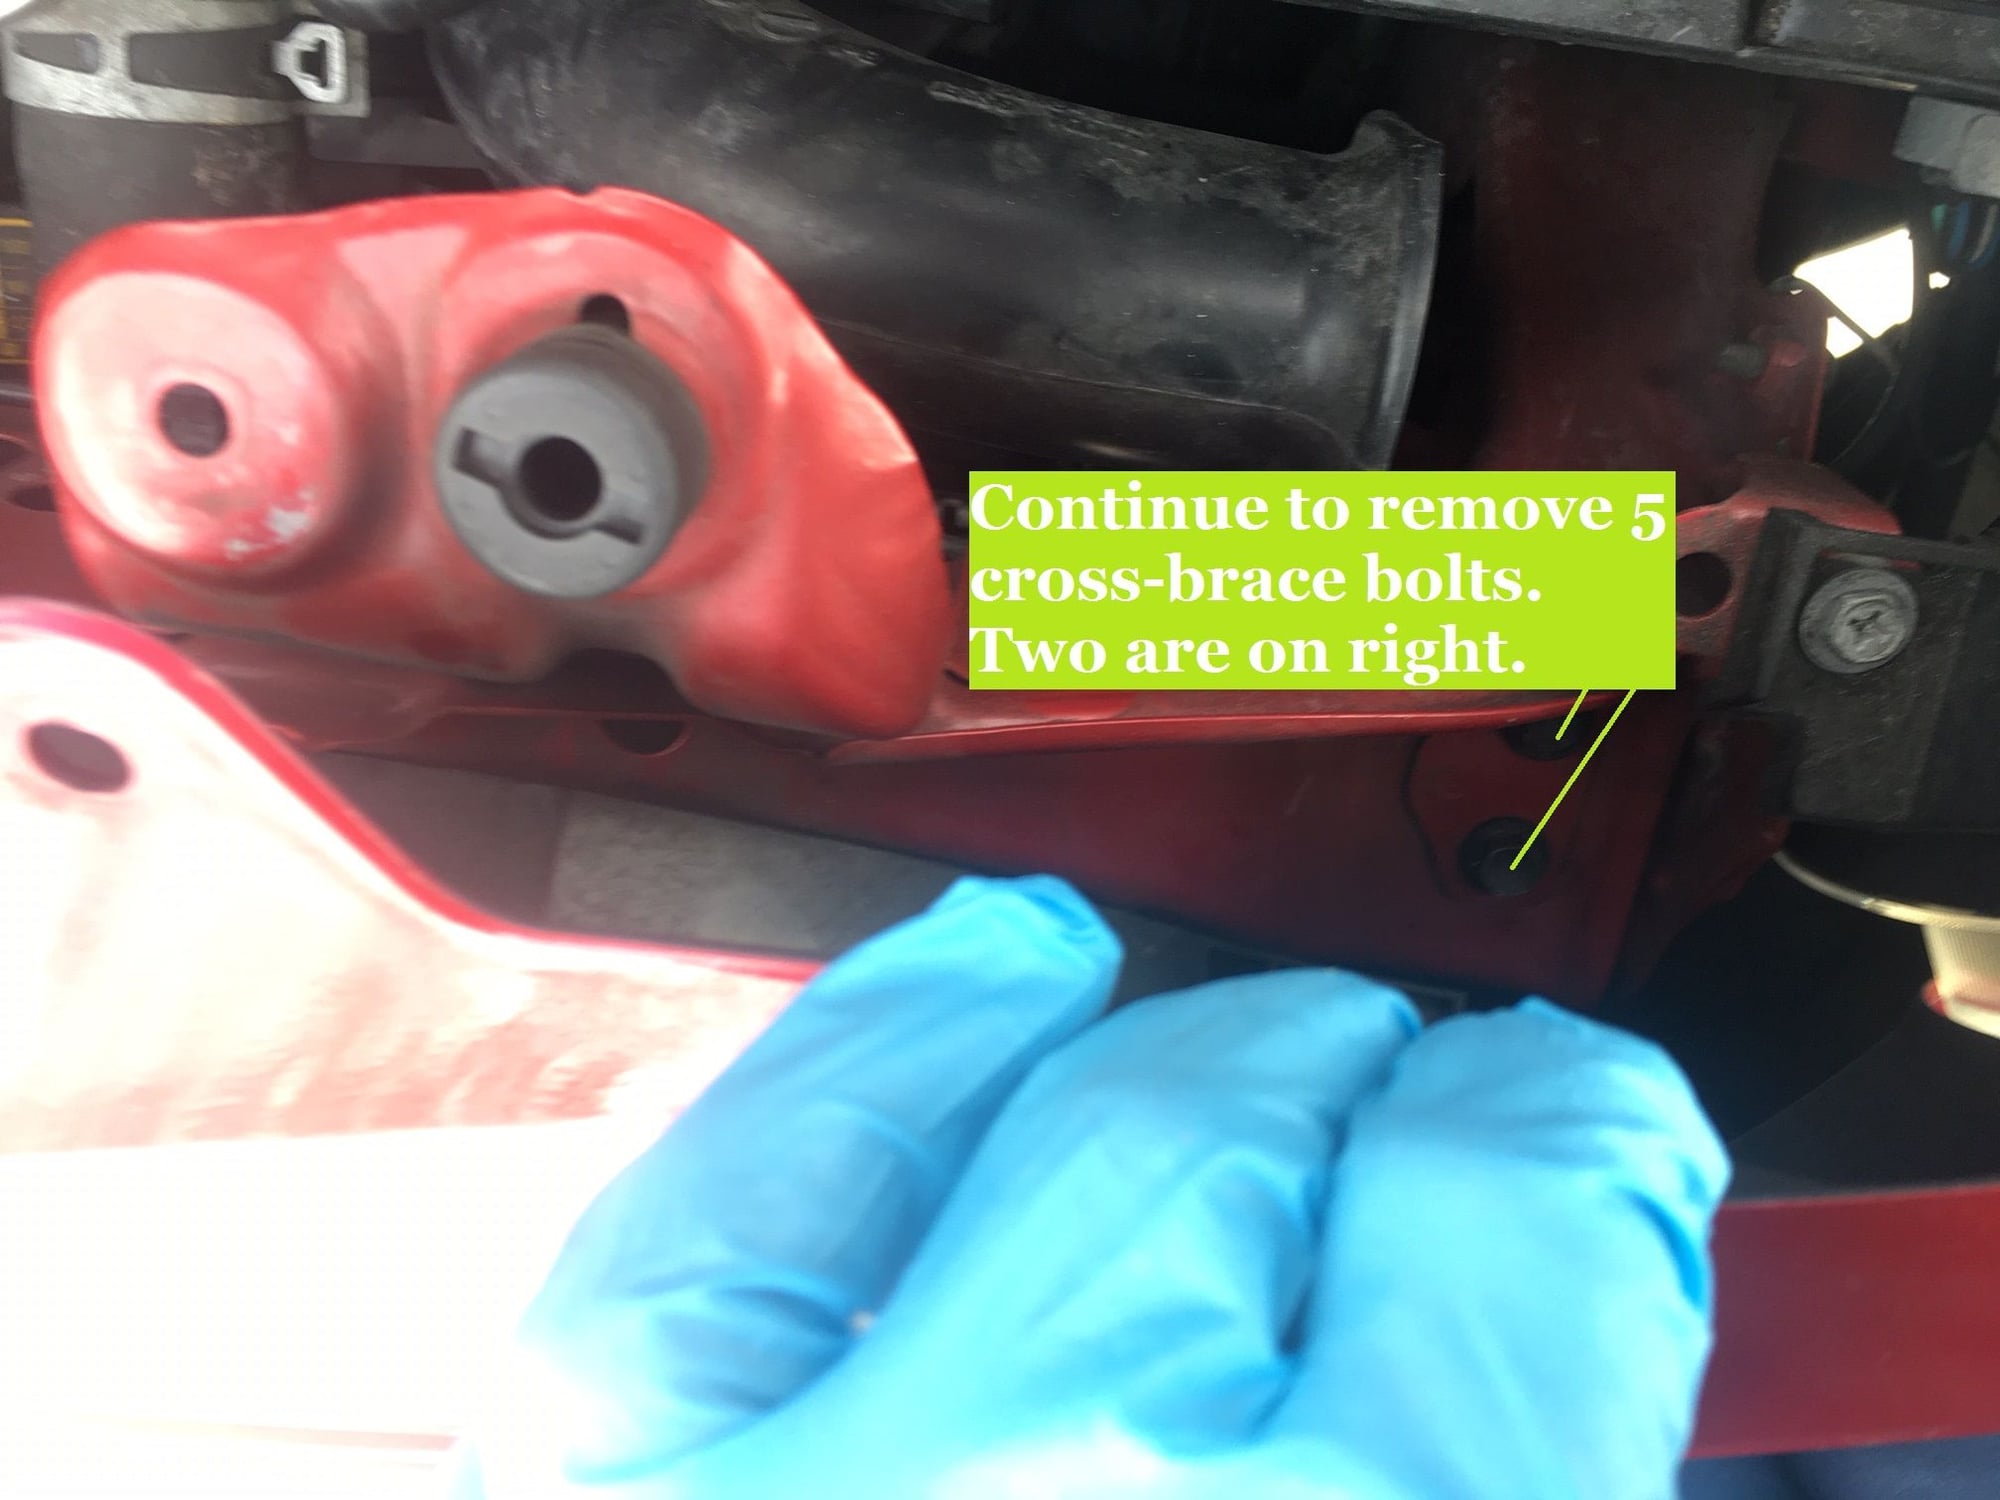
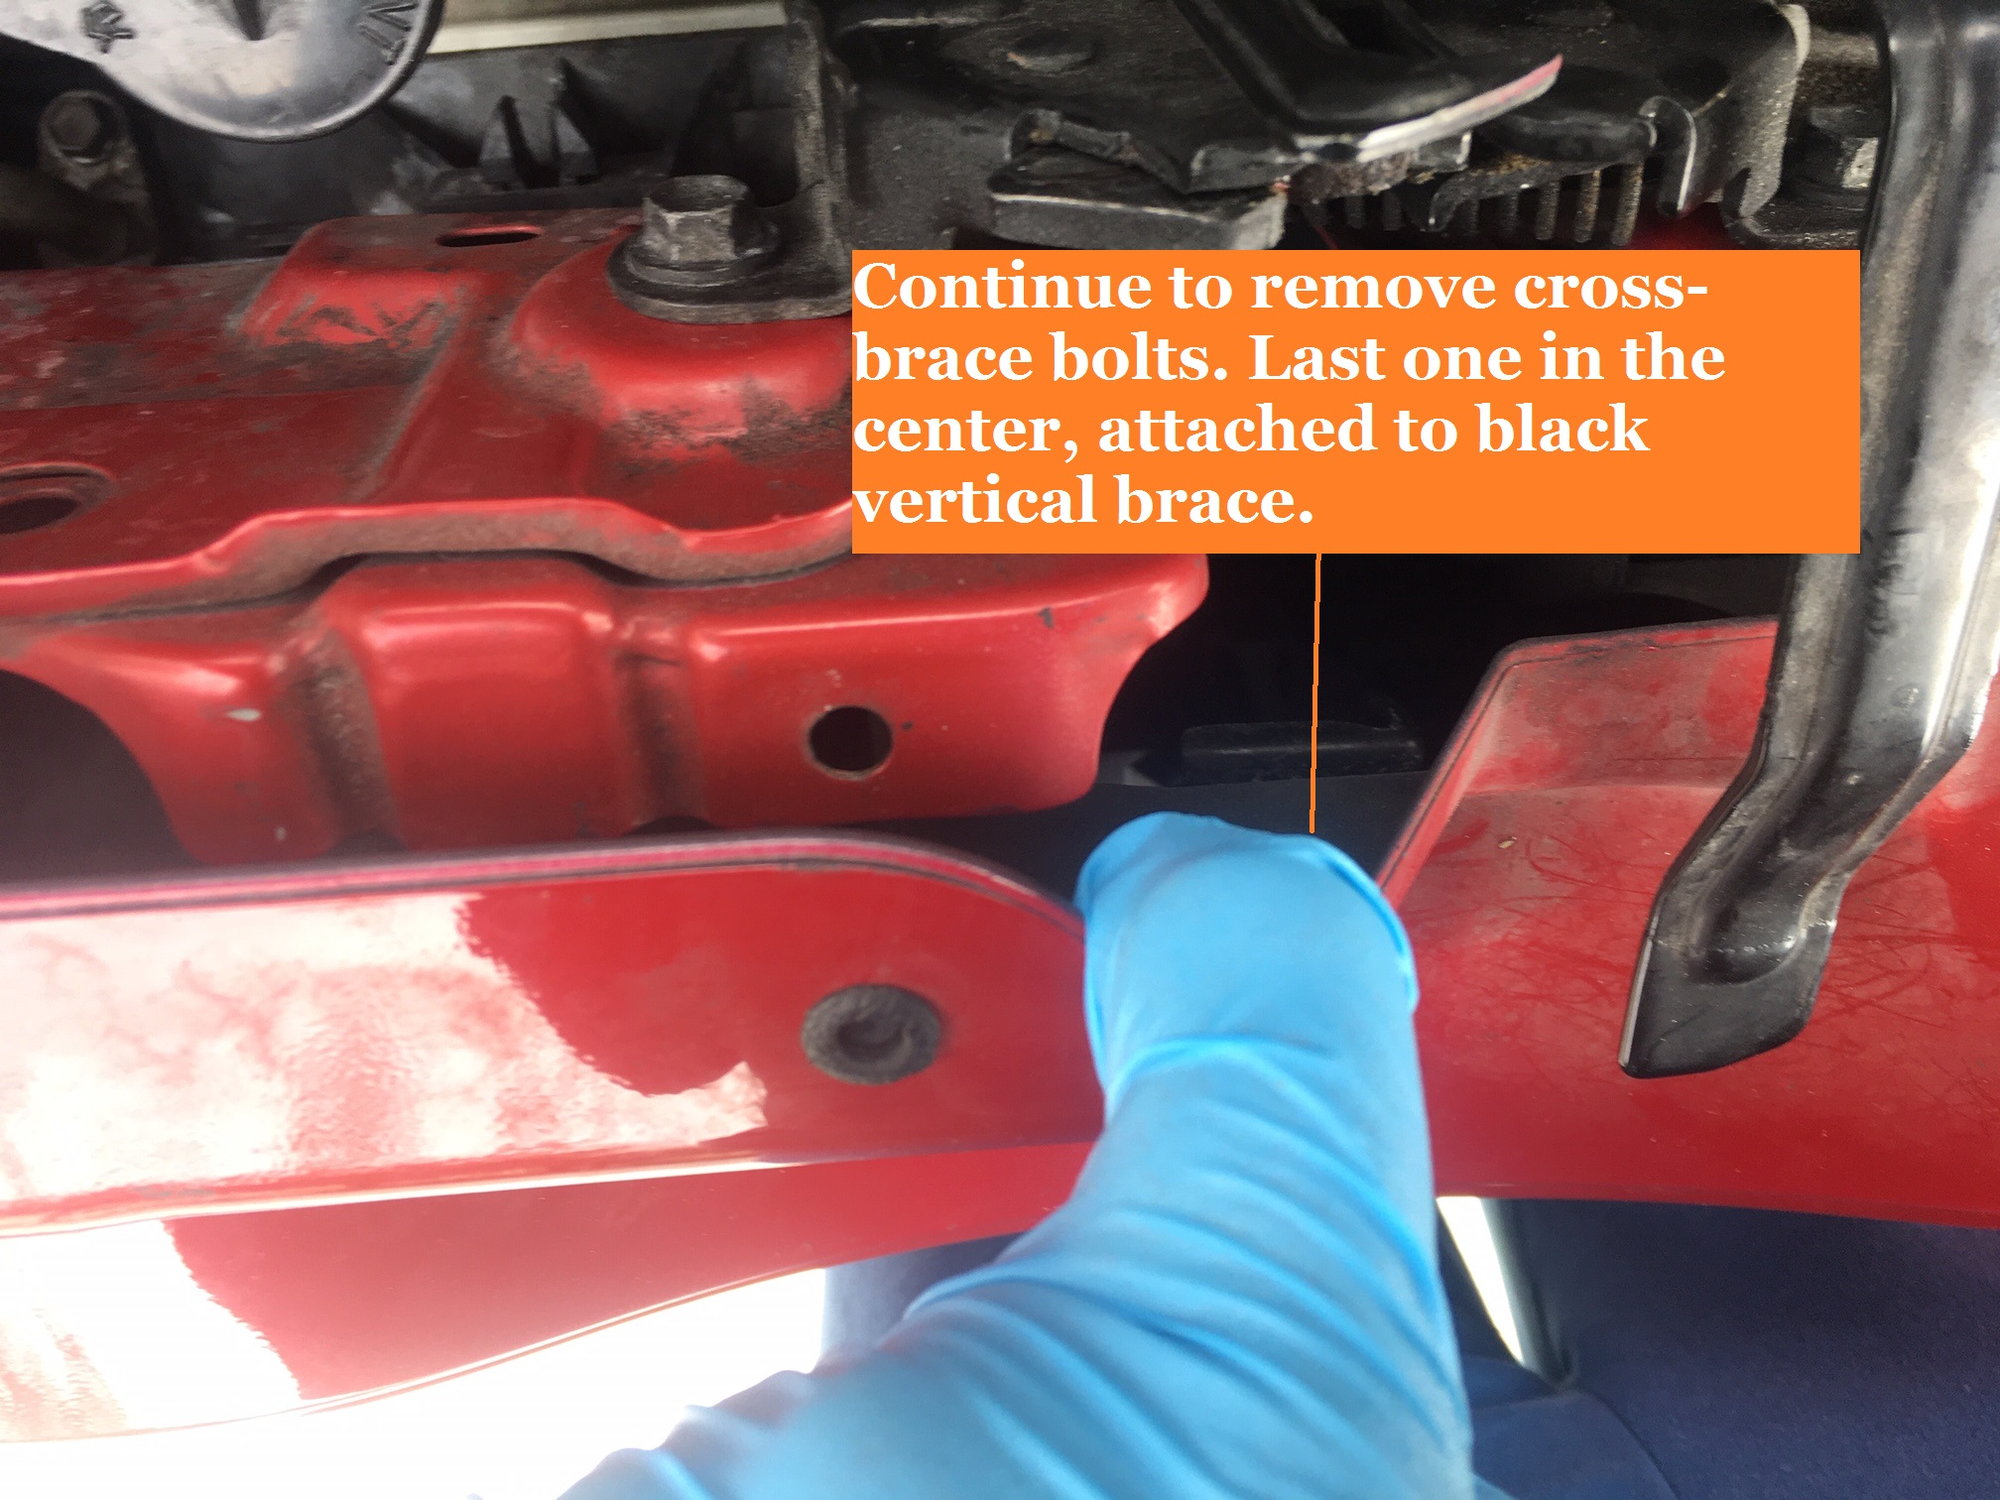
6. Remove the upper Radiator brace. This is the crossbeam the locking mechanism was connected to. Five 10mm bolts. (Two at each side, then one in the middle that connects it to a black vertical brace.)
When you remove this brace (it's painted the same color as the car), a black plastic thing with fins that is usually hidden by the fender will come off, too, exposing the Radiator/Fan/Condenser assembly.
7. The Assembly will then be free to move and can be taken out, but FIRST unclip the condenser from the radiator. Two clips, upper left and upper right. Leave the Condenser and its connected refrigerant lines in the car.
8. Take Radiator and fan out. Transfer old stuff (Fan/Reservoir, four rubber grommets at top and bottom of radiator, part of upper hose, and two 10mm bolts on fan) to new Radiator.
9. Put the whole thing back together again.
Good luck
_____
Last edited by MR_LUV; 03-06-2020 at 05:45 PM.
#7
Hey, thanks, Mr. Luv!
I felt so terrible about popping open the refrigerant lines that I just hope other Scion owners attempting the radiator removal will see this and avoid that terrible mistake. Two on-the-clock guys at a certain auto parts store that will remain unnamed (initials A.A.) both told me that those refrigerant lines were transmission cooler lines and that the condenser was part of the radiator. (I showed them the same photo I posted up top when I started this thread.) Valuable lesson: guys who work in auto parts stores are not mechanics.
Live and learn.
#8
Nice job with all this DIY. I've been looking for something like this but for an 09 xB. Unfortunately I haven't been able to find anything. Besides that I just need to remove the cooling fan motors,
but I heard the fan shroud is attached to radiator with bolts on the upper part & on the bottom part, the radiator basically sits on it, between the radiator support/sub frame.
But at least with this DIY post I can see is ALMOST same procedures for an xB. I hope.
We'll 👀 see... Anyone ???
___
but I heard the fan shroud is attached to radiator with bolts on the upper part & on the bottom part, the radiator basically sits on it, between the radiator support/sub frame.
But at least with this DIY post I can see is ALMOST same procedures for an xB. I hope.
We'll 👀 see... Anyone ???
___
Last edited by MR_LUV; 06-13-2021 at 06:51 AM.
#9
I followed the directions/images here and a video on Youtube and was able to replace mine in about 3 hours.
1 hour to take the old one out, 2 hours to get the new one in.
I totally removed the center support to give the air condenser room to move forward. the radiator was getting pinched and the extra inch of movement was a huge help.
it took at least 5 burping sessions to get all the air out.
i though i still had a leak somewhere and bought a cap pressure tester.
the pressure was holding - i just wasn't aware it would take that much.
no clue where the air was stuck - but eventually it stayed full.
i took to get an oil change after everything was done. while in line for jiffy lube the check engine light came on - ABS low voltage - will be investigating that now.
#10
Thread
Thread Starter
Forum
Replies
Last Post
KineticGSR
Regional - Desert & Salt
1
10-05-2008 04:15 PM


