The Working Toaster System
 11-22-2010, 07:55 AM
#1
Senior Member
SL Member
Thread Starter

Join Date: Oct 2009
Posts: 390
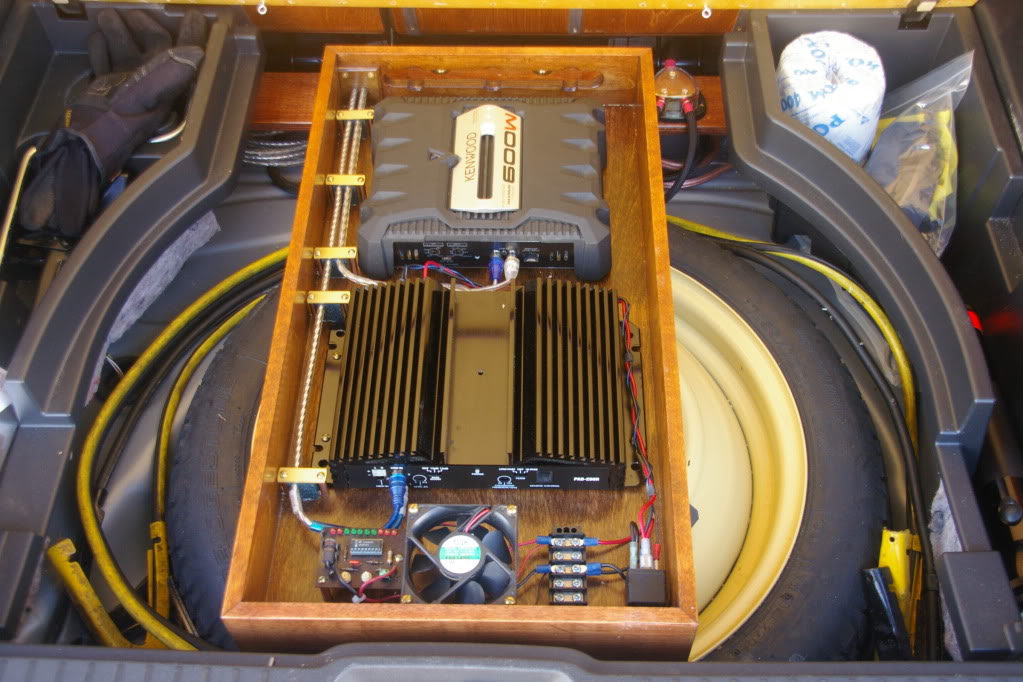
Okay, I finally got the time to clear out the car to take some pics of the system. It's got the front underseat 8" Fosgate subs, over the spare amp rack and rear cargo floor/seat back panels.
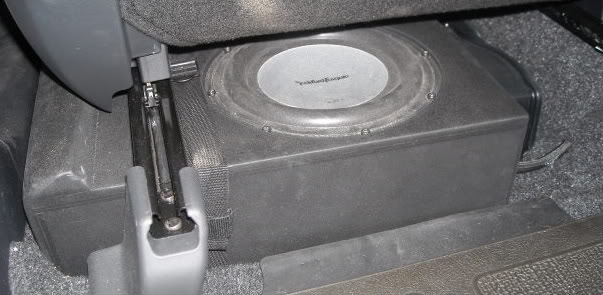
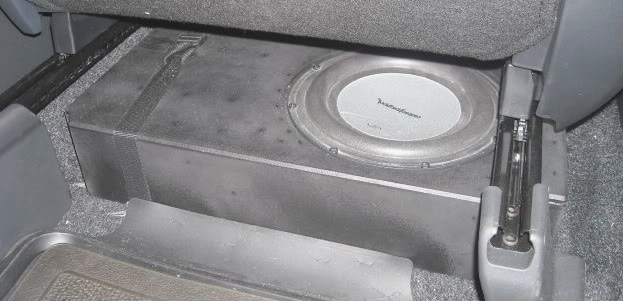
Underseat subs. Each enclosure is made for it's particular side, so I wouldn't have to relocate the car's electronics packages. Each enclosure was made from 1/2" Baltic birch using rabbeted joints, with an internal volume w/o driver of .25 cu ft (.23cu ft with driver, as spec'd by Fosgate). Polyfill was added/removed to tune to box to approximately .70q (not too loose sounding, not too tight, just right). Speaker jacks were scrounged from an old Infinity tower speaker (cost too much to keep replacing the 2 10" woofers because of surround decay). Finally, the enclosures were sprayed with truck bed liner.
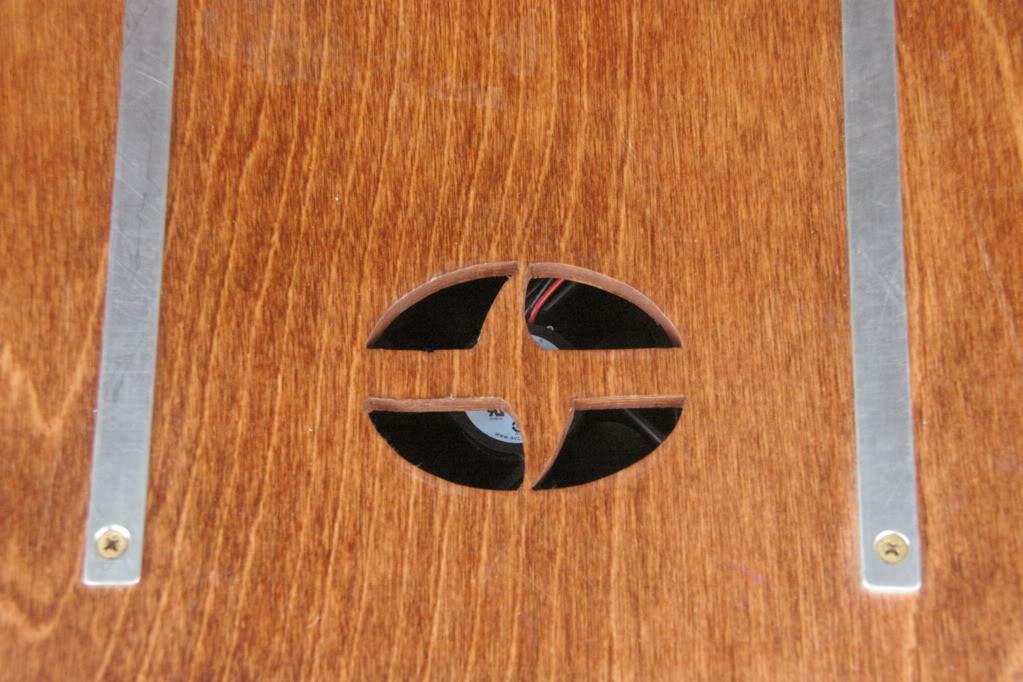
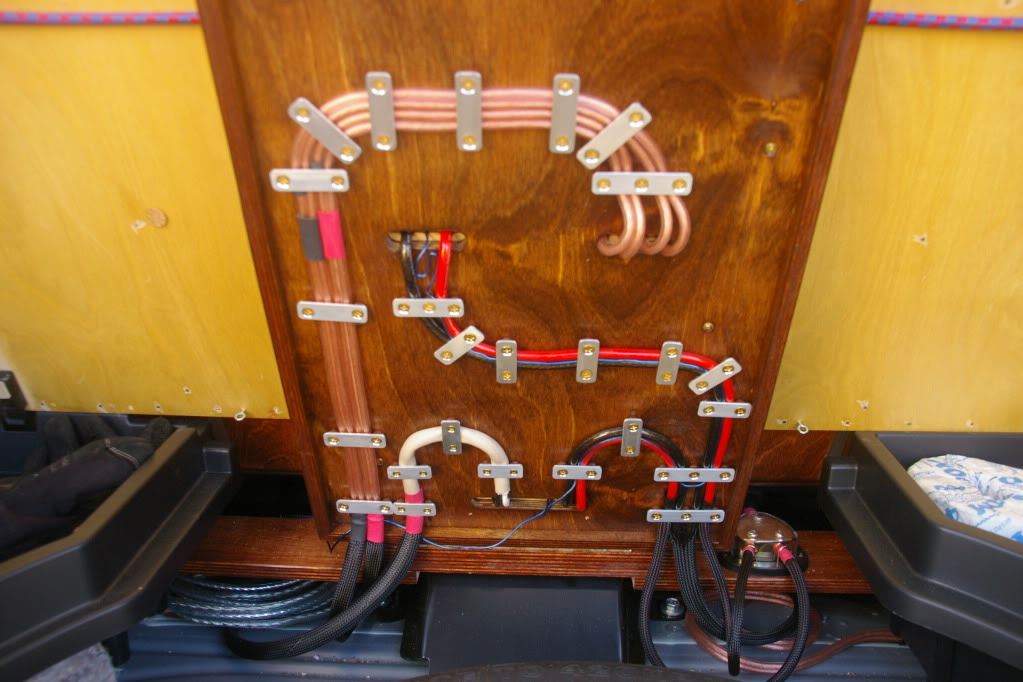
Over the spare amp rack. Since I now had no room for a nice amp install under the seat, I took a cue from a Car Audio magazine article. Again, 1/2" Baltic birch was used for the frame, but 1/4" for the floor. Amps are an old Audiovox ( I think, going to be replaced in the future, see final note) and a Kenwood 300w sub amp. Cooling is done by a box fan venting out the cargo floor. Cable standoffs from Corian, brass plate, brass screws and copper tubing. Under rack cable stays from aluminum and styrene tubes).
Cargo bed and seat backs. 3/8" Baltic birch, stained, with #6 brass woodscrews countersunk into 1/2" wide aluminum strips. Factory hardware keeps the cargo panel in place. The seat backs are made the same way, put screwed into the sheetmetal frame of the seats, with cutouts for the child seat hardware points.
I'm still in the process of building two cargo beds to fit alongside the amp rack to hold tools, straps and such. Also, trying to find time to install the LED lighting and rear speakers in the C-pillar cubbies.
Final install will be replacing the Audiovox amp with an old Aural-Electomultiomincon and installing the new steam lines for the omnicon device. More pic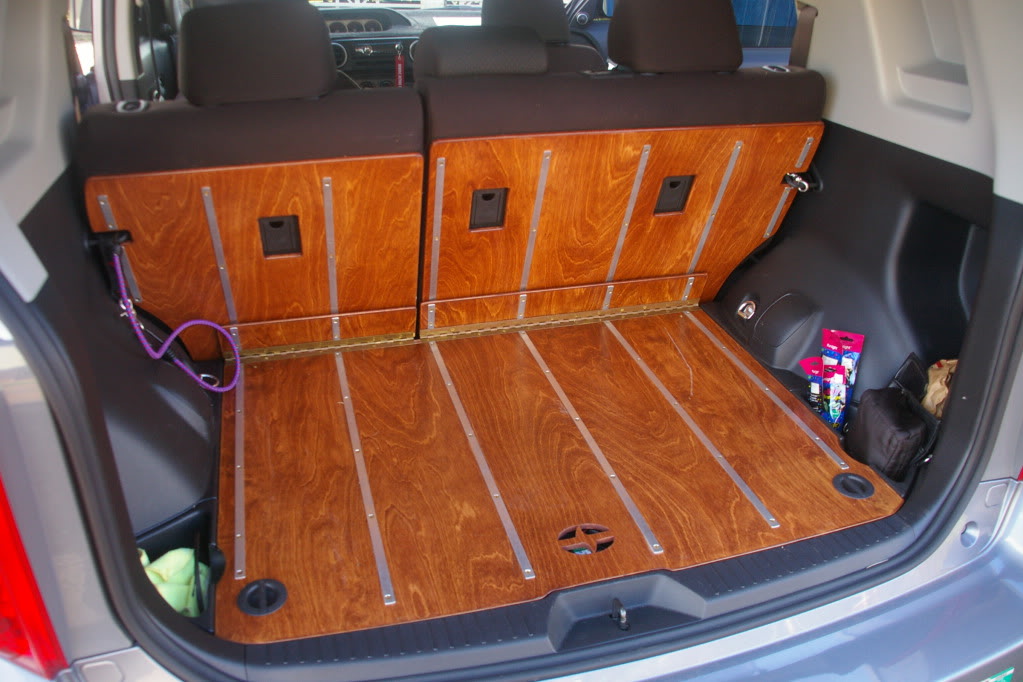
 s to follow!


Underseat subs. Each enclosure is made for it's particular side, so I wouldn't have to relocate the car's electronics packages. Each enclosure was made from 1/2" Baltic birch using rabbeted joints, with an internal volume w/o driver of .25 cu ft (.23cu ft with driver, as spec'd by Fosgate). Polyfill was added/removed to tune to box to approximately .70q (not too loose sounding, not too tight, just right). Speaker jacks were scrounged from an old Infinity tower speaker (cost too much to keep replacing the 2 10" woofers because of surround decay). Finally, the enclosures were sprayed with truck bed liner.
Over the spare amp rack. Since I now had no room for a nice amp install under the seat, I took a cue from a Car Audio magazine article. Again, 1/2" Baltic birch was used for the frame, but 1/4" for the floor. Amps are an old Audiovox ( I think, going to be replaced in the future, see final note) and a Kenwood 300w sub amp. Cooling is done by a box fan venting out the cargo floor. Cable standoffs from Corian, brass plate, brass screws and copper tubing. Under rack cable stays from aluminum and styrene tubes).
Cargo bed and seat backs. 3/8" Baltic birch, stained, with #6 brass woodscrews countersunk into 1/2" wide aluminum strips. Factory hardware keeps the cargo panel in place. The seat backs are made the same way, put screwed into the sheetmetal frame of the seats, with cutouts for the child seat hardware points.
I'm still in the process of building two cargo beds to fit alongside the amp rack to hold tools, straps and such. Also, trying to find time to install the LED lighting and rear speakers in the C-pillar cubbies.
Final install will be replacing the Audiovox amp with an old Aural-Electomultiomincon and installing the new steam lines for the omnicon device. More pic
s to follow!


 11-23-2010, 07:49 AM
#11
Senior Member
SL Member
Thread Starter
Join Date: Oct 2009
Posts: 390
Thanks for the compliments guys, I really appreciate it (especially when it comes from owner with way cooler cars than mine!). I handle all the repairs and upkeep at a small school here on Oahu and woodworking is both my hobby and income.
When I move into my new place, I'll dig up the voltmeter plans. Back in my old job at Auto Audio (Honolulu), I used to make multichannel bargraph wattmeters and digital display voltmeters for our show cars.
As to the TP, it comes in handy in many places (pardon the pun ). My normal trunk stuff contains Gorilla tape (stronger than duct tape and waterproof and leaves less goo), ratcheting cargo straps, mechanics gloves (for changing tires) and the ever trusty 3D LED Maglite. I'll be posting pics of the Yakima rack with my wood rack in the exterior section threads.
Note to GregS: You gave me the idea for the cargo floor. Yours are no slouch by any means, especially in using wood panels instead of plywood. Just riding on your capable shoulders!
When I move into my new place, I'll dig up the voltmeter plans. Back in my old job at Auto Audio (Honolulu), I used to make multichannel bargraph wattmeters and digital display voltmeters for our show cars.
As to the TP, it comes in handy in many places (pardon the pun
Note to GregS: You gave me the idea for the cargo floor. Yours are no slouch by any means, especially in using wood panels instead of plywood. Just riding on your capable shoulders!
Last edited by KaneoheKoa; 11-23-2010 at 07:55 AM. Reason: adding comment
08-17-2011, 02:10 PM
#12
Member

Join Date: Jul 2011
Location: Montreal, Canada
Posts: 30
Wow, that's a serious setup. Great attention to detail... You did a beautiful job! I see what you did with the fan, I think I'll do the same but I'll pull air from below since I don't have anything even close to what you have... Sweet!


Thread
Thread Starter
Forum
Replies
Last Post
Beesh
Scion xA/xB 1st-Gen ICE & Interior
3
01-09-2015 06:30 PM
TheTripleC
PPC: Vehicles
1
01-04-2015 06:46 PM
gettoastedinthetoaster
Scion xB 2nd-Gen Wheel & Tire
4
12-29-2014 11:39 PM
JM Auto Racing
Exclusive Sponsored Sales
14
12-19-2014 06:36 PM