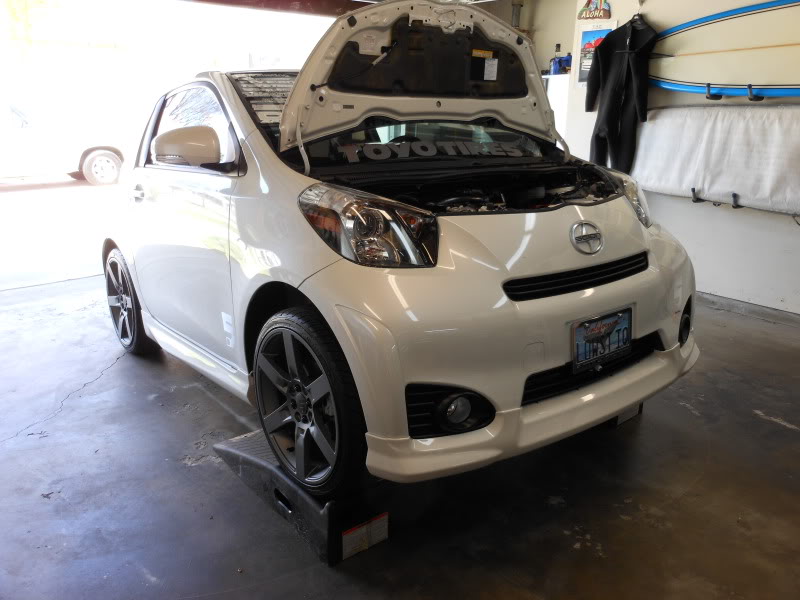
Changing the oil in your iQ...sort of...
 04-27-2012, 03:03 PM
#1
Senior Member

SL Member
Thread Starter
Join Date: Nov 2005
Location: Surf City SoCal
Posts: 1,527
A little DIY on changing the oil in your iQ. Let me point out at the start that I DID NOT read the directions and did the job old school. This is NOT the correct way to do it. I have not seen a canister type oil filter like the one on the iQ. If I had read the directions it would have been much easier and much less of a mess. That being said here is what to do (with corrections added as we go).
First off, be safe. Whether you use a floor jack or car ramps, set your parking brake. I use car ramps.
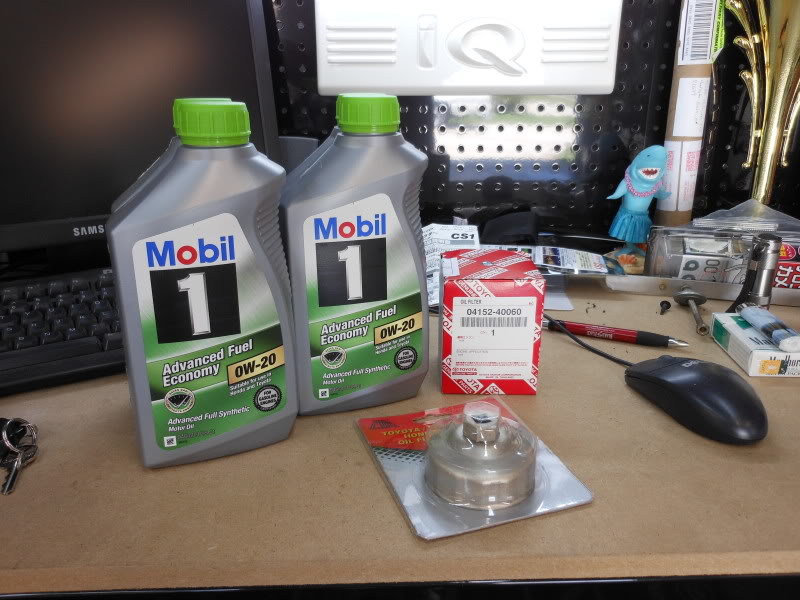
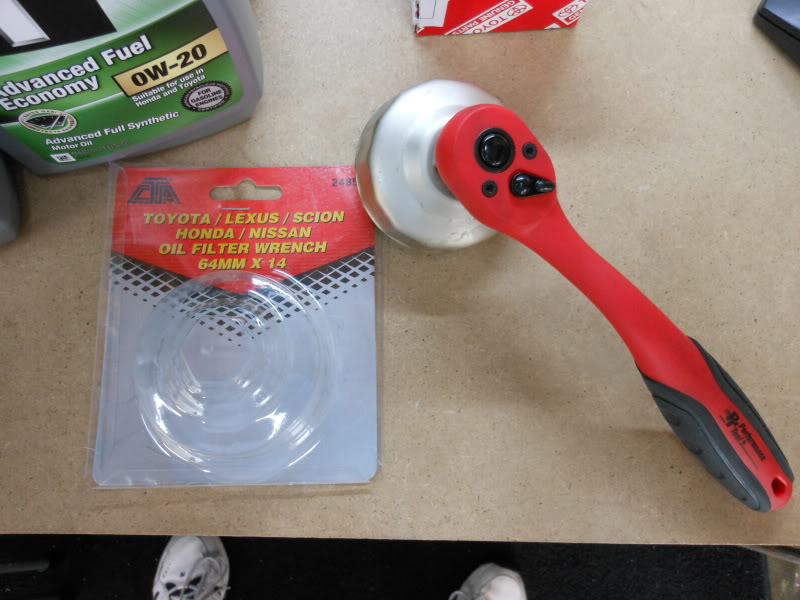
Here is what you'll need...
Four quarts of 0w-20w synthetic oil (that weight is always synthetic)
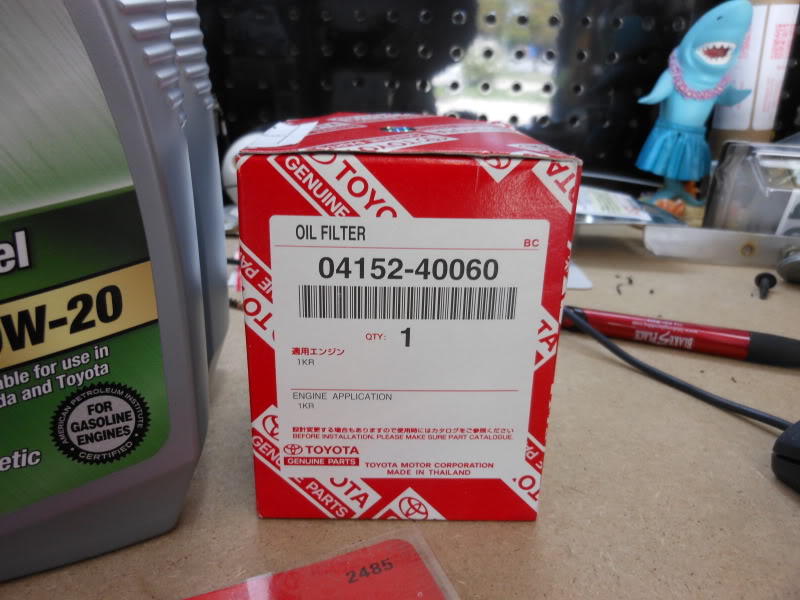
One oil filter (I use the Toyota brand)
14mm wrench
1/4" drive rachet
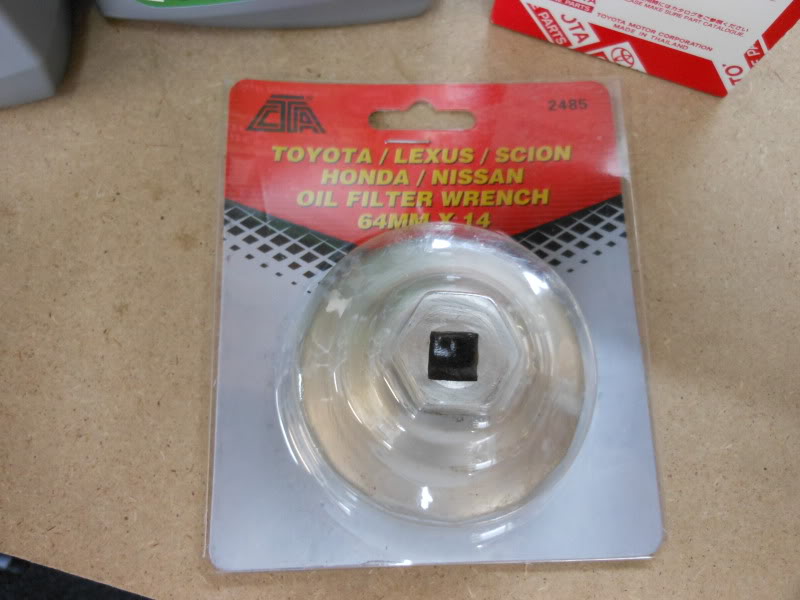
64mm oil filter removal tool
Drain pan
Rags or towels
Funnel
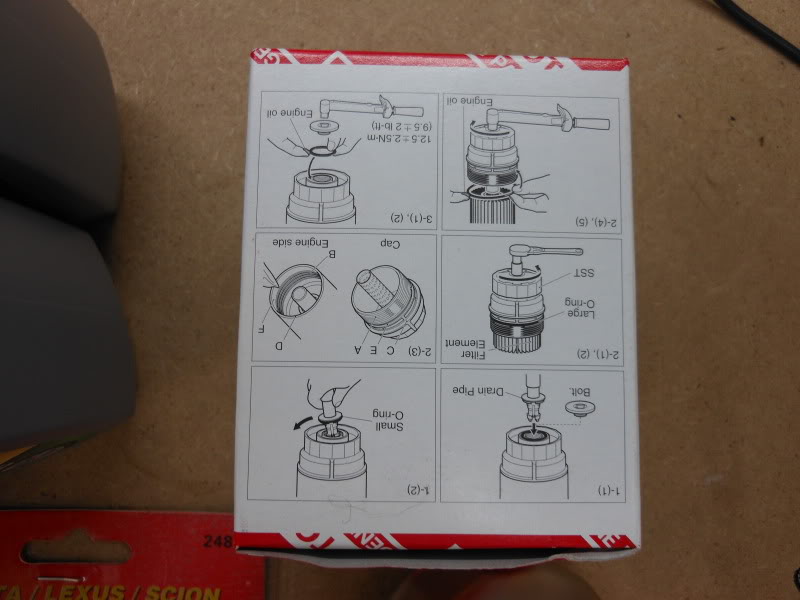
Here are the directions on the oil filter replacement (READ THEM AND SAVE YOURSELF A BIG MESS)
The oil drain plug and oil filter canister located under the motor on the passenger side of the vehicle.
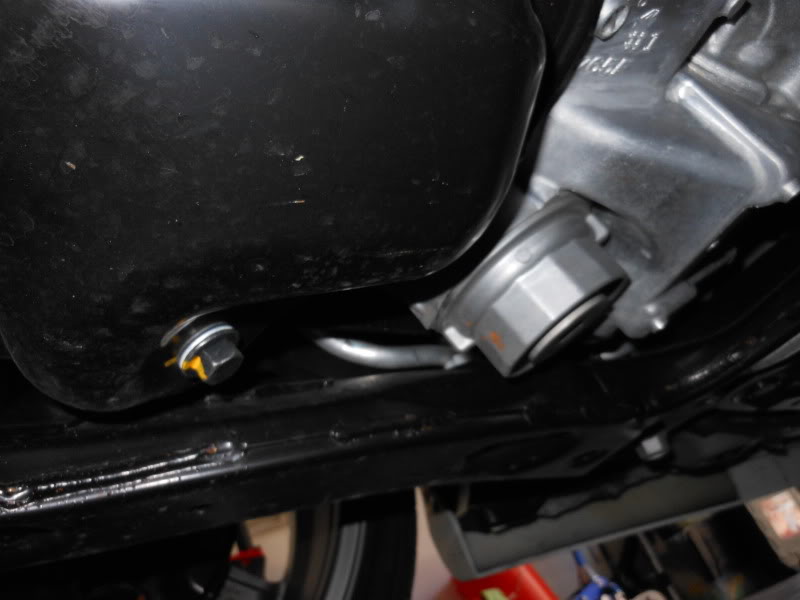
Use the 14mm wrench to loosen the oil drain plug.
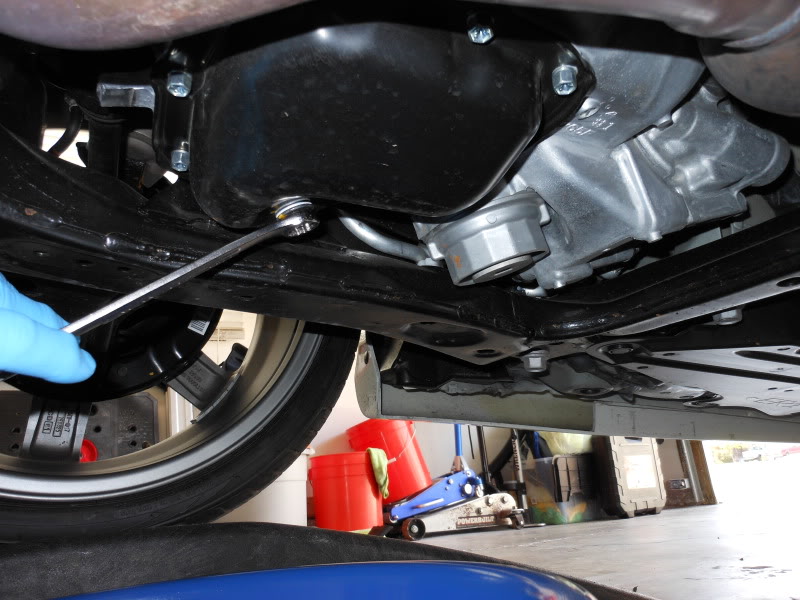
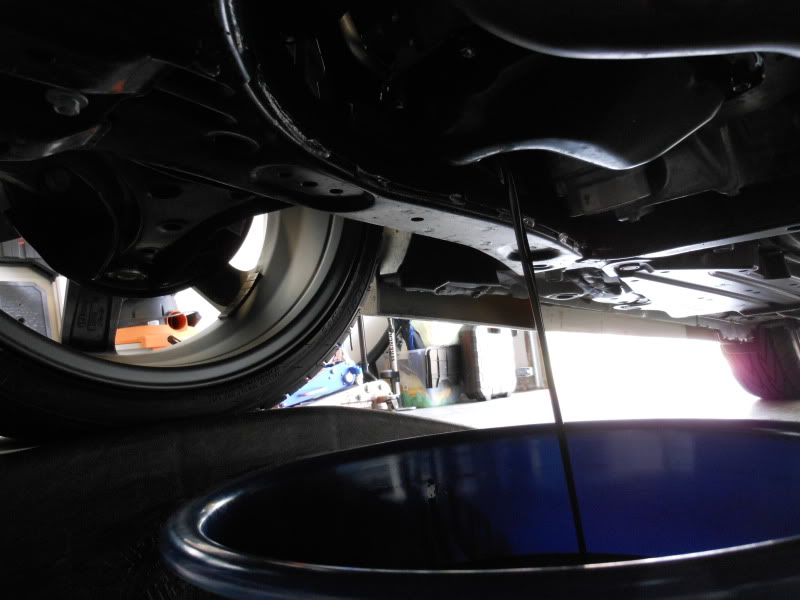
Allow the oil to drain from the iQ into a pan.
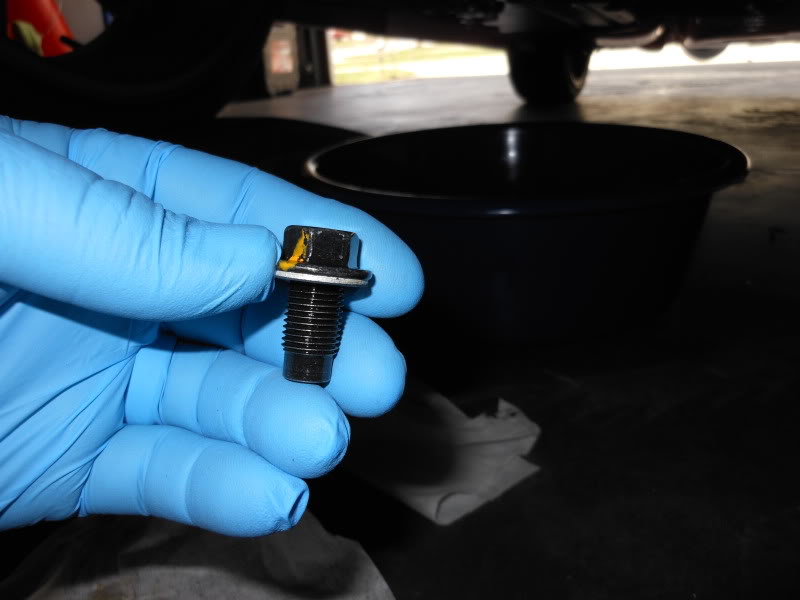
Clean the oil drain plug and threads.
Once the oil has stopped dripping you can remove the oil filter canister.
THIS IS WHERE IT WOULD BE EASIER TO FOLLOW DIRECTIONS. There is a small indentation on the end of the oil filter canister that allows you to connect a 1/4" ratchet and remove the small cap. Once this small cap is removed you place the plastic spout, with some force, into the opening and a valve inside opens to allow the oil from the canister to drain out cleanly into the pan. Once the oil has drained from the spout it is removed and you can move on to the next step, removing the oil filter canister.
Connect the 1/4" ratchet to the oil filter canister removal tool and place on the end of the canister.
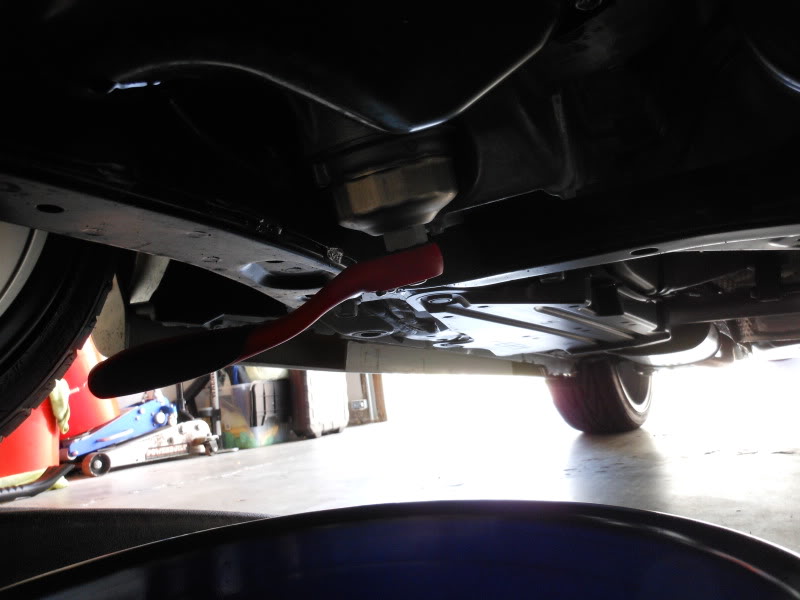
Loosen the canister until you can remove it by hand. If done correctly (using the spout mentioned earlier) the job will not be this messy.
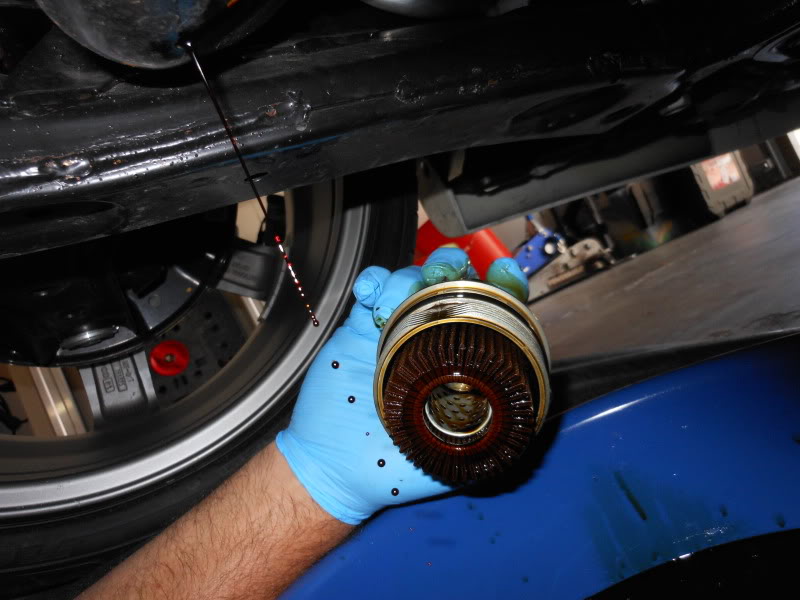
Now that you have the canister out, pour out the remaining oil and clean the housing.
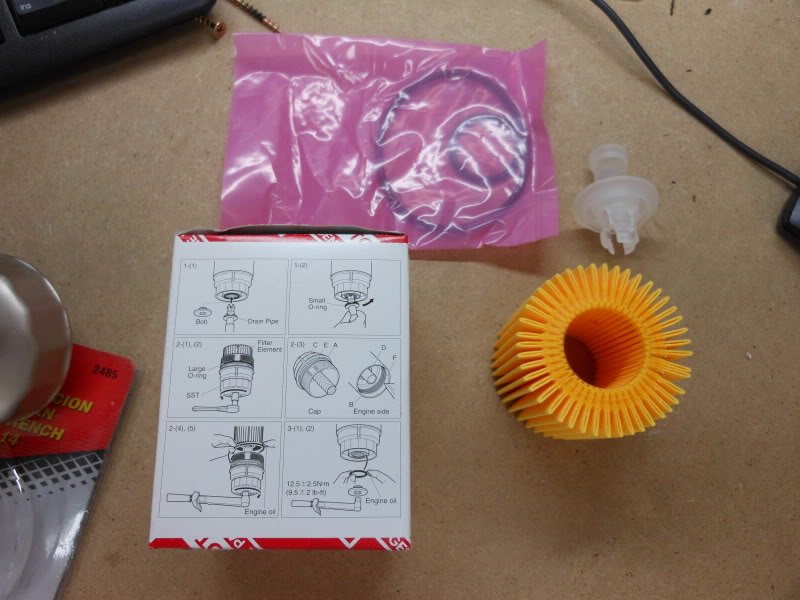
Your parts from the Toyota oil filter. (notice the white plastic spout that would have made this job so much easier)
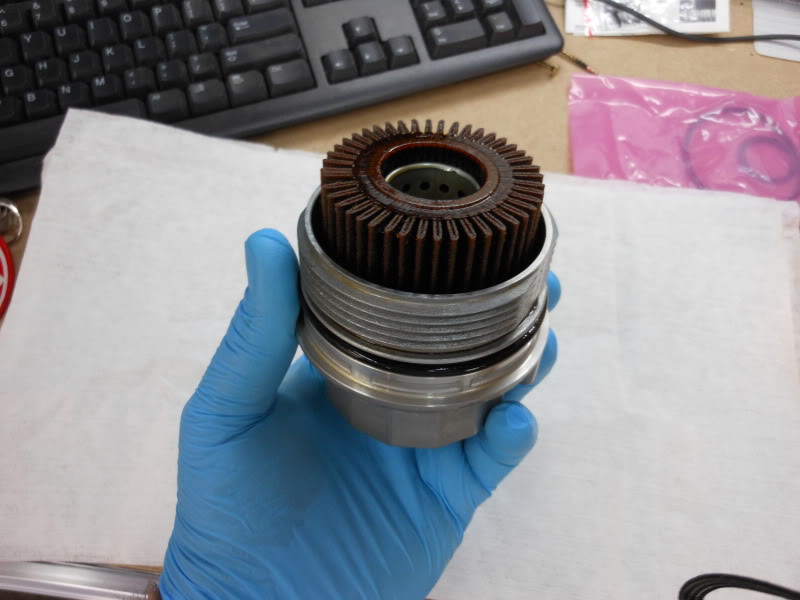
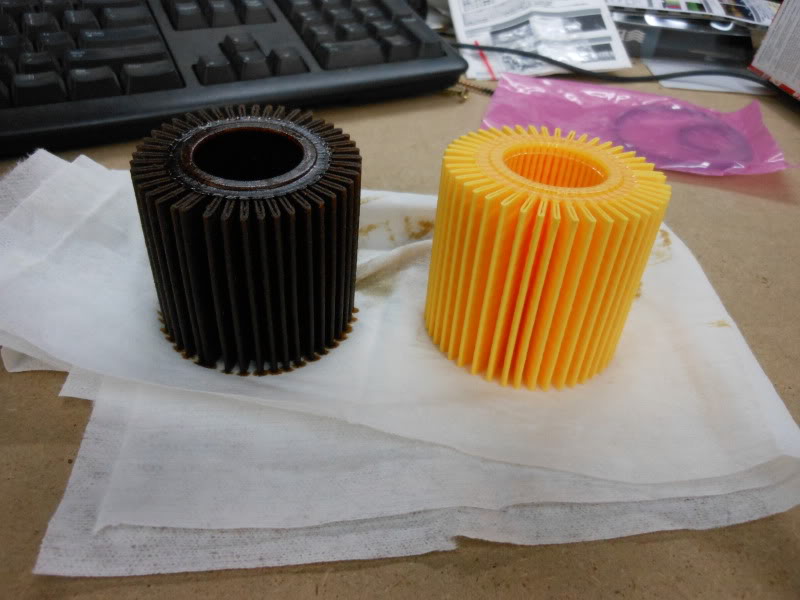
Remove the used oil filter element.
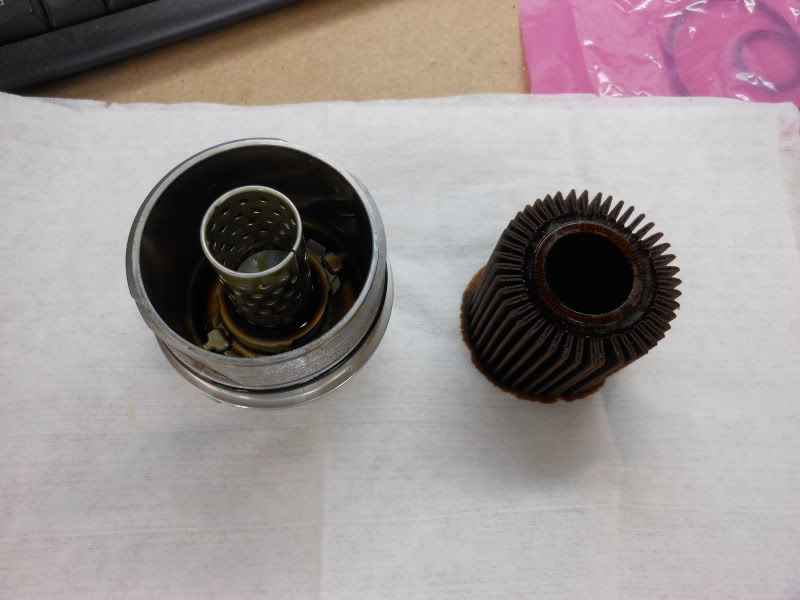
Compared to the new one.
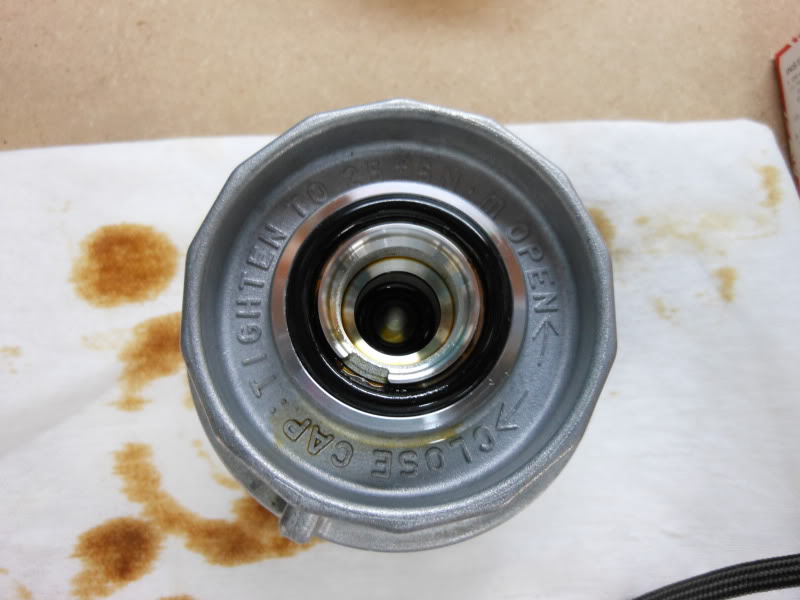
There are two O-rings that need to be replaced. Do not reuse the old ones. This view is the small O-ring under the cap that is on the bottom of the canister. (the one that should have been removed while the canister was still on the vehicle)
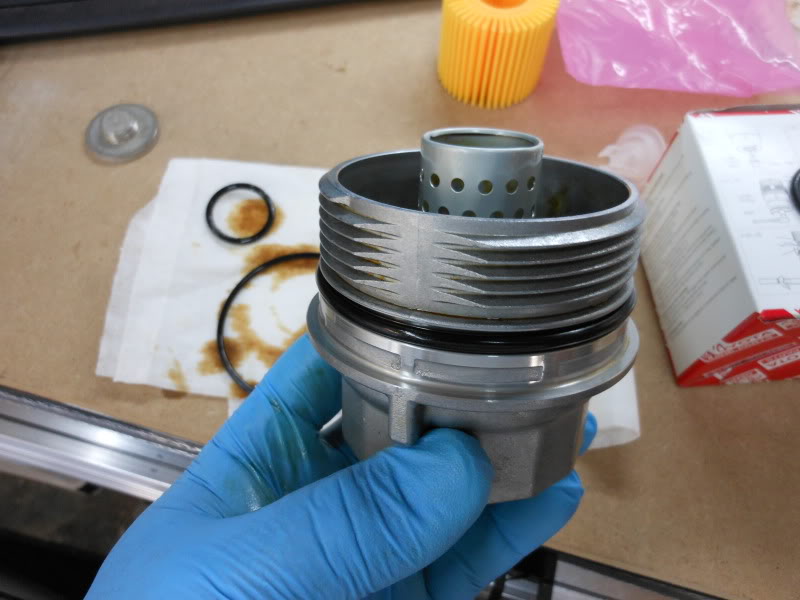
Replace it with the new O-ring and apply motor oil to it to prevent leaks and sticking.
Replace the large O-ring with the new one and apply motor oil to it as well.
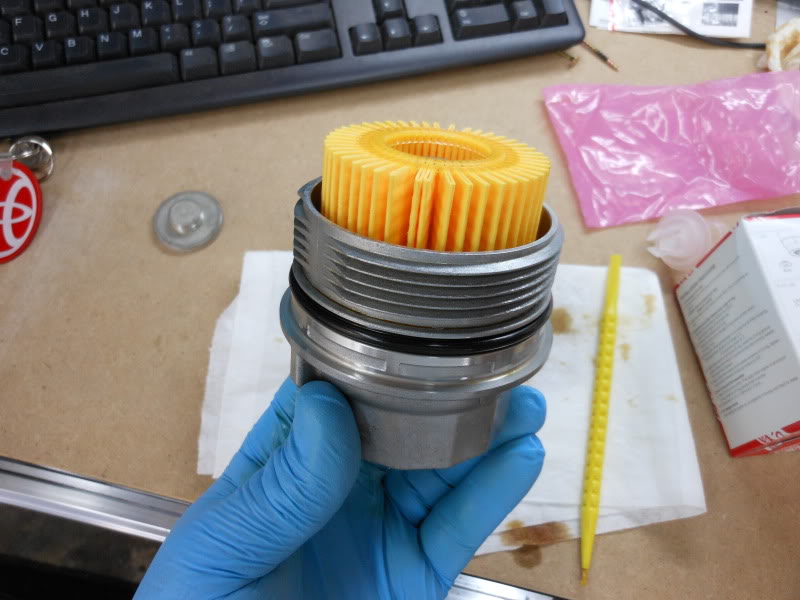
Now install the new oil filter element.
Reassemble the oil filter canister, the cap on the bottom and place it back on the vehicle in reverse order from removal.
Re-install the oil drain plug using the 14mm wrench.
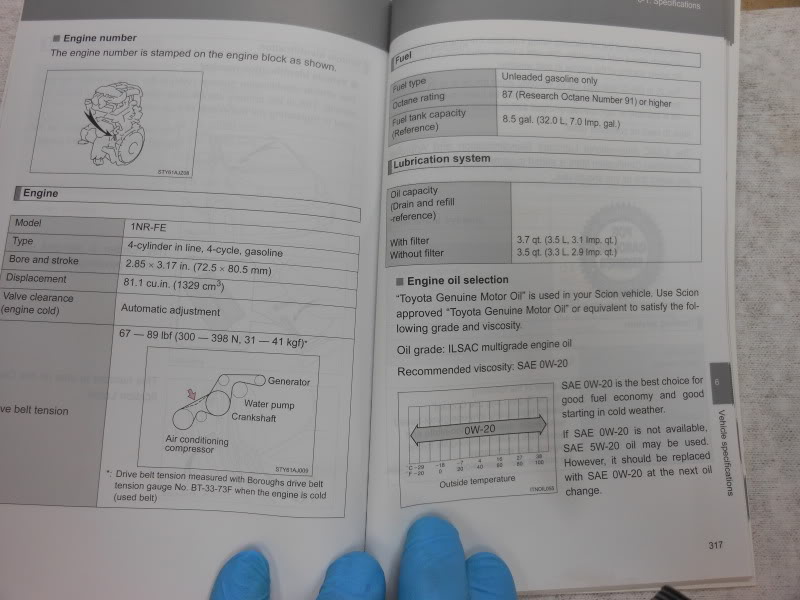
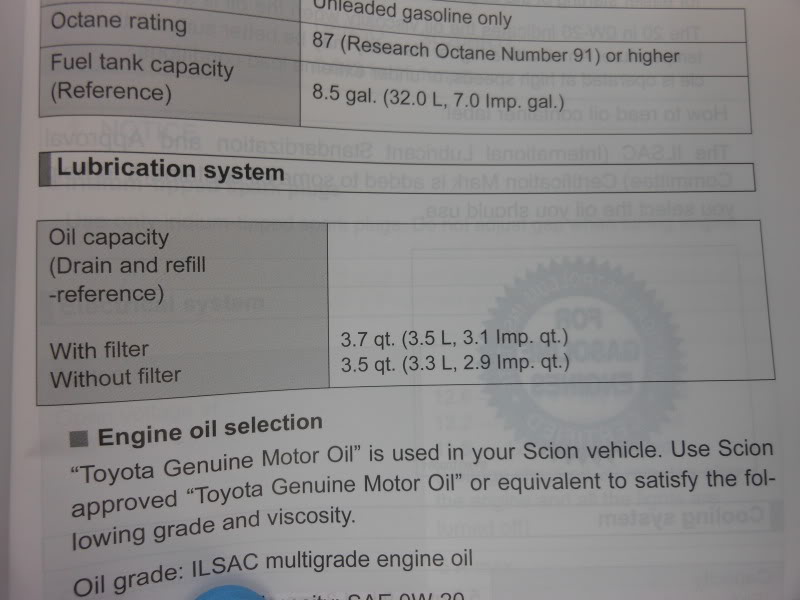
Add 3.7 quarts of motor oil using a funnel. The oil intake is located on the passenger side of the motor.

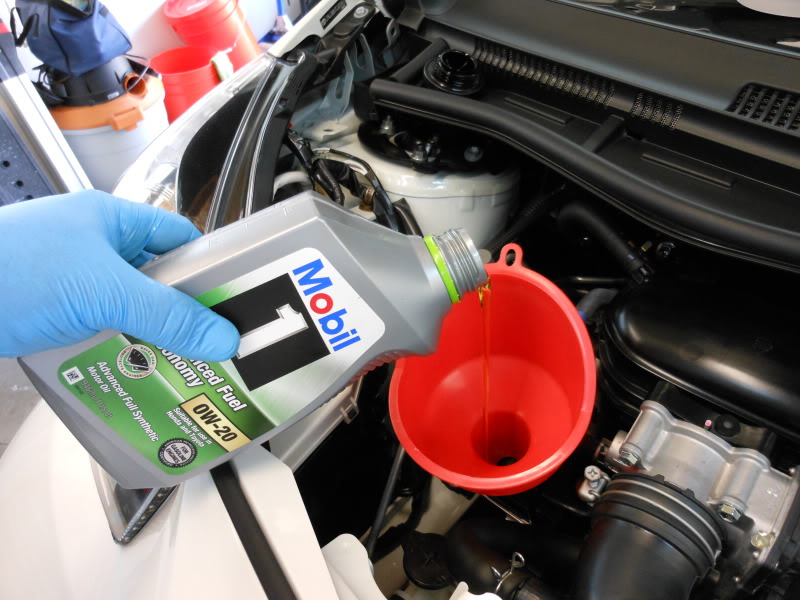
The oil capacity information can be found in your iQ owners manual.
Once the oil has been added, check the dipstick (dip cable in the case of the iQ) and make sure your level is at the full mark.
The dipstick is located mid engine.
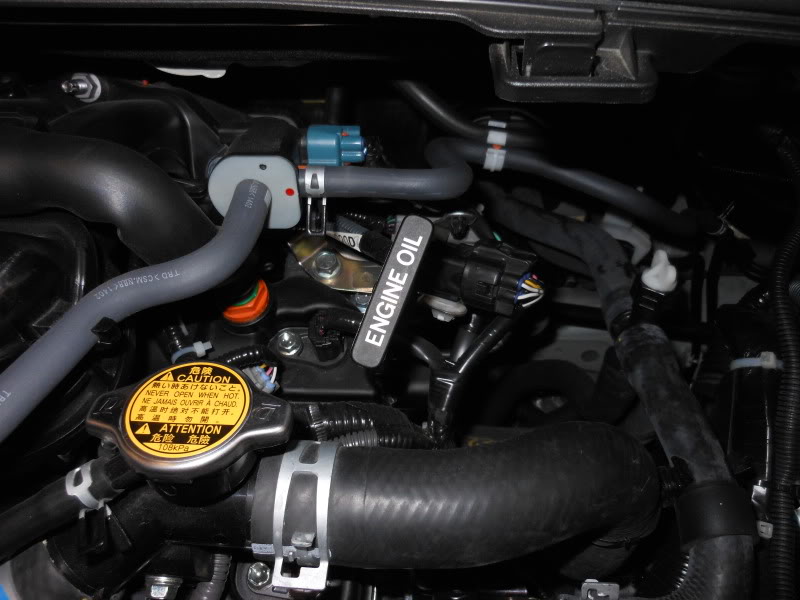
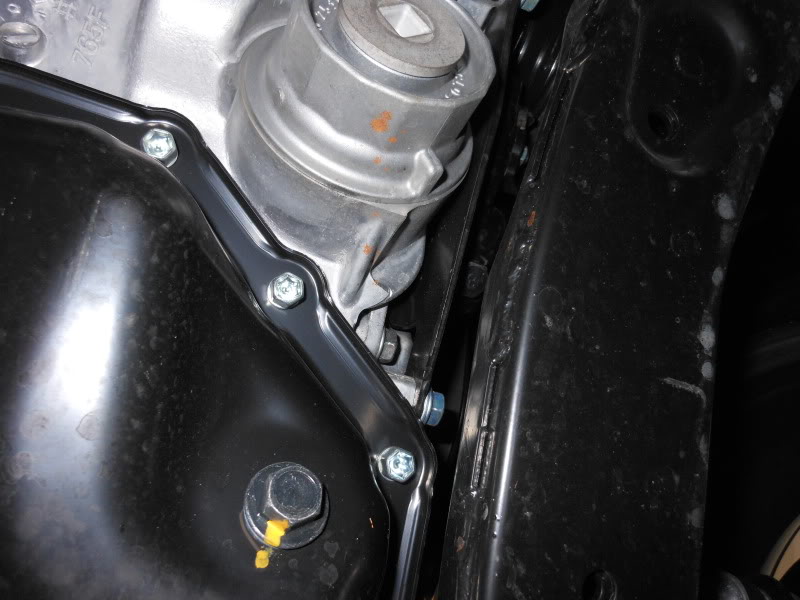
Replace the oil filler cap and start the iQ. Check for oil leaks under the vehicle.
As always dispose of your used oil in an appropriate container and disposal site. I'm lucky in Huntington Beach, they come to the door and pick it up.
The owners manual suggests changing the oil at 10,000 mile intervals but I'm a little old school. 5,000 miles is max for me.
I'll post up pictures of the correct way to do it at the next oil change.
First off, be safe. Whether you use a floor jack or car ramps, set your parking brake. I use car ramps.
Here is what you'll need...
Four quarts of 0w-20w synthetic oil (that weight is always synthetic)
One oil filter (I use the Toyota brand)
14mm wrench
1/4" drive rachet
64mm oil filter removal tool
Drain pan
Rags or towels
Funnel
Here are the directions on the oil filter replacement (READ THEM AND SAVE YOURSELF A BIG MESS)
The oil drain plug and oil filter canister located under the motor on the passenger side of the vehicle.
Use the 14mm wrench to loosen the oil drain plug.
Allow the oil to drain from the iQ into a pan.
Clean the oil drain plug and threads.
Once the oil has stopped dripping you can remove the oil filter canister.
THIS IS WHERE IT WOULD BE EASIER TO FOLLOW DIRECTIONS. There is a small indentation on the end of the oil filter canister that allows you to connect a 1/4" ratchet and remove the small cap. Once this small cap is removed you place the plastic spout, with some force, into the opening and a valve inside opens to allow the oil from the canister to drain out cleanly into the pan. Once the oil has drained from the spout it is removed and you can move on to the next step, removing the oil filter canister.
Connect the 1/4" ratchet to the oil filter canister removal tool and place on the end of the canister.
Loosen the canister until you can remove it by hand. If done correctly (using the spout mentioned earlier) the job will not be this messy.
Now that you have the canister out, pour out the remaining oil and clean the housing.
Your parts from the Toyota oil filter. (notice the white plastic spout that would have made this job so much easier)
Remove the used oil filter element.
Compared to the new one.
There are two O-rings that need to be replaced. Do not reuse the old ones. This view is the small O-ring under the cap that is on the bottom of the canister. (the one that should have been removed while the canister was still on the vehicle)
Replace it with the new O-ring and apply motor oil to it to prevent leaks and sticking.
Replace the large O-ring with the new one and apply motor oil to it as well.
Now install the new oil filter element.
Reassemble the oil filter canister, the cap on the bottom and place it back on the vehicle in reverse order from removal.
Re-install the oil drain plug using the 14mm wrench.
Add 3.7 quarts of motor oil using a funnel. The oil intake is located on the passenger side of the motor.
The oil capacity information can be found in your iQ owners manual.
Once the oil has been added, check the dipstick (dip cable in the case of the iQ) and make sure your level is at the full mark.
The dipstick is located mid engine.
Replace the oil filler cap and start the iQ. Check for oil leaks under the vehicle.
As always dispose of your used oil in an appropriate container and disposal site. I'm lucky in Huntington Beach, they come to the door and pick it up.
The owners manual suggests changing the oil at 10,000 mile intervals but I'm a little old school. 5,000 miles is max for me.
I'll post up pictures of the correct way to do it at the next oil change.

 05-03-2012, 12:51 PM
#4
Senior Member
SL Member
Thread Starter
Join Date: Nov 2005
Location: Surf City SoCal
Posts: 1,527
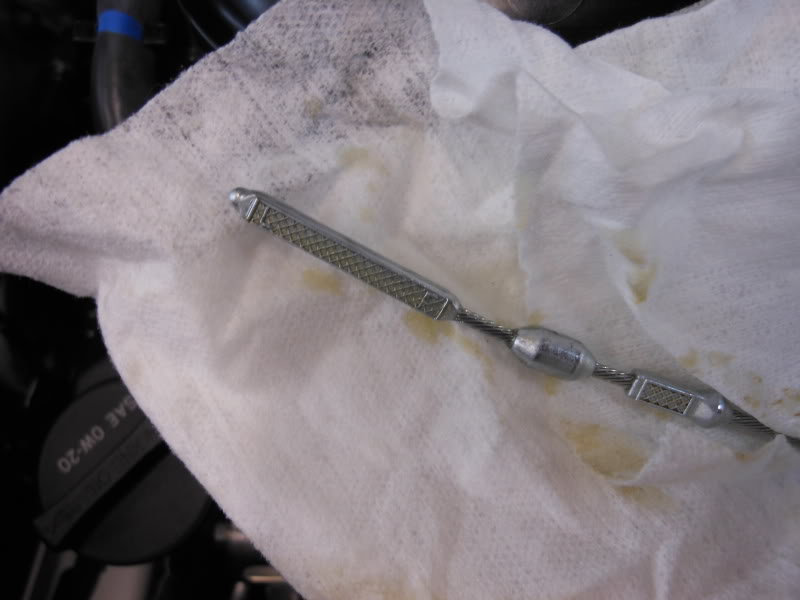
I saw some of those type on line, seems so strange to have them mounted like they are.
 09-17-2012, 01:19 PM
#7
Senior Member
SL Member
Thread Starter
Join Date: Nov 2005
Location: Surf City SoCal
Posts: 1,527
09-18-2012, 10:46 PM
#8
Junior Member

Join Date: Mar 2005
Location: West Fort Worth
Posts: 8
Thanks "surf". I picked up the filter today at Toyota. It was $10+ till I told him Pep Boys sold Fram filters for $7+ (albeit the Fram comes only with the large o-ring and not with that small plastic spout). Toyota parts then sold it to me for $7+. Thanks to your write-up things when smoothly.
 05-13-2013, 12:57 AM
#10
Senior Member
SL Member
Thread Starter
Join Date: Nov 2005
Location: Surf City SoCal
Posts: 1,527
It does not void your warranty. Not changing your oil to the factory required time or mileage intervals will void your warranty.

Thread
Thread Starter
Forum
Replies
Last Post
06ScionTc5sp1
Scion tC 1G Drivetrain & Power
9
10-16-2020 01:18 AM
awdmofo
Scion tC 1G Owners Lounge
44
02-08-2016 05:58 AM
06ScionTc5sp1
Maintenance & Car Care
18
12-21-2014 07:21 AM