
Spoiler install gone wrong *rant* *pics* *update pg 3*


Senior Member
SL Member
Joined: Jul 2008
Posts: 568
From: Bethesda, MD
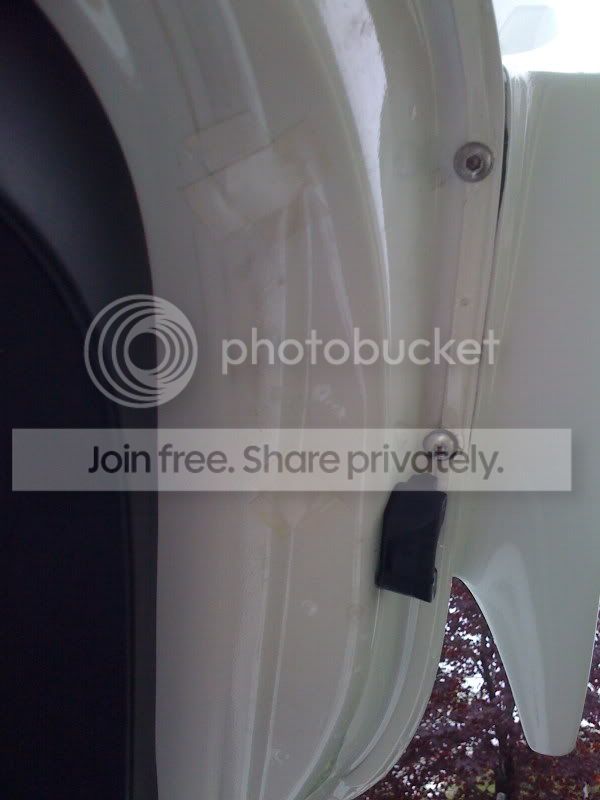
I can't really say it looks that bad in the first picture. I would have to be there in person to really look at it and see if it is on correctly.
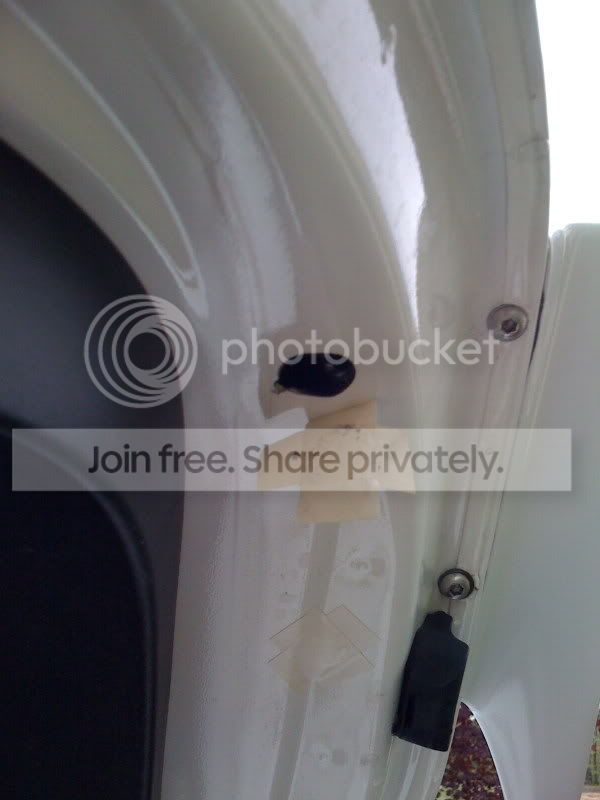
The second pic, well that one hurts. Suggestions: bondo and paint or CF Hatch.
But all together, ouch. I am sure you will get it all figured out, or a body shop will.
Good luck.
The second pic, well that one hurts. Suggestions: bondo and paint or CF Hatch.
But all together, ouch. I am sure you will get it all figured out, or a body shop will.
Good luck.

Thread Starter
Joined: Jun 2007
Posts: 3,845
From: La Habra, CA
Thanks man.
Right now we got it to where I can live with it..it's not 100% but when I go see my uncle next time (after saying "holy crap wtf did papa do?!?!" to me lol) i'll see if he can help me out, he's done a lot of body work. I'll post pics as it sits as of earlier this afternoon probably tommorow when I get a chance.
Right now we got it to where I can live with it..it's not 100% but when I go see my uncle next time (after saying "holy crap wtf did papa do?!?!" to me lol) i'll see if he can help me out, he's done a lot of body work. I'll post pics as it sits as of earlier this afternoon probably tommorow when I get a chance.


Thread Starter
Joined: Jun 2007
Posts: 3,845
From: La Habra, CA
Originally Posted by burstaneurysm
I've been there. Tape woulda held that on just fine... ah well.
Mine isn't flush even now because it's just slightly to far forward ATM but with the right adjusting it will be perfect..for right now I will live with it until I get the opportunity to get it fixed.
I'm also a little paranoid about just taping it down vs bolting AND taping. I know it probably would be fine but I have heard horror stories and thats more than enough for me.

Senior Member

Scikotics
SL Member
Joined: Jun 2005
Posts: 2,043
From: Broken Arrow, OK
Uhh.. I am left speechless on this one. How does one manage to even cut a hole like that? So let me get this straight, your gpa lost a screw in there and decided to cut a hole and get it out?
Thread Starter
Joined: Jun 2007
Posts: 3,845
From: La Habra, CA
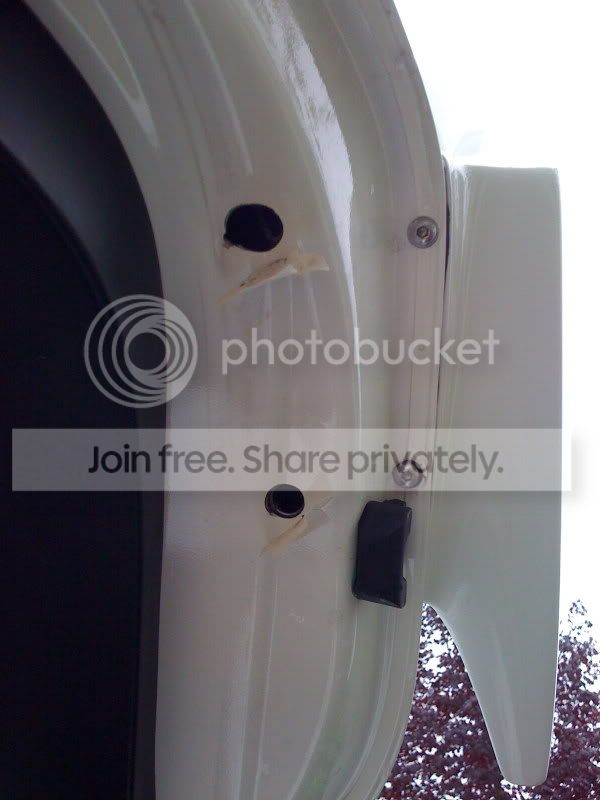
yes he did get bolts lost in there but thats not how the hole came about. There is about three layers he had to get to to get to where the mounting hole for the spoiler was from and unfortunately he (nor I) was aware of that and somehow he ended up drilling that thing
That's about as good an explanation as I have for that one..
That's about as good an explanation as I have for that one..


Joined: Mar 2007
Posts: 16,638
From: Parsippany, NJ
Here is how it's supposed to be...this is for the Kami wing.

I just used some white vinyl to cover up the holes, but you're gonna need some body work to cover that thing up...
I just used some white vinyl to cover up the holes, but you're gonna need some body work to cover that thing up...
Joined: Mar 2007
Posts: 16,638
From: Parsippany, NJ
I knew I should have done a write up on installing the Kami wing...this helps for any wing installation, not just the Kami.
Well if you get a new hatch and decide to install another wing on in, you can use this as reference. You'll still need to get the holes properly aligned, measure, etc.
Tape off the ENTIRE area. I covered aout 1/4 of the hatch on both sides and the fenders. The metal shavings can scratch your paint. Once you have it all measured, make your pilot holes. I think I used a 3/32" drill bit for these holes.

Now use a step drill bit, and progressively make the holes larger.


Don't have pics for the next stuff...but for the underside, you're going to need to do a little measuring and eyeballing to get the underside holes correct. Once you determine where the holes need to be, begin with the same bit you used for your pilot holes. Then progressively work your way up until the holes are larger enough for the bolt to pass through.
The hole that is closer to the rear of the car will need to be larger, because there are two layers of metal that you need to cut through, unless you use a boring drill bit. In that case, you can just cut out a chunk.
Now that you have the holes all cut, place the wing down and do a test fitment, to make sure the bolts will pass through without obstruction. Now remove the wing and apply a thin layer of sealant along the edges of the base, this will prevent water and condensation from building up inside. Now firmly place the wing down and begin bolting it in. Do not torque any of the bolts down, until all 8 are in place and snug. Then, tighten them accordingly
1___8_____5___3
4___6_____7___2
Well if you get a new hatch and decide to install another wing on in, you can use this as reference. You'll still need to get the holes properly aligned, measure, etc.
Tape off the ENTIRE area. I covered aout 1/4 of the hatch on both sides and the fenders. The metal shavings can scratch your paint. Once you have it all measured, make your pilot holes. I think I used a 3/32" drill bit for these holes.
Now use a step drill bit, and progressively make the holes larger.
Don't have pics for the next stuff...but for the underside, you're going to need to do a little measuring and eyeballing to get the underside holes correct. Once you determine where the holes need to be, begin with the same bit you used for your pilot holes. Then progressively work your way up until the holes are larger enough for the bolt to pass through.
The hole that is closer to the rear of the car will need to be larger, because there are two layers of metal that you need to cut through, unless you use a boring drill bit. In that case, you can just cut out a chunk.
Now that you have the holes all cut, place the wing down and do a test fitment, to make sure the bolts will pass through without obstruction. Now remove the wing and apply a thin layer of sealant along the edges of the base, this will prevent water and condensation from building up inside. Now firmly place the wing down and begin bolting it in. Do not torque any of the bolts down, until all 8 are in place and snug. Then, tighten them accordingly
1___8_____5___3
4___6_____7___2