
NST Pulley Install and Review


Thread Starter
Senior Member

Scikotics
SL Member
Joined: Jun 2005
Posts: 2,757
From: West Des Moines, IA
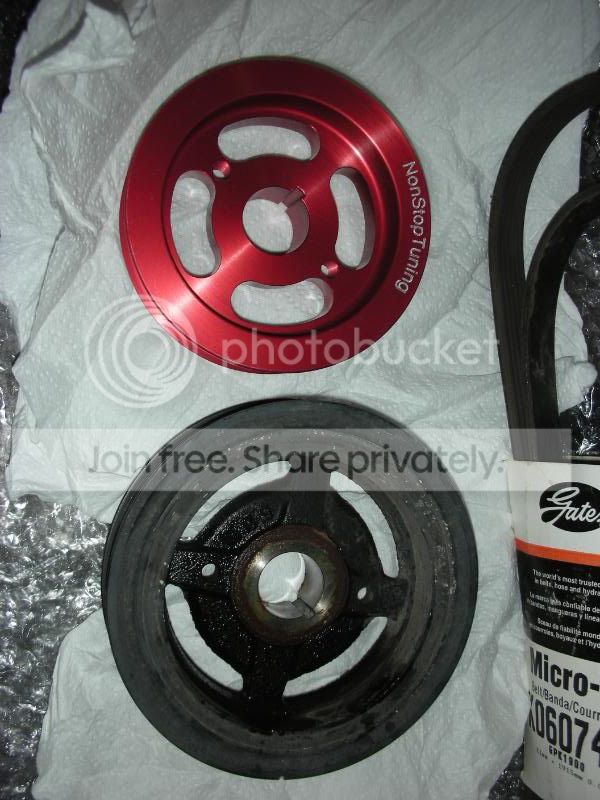
Last Friday, I got a package in the mail from NST. My long awaited red pulley set had arrived. Thankfully, I was headed up to my parents that weekend to use my dad's shop and get these automotive pieces of art installed on my car. I have done a crank pulley install in the past and I am pretty sure that the stock crank pulley is heavier than the entire package I got from NST (I didn't weigh the package before I tore into it so I don't know for sure). Of course, I had to open up the package right away and see these pulleys. They looked amazing. The craftsmanship on them is second to none. The three pulleys were flawless and I almost felt bad installing them on my car....almost.
Make sure you check NST's website BEFORE starting the install and get the recommended belt. Different sized pulleys may require different sized belts.
The Install
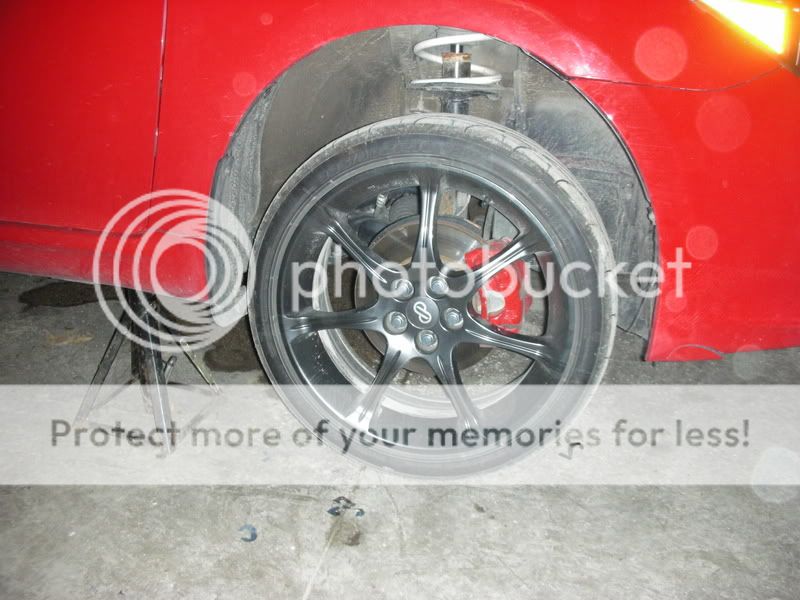
When I got home, I pulled my car in the shop and got to work. I started by locking the e-brake, putting the car in gear, and busting my front passenger tire lug nuts loose. I jacked up the front passenger side of the car and finished taking the lugs off and pulled the wheel off the car.
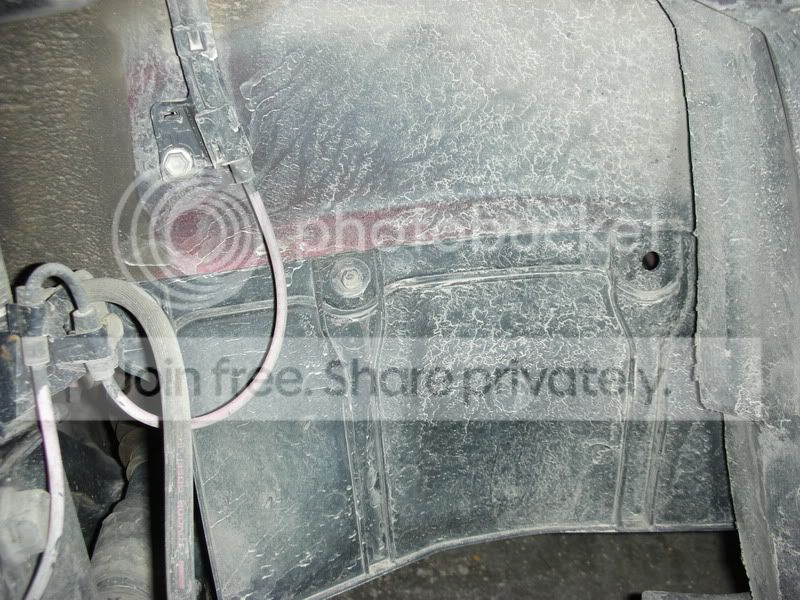
With the tire off, I was able to access the screws and plastic rivets I needed to remove to take off the inner part of the wheel well to access the pulley. You can see one of the screws in the picture below and a pop rivet is behind the brake line.
Another screw is accessible by pushing the wheel well liner back a bit. Then, I got under my car to get the rest of the fasteners. There is a pop rivet on the underside of the car that connects this piece to the splash guard as well as a "clip" that holds the top of the piece to the metal frame of the car. There might be one more clip to remove, but I can't remember off the top of my head. You'll be able to see it if you get under the car.
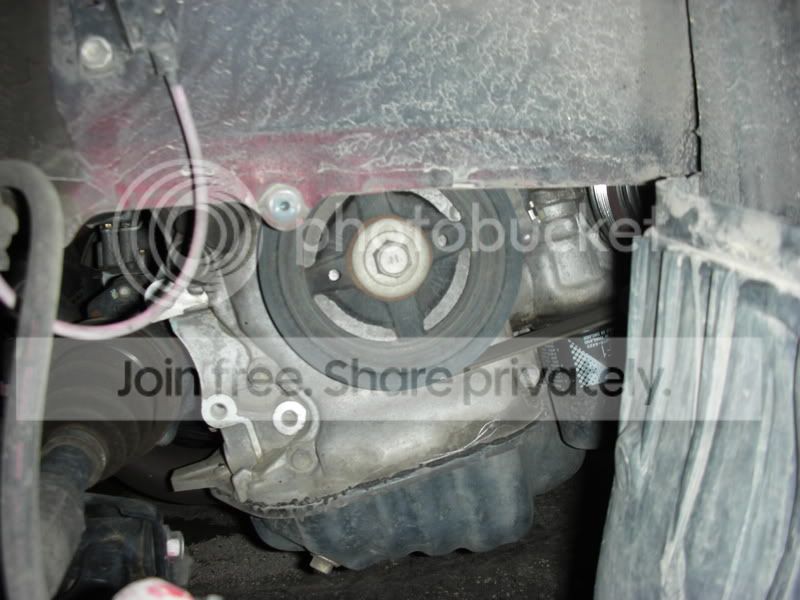
Once you get all of the clips and screws removed, you can pull that piece off the car. It will make things much easier later in the install. As you can see in the pic below, I left the piece on and just held it back while I removed the bolt holding the crank pulley on. I removed the piece completely later on in the install.
To get the crank pulley bolt off, an impact wrench works the best. I couldn't imagine doing this install without air tools.
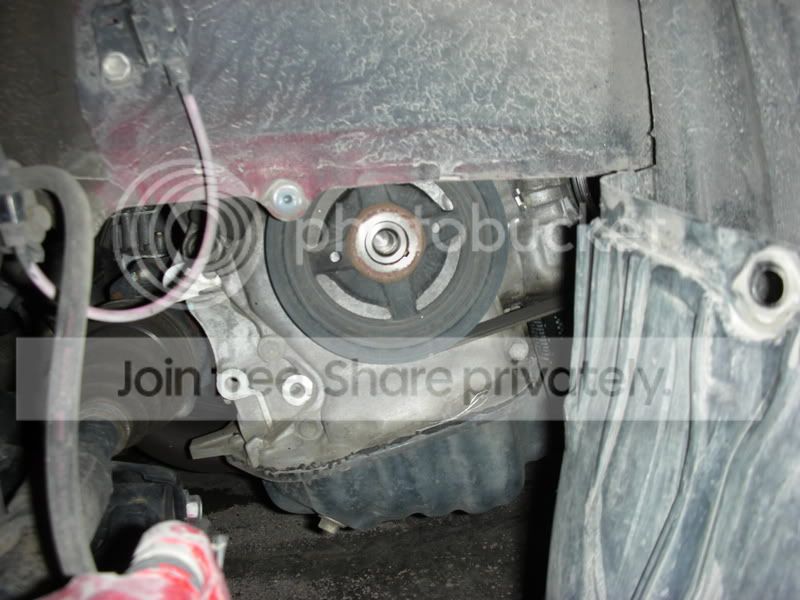
Bolt on:
Bolt off:
After I got the bolt off, I went topside to work on the alternator and water pump pulleys. To start, you need to take the accessory belt off. If you put your hand under the belt as it comes off the top of the alternator pulley (make sure your engine is off when you put your hand under the belt), and move your hand towards the back of the engine, you should be able to feel the tensioner nut a few inches back from the alternator. Put a socket on a ratchet wrench or breaker bar and put it on the nut. Get a friend for the next part.
Have your friend pull the wrench towards the front of the car while you CAREFULLY remove the belt from the crank pulley. DO NOT try to remove the belt from the alternator pulley. Be very careful and mindful of your fingers when removing the belt from the pulley. I actually tried removing the belt at the alternator pulley and didn't have enough slack to get the belt off. I ended up snapping the tensioner nut off the assembly. Learn from my mistake and 1) take the belt off at the crank pulley and; 2) be careful of your fingers because the bolt can snap and suddenly put tension back on the belt.
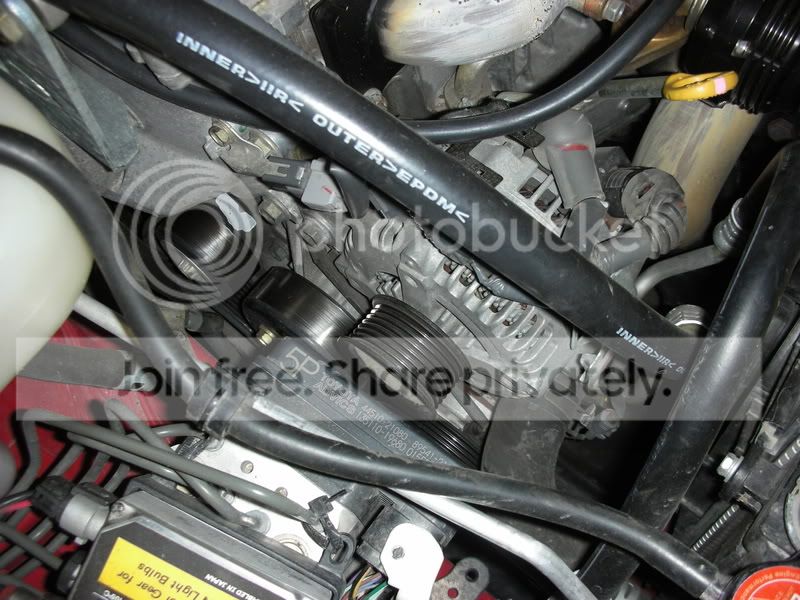
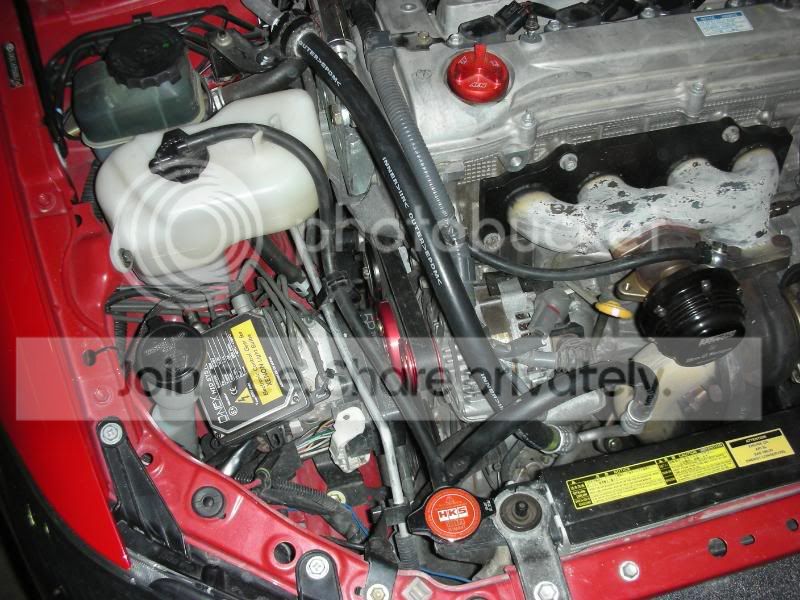
Here you can see (from right to left) the alternator pulley, water pump pulley, and tensioner pulley:
Carefully take off the connections to the alternator. Remove the two connectors on the top of the alternator (one is held on with a nut and the other clips in). On the left side of the alternator, towards the back of the alternator, there is another wire clip to unhook. Finally, on the front side of the alternator bracket, there is a white wire "harness" that keeps some wires secured. Unclip this fastener from the bracket so you can get the alternator out easier. I also found it helpful to remove the coolant overflow to give myself more room to work. This isn't too hard, just remove the overflow hose, wipe it off, and put it out of the way (somewhere clean). Then remove the bolt holding the reservoir to the body of the car and carefully lift the overflow upwards and out of the engine bay. Make sure you have somewhere to put this to keep it upright so you don't spill the fluid everywhere. I used a coffee can.
To remove the alternator, remove the 14 millimeter bolt that is behind the alternator. This one is easy to get to. The second (12mm I believe) bolt isn't so easy. It is under the alternator and kind of hidden. If you move around the alternator a bit, you might be able to access this bolt better, but I got it out mostly by feeling around, putting my socket on it, turning it a few turns, having the socket fall off, swearing, and starting over again. There isn't much room to work down there, so be sure to have a good light. Once the two bolts are out, you can wiggle the alternator and rotate it out of the bracket and pull it out of the engine bay.
Alternator out. You can see where the bolt secures the underside of the alternator to the bracket in this pic.

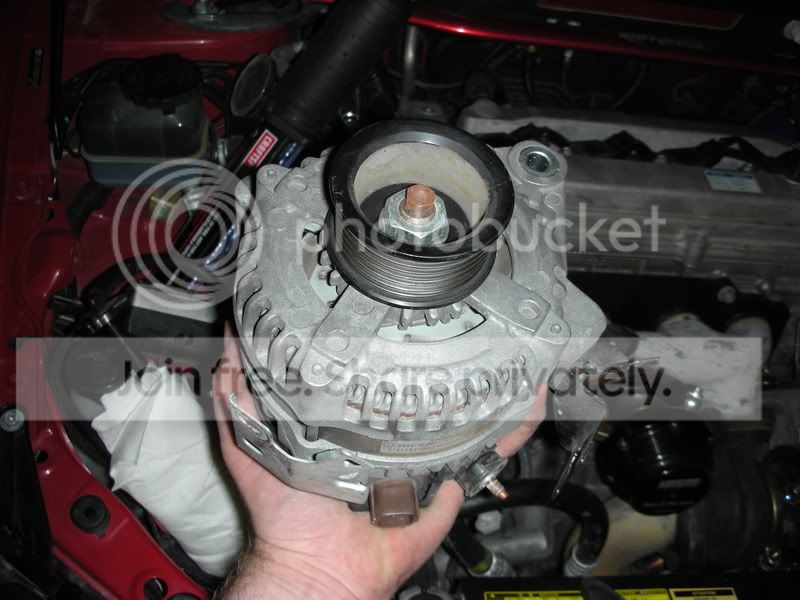
The alternator with the heavy stock pulley on it:
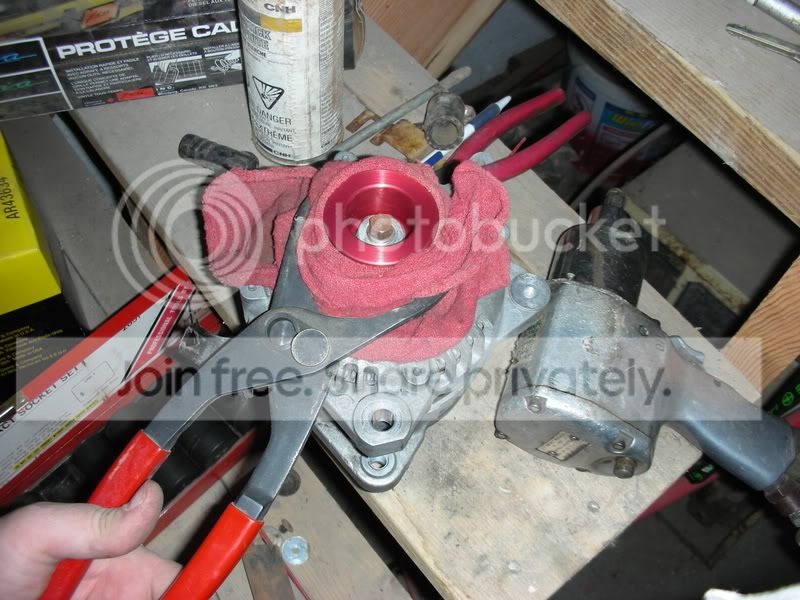
Getting the alternator pulley off is a bit tricky. There is nothing really to "grab onto" while trying to remove the bolt. I didn't want to clamp something directly on the pulley in case I needed to return to stock in the future. What I ended up doing is wrapping a rag around the pulley to protect the ribs. Then, I used a set of oil filter pliers to hold the pulley while I used an impact (air tools FTW!) to remove the bolt holding the pulley on. This worked perfectly.
How I removed the pulley bolt:
Stock vs. NST:

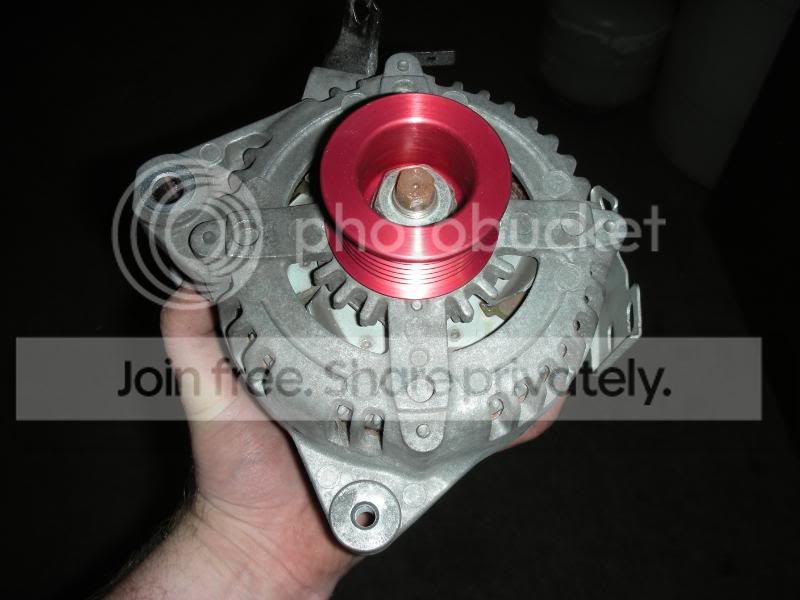
New pulley secured:
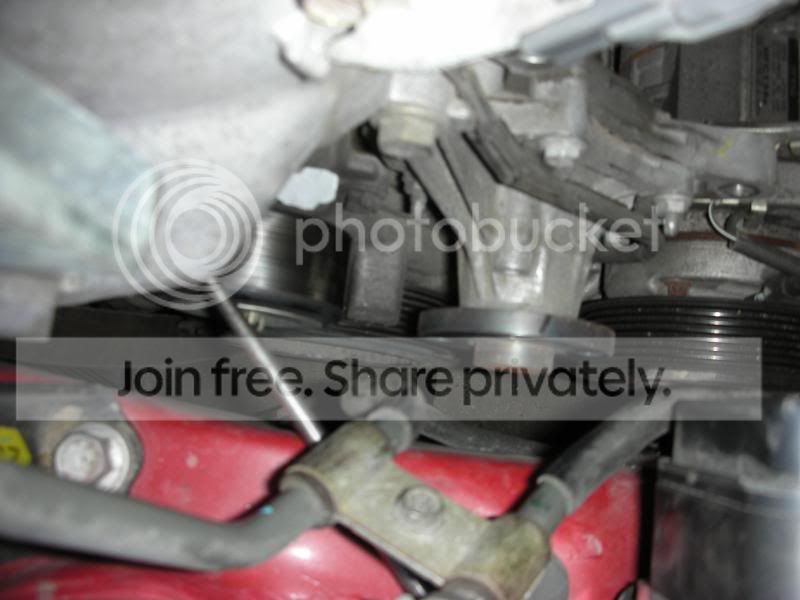
Next is the water pump pulley. This is where taking the coolant overflow reservoir off really helps. To keep the pulley from spinning while attempting to remove the 4 bolts holding it on, I shoved a screwdriver through one of the holes in the pulley and put the tip of the driver against the engine. Make sure you use the biggest screwdriver that will fit through the hole. I bent one screwdriver because it wasn't strong enough. These bolts are on tight. Chances are, a little more swearing will help you out at this point. Be especially careful when the bolts break loose because some of the swearing was caused when a bolt broke loose and I donated some flesh from my hand to the engine. Wear some gloves if you have them to prevent this from happening to you. Once you get the pulley off, you can either store it with your alternator pulley or choose to throw the thing across your garage. (I chose the former, though the latter was definitely looking like a good idea at the time.)
Water pump sans pulley:
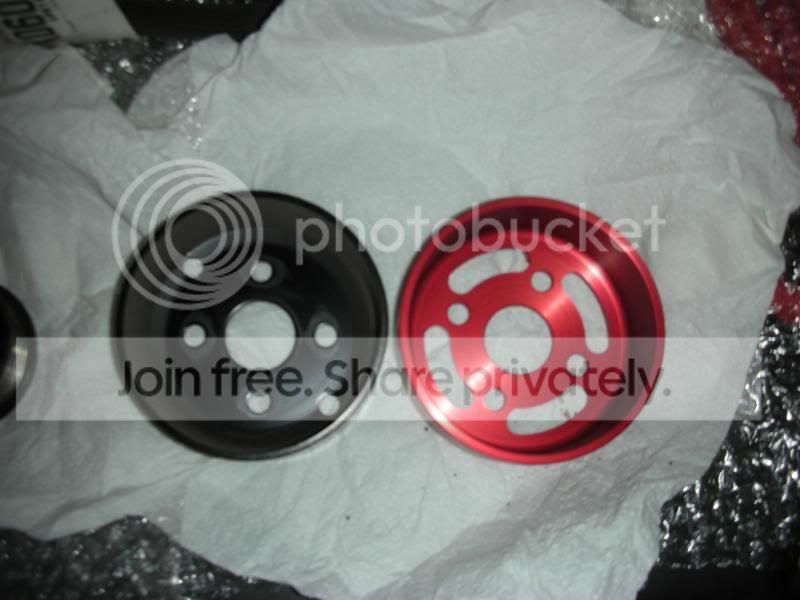
Pulley comparison. Though they look similar, the NST pulley is a lot lighter:
Getting the pulley back on is a bit more difficult because I couldn't find a screwdriver that would fit through the slot and keep it from turning. I started out by threading on all four bolts by hand. Then, I carefully put a screwdriver vertically across the face of the pulley and used 2 of the bolt heads to keep the pulley from turning as I tightened the bolts. Be careful not to scratch your new pulley if you use this method to tighten the bolts.
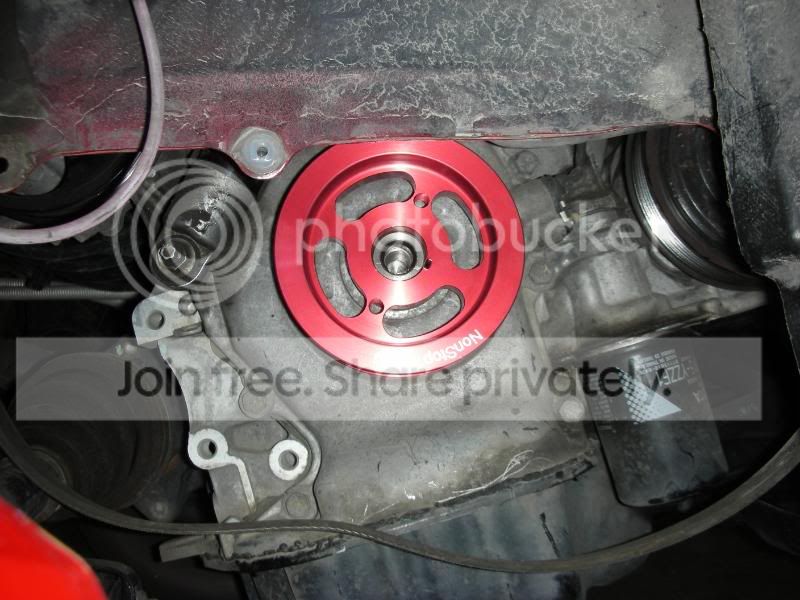
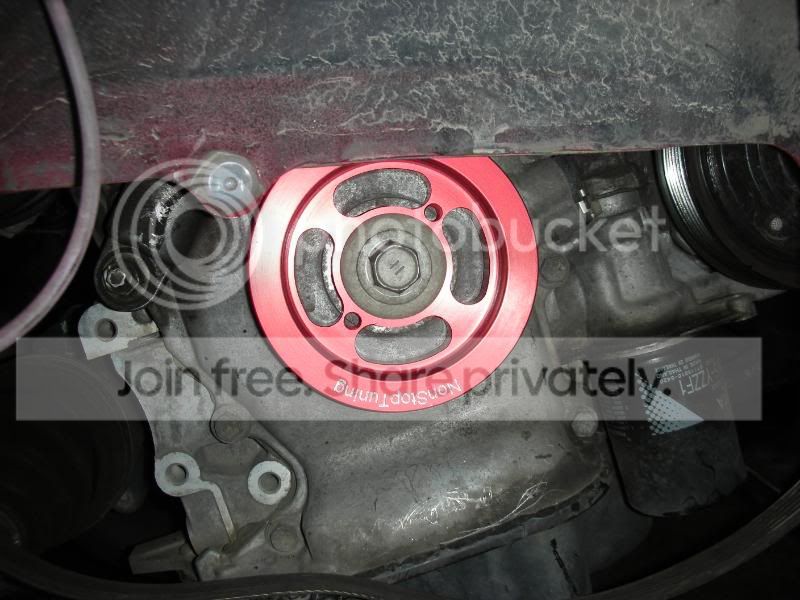
Water pump pulley secured:
I found the way that worked for me to get the alternator back on is to put the long bolt that is towards the back on first. Once I had this bolt threaded in and finger tight, I got the bottom holes lined up by rocking the alternator up and down. It seemed this bolt was a bit easier going in than trying to get it out.
Water pump and alternator pulleys:

At this point, I decided it was time to return to the crank pulley. The pulley I did on my friend's car was easy. Took the bolt off and the pulley just pulled off the shaft. My pulley was having none of that. It didn't want to relinquish its job of turning the engine's accessories. I tried using a gear puller to no avail (the only ones in my dad's shop were used for pulling tractor gears and were large and cumbersome to work with). I ended up using two large flathead screwdrivers. I placed one under each side of the pulley and gently "rocked" the pulley back and forth until it was loose enough to just pull off.
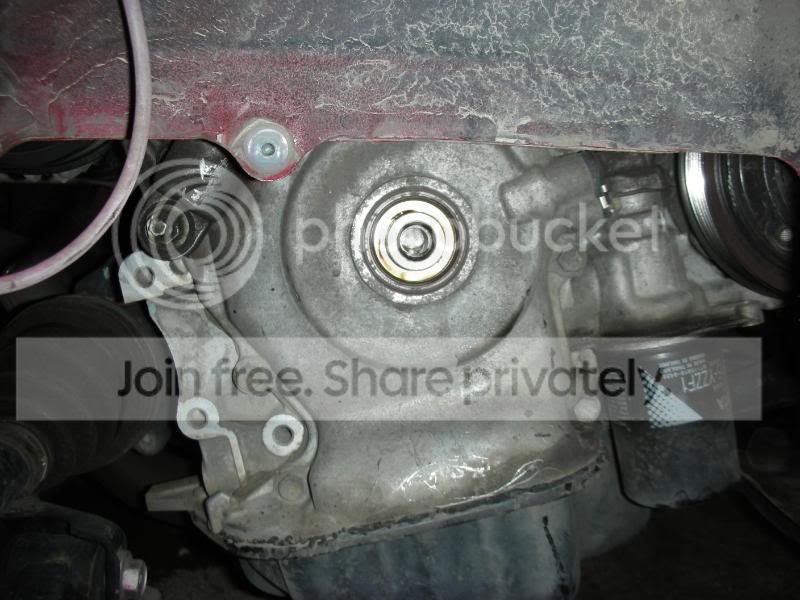
Crankshaft minus pulley:
The stock pulley is very heavy compared to the NST counterpart. I knew there would be a weight difference, but I was amazed when I compared the two:
Before putting the pulley back on, take note of where the "key" is on the crankshaft. This is the little pin that is sticking up to orient the pulley. I made a little mark on the crankshaft so I knew how to mount the pulley. The pulley goes on the crank so that the key is inside of the groove on the pulley. This ensures the pulley spins at the same speed as the crank.
Getting ready to put the pulley on. If you look close, you can see the little mark I made on the crank to line up the pulley:
My pulley was pretty tight going on. I used a rubber mallet to lightly tap it on, checking often that they key was lining up with the groove on the pulley. Once it was on, I used the impact and put the bolt back on.
Crank pulley mounted:
Now came the fun of getting the belt back on. Put your new belt on the pulleys. If you can't remember how it was on before, your instruction manual should have a belt diagram. Get the belt on all of the pulleys except the crank. Call you friend again (promise them the first ride in your car with the pulleys on) and have him/her help you hold the belt on and make sure you have it routed correctly. Get down by the crank pulley and have your friend relieve the tension on the belt with the wrench again and carefully put the belt back on the crank pulley. Once you have it on, look over the belts again to make sure you have it routed correctly and everything lines up right. You don't want to find out you had the belt on wrong when you start your engine.
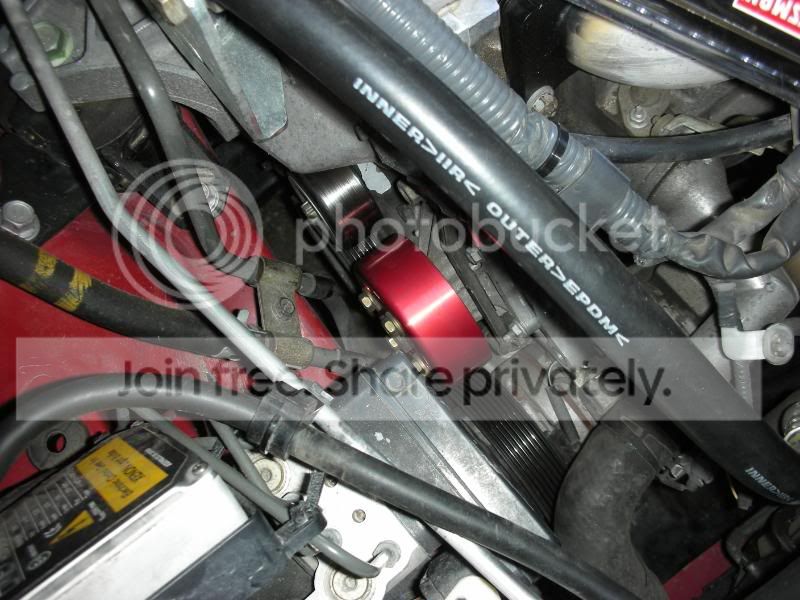
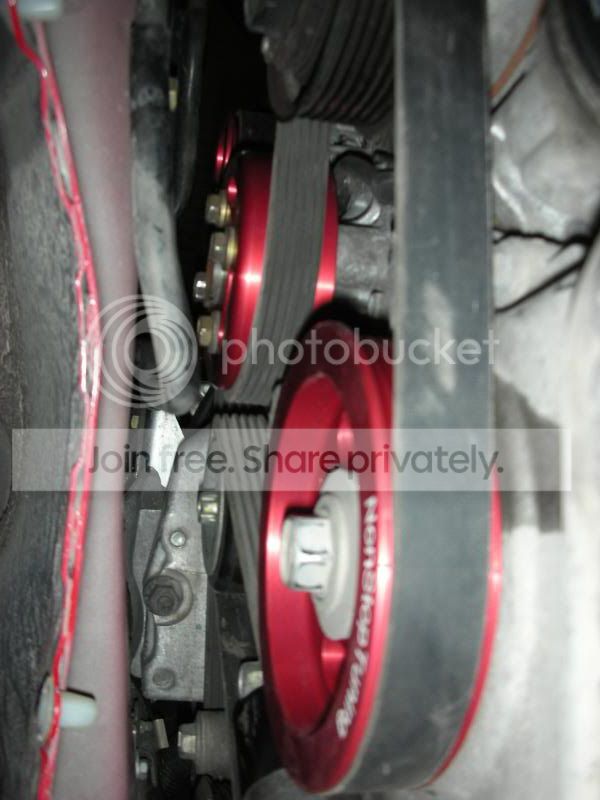
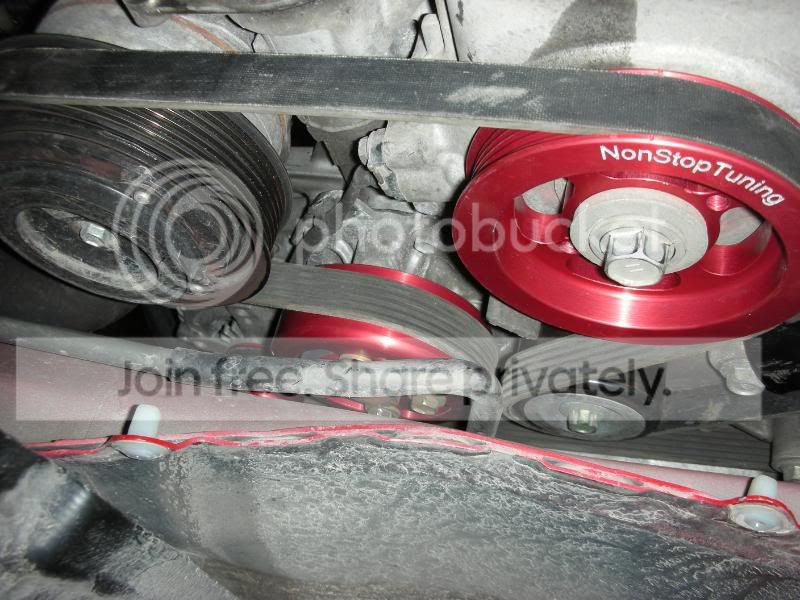
A few shots with the pulleys and the belt on:
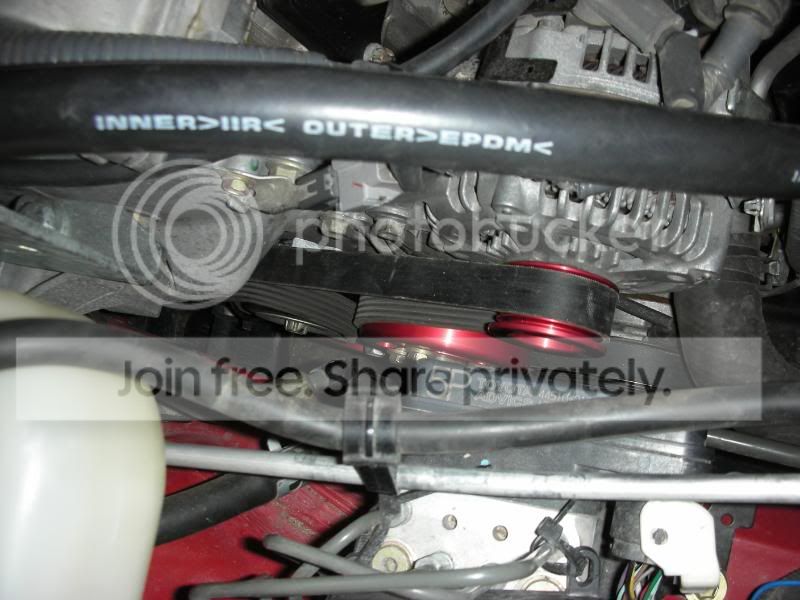
Under the car looking up:
Now, if you are sure you have everything on correctly, you can replace the panel in the wheel well that protects the crank pulley. Make sure all of the clips and screws are in securely. Then, replace the wheel and put the lugs back on finger tight. After you let your car down off the jack stand, torque down the wheel lugs to spec.
This is the moment of truth. Turn your radio and fan off so you can hear your engine clearly. Start your engine, but be ready to turn it off immediately if you hear anything that doesn't sound right. Once you are sure everything is running smoothly, you are ready to take it out for a quick spin. Be mindful of the sounds and again, if anything doesn't sound right, turn the car off immediately and check things out.
Final Thoughts
Though the alternator and water pump pulleys were a bit harder to install than I had anticipated, it wasn't a bad install overall. I would suggest planning on a few hours for the install so you aren't rushed. I would not recommend this install without an impact wrench. It made getting stubborn bolts much easier to get out. Also, you should have someone helping you when taking off and putting on the belt.
The quality of the pulleys is second to none. Very high quality pieces. The weight is also amazing. You really can't grasp the weight difference in the stock versus the NST pulleys until you are holding them in your hands. I was blown away at how much lighter the NST pulleys are over stock, especially the crank.
When I started up my car and on my drive home, I noticed much quicker engine response. The engine revved quicker and I noticed slightly quicker acceleration. Because of the quicker revving nature of the engine, my turbo built boost a little quicker as well (not necessarily sooner in the RPM band, but quicker overall). I will be excited to get out on the drag strip and autocross track and see how these pulleys help my acceleration in competition.
These pulleys are a relatively inexpensive way to free up horsepower that is being wasted by your engine to turn the heavy stock parts. Though there is no shortage of people saying pulleys will harm your engine, you will be hard pressed to actually find any people that have had engine issues caused by NST's pulleys. They have been in the game for a while and it shows in the amazing craftsmanship of these parts.
If you want better acceleration and a few more horsepower going to your wheels at the strip, track, or on the street; give Mike a call at NonStopTuning.
Make sure you check NST's website BEFORE starting the install and get the recommended belt. Different sized pulleys may require different sized belts.
The Install
When I got home, I pulled my car in the shop and got to work. I started by locking the e-brake, putting the car in gear, and busting my front passenger tire lug nuts loose. I jacked up the front passenger side of the car and finished taking the lugs off and pulled the wheel off the car.
With the tire off, I was able to access the screws and plastic rivets I needed to remove to take off the inner part of the wheel well to access the pulley. You can see one of the screws in the picture below and a pop rivet is behind the brake line.
Another screw is accessible by pushing the wheel well liner back a bit. Then, I got under my car to get the rest of the fasteners. There is a pop rivet on the underside of the car that connects this piece to the splash guard as well as a "clip" that holds the top of the piece to the metal frame of the car. There might be one more clip to remove, but I can't remember off the top of my head. You'll be able to see it if you get under the car.
Once you get all of the clips and screws removed, you can pull that piece off the car. It will make things much easier later in the install. As you can see in the pic below, I left the piece on and just held it back while I removed the bolt holding the crank pulley on. I removed the piece completely later on in the install.
To get the crank pulley bolt off, an impact wrench works the best. I couldn't imagine doing this install without air tools.
Bolt on:
Bolt off:
After I got the bolt off, I went topside to work on the alternator and water pump pulleys. To start, you need to take the accessory belt off. If you put your hand under the belt as it comes off the top of the alternator pulley (make sure your engine is off when you put your hand under the belt), and move your hand towards the back of the engine, you should be able to feel the tensioner nut a few inches back from the alternator. Put a socket on a ratchet wrench or breaker bar and put it on the nut. Get a friend for the next part.
Have your friend pull the wrench towards the front of the car while you CAREFULLY remove the belt from the crank pulley. DO NOT try to remove the belt from the alternator pulley. Be very careful and mindful of your fingers when removing the belt from the pulley. I actually tried removing the belt at the alternator pulley and didn't have enough slack to get the belt off. I ended up snapping the tensioner nut off the assembly. Learn from my mistake and 1) take the belt off at the crank pulley and; 2) be careful of your fingers because the bolt can snap and suddenly put tension back on the belt.
Here you can see (from right to left) the alternator pulley, water pump pulley, and tensioner pulley:
Carefully take off the connections to the alternator. Remove the two connectors on the top of the alternator (one is held on with a nut and the other clips in). On the left side of the alternator, towards the back of the alternator, there is another wire clip to unhook. Finally, on the front side of the alternator bracket, there is a white wire "harness" that keeps some wires secured. Unclip this fastener from the bracket so you can get the alternator out easier. I also found it helpful to remove the coolant overflow to give myself more room to work. This isn't too hard, just remove the overflow hose, wipe it off, and put it out of the way (somewhere clean). Then remove the bolt holding the reservoir to the body of the car and carefully lift the overflow upwards and out of the engine bay. Make sure you have somewhere to put this to keep it upright so you don't spill the fluid everywhere. I used a coffee can.
To remove the alternator, remove the 14 millimeter bolt that is behind the alternator. This one is easy to get to. The second (12mm I believe) bolt isn't so easy. It is under the alternator and kind of hidden. If you move around the alternator a bit, you might be able to access this bolt better, but I got it out mostly by feeling around, putting my socket on it, turning it a few turns, having the socket fall off, swearing, and starting over again. There isn't much room to work down there, so be sure to have a good light. Once the two bolts are out, you can wiggle the alternator and rotate it out of the bracket and pull it out of the engine bay.
Alternator out. You can see where the bolt secures the underside of the alternator to the bracket in this pic.
The alternator with the heavy stock pulley on it:
Getting the alternator pulley off is a bit tricky. There is nothing really to "grab onto" while trying to remove the bolt. I didn't want to clamp something directly on the pulley in case I needed to return to stock in the future. What I ended up doing is wrapping a rag around the pulley to protect the ribs. Then, I used a set of oil filter pliers to hold the pulley while I used an impact (air tools FTW!) to remove the bolt holding the pulley on. This worked perfectly.
How I removed the pulley bolt:
Stock vs. NST:
New pulley secured:
Next is the water pump pulley. This is where taking the coolant overflow reservoir off really helps. To keep the pulley from spinning while attempting to remove the 4 bolts holding it on, I shoved a screwdriver through one of the holes in the pulley and put the tip of the driver against the engine. Make sure you use the biggest screwdriver that will fit through the hole. I bent one screwdriver because it wasn't strong enough. These bolts are on tight. Chances are, a little more swearing will help you out at this point. Be especially careful when the bolts break loose because some of the swearing was caused when a bolt broke loose and I donated some flesh from my hand to the engine. Wear some gloves if you have them to prevent this from happening to you. Once you get the pulley off, you can either store it with your alternator pulley or choose to throw the thing across your garage. (I chose the former, though the latter was definitely looking like a good idea at the time.)
Water pump sans pulley:
Pulley comparison. Though they look similar, the NST pulley is a lot lighter:
Getting the pulley back on is a bit more difficult because I couldn't find a screwdriver that would fit through the slot and keep it from turning. I started out by threading on all four bolts by hand. Then, I carefully put a screwdriver vertically across the face of the pulley and used 2 of the bolt heads to keep the pulley from turning as I tightened the bolts. Be careful not to scratch your new pulley if you use this method to tighten the bolts.
Water pump pulley secured:
I found the way that worked for me to get the alternator back on is to put the long bolt that is towards the back on first. Once I had this bolt threaded in and finger tight, I got the bottom holes lined up by rocking the alternator up and down. It seemed this bolt was a bit easier going in than trying to get it out.
Water pump and alternator pulleys:
At this point, I decided it was time to return to the crank pulley. The pulley I did on my friend's car was easy. Took the bolt off and the pulley just pulled off the shaft. My pulley was having none of that. It didn't want to relinquish its job of turning the engine's accessories. I tried using a gear puller to no avail (the only ones in my dad's shop were used for pulling tractor gears and were large and cumbersome to work with). I ended up using two large flathead screwdrivers. I placed one under each side of the pulley and gently "rocked" the pulley back and forth until it was loose enough to just pull off.
Crankshaft minus pulley:
The stock pulley is very heavy compared to the NST counterpart. I knew there would be a weight difference, but I was amazed when I compared the two:
Before putting the pulley back on, take note of where the "key" is on the crankshaft. This is the little pin that is sticking up to orient the pulley. I made a little mark on the crankshaft so I knew how to mount the pulley. The pulley goes on the crank so that the key is inside of the groove on the pulley. This ensures the pulley spins at the same speed as the crank.
Getting ready to put the pulley on. If you look close, you can see the little mark I made on the crank to line up the pulley:
My pulley was pretty tight going on. I used a rubber mallet to lightly tap it on, checking often that they key was lining up with the groove on the pulley. Once it was on, I used the impact and put the bolt back on.
Crank pulley mounted:
Now came the fun of getting the belt back on. Put your new belt on the pulleys. If you can't remember how it was on before, your instruction manual should have a belt diagram. Get the belt on all of the pulleys except the crank. Call you friend again (promise them the first ride in your car with the pulleys on) and have him/her help you hold the belt on and make sure you have it routed correctly. Get down by the crank pulley and have your friend relieve the tension on the belt with the wrench again and carefully put the belt back on the crank pulley. Once you have it on, look over the belts again to make sure you have it routed correctly and everything lines up right. You don't want to find out you had the belt on wrong when you start your engine.
A few shots with the pulleys and the belt on:
Under the car looking up:
Now, if you are sure you have everything on correctly, you can replace the panel in the wheel well that protects the crank pulley. Make sure all of the clips and screws are in securely. Then, replace the wheel and put the lugs back on finger tight. After you let your car down off the jack stand, torque down the wheel lugs to spec.
This is the moment of truth. Turn your radio and fan off so you can hear your engine clearly. Start your engine, but be ready to turn it off immediately if you hear anything that doesn't sound right. Once you are sure everything is running smoothly, you are ready to take it out for a quick spin. Be mindful of the sounds and again, if anything doesn't sound right, turn the car off immediately and check things out.
Final Thoughts
Though the alternator and water pump pulleys were a bit harder to install than I had anticipated, it wasn't a bad install overall. I would suggest planning on a few hours for the install so you aren't rushed. I would not recommend this install without an impact wrench. It made getting stubborn bolts much easier to get out. Also, you should have someone helping you when taking off and putting on the belt.
The quality of the pulleys is second to none. Very high quality pieces. The weight is also amazing. You really can't grasp the weight difference in the stock versus the NST pulleys until you are holding them in your hands. I was blown away at how much lighter the NST pulleys are over stock, especially the crank.
When I started up my car and on my drive home, I noticed much quicker engine response. The engine revved quicker and I noticed slightly quicker acceleration. Because of the quicker revving nature of the engine, my turbo built boost a little quicker as well (not necessarily sooner in the RPM band, but quicker overall). I will be excited to get out on the drag strip and autocross track and see how these pulleys help my acceleration in competition.
These pulleys are a relatively inexpensive way to free up horsepower that is being wasted by your engine to turn the heavy stock parts. Though there is no shortage of people saying pulleys will harm your engine, you will be hard pressed to actually find any people that have had engine issues caused by NST's pulleys. They have been in the game for a while and it shows in the amazing craftsmanship of these parts.
If you want better acceleration and a few more horsepower going to your wheels at the strip, track, or on the street; give Mike a call at NonStopTuning.


Thread
Thread Starter
Forum
Replies
Last Post
ColonelSanders85
Scion tC 1G Forced Induction
3
Dec 9, 2020 09:44 AM
NonStopTuning
Exclusive Sponsored Sales
4
Jan 20, 2015 05:20 AM
TheRedBox
Scion xA/xB 1st-Gen Drivetrain & Power
31
Dec 2, 2003 04:53 PM

