


Speed-Source Polyurethane Motormounts.. *PICS*


Senior Member


Scikotics
SL Member
Joined: Feb 2005
Posts: 1,396

Originally Posted by InfideL
this all sound very good
i am just worried that the rear will be a pita
can anyone make a DIY? snap some pics....plz

i am just worried that the rear will be a pita
can anyone make a DIY? snap some pics....plz
I have taken some pics and i will give a half a$$ walk through of how this went down...hopefully this well help some and if you have questions or comments, fire away
After roughly 3-4 hours from start to finish i am happy that it is done and will NOT do that again!! Sorry for the limited pics but its a tough area to picture!
I recommend a lift of some sort because without it a see our time doubling to get this job done....Keep in Mine this walk through is for the people who have already installed the front as they are familiar with the area....Make sure you have plenty of tools around with some long sockets and maybe access to air tools too....
Tip remember this because the rear bracket will have to be opened a little bit
"Prototype_xB wrote:
Will the mounts be changed so you won't have to spread the rear mount 1/4"?
SpeedSource wrote:
no - because you will need to open up the bracket a little bit to get in the mount anyways...
I would say it was opened about an 1/8 to 1/4 of an inch - it was literally just sticking it in the vice, and hitting the mount 3-4 times with a hammer... There is a different offset on the rear mount then envisioned, so to fit in a replacement mount - "
Tip #2 which i am surprise no one mentioned yet.....once you get the rear mount out....when you cut out the OEM one there is a metal ring inside that is left....this needs to be hammered out with some serious force....we literally dremeled portions and then hammered until it popped out....be ready this is a minor PITA
1) Once car is in the air, remove the plastic shield in the center covering your cross member bar.....you can even remove both sides of the other plastic shields for ease of access to other things. We didn’t bother!
2) Next remove the cross member....i didn’t take a good pic of this but this is what it looks like out
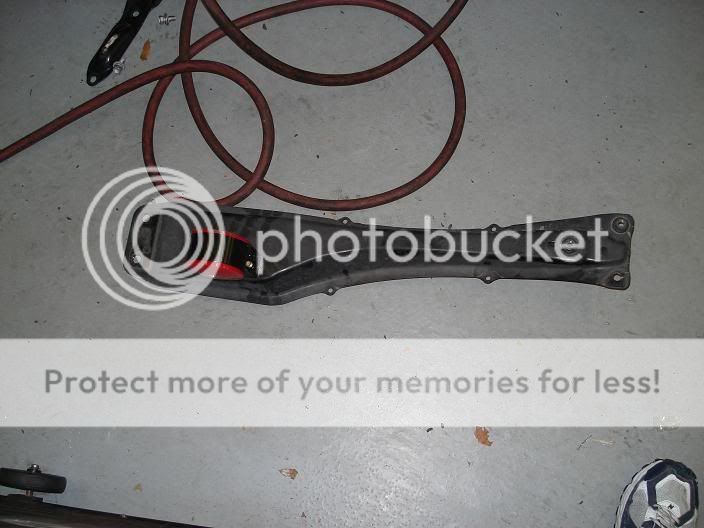
as you can see the front mount is still attached. Removing this part will give you more room for you to reach around....
this is a pic of what it looks like removed
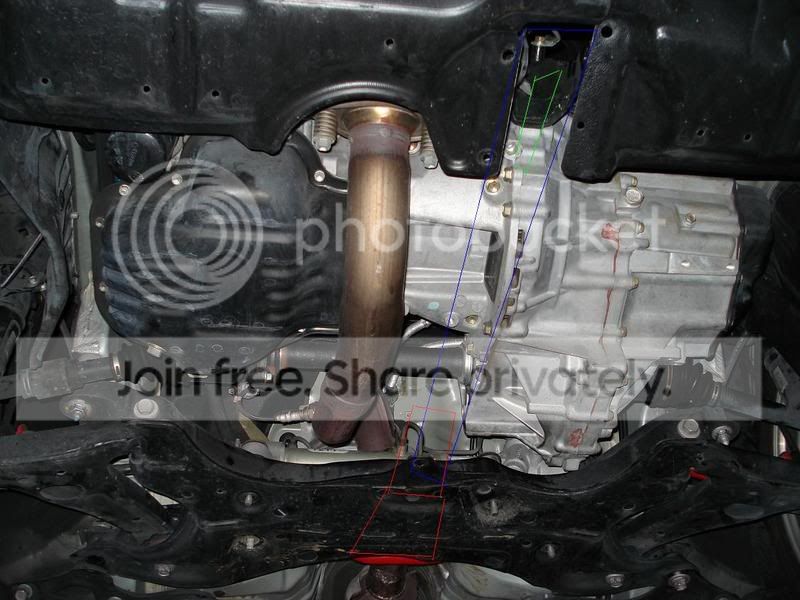
The blue box is where the cross member goes, the green box is where the front mount sits on top and the red box is the area where the rear mount would be! I have a larger file if anyone wants it! From this picture you can see that we loosen many of the engine cradle bolts if not removed them. To help allow more movement to get to the rear mount.
We also removed the spring loaded bolts for the s-pipe to allow the exhaust to move over when it was in the way....
This is actually the best shot of viewing where the mount is.....from the drivers side wheel.....
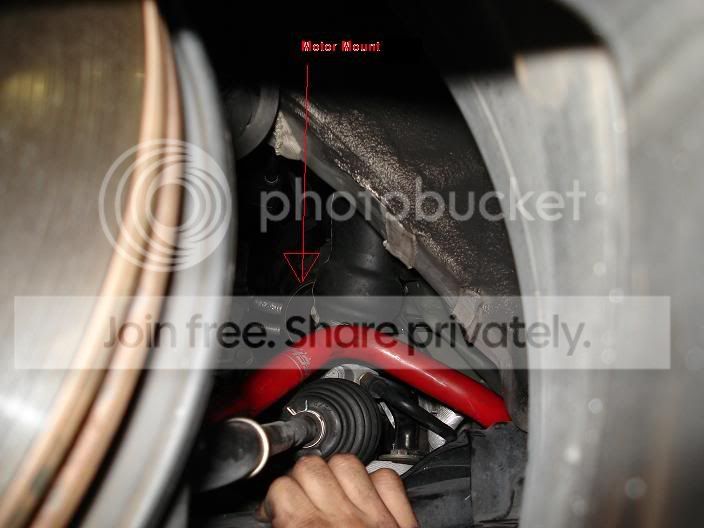
here’s another
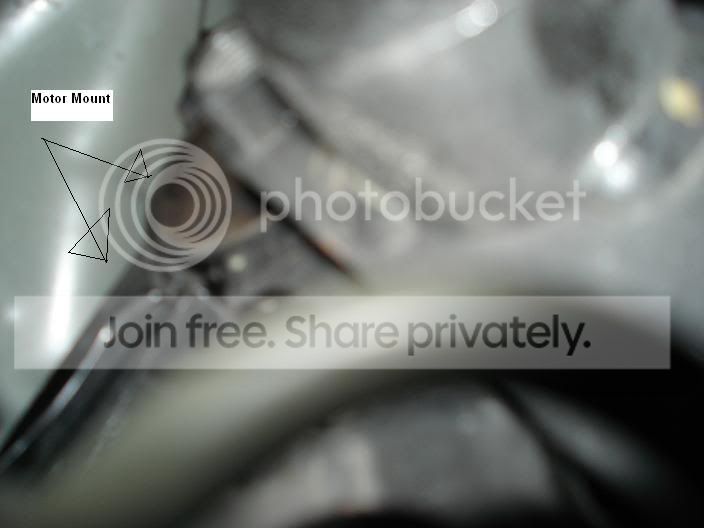
3) This is the hard part removing the bolts to the bracket holding the mount and tranny together......i cant remember the sizes but 14's 12's and 18's think the cradle is....doesn’t really matter just make sure you have lots of sizes with you.....there is very limited small and getting leverage to loosen these bolts are not fun.....The center bolt through the mount needs to be removed as well....
4) Once you curse like a sailor and cut up your hands and arms, you should have gotten all the bolts and nuts free......then stare at amazement at how the hell you are going to get this mount bracket out of there....pic below with new mount in
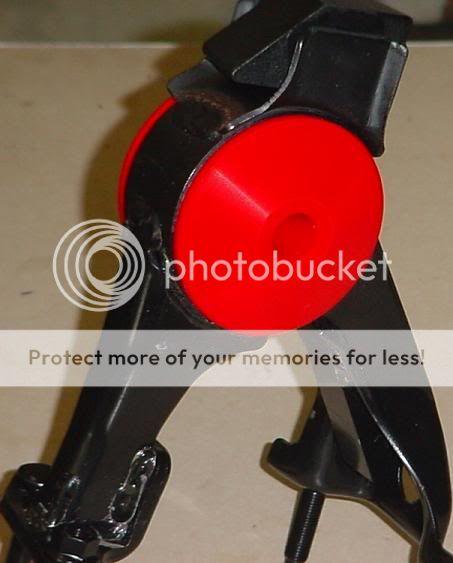
After many attempts to slide it free.....i got it out over by the drivers side end link where the sway bar connects....it was a large enough area to get it through....
5) Remove the OEM mount......cut the rubber piece out...that the easy part.....hammering the metal ring was another fun task....i recommend a dremel or jig saw of some sort to slightly cut into the ring and then hammer the hell out of it.....Have no fear it will eventually pop out....because it seemed to be in there extremely tight.....
6) once completely removed throw some grease in there and then fit the new mounts in and slide the metal tube through (grease it to help it in)....also i noticed that the tube isn’t long enough to sit flush on both sides??? Not sure if it matters but we just centered it in the middle of both mounts!
7) Important...i noted this before and mention the bracket that attaches to the tranny and the mount needed to be pried open a little to let the mount and bracket fit together.....sorry didn’t get a pic of this...but you will know what i mean if you get this far

8.) Putting things back together....THIS is Important if you removed the cross member....BEFORE you put back the rear motor mount make sure you place the cross member back in its place...it does not need to be bolted back together just sitting in place....we did not do this and hand to removed the tranny bracket and motor mount after we got it in place and tighten it down...we did not realize that the cross member will NOT fit back in place with the motor mount in first!!!!.....not so fun to do this twice and reason so much time was spent.....Then after we used a crowbar several times to pull the tranny back to fit the mount back in place we finally got it to sit right......the size of this mount just makes it so hard in a tight place to move it around using a crowbar to rock the tranny back and forth helped....its frustrating but it will go.....here is a pic of the mount in place Without bracket above
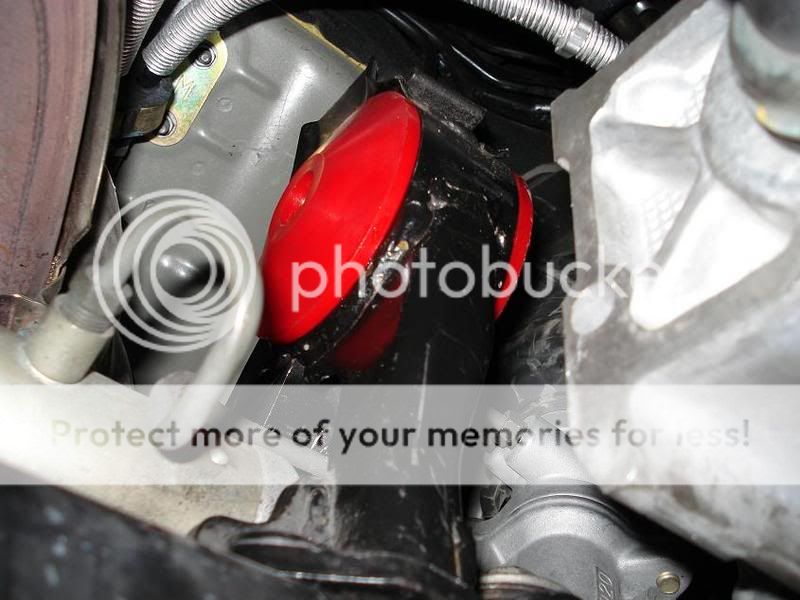
Then slide the bracket on top and again you the crowbar to move things (tranny) around to get holes to line up and get you hand in tight spots to fit the bolts in.....make sure you tighten everything as tight as possible....as you don’t want things getting loose....you can not use air tools for these parts so just tighten as much as you can......
9) Tighten motor mount bolts.....Put back spring loaded bolts on s-pipe (if removed)....tighten down cross member bar....tighten the engine cradle bolts....double check to make sure everything is put back and tighten down....reference manual for torque specs....
On a side note we bent back a piece of the heat shield (between exhaust and bottom of car) to give some more room to get hands in certain places....make sure you remember to bend it back in place.....we forgot and i had my car rattling for a couple of days before we lifted it again and fixed it....nothing serious, it was just rattling against exhaust.....
10) Put back plastic shields and plastic clips and have a few shots of your favor alcohol because it will be needed!!!
Big thanks to Joel for helping me out and busting his a$$!!!
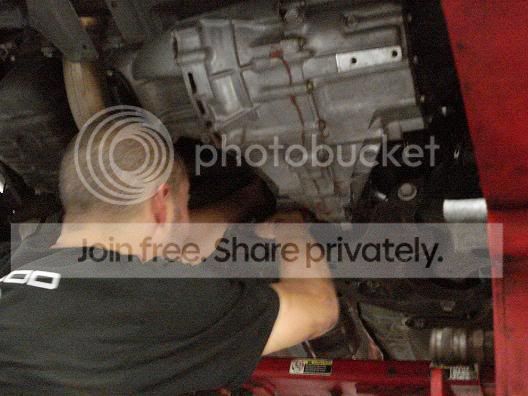
After installed not too much difference between the front only in. It does feel more solid and no extra vibration with rear added actually almost feel a slight improvement.....after we fixed the rattling (from Heat Shield), i am very happy that both are installed and done....These make a major difference in your car in launch and rev matching, and for those with FI motors the mounts are a must......
After a while with these in i'll review them again!!
Hope this helps alittle with the install....tips and pointers are always helpful to avoid our mistakes and extra time spent!!!
GOOD LUCK ALL.....be prepared for a tough install
-Jason

Senior Member
Team Hamster
SL Member
Joined: Jun 2006
Posts: 115
From: Illinois
Originally Posted by web
I've driven a 240 with solid motor mounts and it's the most uncomfortable and annoying ride/sound EVER.

Hope that clears things up a bit.

Senior Member
SL Member
Joined: Mar 2005
Posts: 1,436
From: SC
i could not remove the bolts on the tranny bracket to save my life. i got the front mount on on, but dam, that back one i got loose and couldn't undo the bracket. any recommendations on removing those horrible screws???

I found that removing the s-pipe and the mid section of the exhaust made the installation of the rear mount a lot easier. With the exhaust removed you can now remove and install the mount by going through the area above the steering rack where the exhaust runs.
-Jeremy
-Jeremy

Senior Member
Team Hamster
SL Member
Joined: Jun 2006
Posts: 115
From: Illinois
^
We only sell the kits with the front and rear together - because that is what we suggest doing with the installation
It is a little difficult to get the back one on - but once it is there, you will be happy with the results!
We only sell the kits with the front and rear together - because that is what we suggest doing with the installation
It is a little difficult to get the back one on - but once it is there, you will be happy with the results!
Senior Member
SL Member
Joined: Mar 2005
Posts: 1,436
From: SC
in the process of trying to remove one of those bolts, i think it is close to stripping. the bottom one to the right; it is really on there. i went to buy some of those flex head boxed end wrenches so i could get in there, even with the engine proped up for the most room, still wouldn't come loose. do i need to take off that screw or is there one at the top and taking off the other one enough to get the mount out?

Senior Member
SL Member
Joined: Jul 2005
Posts: 384
From: The 413
Just got my mounts installed on Tuesday and I love them so much more than my old Ingalls dampner. No more creaking and they feel much more solid. The only bad part was the rear mount took about 5 hours for my shop to install and I was told they're never doing another set again. The directions sounded so easy and even though the cost is that of an engine dampner, you lose more money on the install. Still, I love the way they feel and since money grows on trees, I'm pleased.
Senior Member
Scikotics
SL Member
Joined: Feb 2005
Posts: 1,396
Originally Posted by IAmTheProdigy
Just got my mounts installed on Tuesday and I love them so much more than my old Ingalls dampner. No more creaking and they feel much more solid. The only bad part was the rear mount took about 5 hours for my shop to install and I was told they're never doing another set again. The directions sounded so easy and even though the cost is that of an engine dampner, you lose more money on the install. Still, I love the way they feel and since money grows on trees, I'm pleased.
Senior Member
Scikotics
SL Member
Joined: Feb 2005
Posts: 1,396
Originally Posted by web
With that type of review, the work itself doesn't seem worth it for the slightly better "feel."

Senior Member
SL Member
Joined: Jul 2006
Posts: 2,338
From: Central Maryland
Originally Posted by Fsu1dolfan
Originally Posted by web
With that type of review, the work itself doesn't seem worth it for the slightly better "feel."
Yeah, IMO, seems like more of a hassle.....I'll stick to my ETD.............not trying to dog the product....just my opinion.
Question:
My buddy with the Cobalt SS S/C said that there is a trany ETD out for their car now. I was wondering if anyone knew of this and if this was something possibly in the make for the tC. A piston/shock would be so much easier to install than motor mounts. .....hmmm
Senior Member
SL Member
Joined: Jul 2005
Posts: 384
From: The 413
I wouldn't say there is a "slightly better feel" after installation. I would say there is a significantly better feel. I could still feel movement with my ETD, especially since I'm boosted and have a higher propensity to really stomp on my gas. With these mounts, I feel as close to no movement as I can humanly tell.
Senior Member
SL Member
Joined: Mar 2005
Posts: 1,436
From: SC
I'm going to end up dropping the transmission and swaping the clutch,flywheel and rear mount at the same time due to that dern tranny bracket. Well i guess ill have to wait until April to do it, the local tuner shop is moving.

Senior Member
SL Member
Scinergy
Joined: Mar 2005
Posts: 863
From: Atizzle
Hey, I just wanted to put a bump out there for these guys. I just got my mounts in and they look great. the shipping was quick and the quality seems topnotch. quick response and very good business practices. if you guys had more products for the tC i'd deffinatly buy from you.
Thanks,
Complication
Thanks,
Complication

Senior Member
Team Hamster
SL Member
Joined: Jun 2006
Posts: 115
From: Illinois

Junior Member
Joined: Jan 2007
Posts: 12
i just ordered my poly mounts and can't wait till they come in. I also ordered your extended clutch slave cylinder push rod. I have the ZPI street/strip clutch. will the rod make much of a difference? For $24 bucks I thought what the hell.  Is the rod hard to install?
Is the rod hard to install?