


Built in FOG machine installation W/ pics


Thread Starter
Senior Member


SL Member
Joined: Feb 2011
Posts: 455
From: Oregon City, OR
 Built in FOG machine installation W/ pics
i know this isnt what alot of you would put time into doing but i hope some will appreciate the hours and hours of soldering work that went into it. i dont think theres alot of gen2 xbs with a built in fog machine in it. i decided with all the lighting work ive been doing to my car and with the one of a kind LASER system i HAD to have fog to being out the lasers so heres a detailed WIP of how i retrofited the fog machine for car installation with control capability in the dash and so i could remove the fog machine when i wasnt showing and when i needed to clean and refill it.
so first i started off with an Amercian DJ mini fog machine with a 400 watt heater. this was the smallest fog machine i could find and it just so happens to fit perfectly under my front passenger seat. so first off i took the cover off to see what i was working with:

i then located the momentary button on top that also has the status light. the light comes on with the fog is heated and ready to go.

i then removed both momentary switch and light. being careful to remember how they were wired.
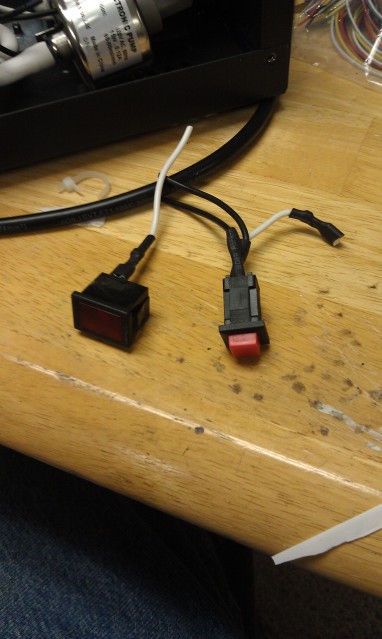
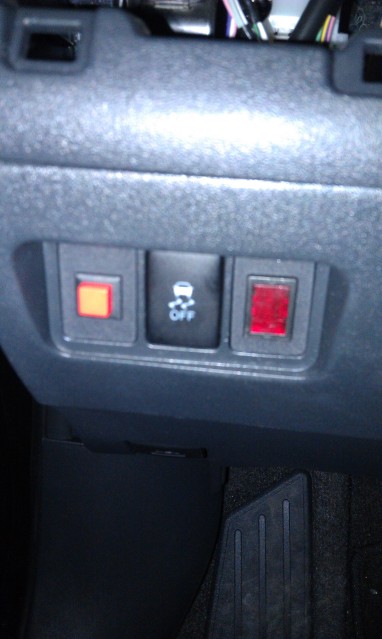
i contemplated on where i was going to mount the light and switch and then it dawned on me. so i took my switch hole covers down by my traction control button and took and exacto knife and trimed out the ribs on the inside

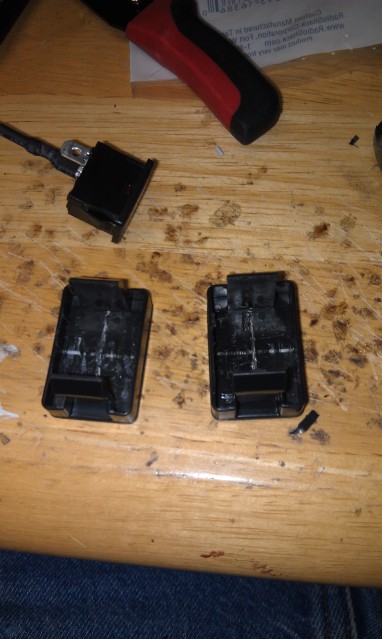
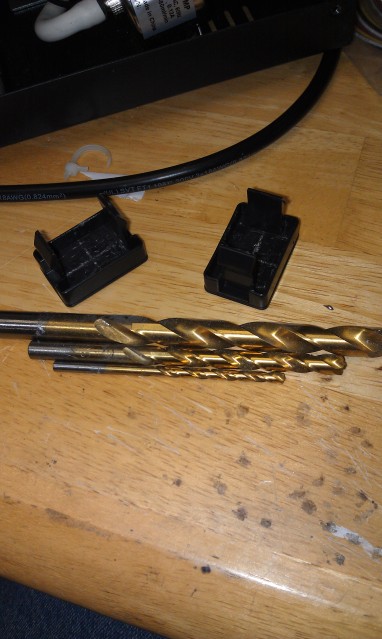
took some drill bits and drilled a hole right in the center and then took the exacto knife to open the hole into a square for perfect fitment of the switch and light
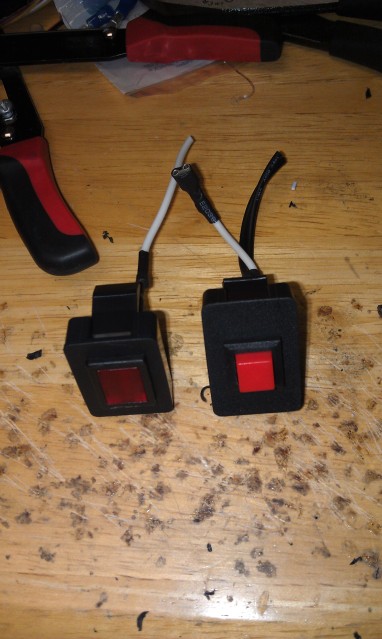
i then extended some of the wires and added some clip connecters. one of them was a JST connecter and the other one a pinch single wire connector (i recently discovered them and its awesome i love it and normally i hate pinch connectors)
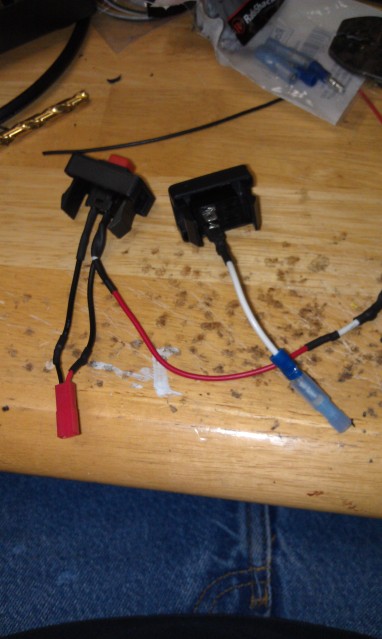
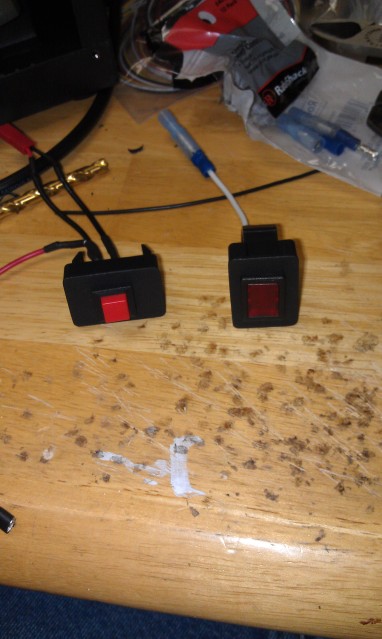
and heres the switches installed and ready to go:
----------------------------------------------------------------------------------
so now its time to get the actual unit ready.
i went to radio shack and picked up a 9 wire locking clip connector. this is so i can unplug the unit all at once and i dont have to worry about pluging something in where it shouldnt go. because i have 3 wires for the power, 2 wires for the on/off switch and 3 wires for the momentary button and light.
before i started hookin stuff up i drew out which wire goes where:

next i drilled a hole in the back of the unit to run the three wires for the momentary switch and light and i also extended the wires.


now its time to install the clip inserts. i clipped off the power wire and striped them, as well as pulled the on/off switch out extended those wires and striped them.

heres all the wires in their proper place in the connector and ready to go and the cover back on....


so now all i have left is to install the power inverter and assemble the other half of the wiring harness. more pics to follow but for now heres a cute kitten sniffing a flower

so first i started off with an Amercian DJ mini fog machine with a 400 watt heater. this was the smallest fog machine i could find and it just so happens to fit perfectly under my front passenger seat. so first off i took the cover off to see what i was working with:
i then located the momentary button on top that also has the status light. the light comes on with the fog is heated and ready to go.
i then removed both momentary switch and light. being careful to remember how they were wired.
i contemplated on where i was going to mount the light and switch and then it dawned on me. so i took my switch hole covers down by my traction control button and took and exacto knife and trimed out the ribs on the inside
took some drill bits and drilled a hole right in the center and then took the exacto knife to open the hole into a square for perfect fitment of the switch and light
i then extended some of the wires and added some clip connecters. one of them was a JST connecter and the other one a pinch single wire connector (i recently discovered them and its awesome i love it and normally i hate pinch connectors)
and heres the switches installed and ready to go:
----------------------------------------------------------------------------------
so now its time to get the actual unit ready.
i went to radio shack and picked up a 9 wire locking clip connector. this is so i can unplug the unit all at once and i dont have to worry about pluging something in where it shouldnt go. because i have 3 wires for the power, 2 wires for the on/off switch and 3 wires for the momentary button and light.
before i started hookin stuff up i drew out which wire goes where:
next i drilled a hole in the back of the unit to run the three wires for the momentary switch and light and i also extended the wires.
now its time to install the clip inserts. i clipped off the power wire and striped them, as well as pulled the on/off switch out extended those wires and striped them.
heres all the wires in their proper place in the connector and ready to go and the cover back on....
so now all i have left is to install the power inverter and assemble the other half of the wiring harness. more pics to follow but for now heres a cute kitten sniffing a flower


Thread Starter
Senior Member
SL Member
Joined: Feb 2011
Posts: 455
From: Oregon City, OR
yeah its crazy the type of fog im using is just normal fog i need to get the atmospheric stuff. but the normal fog makes it look like my interior is on fire. hahaha.
i actually discovered my fog container inside the unit had a bad leak. im glad i found it BEFORE setting it in my car. i got it all sealed up though with some marine grade sealant. no leak. but its all done and installed. ill post up some pics later.
i actually discovered my fog container inside the unit had a bad leak. im glad i found it BEFORE setting it in my car. i got it all sealed up though with some marine grade sealant. no leak. but its all done and installed. ill post up some pics later.
Thread Starter
Senior Member
SL Member
Joined: Feb 2011
Posts: 455
From: Oregon City, OR
well first i had to do this:

heres the clip for the wiring harness. 5 wires go to the dash and three of them are the AC power cable from the inverter:


heres the inverter installed.

and fog machine sitting all hidden under my passenger seat


ya know even i think im a little crazy for putting this much time into installing this damn thing. lol
heres the clip for the wiring harness. 5 wires go to the dash and three of them are the AC power cable from the inverter:
heres the inverter installed.
and fog machine sitting all hidden under my passenger seat
ya know even i think im a little crazy for putting this much time into installing this damn thing. lol


Thread
Thread Starter
Forum
Replies
Last Post
mischman
PPC: Exterior / Styling
2
Sep 15, 2015 03:38 PM
scionmilktruck
Scion xB 1st-Gen Aero & Exterior
4
May 1, 2004 01:26 PM
