
(NON56K friendly) bumper corner trim cold air mod


Thread Starter
Senior Member

SL Member
Joined: Jun 2008
Posts: 1,285
From: Delaware
So, I've noticed some of the modders here have been switching to the cold air intakes of one kind of another; i did the same when i got my xd by installing a spectre and making some custom brackets.
one of the problems i noticed with this and I'm sure some of you all did to was, no cold air in the engine bay and no air at all in the fender well. kinda ____es me off that scion would set up a really efficient engine to suck in hot air. so, i did a mod to remedy this. feel free to try it yourself, but don't blame me if you bugger it up. this first pic is my first design. cut a hole, put a computer fan screen over hole to keep out debris and cover rough edges. sadly when drilling the holes for screws, used markings on back of trim piece for alignment. bad idea, screen ended up cocked, and the screws rusted in the first hard rain.
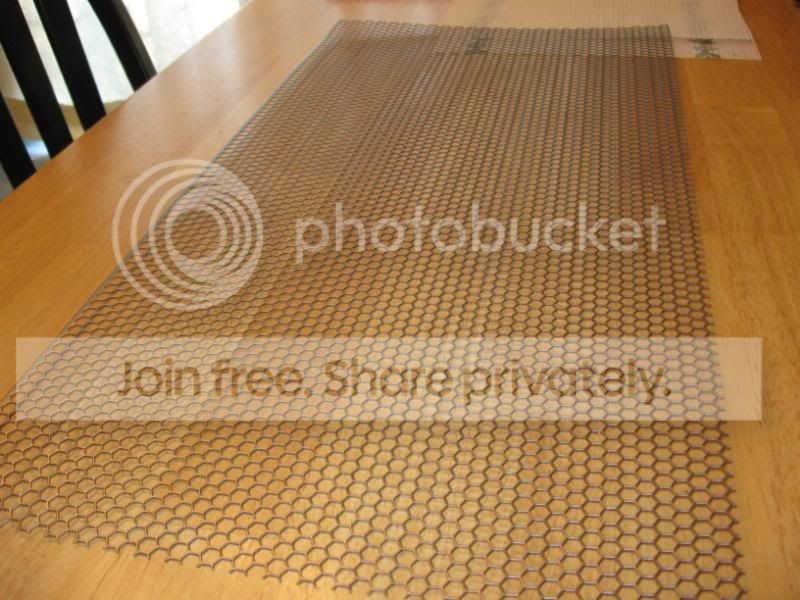
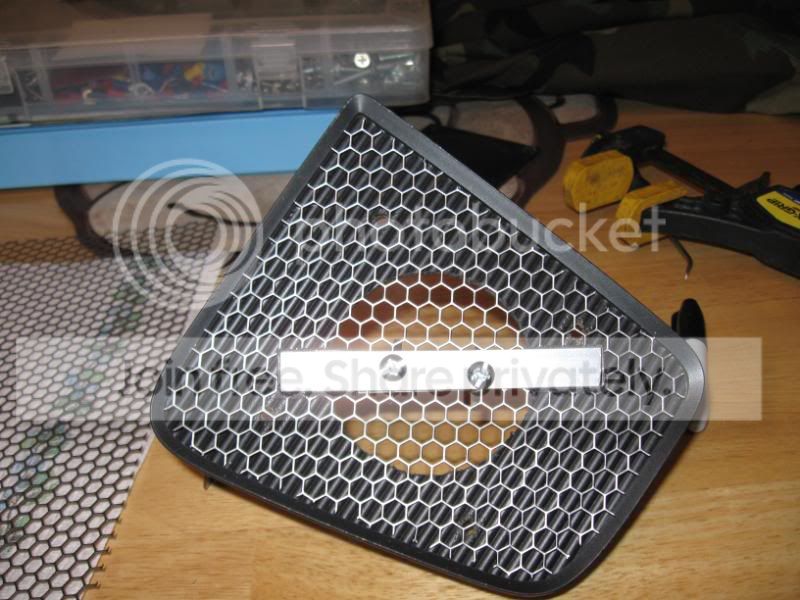
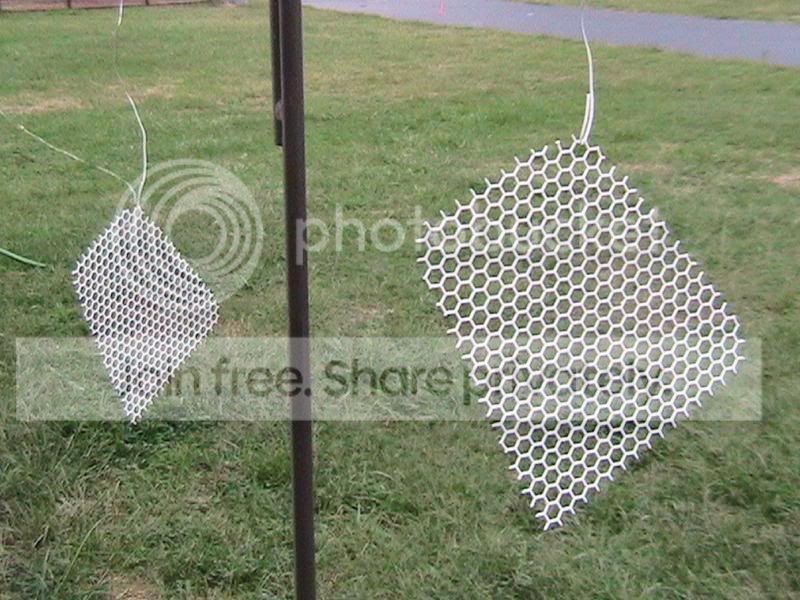
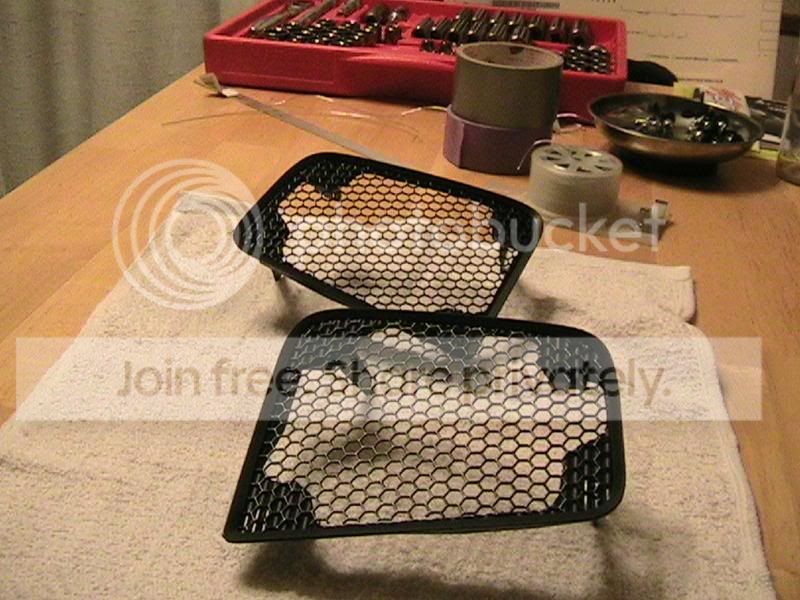
second time around, decided to go a bit farther. got some modder's mesh, 1/4" honeycomb.
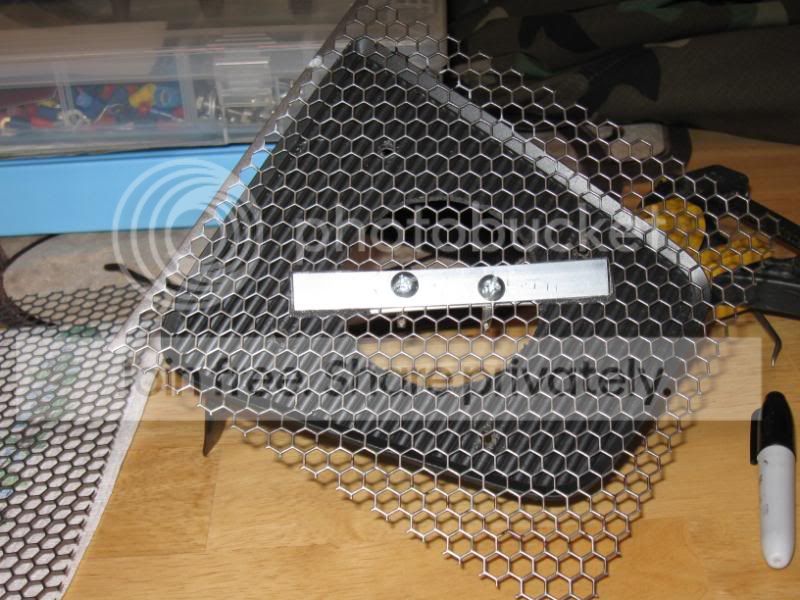
i cut out some squares and fabricated a clamp to hold it securely to the trim piece.
then carefully cut the mesh with a pair of dykes just inside the lip on the trim piece. take your time on that one.
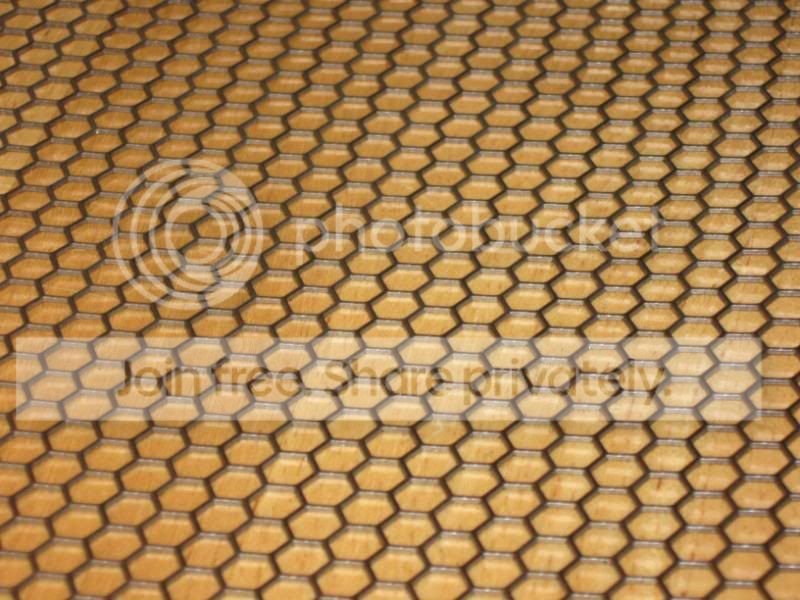
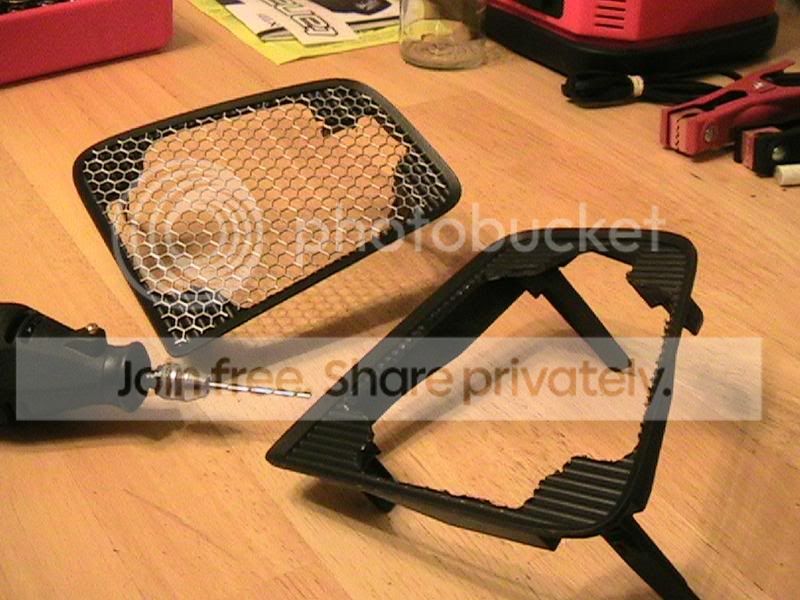
next i used my dremmel and a .... well i don't know what the bits called buy it eats plastic like a sawzall. i cut away all the excess plastic till i had a skeleton frame left. used a torch to clean up the plastic burrs, then wiped it down with isopro alcohol. using brake cleaner then isopro, i cleaned the cosmoline like grease from the mesh.(used to keep the steel from rusting). this is post cut and wash.
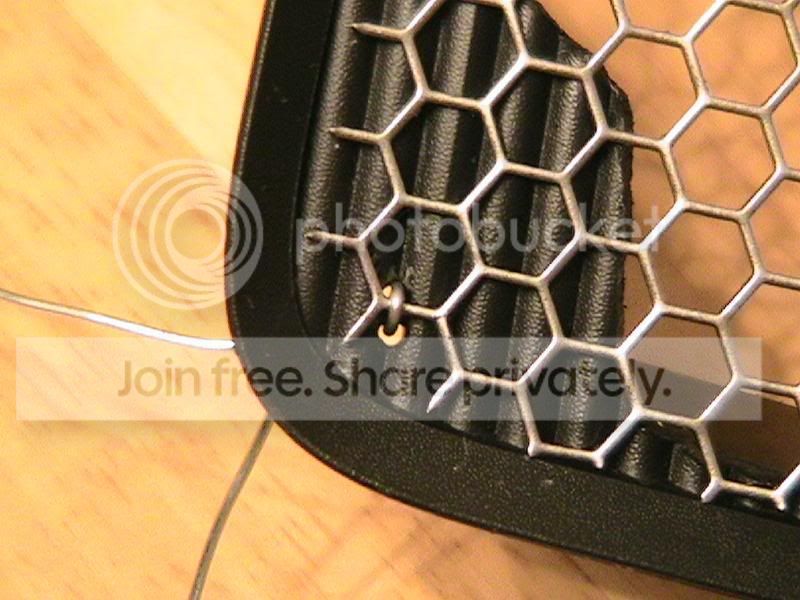
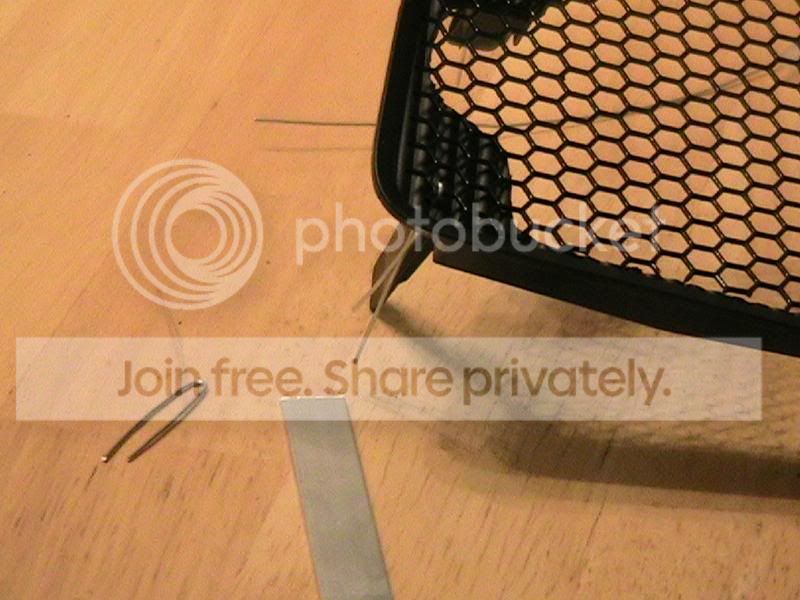
i planed to attach the mesh with safety wire in the corners and drilled two tiny holes to loop thru. heres the wire temp installed.
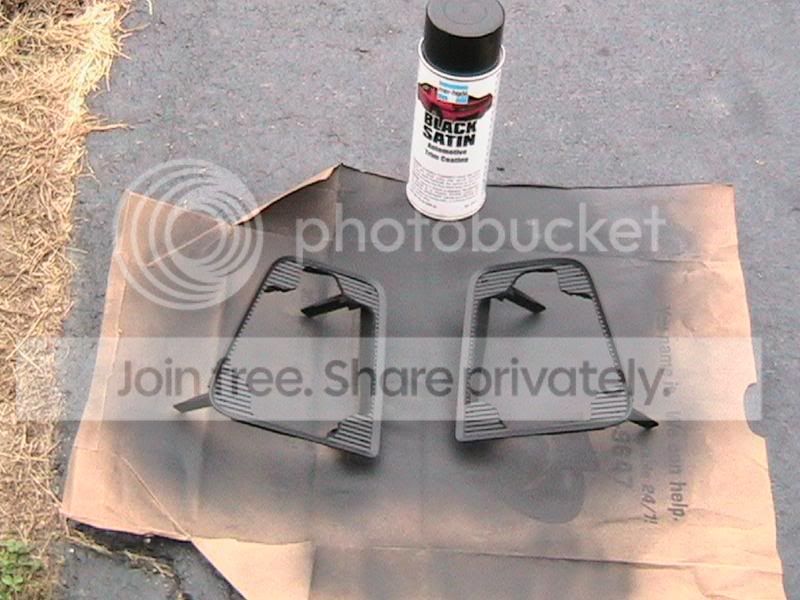
next, painted the trim with mar-hyde's satin black auto trim coating. awesome stuff for plastics. no primer needed.
the mesh got a torch treatment to remove any lint, then hung and primed with rustoleum white clean metal primer.(white so i could see if i missed any spots with the actual paint). two light coats of primer, then three coats of rustoleum semigloss protec enamel. pic of primer stage.
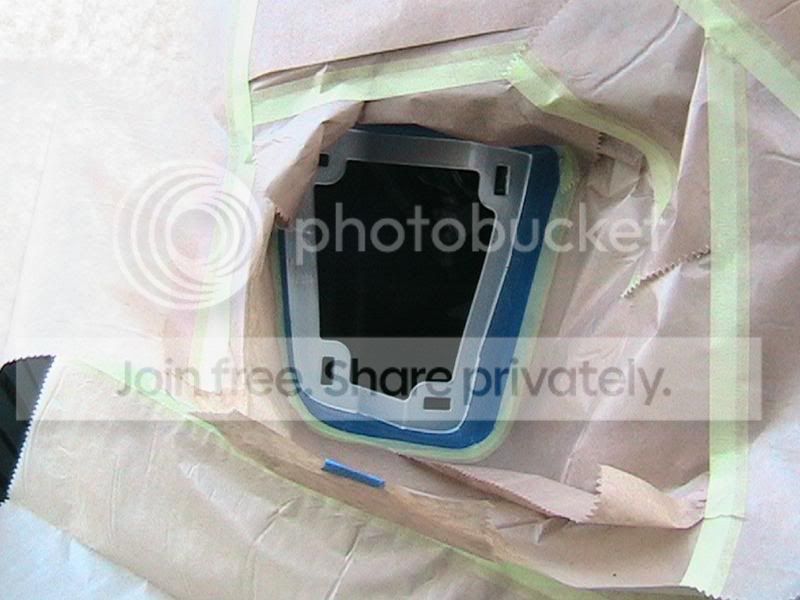
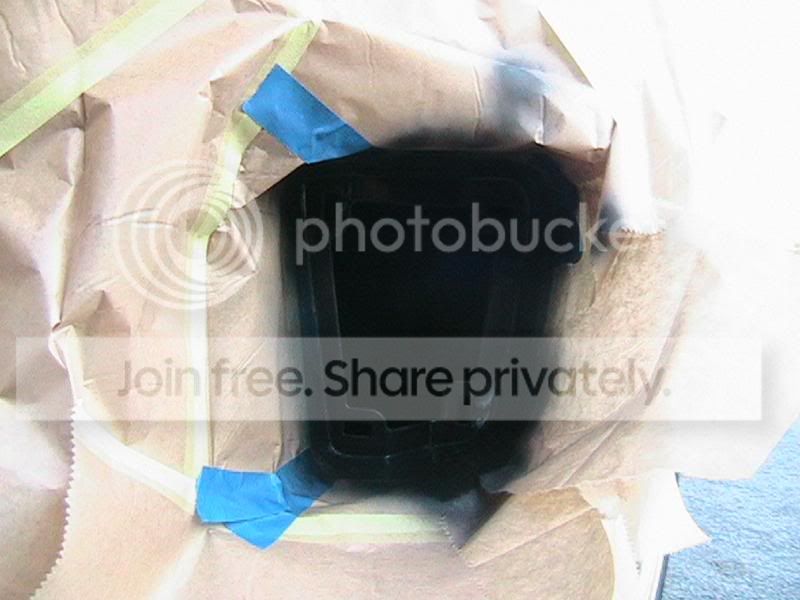
now for the bumper. due to the cutting of the trim, some of the bumper will be visible when trim is installed. so tape and cover area(refer to pic) give area a little 800grit sand action, then a little isopro, then go with a rustoleum black auto primer followed by more of the black enamel.
now run safety wire thru the holes in the corners and do your 1/4" twists. fold over the twists and apply a little duct tape to keep from scratching the bumper. ( pic is pre-twist)
then mask of around wire loops on the front and give it a couple coats of the enamel to A. fill the tiny holes in and B. protect the safety wire from rusting and C. to make the wire black as the mesh.
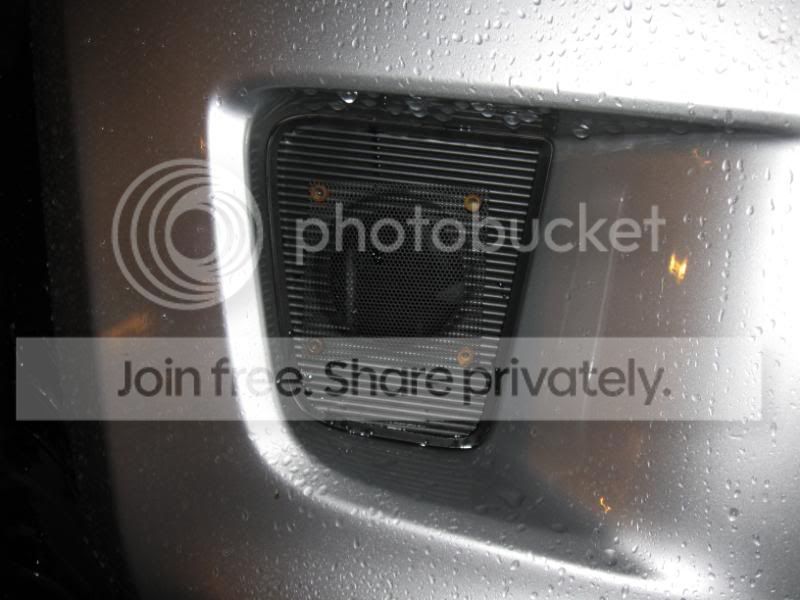
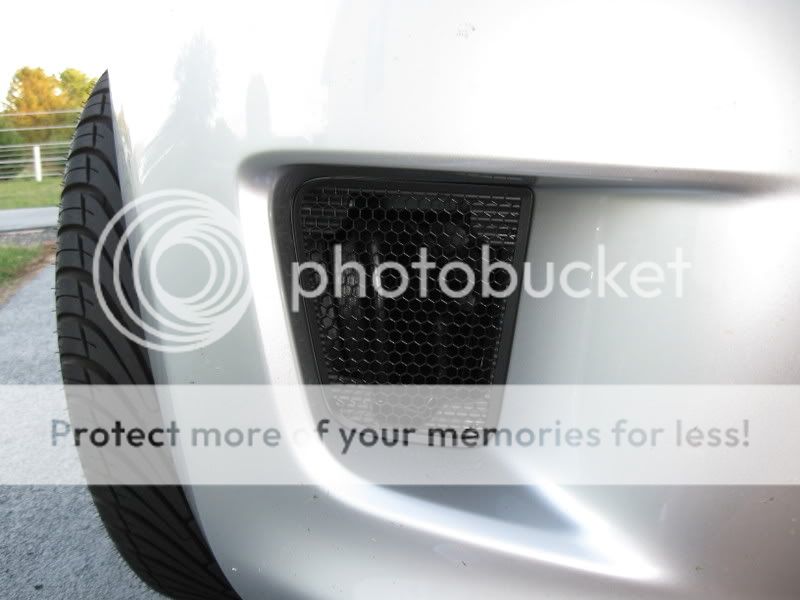
hers the installed part.
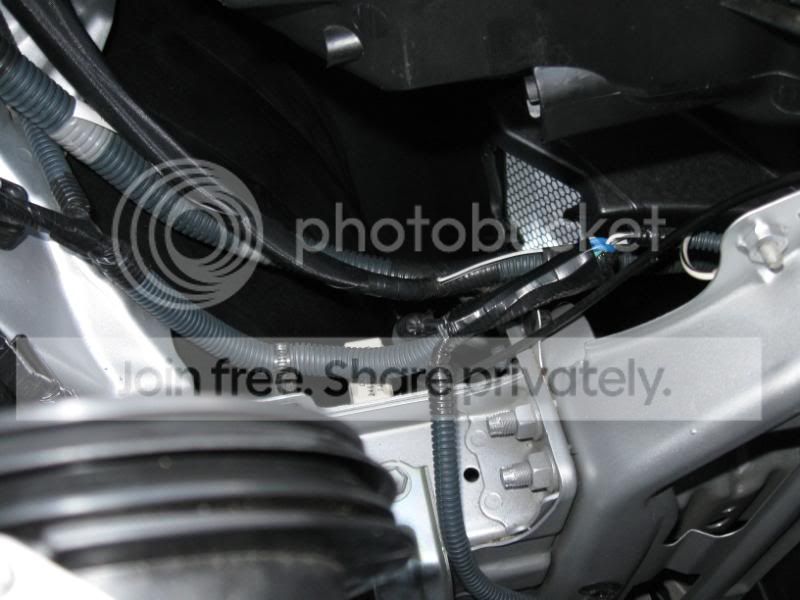
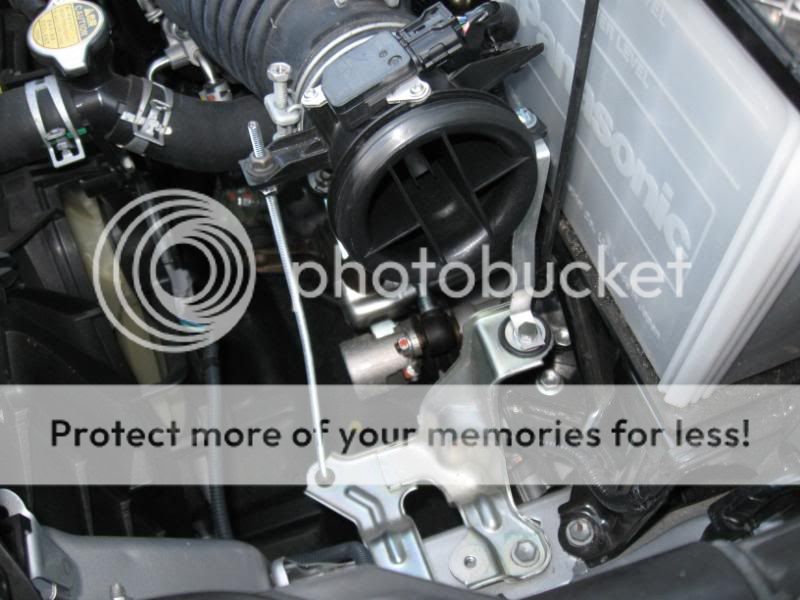
heres cone removed, looking down into fender well.
cone installed.
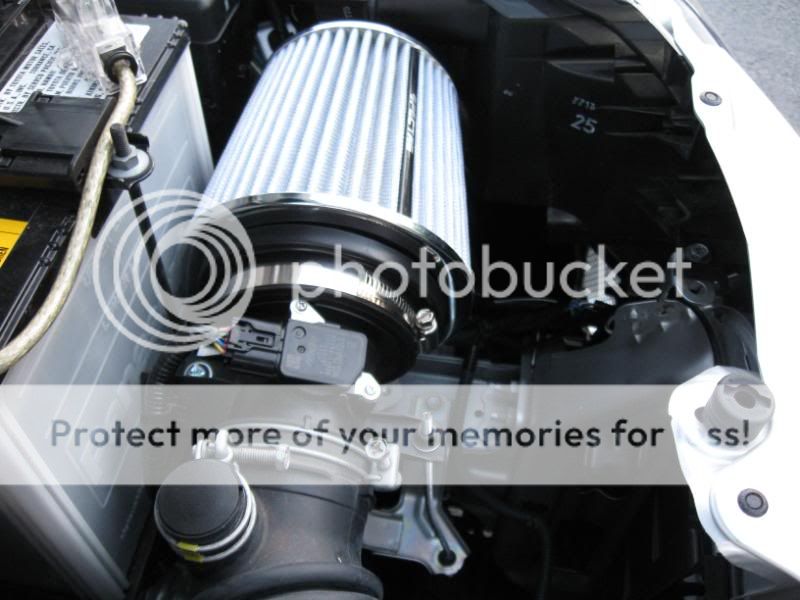
fabricated supports for air filter cone( cone removed)
so in closing, this took a few days and i think it'll be work the effort. and no, i don't plan on running the air filter way down into the fender well, since it'll get wet in inclement weather. may get the fujita in the near future though. any questions, let me know.
one of the problems i noticed with this and I'm sure some of you all did to was, no cold air in the engine bay and no air at all in the fender well. kinda ____es me off that scion would set up a really efficient engine to suck in hot air. so, i did a mod to remedy this. feel free to try it yourself, but don't blame me if you bugger it up. this first pic is my first design. cut a hole, put a computer fan screen over hole to keep out debris and cover rough edges. sadly when drilling the holes for screws, used markings on back of trim piece for alignment. bad idea, screen ended up cocked, and the screws rusted in the first hard rain.
second time around, decided to go a bit farther. got some modder's mesh, 1/4" honeycomb.
i cut out some squares and fabricated a clamp to hold it securely to the trim piece.
then carefully cut the mesh with a pair of dykes just inside the lip on the trim piece. take your time on that one.
next i used my dremmel and a .... well i don't know what the bits called buy it eats plastic like a sawzall. i cut away all the excess plastic till i had a skeleton frame left. used a torch to clean up the plastic burrs, then wiped it down with isopro alcohol. using brake cleaner then isopro, i cleaned the cosmoline like grease from the mesh.(used to keep the steel from rusting). this is post cut and wash.
i planed to attach the mesh with safety wire in the corners and drilled two tiny holes to loop thru. heres the wire temp installed.
next, painted the trim with mar-hyde's satin black auto trim coating. awesome stuff for plastics. no primer needed.
the mesh got a torch treatment to remove any lint, then hung and primed with rustoleum white clean metal primer.(white so i could see if i missed any spots with the actual paint). two light coats of primer, then three coats of rustoleum semigloss protec enamel. pic of primer stage.
now for the bumper. due to the cutting of the trim, some of the bumper will be visible when trim is installed. so tape and cover area(refer to pic) give area a little 800grit sand action, then a little isopro, then go with a rustoleum black auto primer followed by more of the black enamel.
now run safety wire thru the holes in the corners and do your 1/4" twists. fold over the twists and apply a little duct tape to keep from scratching the bumper. ( pic is pre-twist)
then mask of around wire loops on the front and give it a couple coats of the enamel to A. fill the tiny holes in and B. protect the safety wire from rusting and C. to make the wire black as the mesh.
hers the installed part.
heres cone removed, looking down into fender well.
cone installed.
fabricated supports for air filter cone( cone removed)
so in closing, this took a few days and i think it'll be work the effort. and no, i don't plan on running the air filter way down into the fender well, since it'll get wet in inclement weather. may get the fujita in the near future though. any questions, let me know.


Member
SL Member
Joined: Jun 2008
Posts: 97
From: Roselle, NJ
Looks good and way better than you first try
Had basically the same idea just don�t have the guts to start cutting into my 4 month old car yet.
You could try some kind of ducting to direct the airflow up into the engine compartment!
Had basically the same idea just don�t have the guts to start cutting into my 4 month old car yet.
You could try some kind of ducting to direct the airflow up into the engine compartment!
Thread Starter
Senior Member
SL Member
Joined: Jun 2008
Posts: 1,285
From: Delaware
yea, the first version was the right size to put a flange and ducting to run up to a custom air box i was thinking of fabing out of sheet metal and jb weld. with this version, it would be diffucult to mount a duct down in the fender well to force air into. if ya think about it, the off the shelf CAI dyno specs we've seen show the gains in the mid to upper range, which is when the most air is being forced into the fender well due to speed... im debating wether to get the fujita or wait and see how much the k&n typhoon is and wether the wall on the typhonn whould help or hinder the gathering of the cold air from my mod, as it looks like it buts up to the head lamp housing. anyone gets that typhoon, let me know, show pics, price, etc.
Thread Starter
Senior Member
SL Member
Joined: Jun 2008
Posts: 1,285
From: Delaware
did an online search for it, seems there was only one place that sold small sheets of it, everyone else that came up on the search sold it by commercial rolls. the site was for computer modders. they had 1x1, 1x2 sheets. the 1x2 is 19.99 but on top of that its 9.99 for freakin shipping! felt ripped off but its hard to stop the creative juices once i get going.
Thread Starter
Senior Member
SL Member
Joined: Jun 2008
Posts: 1,285
From: Delaware
eh, i'm not in it for the money, i just enjoy tinkering with things. i like making my rides a little diffrent. the best things i do to my cars are things i didnt buy from a store, since no one else has the same thing, you know? i belive the best modds are the ones you do urself, not pieces you buy from some site and ask someone else to put on for you. just my .02 cents

Member
Joined: Feb 2008
Posts: 43
From: Central KY
So I think I'll be attempting this mod this weekend. I found some black plastic gutter mesh at Lowes that I think will be okay. Huge roll for about $4.
The driver's side should be no problem as it looks like there is a lot of arm room to get in there and remove the piece, but i'm not sure the passenger side is going to be easy. did you have to go through the bottom of the car? it looks like there is a reservoir in the way coming from the top...
The driver's side should be no problem as it looks like there is a lot of arm room to get in there and remove the piece, but i'm not sure the passenger side is going to be easy. did you have to go through the bottom of the car? it looks like there is a reservoir in the way coming from the top...

Thread Starter
Senior Member
SL Member
Joined: Jun 2008
Posts: 1,285
From: Delaware
no need to pull the bumper off. just look under the right side below the trim panel area, theres a couple of screws on the under side of that area. pull those and the little black pin fastener from the front edge of the right wheel well. then pull the wheel well liner away/out to reach the back of the trim panel. sounds complicated, but isnt. as to the plastic mesh; gl with that. metals alot sturdier and wont roll/ bend like the plastic. if u use it, gonna need to secure it better that wire in the corners. if u really wanna do the mod, im willing to cut the rest of this mesh i have into pieces for one person. gonna need to send me a pre paid self addresed big padded envelope and ill mail them to you. pm me if really interested.
Member
Joined: Feb 2008
Posts: 43
From: Central KY
So I used my dremel to cut out the center of the plastic and completely destroyed the part. instead of cutting through the plastic, the dremel melted the plastic. so I ditched the plastic piece and directly zip-tied the mesh to the clip holes. Found metal gutter mesh at Lowes and spray painted it black. seems like it works well.
thanks for the top about removing the wheel well plastic.
thanks for the top about removing the wheel well plastic.

Thread
Thread Starter
Forum
Replies
Last Post
hampton1100
Scion tC 2G Drivetrain & Power
6
May 28, 2015 07:32 AM
IGotThatOrangeToaster
Scion xB 1st-Gen Owners Lounge
1
Jan 19, 2015 02:35 AM