C-Pillar 6x9 Pod Project **WIP**
 05-03-2012, 08:21 PM
#1
Member
SL Member
Thread Starter

Join Date: Aug 2010
Posts: 55
So I've always wanted to make a build log and I've been needing to put some rear speakers in the box for awhile now, so I figured this would be a good littler project to document and that way it might give someone else a little inspiration to build something similar or better.
Now this is not a DIY instructional, rather a project log, so don't try to imitate this and then when things go awry blame me for your troubles.
First off, I wanted to utilize the cubbies in the rear c-pillar panels, and since we all know the rear door speakers do absolutely NOTHING, I figured it would be a good idea to add speaker pods to complete the sound stage.
I chose 6x9s because I already had a pair of Kicker KS693 3-ways from my last car that were barely used and sounded great. Instead of buying new coaxials, I figured I'd just make the 6x9s fit which would obviously require the use of fiberglass.
Now, I don't have a lot of experience working with fiberglass, so this was a good project to cut my teeth on a bit.
This post will have the first steps I took.
For setting the back half of the pods, I had to remove the two gray rear panels (which entails unbolting the seat-belts temporarily) from the car. I won't include a picture of them because I'm pretty sure we are all familiar with what they look like.
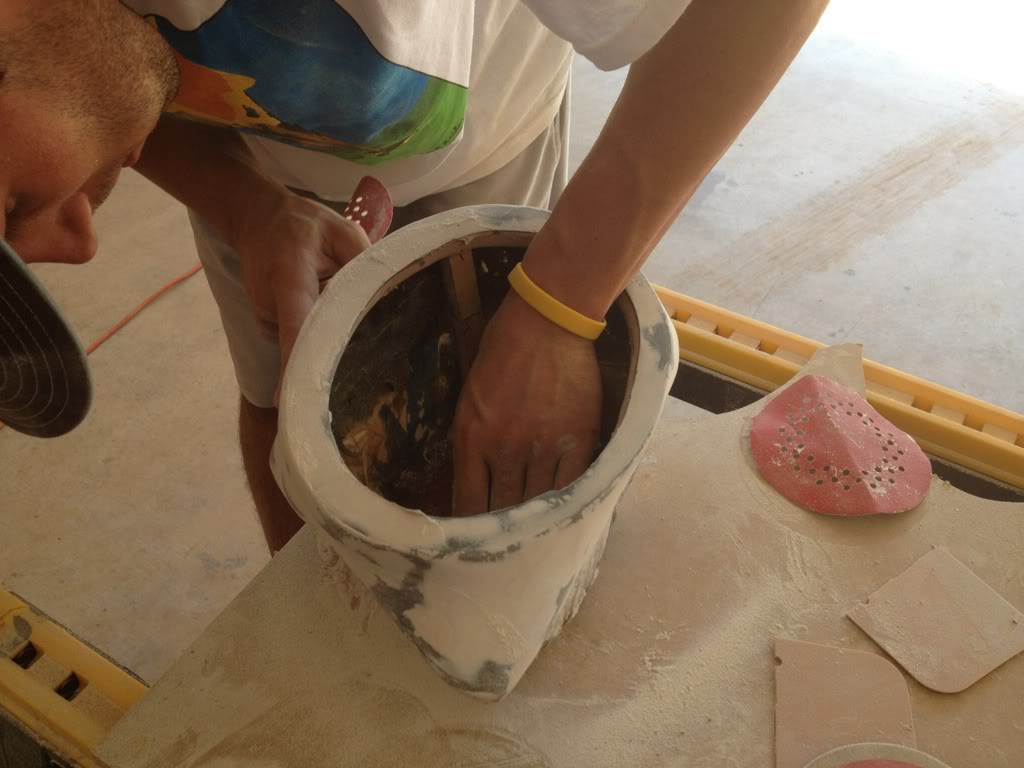
Once they were out, a buddy and I started lining the cubbies with several layers of aluminum foil to keep the fiberglass resin off the panels (duh!). We made sure the foil extended pretty far out past the edges just in case of any resin drips or spills.
We then used blue painters tape to cover any tears or seams in the foil as reinforcement and to also hold the foil down on the panels.
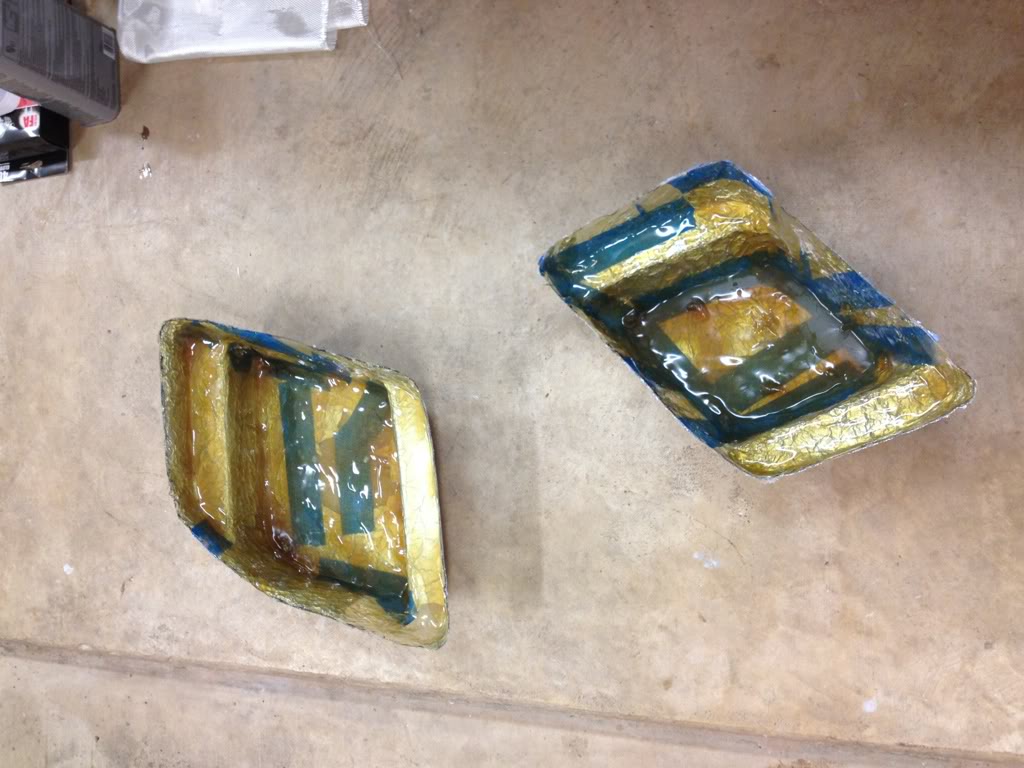
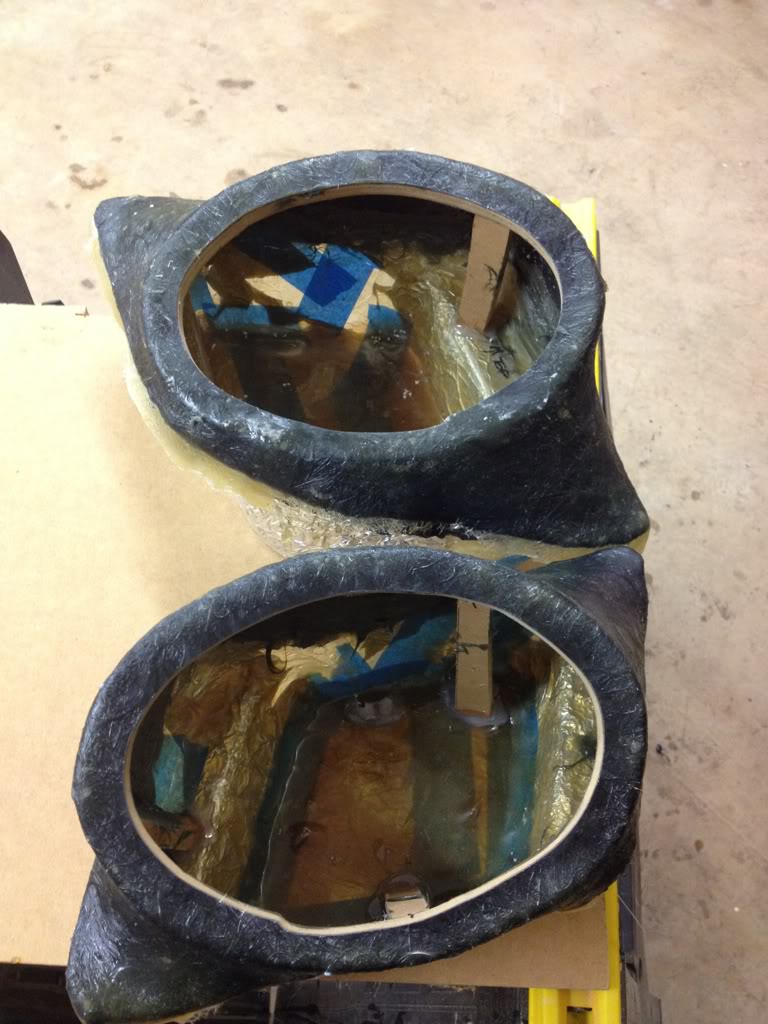
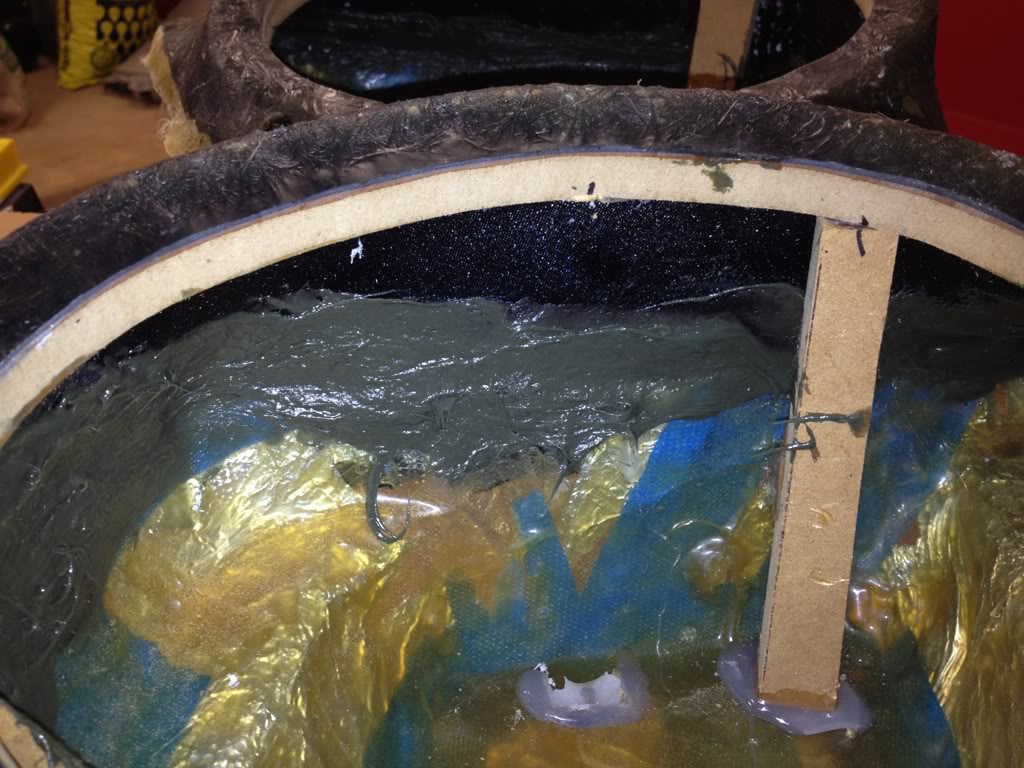
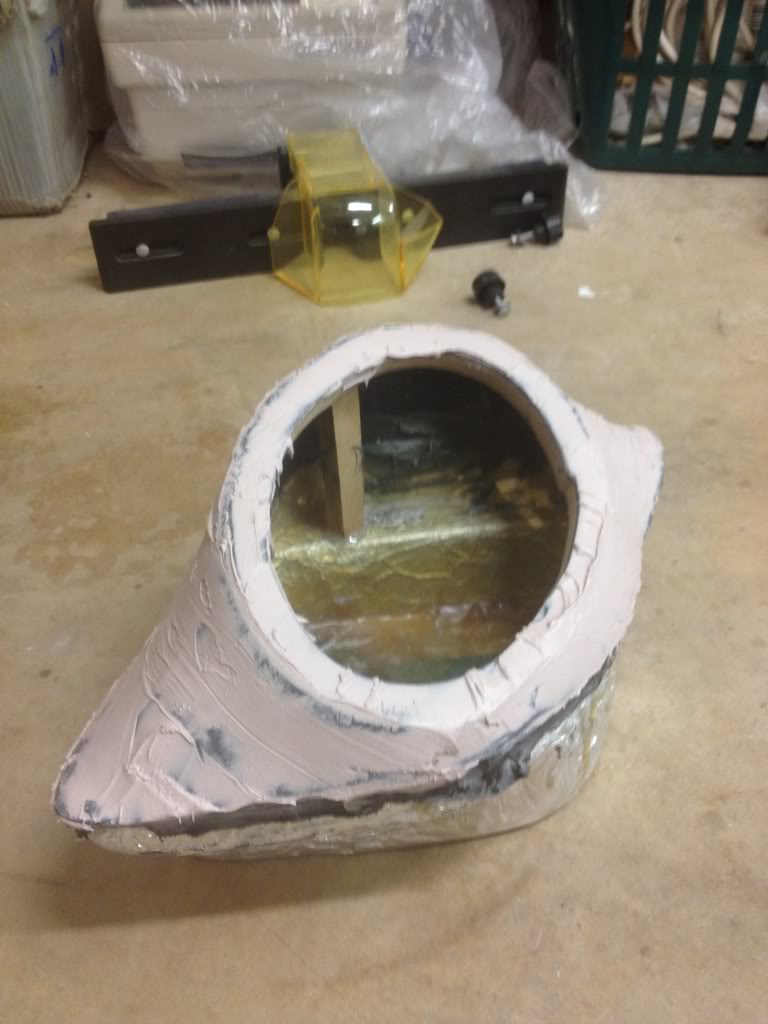
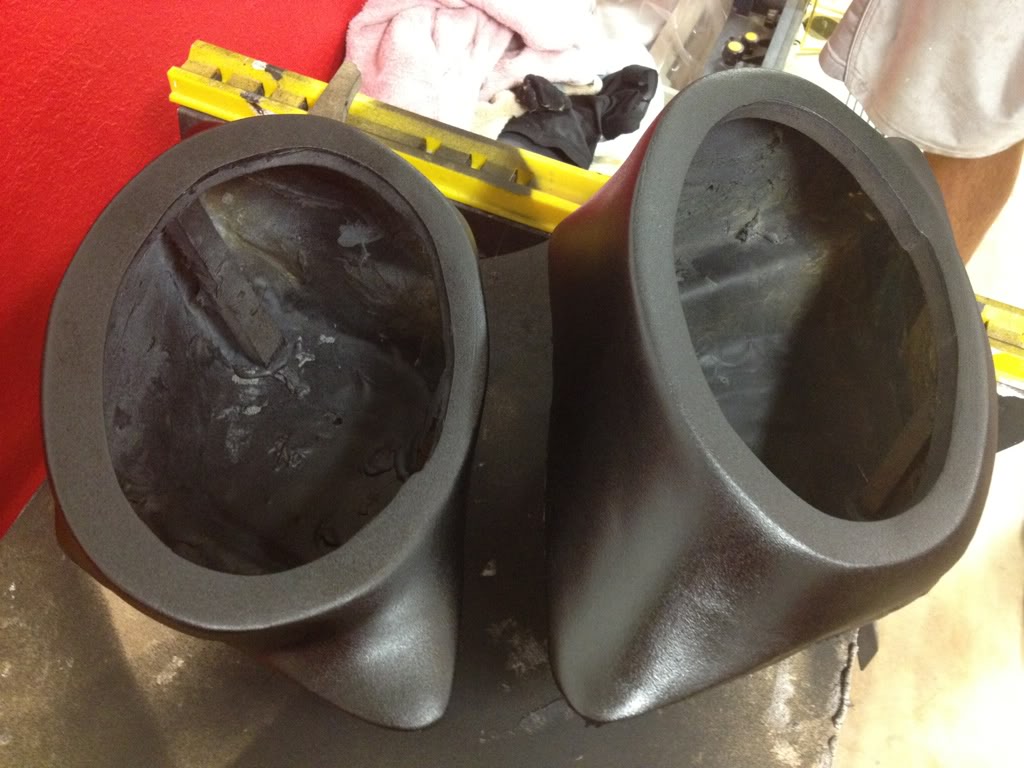
Then it was simply a matter of tearing up the fiberglass cloths into pieces and lining the cubby with them, then mixing and applying the resin with an old brush. We let it dry for an hour (it's hot here in Texas) then popped out the molds and tried to
remove as much of the foil and tape from behind as possible. It isn't pretty (see pic below) but this part will never be seen once finished.
We then traced a line around the fiberglass at the edge where it extends past the cubby and used a dremel to knock off the rough excesses. There were a few "soft spots" in the resin so we ended up mixing a little more and dabbing it in a few places
to strengthen it up. Luckily these pods don't have to hold a ton of weight nor do they have to be air-tight like a sealed sub box but I want them to be sufficiently strong enough for the 6x9s.
Here is as far as we've gotten. Next we'll be cutting the speaker rings and fiberglassing(??) the top half.
Now this is not a DIY instructional, rather a project log, so don't try to imitate this and then when things go awry blame me for your troubles.
First off, I wanted to utilize the cubbies in the rear c-pillar panels, and since we all know the rear door speakers do absolutely NOTHING, I figured it would be a good idea to add speaker pods to complete the sound stage.
I chose 6x9s because I already had a pair of Kicker KS693 3-ways from my last car that were barely used and sounded great. Instead of buying new coaxials, I figured I'd just make the 6x9s fit which would obviously require the use of fiberglass.
Now, I don't have a lot of experience working with fiberglass, so this was a good project to cut my teeth on a bit.
This post will have the first steps I took.
For setting the back half of the pods, I had to remove the two gray rear panels (which entails unbolting the seat-belts temporarily) from the car. I won't include a picture of them because I'm pretty sure we are all familiar with what they look like.
Once they were out, a buddy and I started lining the cubbies with several layers of aluminum foil to keep the fiberglass resin off the panels (duh!). We made sure the foil extended pretty far out past the edges just in case of any resin drips or spills.
We then used blue painters tape to cover any tears or seams in the foil as reinforcement and to also hold the foil down on the panels.
Then it was simply a matter of tearing up the fiberglass cloths into pieces and lining the cubby with them, then mixing and applying the resin with an old brush. We let it dry for an hour (it's hot here in Texas) then popped out the molds and tried to
remove as much of the foil and tape from behind as possible. It isn't pretty (see pic below) but this part will never be seen once finished.
We then traced a line around the fiberglass at the edge where it extends past the cubby and used a dremel to knock off the rough excesses. There were a few "soft spots" in the resin so we ended up mixing a little more and dabbing it in a few places
to strengthen it up. Luckily these pods don't have to hold a ton of weight nor do they have to be air-tight like a sealed sub box but I want them to be sufficiently strong enough for the 6x9s.
Here is as far as we've gotten. Next we'll be cutting the speaker rings and fiberglassing(??) the top half.
Last edited by MR_LUV; 10-12-2020 at 04:37 AM. Reason: Awarded 5 Yr Badge

 05-04-2012, 03:38 PM
#4
Member
SL Member
Thread Starter
Join Date: Aug 2010
Posts: 55
Okay, so last night I convinced the wife to watch the baby so I could make some more progress. 
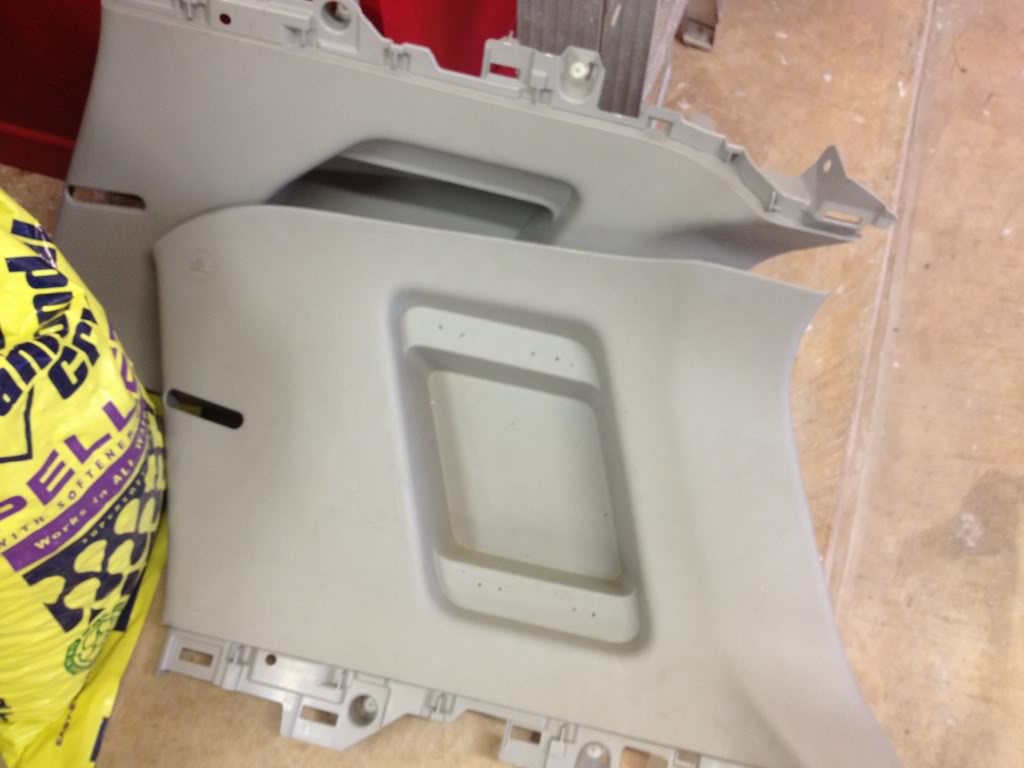
Here's a shot of the panels out of the car just in case you were wondering:
So the next step was to cut the speaker rings for the 6x9s to mount on to. I chose to use some extra 1/2" MDF I had laying around and used a simple oval template on Word to use to trace the outline. Then it was simply a matter of cutting inside and out as carefully as possible with
a jigsaw and then sand all the edges down. You can see a little boo-boo on the inside but I wasn't worried about it since the speaker will cover it up. I then screwed it into another piece of MDF and used my plunge router with a 3/4" flush bit to basically trace an exact copy for the other ring.
Voila:
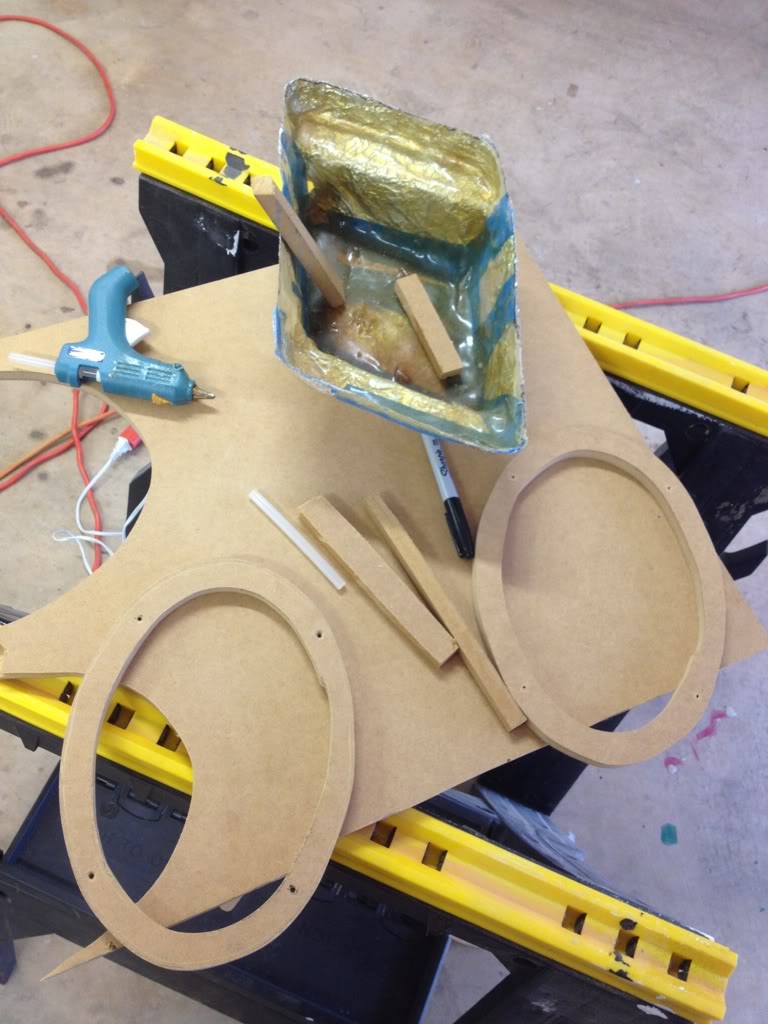
There were some imperfections in the ring but I can fix those in the Bondo filler step.
Next we cut a handful of MDF strips into little pegs (cheaper than buying dowels) and as I positioned the rings where I wanted them in relation to the pods, my friend marked how high the pegs needed
to be and in what angle. Then we used some hot glue to hold everything in place. Once dried, it was sturdy enough to wrap the stretchy cloth over. (Sorry about the low quality iPhone camera pics)
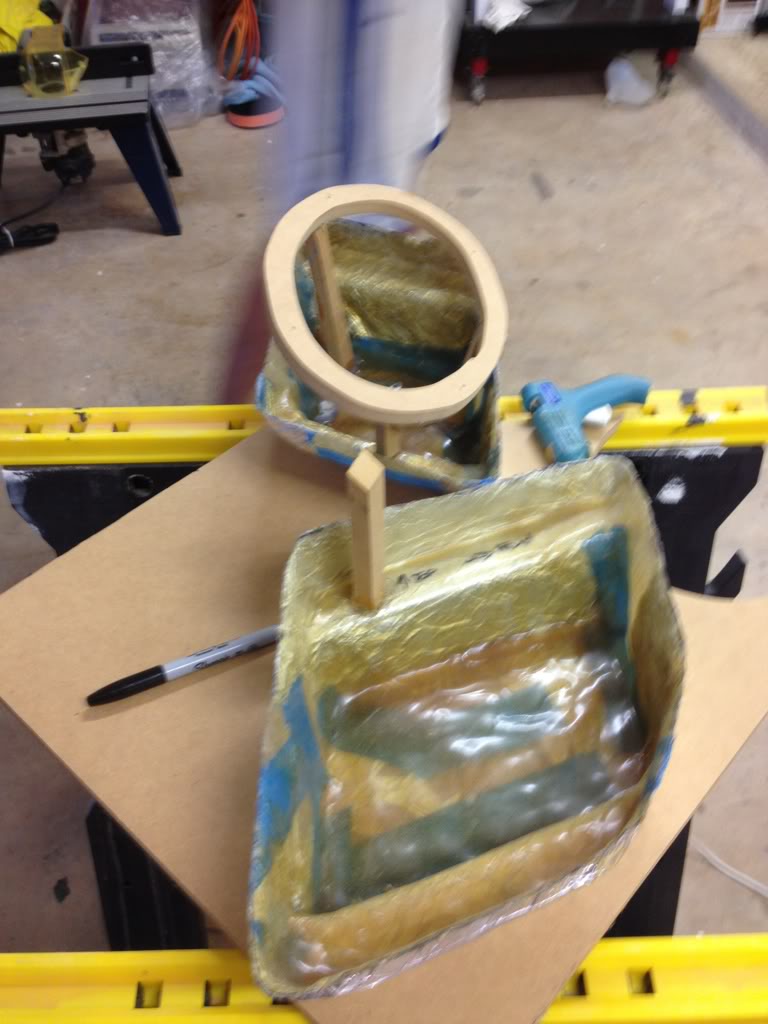
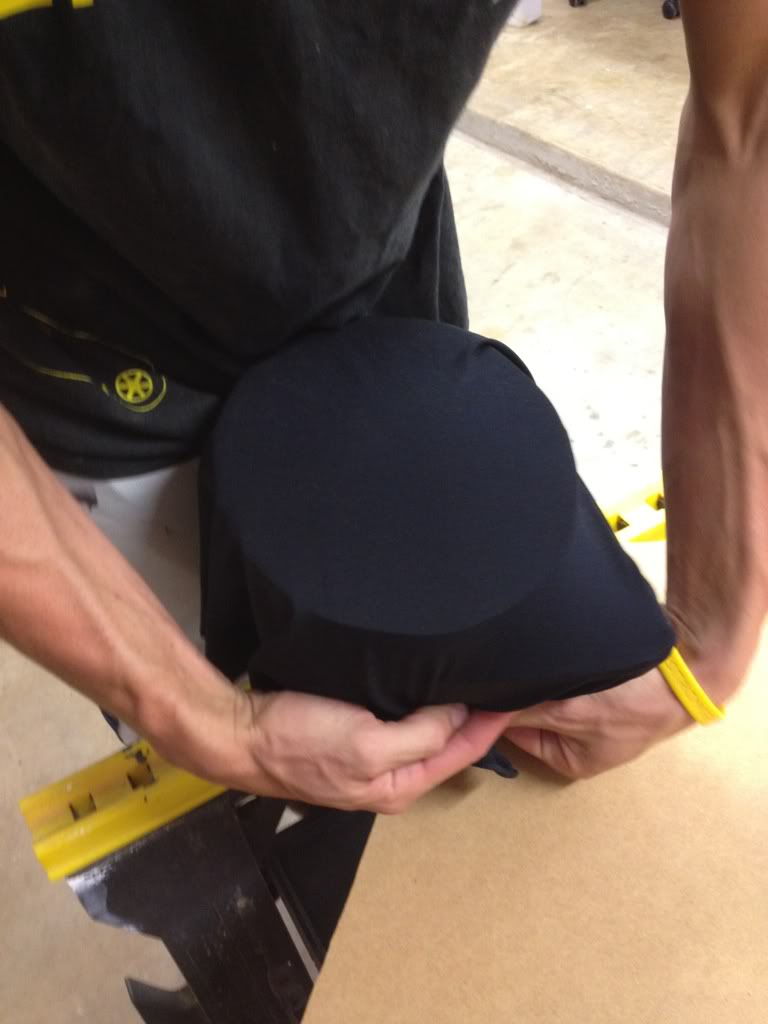
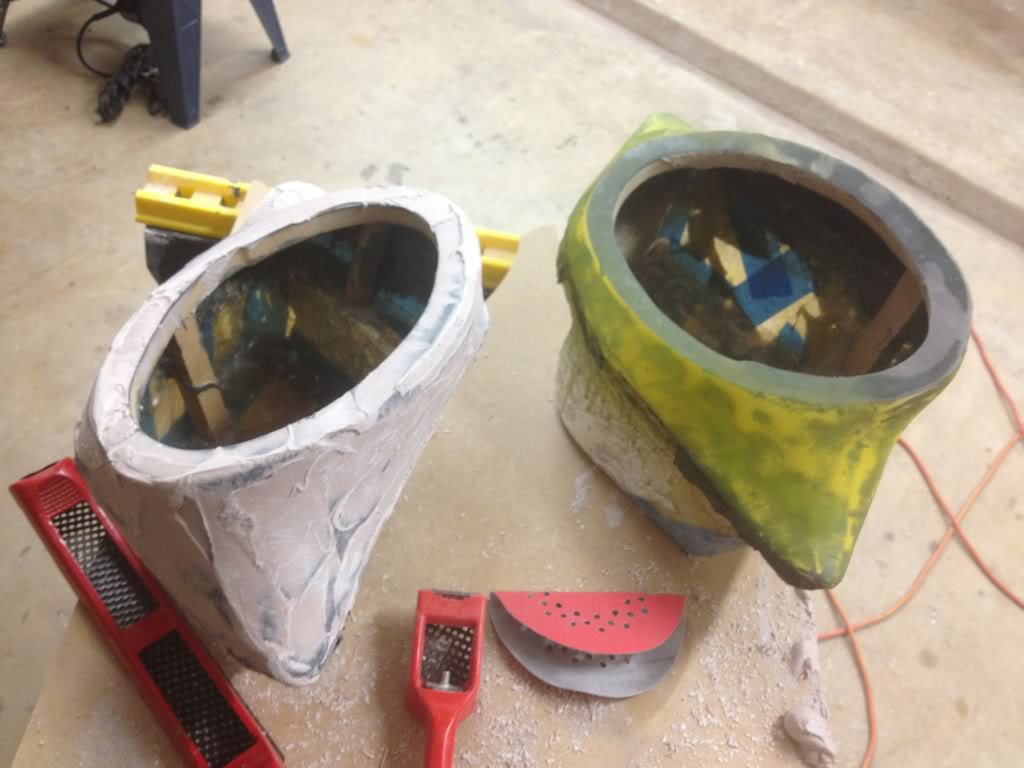
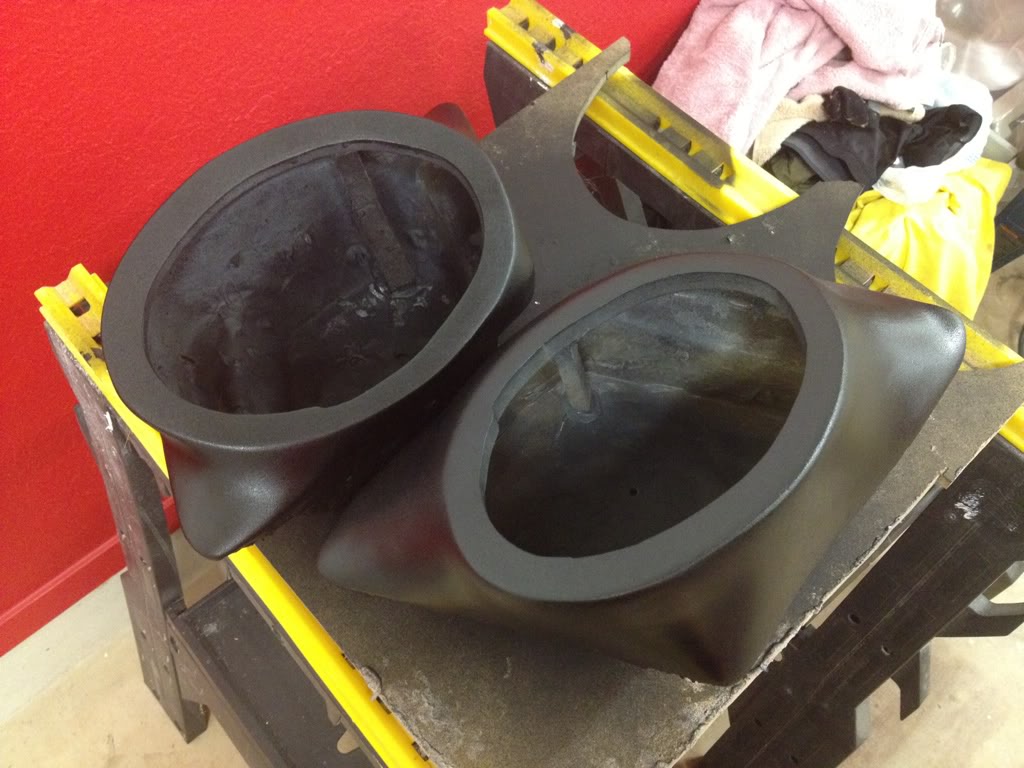
The next step takes two people for sure. First I bought some black 4-way stretchable Spandex cloth from a fabric store. You don't need much but I have plans for the leftovers :D
We basically had to hot glue one edge of the cloth to the outside of the fiberglass at a time. Then we stretched the cloth on the next side and applied hot glue all the way around. We successfully wrapped the larger driver's-side cubby without any creases in the cloth, however on the passenger side cubby, since the
ring is almost the same size as the cubby pod, we ended up having to make one crease in the fabric near the top. If you make it as flat as possible, we should be able to make it unnoticeable after fiberglass and Bondo are applied. Here are both pods once the cloth is stretched and glued on and the excess is cut off.
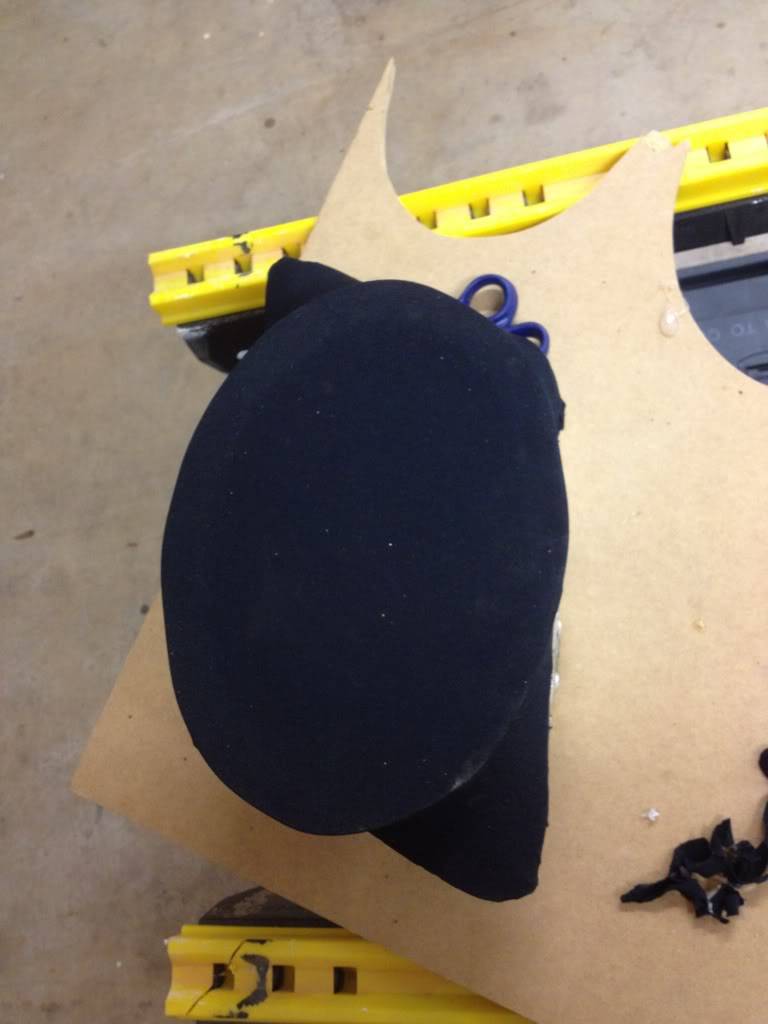

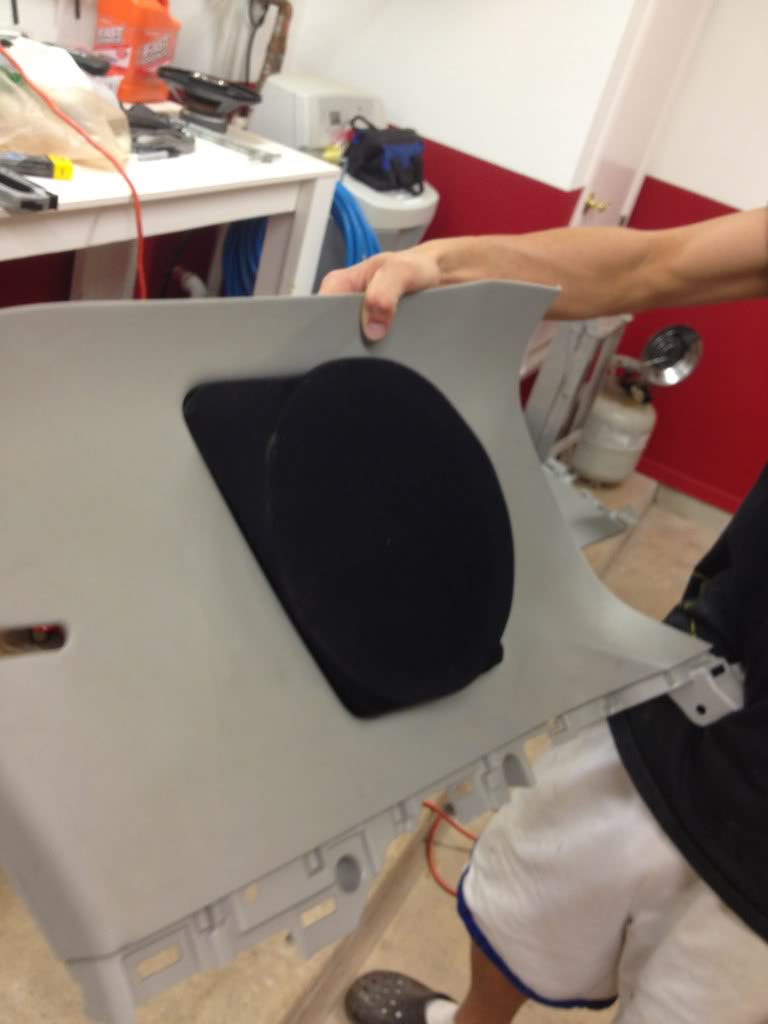
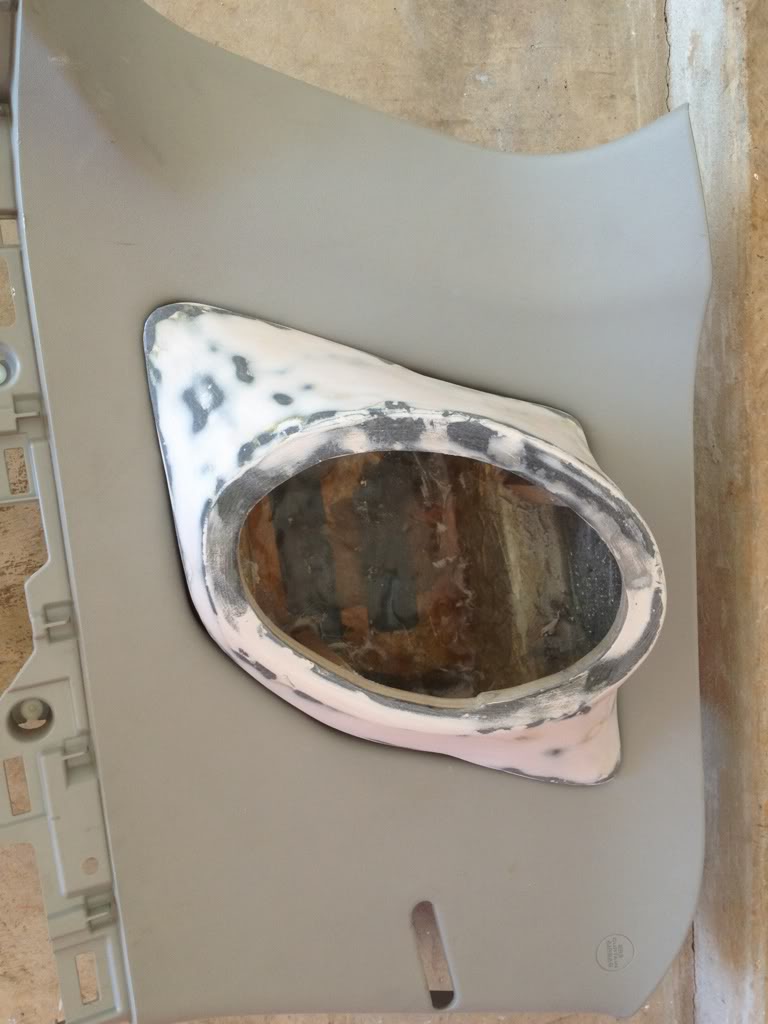
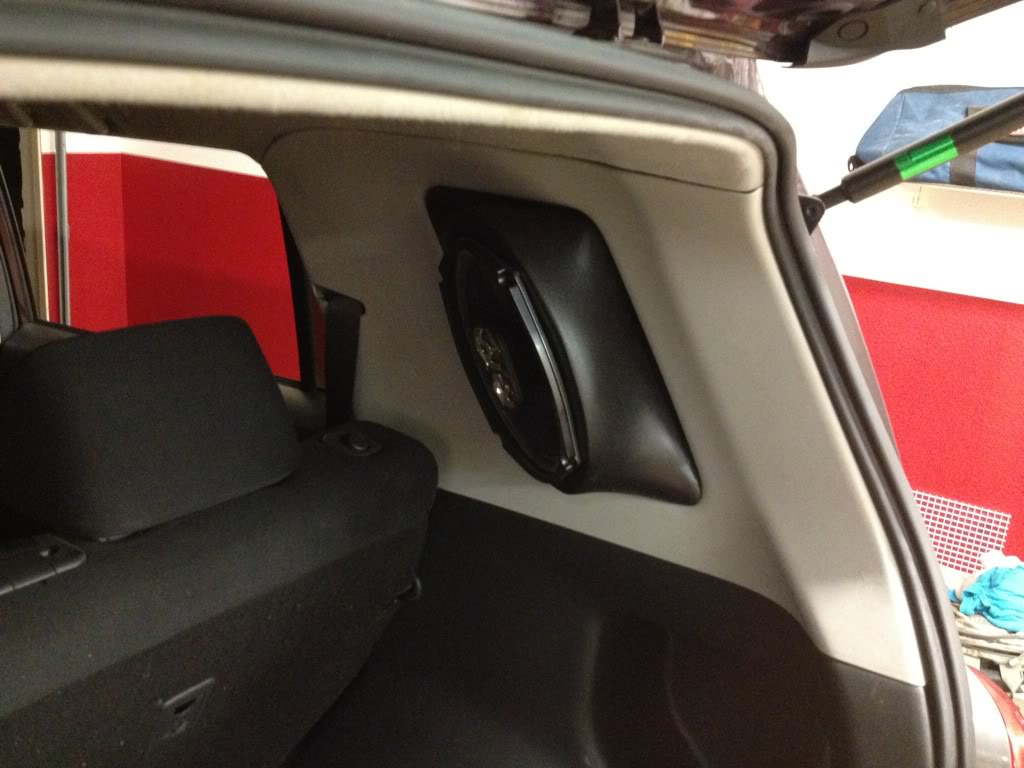
And one shot of it in the panel to give you an idea of what it will look like:
After that, I applied a thin coat of resin only to the cloth with what I had leftover in the Resin can just to help stiffen the cloth a bit. Then I ran some staples through the cloth onto the top face of the speaker ring. That's where I had to stop for the night,
so next will be applying fiberglass to the top, applying "kitty hair" Bondo along the inside seam to help bond the two halves, and then when that's all done, I'll start adding Bondo body filler to smooth it out and prep it for finish. Stay tuned!
_____
Here's a shot of the panels out of the car just in case you were wondering:
So the next step was to cut the speaker rings for the 6x9s to mount on to. I chose to use some extra 1/2" MDF I had laying around and used a simple oval template on Word to use to trace the outline. Then it was simply a matter of cutting inside and out as carefully as possible with
a jigsaw and then sand all the edges down. You can see a little boo-boo on the inside but I wasn't worried about it since the speaker will cover it up. I then screwed it into another piece of MDF and used my plunge router with a 3/4" flush bit to basically trace an exact copy for the other ring.
Voila:
There were some imperfections in the ring but I can fix those in the Bondo filler step.
Next we cut a handful of MDF strips into little pegs (cheaper than buying dowels) and as I positioned the rings where I wanted them in relation to the pods, my friend marked how high the pegs needed
to be and in what angle. Then we used some hot glue to hold everything in place. Once dried, it was sturdy enough to wrap the stretchy cloth over. (Sorry about the low quality iPhone camera pics)
The next step takes two people for sure. First I bought some black 4-way stretchable Spandex cloth from a fabric store. You don't need much but I have plans for the leftovers :D
We basically had to hot glue one edge of the cloth to the outside of the fiberglass at a time. Then we stretched the cloth on the next side and applied hot glue all the way around. We successfully wrapped the larger driver's-side cubby without any creases in the cloth, however on the passenger side cubby, since the
ring is almost the same size as the cubby pod, we ended up having to make one crease in the fabric near the top. If you make it as flat as possible, we should be able to make it unnoticeable after fiberglass and Bondo are applied. Here are both pods once the cloth is stretched and glued on and the excess is cut off.
And one shot of it in the panel to give you an idea of what it will look like:
After that, I applied a thin coat of resin only to the cloth with what I had leftover in the Resin can just to help stiffen the cloth a bit. Then I ran some staples through the cloth onto the top face of the speaker ring. That's where I had to stop for the night,
so next will be applying fiberglass to the top, applying "kitty hair" Bondo along the inside seam to help bond the two halves, and then when that's all done, I'll start adding Bondo body filler to smooth it out and prep it for finish. Stay tuned!
_____
Last edited by MR_LUV; 10-12-2020 at 04:41 AM.
 05-06-2012, 08:22 AM
#8
Senior Member
SL Member

Join Date: Jan 2012
Posts: 171
spandex and ponte is what I have used on my fiberglass projects. I started out using fleece, but ponte soaks up the resin much better and it stretches alot better also. These pods look great, I have been considering doing this, but it will be after I get my 18's put in
05-06-2012, 06:36 PM
#9
Member
SL Member
Thread Starter
Join Date: Aug 2010
Posts: 55
Hey you might as well be comfortable while you're working with fiberglass, right? Haha
And yes I've used fleece before on a friend's fiberglass sub box, but I've found the Spandex is more truely 4-way stretchable which aids in getting the shape you want. It's also very thin and absorbs the primary coat of resin very nicely.
Unfortunately I've had a sick 6-month old this weekend, so I haven't made any more progress like I would have liked, and I'm going on vacation starting next Thursday, so hopefully I can make some more headway early this week. Thanks for watching and stay tuned for more posts!
05-07-2012, 01:22 AM
#11
Senior Member
SL Member

Join Date: Oct 2009
Posts: 390
Looks great! And don't you love it when the fiberglass gets under your clothes!? One caveat with 6x9's in a small enclosure: don't expect any bass from it. 6x9 speakers were designed for infinite baffle installation, ie. your dad's Detroit made 4 door. They got their best bass from large enclosures, like the trunk. Small enclosures, like the small shoe box enclosures fit the spkr, but had little bass (air behind the driver got stiff to quickly, restricting driver motion). The cubbies on the xB are even smaller. That said, you will get decent upper bass and up from them.
05-25-2012, 02:07 PM
#12
Member
SL Member
Thread Starter
Join Date: Aug 2010
Posts: 55
Looks great! And don't you love it when the fiberglass gets under your clothes!? One caveat with 6x9's in a small enclosure: don't expect any bass from it. 6x9 speakers were designed for infinite baffle installation, ie. your dad's Detroit made 4 door. They got their best bass from large enclosures, like the trunk. Small enclosures, like the small shoe box enclosures fit the spkr, but had little bass (air behind the driver got stiff to quickly, restricting driver motion). The cubbies on the xB are even smaller. That said, you will get decent upper bass and up from them.
05-25-2012, 02:45 PM
#13
Member
SL Member
Thread Starter
Join Date: Aug 2010
Posts: 55
Okay sorry about the delay but I finally got around to working on these pods again the last few nights, so here's an update:
So we finally got some fiberglass on the top half of the pods. We gave the spandex cloth a layer of resin to begin with just to help
harden it and hold it's shape while we laid fiberglass. We found two layers of fiberglass to be ample and strong enough for our needs.
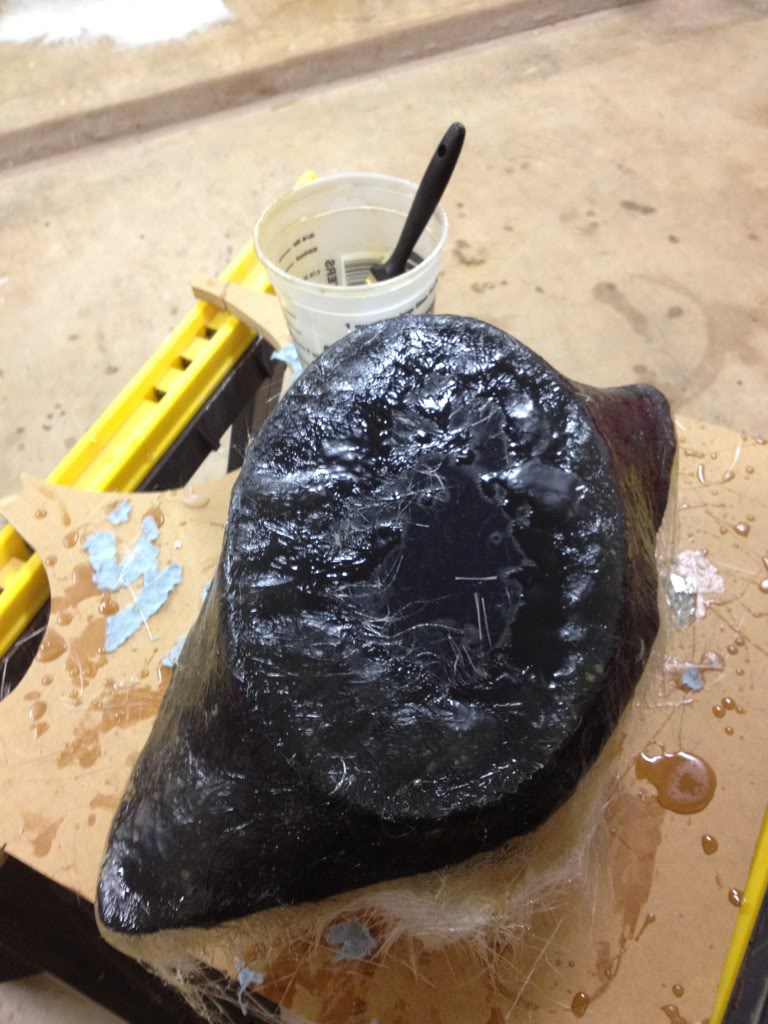
Once it dried, we used a flush bit on our router table to cut the top hole.
In order to help strengthen the seam between the top and bottom halves, we applied some "kitty hair" (short-stranded Bondo) along the inside. I know it doesn't look pretty but being on the inside, it doesn't have to!
Then gave the rough fiberglass a pass with 60 grit on the orbital sander to give the Bondo body filler a semi-smooth working surface.
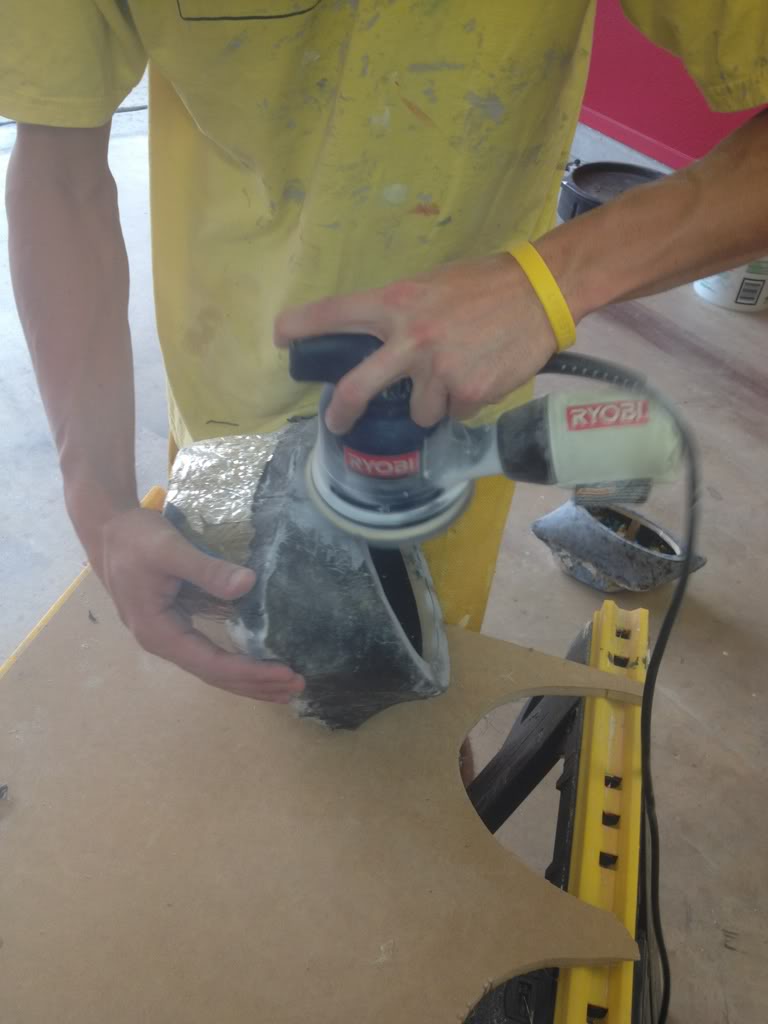
Now its time for Bondo! Put a thick coat on the first time and accidentally put too much hardener in it so it started drying and clumping while still trying to put it on! Oh well, that's what sanders are for.
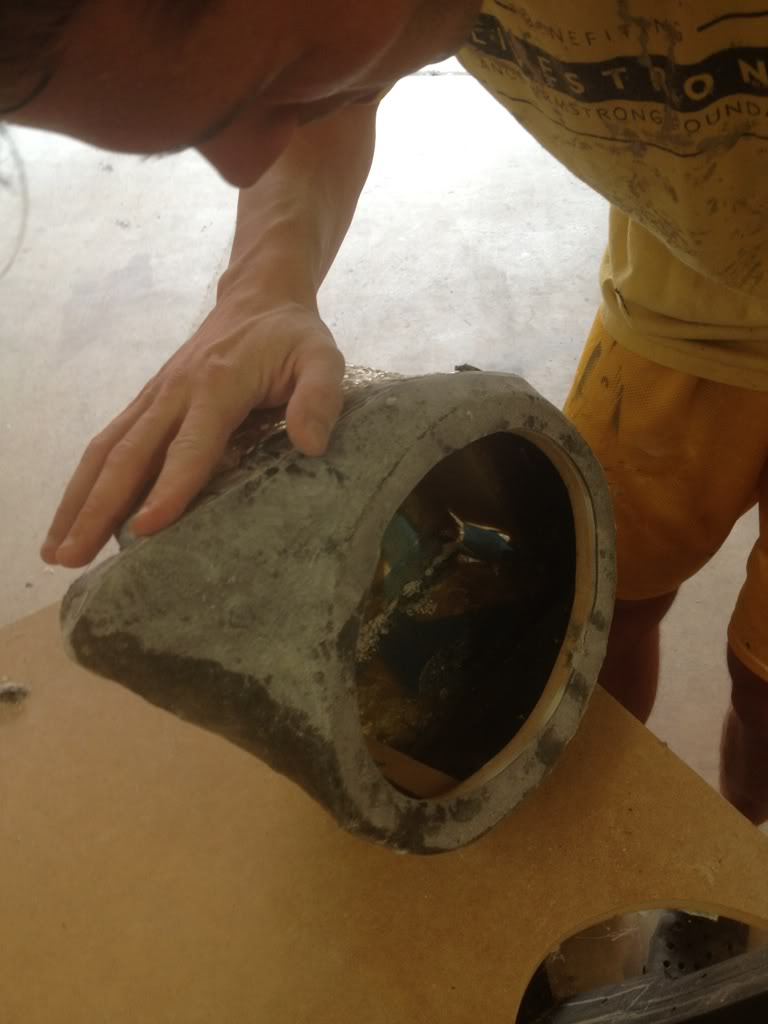
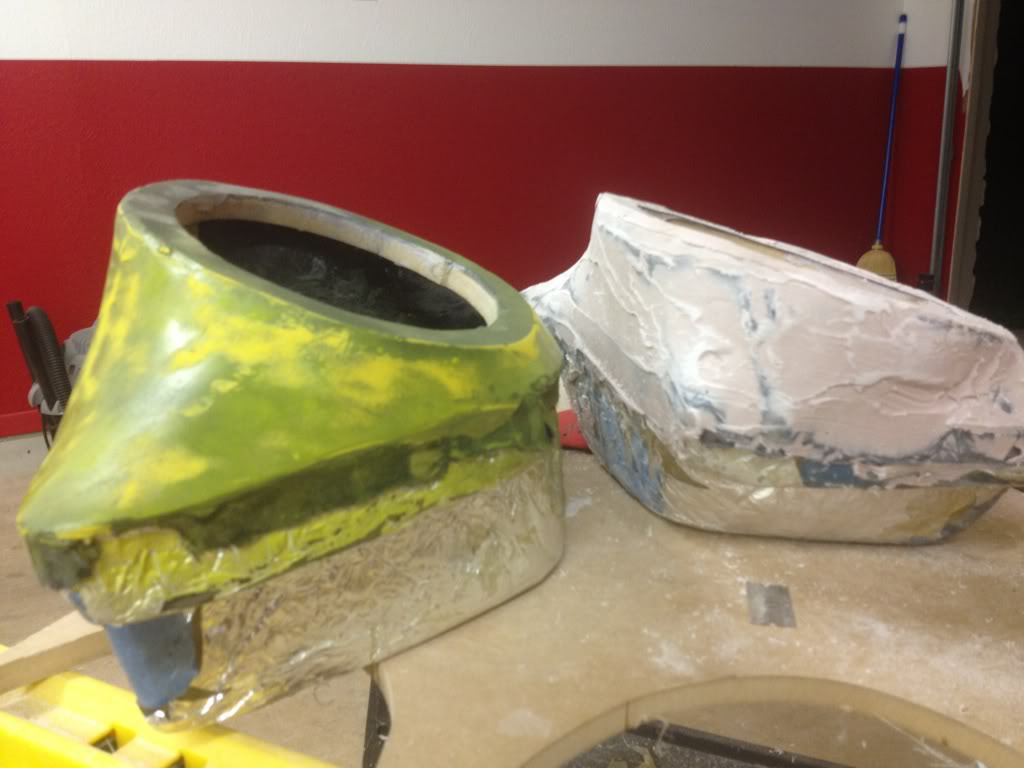
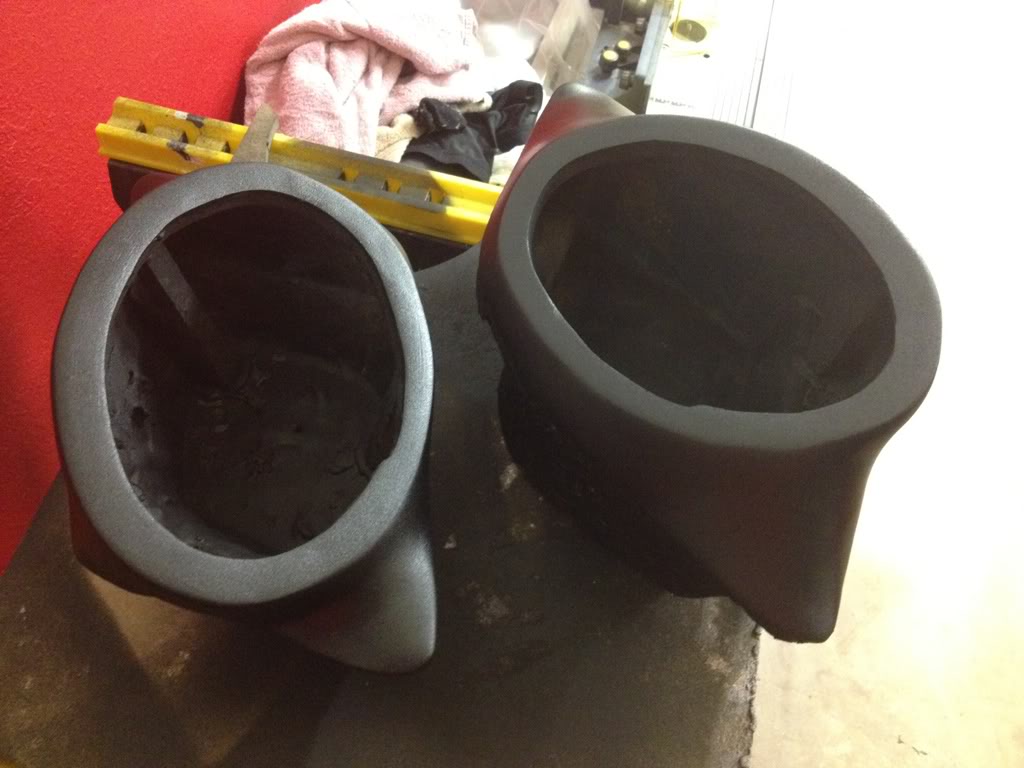
Once dried, I went over it with the Bondo cheese graters to knock down the big chunks, then hit it with 100 grit on the sander. To help find any low spots, we sprayed it with
a light coat of yellow Krylon and after that dried, a light sand over it. Any yellow spots left are lower and now we know where to fill in with more Bondo on the second coat!
You can see it getting smoother! Here's a comparison of before and after. We had to stop at this point (it was 2am and I have work in the morning) but we'll finish up the Bondo this weekend and then its on to the finish coat.
__________________
So we finally got some fiberglass on the top half of the pods. We gave the spandex cloth a layer of resin to begin with just to help
harden it and hold it's shape while we laid fiberglass. We found two layers of fiberglass to be ample and strong enough for our needs.
Once it dried, we used a flush bit on our router table to cut the top hole.
In order to help strengthen the seam between the top and bottom halves, we applied some "kitty hair" (short-stranded Bondo) along the inside. I know it doesn't look pretty but being on the inside, it doesn't have to!
Then gave the rough fiberglass a pass with 60 grit on the orbital sander to give the Bondo body filler a semi-smooth working surface.
Now its time for Bondo! Put a thick coat on the first time and accidentally put too much hardener in it so it started drying and clumping while still trying to put it on! Oh well, that's what sanders are for.
Once dried, I went over it with the Bondo cheese graters to knock down the big chunks, then hit it with 100 grit on the sander. To help find any low spots, we sprayed it with
a light coat of yellow Krylon and after that dried, a light sand over it. Any yellow spots left are lower and now we know where to fill in with more Bondo on the second coat!
You can see it getting smoother! Here's a comparison of before and after. We had to stop at this point (it was 2am and I have work in the morning) but we'll finish up the Bondo this weekend and then its on to the finish coat.
__________________
Last edited by MR_LUV; 10-12-2020 at 04:46 AM. Reason: Awarded 5 Yr Badge
05-25-2012, 06:32 PM
#14
Senior Member
SL Member

Join Date: Feb 2011
Location: Oregon City, OR
Posts: 455
i hate using bondo. it sands like ____ to be honest. after working with bondo and then going to auto body premium light weight body filler, polyester glazing putty and poly-flex (flexible polyester glazing putty) ill never use bondo again. head down to your local autobody supply store and pick some standard premium filler you may be suprised how much nicers smoother and faster it sands. at least i was.  also heres another tip.... get that krylon off of there ASAP. krylon will have a terrible reaction with most proffesional paint systems.when i was painting my upper C pillars i left alot of the black krylon on the bottom of the pocket thinking it wasnt a big deal since i was putting my mirror there but as soon as i sprayed on the epoxy primer it lifted all of it on the bottom and i had to sand it all down again and set me back 5 hours. my suggestion is use guide coat because thats exactly designed for what youre doing with krylon and it comes off alot easier when sanding plus if you leave some here and there in tight corners it wont lift primer or sealer. progress looks good so far man. really likin it and cant wait to see it get done. if you need someone to paint it dirt ___ cheap. hit me up id be willing to shoot it in autobody class. we have full garmat spray booths and everything. just get it smooth for me with no defects to 360 grit sand paper and ill do the rest for ya. primer and blocked out, sealer, color coat and clear coat. just cost of materials (discounted for students) and a fraction of what autobody shops charge for hourly labor. i could have it painted within 3 days. of your interested send me PM and well talk.
07-12-2012, 08:43 PM
#15
Member
SL Member
Thread Starter
Join Date: Aug 2010
Posts: 55
OK, so its been awhile since I last updated but the good news is that I finally finished the project with desirable results.
We sanded off the yellow paint per DJMoonBass' suggestion and did about 3 coats of bondo sanding it all the way down to a 250 grit.
Once the sanding was done, it was time to hang em up and put a layer of primer on.
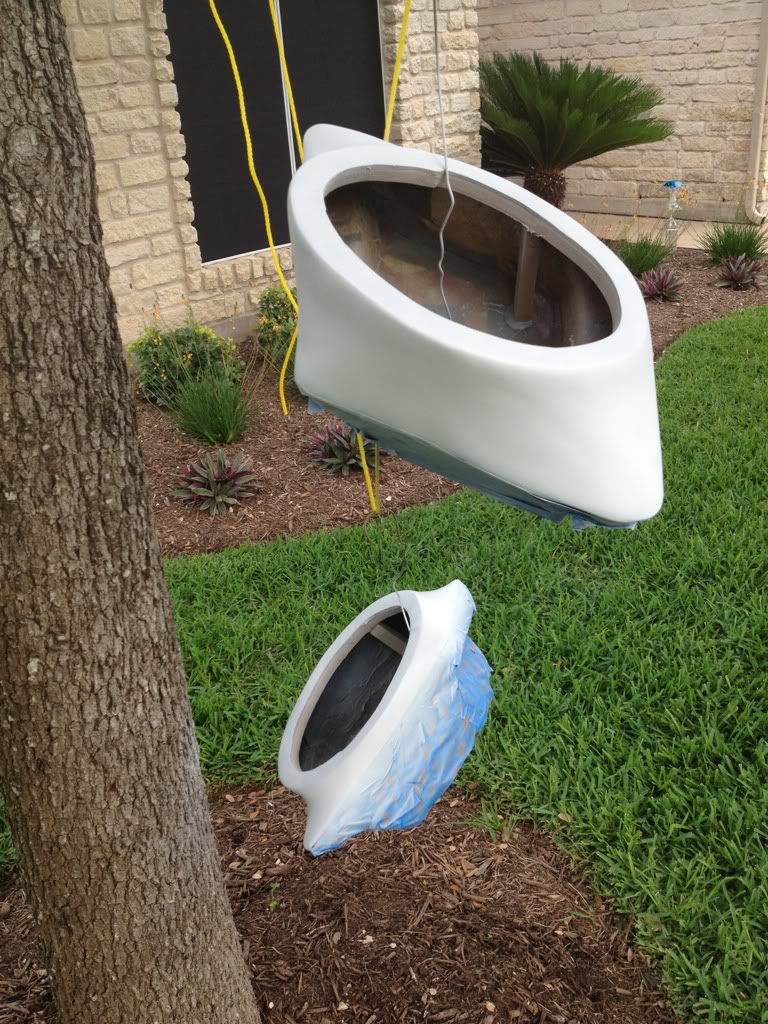
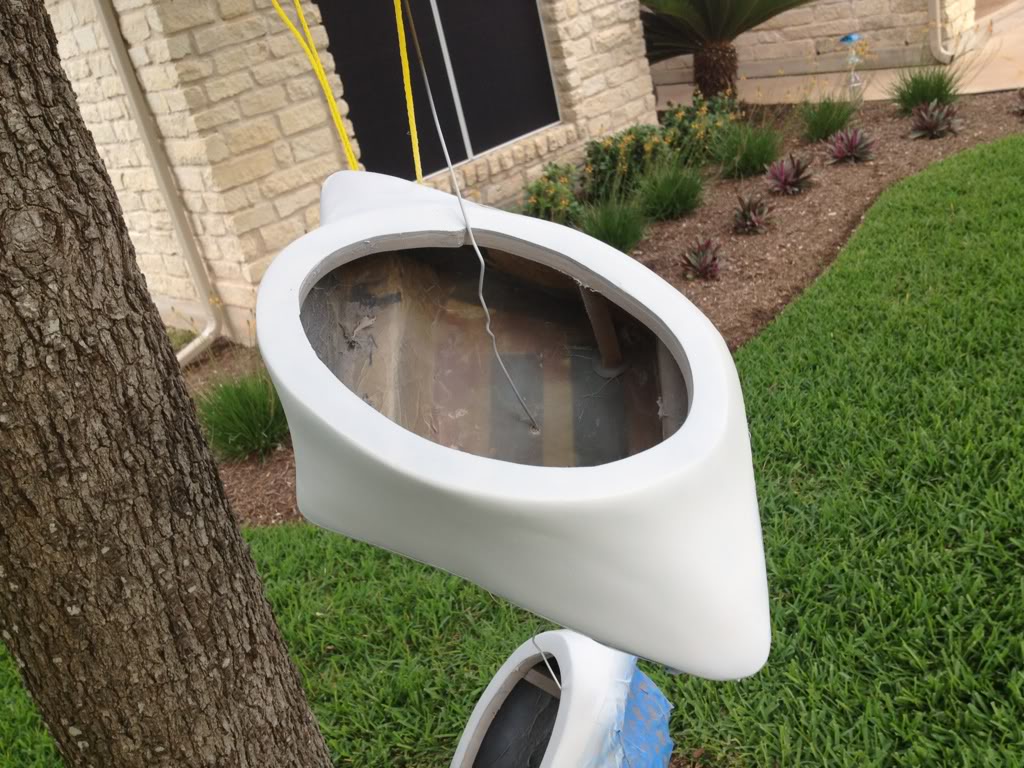
Once that dried, we decided instead of paint, it was much cheaper and easier to apply truck bed liner in a can. Home Depot has a Rustoleum rattle can of bed liner for $7. It took a bit to learn how to apply it,
but make sure you do broad, even strokes. Also, the nozzle gets clogged quickly so either be ready to spray everything all together or have some mineral spirits nearby to soak the nozzle in.
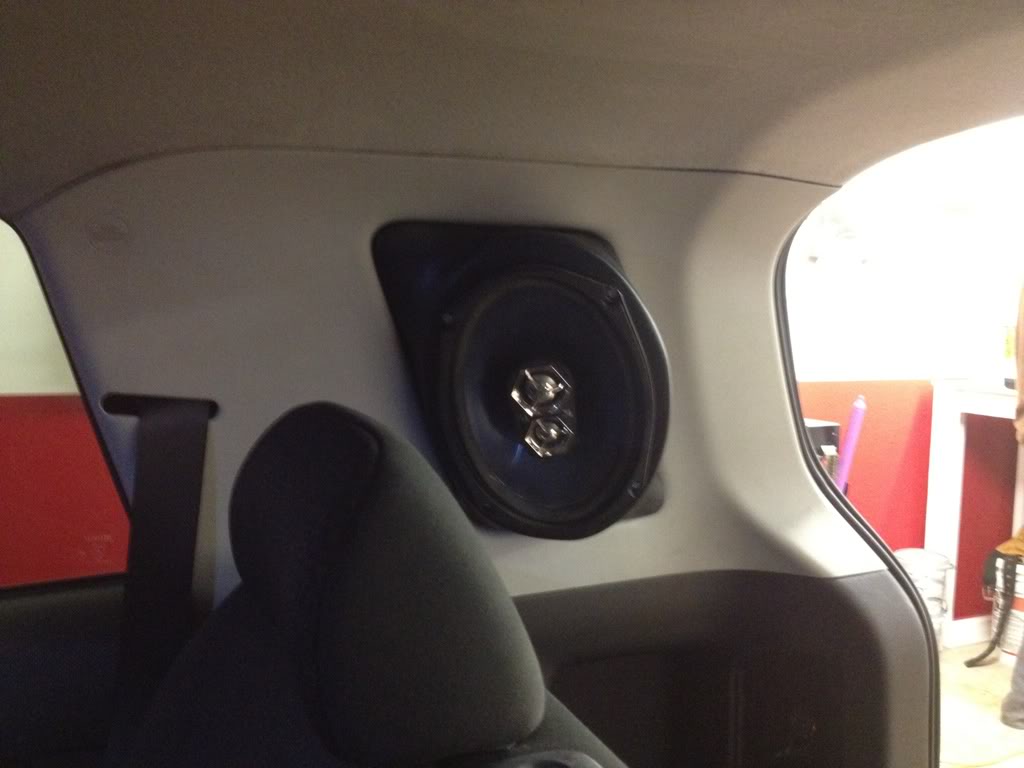
Here's the result!
I love the result! Its got a nice color consistency and a perfect little grain pattern. Its pretty tough too, which is nice considering
these are gonna sit in the rear cubbies and are likely to get occasionally bumped by larger cargo from time to time.
Then we ran the wires to my Infiniti 4 channel amp, drilled mounting holes into the panels, mounted everything up, screwed in the Kicker 6x9s and gave it a test run. The rear seat finally
has a sound stage!!! I still need to get to the amp and tweak the gain settings and crossovers too, but for now it sounds SOOO much better than with the little 6"s sitting in the rear doors.
I appreciate everyone's comments and feedback. I know these aren't perfect, but they look pretty damn good and sound great and the entire project cost me less than $75 to make (I already had the speakers though).
And no, I'm not taking any orders to make them. This one-off pair took me long enough to make, but someday in the future I might sell these on the forums. Hopefully this inspires someone to go above and beyond
what I've done here and do something even crazier.
This concludes my first DIY write-up. Hope you enjoy!
__________________
We sanded off the yellow paint per DJMoonBass' suggestion and did about 3 coats of bondo sanding it all the way down to a 250 grit.
Once the sanding was done, it was time to hang em up and put a layer of primer on.
Once that dried, we decided instead of paint, it was much cheaper and easier to apply truck bed liner in a can. Home Depot has a Rustoleum rattle can of bed liner for $7. It took a bit to learn how to apply it,
but make sure you do broad, even strokes. Also, the nozzle gets clogged quickly so either be ready to spray everything all together or have some mineral spirits nearby to soak the nozzle in.
Here's the result!
I love the result! Its got a nice color consistency and a perfect little grain pattern. Its pretty tough too, which is nice considering
these are gonna sit in the rear cubbies and are likely to get occasionally bumped by larger cargo from time to time.
Then we ran the wires to my Infiniti 4 channel amp, drilled mounting holes into the panels, mounted everything up, screwed in the Kicker 6x9s and gave it a test run. The rear seat finally
has a sound stage!!! I still need to get to the amp and tweak the gain settings and crossovers too, but for now it sounds SOOO much better than with the little 6"s sitting in the rear doors.
I appreciate everyone's comments and feedback. I know these aren't perfect, but they look pretty damn good and sound great and the entire project cost me less than $75 to make (I already had the speakers though).
And no, I'm not taking any orders to make them. This one-off pair took me long enough to make, but someday in the future I might sell these on the forums. Hopefully this inspires someone to go above and beyond
what I've done here and do something even crazier.
This concludes my first DIY write-up. Hope you enjoy!
__________________
Last edited by MR_LUV; 10-12-2020 at 04:34 AM. Reason: Awarded 5 Yr Badge


 !
10-12-2020, 02:11 AM
!
10-12-2020, 02:11 AM
#19
Junior Member
SL Member

Join Date: Aug 2020
Posts: 2
Hey man killer job i love it. I have been thinking bout doing this. My question is how did u attach them to the car? I wanna make a mold of the space and build pods but im not sure on how to connect them to the car... Please help me out wanna get started on this asap but need to know how to finish the process before i start

Thread
Thread Starter
Forum
Replies
Last Post
ajcadoo
Scion xA/xB 1st-Gen ICE & Interior
22
03-27-2010 09:14 PM